
Self-Hosting Node-RED: Complete Guide to Installation, Security, and Remote Access
Node-RED is one of the most powerful low-code automation tools available. Running it on your own hardware gives you complete control over your flows, your data, and your integrations. This guide covers every installation method (npm, Docker, Raspberry Pi, Windows), how to secure Node-RED with proper authentication before exposing it, how to run it as a system service so it survives reboots, how to receive webhooks from external services, and how to make Node-RED accessible from anywhere on the internet using a Localtonet tunnel, without port forwarding or a static IP.
What Is Node-RED?
Node-RED is an open-source, flow-based programming tool originally created by IBM and now maintained by the OpenJS Foundation. It runs as a lightweight Node.js application and provides a browser-based visual editor that lets you wire together hardware devices, APIs, databases, and online services by connecting nodes on a canvas.
Unlike traditional programming, Node-RED does not require writing extensive code for most integrations. You drag nodes from the palette, drop them on the canvas, connect them with wires, and click Deploy. The underlying runtime handles the messaging and execution. When you do need custom logic, JavaScript function nodes let you write code inline.
Why Self-Host Node-RED?
Cloud-hosted Node-RED services exist (FlowFuse, IBM Cloud), but self-hosting gives you advantages that matter in real projects:
Self-Hosting Advantages
- Zero recurring software cost
- Your flows and credentials never leave your hardware
- Direct access to local devices, sensors, and databases
- No API rate limits or flow execution quotas
- Works without internet (local IoT use cases)
- Full control over Node-RED version and configuration
Self-Hosting Responsibilities
- You manage updates and security patches
- You configure authentication before exposing to internet
- You handle backups of your flows
- Uptime depends on your hardware
Prerequisites
Node-RED requires Node.js v18 or higher. Check your current version:
$ node --version
v20.11.0
$ npm --version
10.2.4
node --version # Must be v18 or higher
npm --versionIf Node.js is not installed or is outdated, install it for your platform:
Installing Node.js
# Windows / macOS:
# Download the LTS version from https://nodejs.org

# Ubuntu / Debian:
curl -fsSL https://deb.nodesource.com/setup_20.x | sudo -E bash -
sudo apt-get install -y nodejs

# Raspberry Pi OS (Bookworm):
curl -fsSL https://deb.nodesource.com/setup_20.x | sudo -E bash -
sudo apt-get install -y nodejs

# macOS via Homebrew:
brew install node@20
Installation Method 1: npm (Windows, macOS, Linux)
The simplest way to install Node-RED on any system with Node.js is via npm:
added 329 packages in 45s# Global installation (recommended for most users):
npm install -g --unsafe-perm node-red
# Verify installation:
node-red --versionThe --unsafe-perm flag is required on some systems to allow native module compilation during installation. After installation, verify the version:
$ node-red --version
v4.0.9Start Node-RED
node-redYou will see startup messages ending with Server now running at http://127.0.0.1:1880/.
Open the editor in your browser
Navigate to http://localhost:1880. The Node-RED flow editor loads.
Welcome to Node-RED
===================

30 Jan 12:00:00 - [info] Node-RED version: v4.0.9
30 Jan 12:00:00 - [info] Node.js  version: v20.11.0
30 Jan 12:00:00 - [info] Loading palette nodes
30 Jan 12:00:00 - [info] Server now running at http://127.0.0.1:1880/
30 Jan 12:00:00 - [info] Starting flows
30 Jan 12:00:00 - [info] Started flows
Installation Method 2: Raspberry Pi (Official Script)
Node-RED provides an official install script for Raspberry Pi OS and other Debian-based Linux systems. This script installs Node.js, npm, Node-RED, and sets up a systemd service for automatic startup in one command:
Running Node-RED install for user pi at /home/pi on raspbian
...
This can take 20-30 minutes on the slower Pi versions - please wait.
...
All done. You can now start Node-RED with the command  node-red-start
or using the icon under   Menu / Programming / Node-RED
To run Node-RED in the background and start on every boot:
  sudo systemctl enable nodered.service
bash <(curl -sL https://raw.githubusercontent.com/node-red/linux-installers/master/deb/update-nodejs-and-nodered)The script asks if you want to install the Pi-specific nodes and whether to start Node-RED on boot. After installation, use these commands to manage the service:
# Start Node-RED:
node-red-start

# Stop Node-RED:
node-red-stop

# View logs:
node-red-log

# Enable autostart on boot:
sudo systemctl enable nodered

# Disable autostart:
sudo systemctl disable noderedOn Raspberry Pi models with limited RAM (Pi Zero, Pi 1, Pi 2), Node-RED defaults to 256 MB of heap. For Pi 3 and newer, 512 MB is recommended. Edit /lib/systemd/system/nodered.service and update the line Environment="NODE_OPTIONS=--max_old_space_size=256" to a higher value if you run large flows or install many nodes.
Installation Method 3: Docker
Docker is the recommended installation method for production self-hosting because it isolates Node-RED from the host system, makes upgrades trivial, and ensures consistent behavior across machines.
Unable to find image 'nodered/node-red:latest' locally
latest: Pulling from nodered/node-red
...
Status: Downloaded newer image for nodered/node-red:latest

Welcome to Node-RED
===================
30 Jan 12:00:00 - [info] Server now running at http://127.0.0.1:1880/
Quick start with Docker:
docker run -it -p 1880:1880 -v node_red_data:/data --name mynodered nodered/node-red:latestThis command starts Node-RED with persistent storage. The -v node_red_data:/data flag creates a named volume to store your flows, credentials, and installed nodes. Without it, everything is lost when the container stops.
Recommended: Docker Compose
For a production setup with automatic restarts, create a docker-compose.yml file:
version: "3.8"
services:
  node-red:
    image: nodered/node-red:latest
    container_name: node-red
    restart: unless-stopped
    ports:
      - "1880:1880"
    volumes:
      - ./node-red-data:/data
    environment:
      - TZ=Europe/Istanbul          # Set your timezone
      - NODE_RED_ENABLE_PROJECTS=true  # Enable Git-backed projects
# Start:
docker compose up -d

# View logs:
docker compose logs -f node-red

# Stop:
docker compose down

# Update to latest version:
docker compose pull && docker compose up -dIf Node-RED fails to write to the mounted volume on Linux, fix ownership with: sudo chown -R 1000:1000 ./node-red-data. The Node-RED Docker image runs as user ID 1000 by default.
Installation Method 4: Windows
On Windows, install Node.js from nodejs.org (LTS version), then open Command Prompt or PowerShell as Administrator and run:
npm install -g --unsafe-perm node-red
node-red
Node-RED stores its data (flows, credentials, settings) in C:\Users\<username>\.node-red\. To run Node-RED automatically on Windows startup, use the Task Scheduler or install it as a Windows service using the node-windows package.
Securing Node-RED Before Exposing It to the Internet
A fresh Node-RED installation has no username or password. Anyone who can reach port 1880 on your machine has full access to your flows, credentials stored in nodes, and the ability to execute any JavaScript via function nodes. Always add authentication before making Node-RED accessible from outside your local network.
Step 1: Generate a password hash
Node-RED stores passwords as bcrypt hashes, not plain text. Generate the hash using the built-in tool:
$ node-red admin hash-pw
Password: ********
$2b$08$AbCdEfGhIjKlMnOpQrStUuVwXyZ012345678901234567890
node-red admin hash-pwEnter your desired password when prompted. Copy the output hash, which looks like $2b$08$....
Step 2: Edit settings.js
The Node-RED settings file is located at:
| Platform | settings.js Location |
|---|---|
| Linux / macOS (npm) | ~/.node-red/settings.js |
| Windows (npm) | C:\Users\<username>\.node-red\settings.js |
| Raspberry Pi | /home/pi/.node-red/settings.js |
| Docker | /data/settings.js inside the container |
Open settings.js in a text editor and find the adminAuth section. It is commented out by default. Uncomment it and fill in your username and the hash you generated:
adminAuth: {
    type: "credentials",
    users: [
        {
            username: "admin",
            password: "$2b$08$YOUR_GENERATED_HASH_HERE",
            permissions: "*"
        },
        {
            username: "viewer",
            password: "$2b$08$VIEWER_HASH_HERE",
            permissions: "read"   // read-only access
        }
    ]
},
Step 3: Protect the Dashboard (httpNodeAuth)
adminAuth only protects the flow editor. The Node-RED Dashboard and HTTP-In nodes are on a separate route and need their own authentication:
httpNodeAuth: {
    user: "user",
    pass: "$2b$08$YOUR_HASH_HERE"
},
Step 4: Restart Node-RED
# npm install (Linux/macOS):
node-red-stop && node-red-start

# Raspberry Pi service:
node-red-stop && node-red-start

# Docker Compose:
docker compose restart node-red

# systemd:
sudo systemctl restart nodered
After restart, visiting http://localhost:1880 shows a login screen.
Running Node-RED as a System Service (Auto-Start on Boot)
Running Node-RED manually means it stops when you close the terminal or reboot. For a proper self-hosted setup, Node-RED should run as a background service that starts automatically.
Option A: systemd (Linux / Raspberry Pi)
# If you used the Raspberry Pi install script, systemd is already configured:
sudo systemctl enable nodered   # Enable autostart
sudo systemctl start nodered    # Start now
sudo systemctl status nodered   # Check status

# If installing manually on Debian/Ubuntu, use the official install script which
# sets up the systemd service file automatically:
bash <(curl -sL https://raw.githubusercontent.com/node-red/linux-installers/master/deb/update-nodejs-and-nodered)
Option B: PM2 (All Linux/macOS platforms)
# Install PM2:
npm install -g pm2

# Start Node-RED with PM2:
pm2 start node-red -- --max-old-space-size=256

# Save the process list and generate startup script:
pm2 save
pm2 startup   # Follow the printed command to enable autostart

# Useful PM2 commands:
pm2 list          # Show all processes
pm2 logs node-red # View Node-RED logs
pm2 restart node-red
pm2 stop node-red
Option C: Docker Compose with restart policy
If you used Docker Compose with restart: unless-stopped as shown in the installation section above, Node-RED restarts automatically after a reboot. No additional configuration is needed as long as Docker itself starts on boot:
# Enable Docker to start on boot (Linux):
sudo systemctl enable docker
Receiving Webhooks in Node-RED
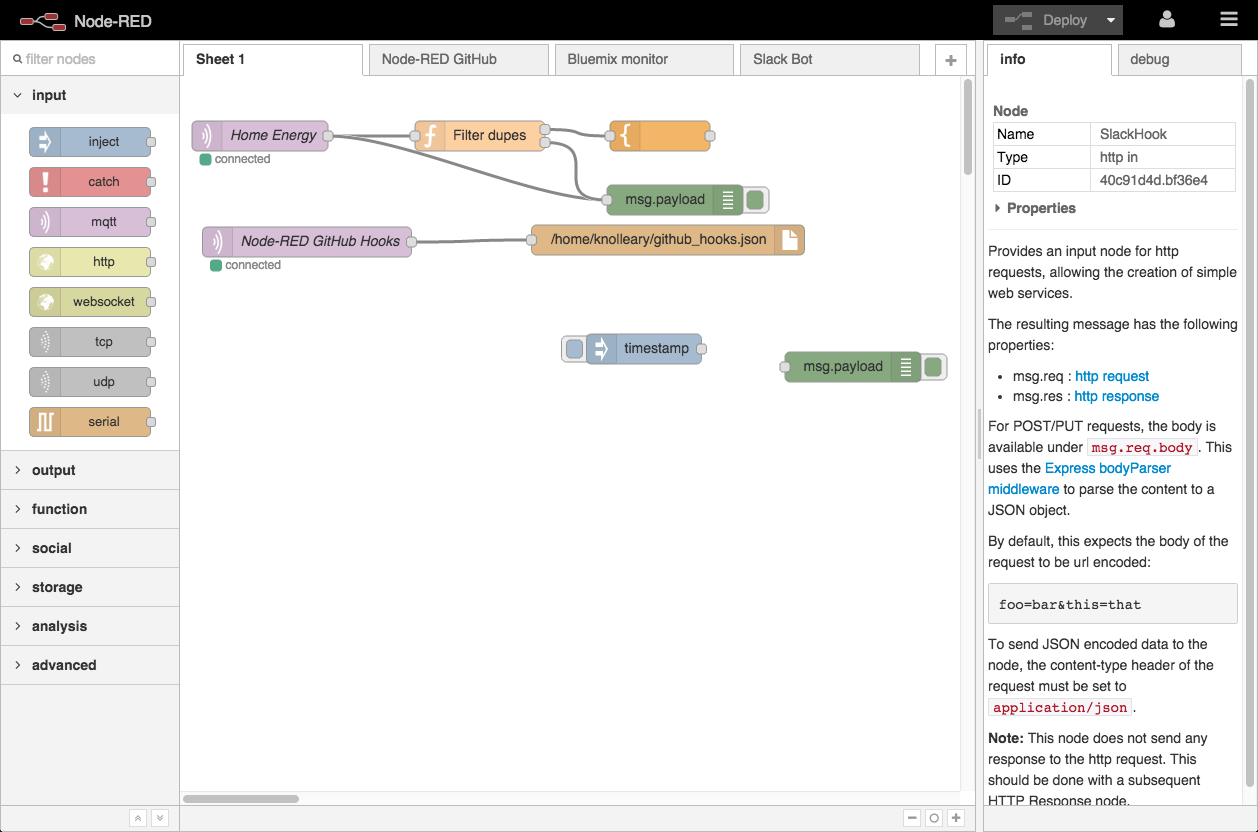
One of the most powerful use cases for self-hosted Node-RED is receiving webhooks from external services: GitHub, Stripe, Twilio, Slack, Shopify, or any service that sends HTTP POST requests on events. This requires Node-RED to be accessible from the internet via a public URL.
Add an HTTP In node to your canvas
From the Node palette, drag an http in node to the canvas. Double-click it to configure: set Method to POST and URL to /webhook (or any path you choose).
Add processing nodes
Connect a function node or any other nodes to process the incoming data. For example, parse the payload, filter events, or forward to another system.
Add an HTTP Response node
Always connect an http response node at the end of the flow. Most webhook senders expect a 200 OK response, otherwise they will retry. Set msg.statusCode = 200 in a function node before the response node.
Click Deploy
Click the red Deploy button in the top-right corner. The flow is now active and listening on http://localhost:1880/webhook.
Expose Node-RED to the internet with Localtonet
Your webhook endpoint is now at http://localhost:1880/webhook, but external services cannot reach localhost. The next section explains how to get a public URL using Localtonet.
Remote Access: Expose Node-RED to the Internet with Localtonet
Localtonet creates an encrypted tunnel from your local machine to a public HTTPS endpoint. When someone (or a webhook sender) accesses the public URL, the request is forwarded through the tunnel to your Node-RED instance running on localhost:1880. No port forwarding, no static IP, and it works behind NAT and CGNAT.
Install Localtonet on the machine running Node-RED
# macOS:
brew tap localtonet/tap && brew install localtonet

# Linux / Raspberry Pi:
curl -fsSL https://localtonet.com/install.sh | sh

# Windows:
# Download the installer from localtonet.com/downloadRegister and get your AuthToken
Create a free account at localtonet.com. Go to Dashboard → My Tokens and copy your AuthToken. Authenticate:
localtonet --authtoken YOUR_TOKEN_HERECreate an HTTP tunnel for port 1880
Go to localtonet.com/tunnel/http. Fill in:
- IP:
127.0.0.1 - Port:
1880 - AuthToken: Select your token
- Custom Subdomain (optional): e.g.
myflows
Click Create, then Start.
Use your public URL
The dashboard shows a public URL like https://myflows.localto.net. Open it in any browser to access your Node-RED editor from anywhere. Use it as the webhook URL in GitHub, Stripe, or any other service: https://myflows.localto.net/webhook.
Run Localtonet as a Service (Always-On Tunnel)
For a persistent setup where the tunnel automatically restarts on reboot alongside Node-RED, run Localtonet as a system service:
# Install and start as a service (Linux / Raspberry Pi):
sudo localtonet --install-service --authtoken YOUR_TOKEN_HERE
sudo localtonet --start-service --authtoken YOUR_TOKEN_HERE

# Check service status:
sudo localtonet --status-service

# Stop service:
sudo localtonet --stop-serviceMake sure you have completed the adminAuth configuration from the security section above before starting the Localtonet tunnel. An unprotected Node-RED instance with a public URL gives anyone full access to your flows and credentials. Always enable authentication first.
What You Can Build with Self-Hosted Node-RED + Localtonet
🔗 GitHub / GitLab Webhook Automation
Receive push events, pull request notifications, and CI status updates via webhook. Process the payload in a function node, filter by branch or repository, and trigger downstream actions: send a Slack message, update a dashboard, or start a deployment script.
💳 Payment Processing (Stripe, PayPal)
Stripe sends webhook events for successful payments, subscription changes, and refunds. An HTTP In node at /stripe/webhook receives these, a function node validates the signature and extracts the event type, and downstream nodes update your database, send confirmation emails, or trigger fulfillment.
🏠 Home Automation Remote Control
Run Node-RED on a Raspberry Pi with access to your local Home Assistant, Zigbee coordinator, or MQTT broker. The Localtonet tunnel gives you a public URL to control and monitor your home from anywhere. Build a mobile-friendly dashboard with Node-RED Dashboard nodes and access it via your public URL.
📡 IoT Data Collection and Alerting
Sensors on your local network (temperature, humidity, motion, power consumption) report data to an MQTT broker. Node-RED subscribes to MQTT topics, processes the data, stores it in InfluxDB, visualizes it on Grafana, and sends Telegram or email alerts when thresholds are exceeded.
🤖 AI and LLM Automation
Connect Node-RED to a local Ollama instance (also tunneled via Localtonet) to build AI-powered workflows. Receive a message via Telegram or webhook, pass it to a local LLM, and return the response. Build chatbots, document processors, and intelligent automation agents entirely on your own hardware.
📊 Data Pipeline and Reporting
Pull data from REST APIs on a schedule (inject node with interval), transform it through function nodes, and push results to Google Sheets, a database, or a dashboard. No cloud ETL service needed. Your data flows entirely through your machine.
Troubleshooting Common Issues
| Problem | Cause | Fix |
|---|---|---|
| Port 1880 already in use (EADDRINUSE) | Another Node-RED instance or another application is running on port 1880 | Run lsof -i :1880 (macOS/Linux) or netstat -ano | findstr :1880 (Windows) to find and stop the conflicting process. Or change Node-RED's port in settings.js: uiPort: 1881 |
| Login screen not appearing after setting adminAuth | Node-RED not restarted after settings.js change | Fully stop and restart Node-RED. Refresh the browser with a hard reload (Ctrl+Shift+R). |
| Dashboard not protected after setting httpNodeAuth | Node-RED not restarted, or dashboard is on a different route | Restart Node-RED. Confirm the dashboard URL path matches what httpNodeAuth is protecting. The dashboard runs at /ui by default. |
| Flows lost after Docker container restart | Container started without a persistent volume | Always use -v node_red_data:/data or a bind mount like -v /home/user/.node-red:/data. Never run the container without a volume if you want to keep your flows. |
| Node-RED not starting on boot (Linux) | systemd service not enabled | Run sudo systemctl enable nodered and sudo systemctl start nodered. Verify with sudo systemctl status nodered. |
| Webhook not receiving events | Tunnel not running or wrong URL used in service | Confirm the Localtonet tunnel is Active. Check the exact public URL in the dashboard. Make sure the external service has the correct URL including the path (e.g. /webhook). |
| WebSocket nodes disconnecting through Localtonet | Proxy headers not forwarded | Localtonet forwards WebSocket connections natively for HTTP tunnels. If using Node-RED Dashboard, ensure you are using the HTTPS tunnel URL. |
| node-red-dashboard not accessible after adminAuth | httpNodeAuth not set separately | Add httpNodeAuth: {user:"user", pass:"$2b$08$HASH"} to settings.js to protect dashboard routes. adminAuth alone does not protect /ui. |
Frequently Asked Questions
What port does Node-RED run on?
Node-RED runs on port 1880 by default. You access it at http://localhost:1880. You can change the port by editing the uiPort setting in settings.js. For example, uiPort: 3000 moves Node-RED to port 3000. If port 1880 is already in use, Node-RED will fail to start with an EADDRINUSE error.
How do I add a password to Node-RED?
Run node-red admin hash-pw to generate a bcrypt hash of your chosen password. Then open ~/.node-red/settings.js, find the adminAuth section, uncomment it, and paste in your username and the hash. Restart Node-RED. A login screen now appears when you open the editor. Note that adminAuth only protects the editor. To also protect the Node-RED Dashboard and HTTP-In routes, add httpNodeAuth with a username and hash to the same settings file.
How do I make Node-RED start automatically on boot?
On Raspberry Pi and Debian-based Linux: run sudo systemctl enable nodered after using the official Node-RED install script. On any Linux/macOS: install PM2 (npm install -g pm2), start Node-RED with PM2, then run pm2 save and pm2 startup. With Docker Compose: add restart: unless-stopped to your service definition and ensure Docker itself starts on boot with sudo systemctl enable docker.
How do I access Node-RED remotely from outside my home network?
Use a tunnel service like Localtonet to create a public HTTPS URL that forwards to your local localhost:1880. Install Localtonet, create an HTTP tunnel pointing to 127.0.0.1:1880, and start it. You receive a public URL like https://myflows.localto.net that works from any network without port forwarding or a static IP. Make sure Node-RED has authentication enabled via adminAuth before making it publicly accessible.
How do I receive webhooks in Node-RED?
Add an http in node to your canvas, set the method to POST and the URL to a path like /webhook. Connect it to your processing nodes and end with an http response node. Click Deploy. The webhook endpoint is now live at http://localhost:1880/webhook. To receive webhooks from external services (GitHub, Stripe, Twilio), you need a public URL. Use Localtonet to tunnel port 1880 and give the external service your public URL: https://yoursubdomain.localto.net/webhook.
How do I back up my Node-RED flows?
Node-RED stores all flows in a file called flows.json in the user directory (~/.node-red/ on Linux/macOS, C:\Users\username\.node-red\ on Windows, /data/ in Docker). Back up this directory to keep your flows, credentials, and installed nodes. You can also export individual flows or the entire workspace from the Node-RED editor menu: Hamburger menu → Export → All Flows → Download. The exported JSON file can be imported on any Node-RED instance. For version-controlled backups, enable Node-RED Projects (set NODE_RED_ENABLE_PROJECTS=true) to back flows to a Git repository.
Can I run Node-RED on a Raspberry Pi?
Yes. Raspberry Pi is one of the most popular platforms for Node-RED. Use the official install script: bash <(curl -sL https://raw.githubusercontent.com/node-red/linux-installers/master/deb/update-nodejs-and-nodered). This installs Node.js, Node-RED, and sets up a systemd service so Node-RED starts automatically on boot. Raspberry Pi 3 and newer run Node-RED well. On Pi Zero or Pi 1 (limited RAM), limit the heap to 128 MB by setting NODE_OPTIONS=--max_old_space_size=128 in the service file.
Make Your Self-Hosted Node-RED Accessible from Anywhere
Localtonet creates a secure HTTPS tunnel from Node-RED on your local machine to a public URL. Receive webhooks, share dashboards, and access your flows remotely. No port forwarding. No static IP. Free to start.
Get Started Free →