

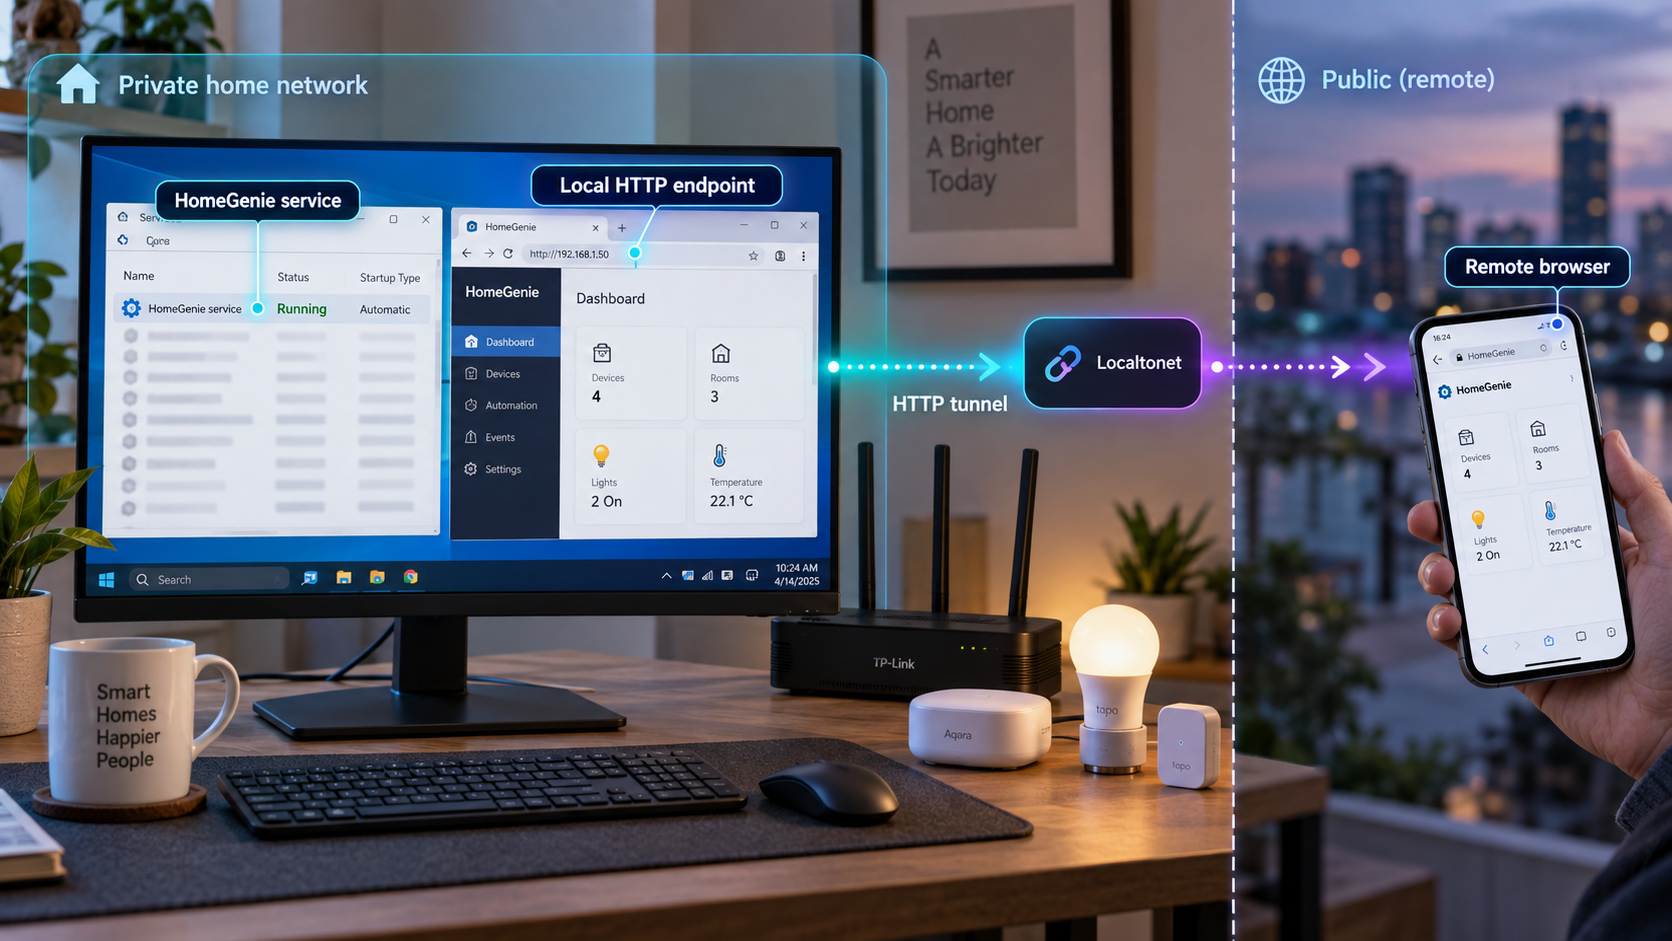
Run HomeGenie continuously on Windows, verify its local dashboard, and make it reachable when you are away from home
HomeGenie is a local-first, open-source automation server with a browser-based interface for managing devices, dashboards, programs, and connected home systems. This guide explains how to select the correct Windows release, install and test HomeGenie locally, prepare it for unattended operation, identify its actual HTTP address, and then publish that working endpoint through a Localtonet HTTP tunnel. We also cover service-account considerations, safe exposure, routine operation, and the most common causes of failed remote access. Exact Windows service commands can vary with the HomeGenie release, so this guide clearly separates verified installation behavior from release-specific service registration details that must be checked in the downloaded package.
📋 What's in this guide
How HomeGenie and Localtonet fit together
HomeGenie is designed to run on hardware you control. Its backend service hosts a browser interface and connects local automation components, while its automation and AI capabilities can operate on the local server. The project distributes portable release archives for Windows, Linux, macOS, and Raspberry Pi. On Windows, the basic installation model is straightforward: choose the correct release archive, extract it, and launch the included start.bat script.
That local installation and remote connectivity are separate layers. HomeGenie must first be installed, started, and reachable through its local HTTP endpoint. Only after that endpoint works should it be connected to Localtonet. This order matters because a tunnel cannot repair a HomeGenie process that failed to start, selected an unexpected port, or is inaccessible from the device running our client.
With Localtonet, the client application establishes an outbound connection from the Windows device to one of our relay servers. An HTTP tunnel then points to HomeGenie's local IP address and port. This provides a public HTTP tunnel address without requiring inbound router port forwarding, firewall port exposure, a public IP address, or VPN setup. The tunnel remains available only while the selected Localtonet client is connected and the tunnel is running.
Request flow
During local use, a browser connects directly to an address in the form http://<server_ip>:<port>/. During remote use, the browser connects to the public address assigned to the Localtonet HTTP tunnel. Our relay forwards the web traffic through the connected client to the configured local target. HomeGenie still runs on the Windows computer, and its automation environment remains on that system.
A Localtonet tunnel does not turn HomeGenie into a hosted cloud installation, and standard tunneling is not a VPN. If a private mesh network is required instead of publishing one HTTP service, that is a different architecture involving Localtonet VPN Manager. This guide focuses specifically on exposing the HomeGenie web endpoint through an HTTP tunnel.
Keep the two troubleshooting domains separate. If HomeGenie cannot be opened locally, fix the HomeGenie process, port, service account, or local firewall first. Configure Localtonet only after the local endpoint responds consistently.
Prepare the Windows host
Choose a Windows computer that can remain powered on when remote access is needed. HomeGenie and the Localtonet client must both be running for the complete path to work. Windows sleep, shutdown, network disconnection, or service failure will make the remote endpoint unavailable even if the tunnel configuration remains saved in the dashboard.
Before downloading a HomeGenie release, identify the computer's architecture and graphics hardware. HomeGenie publishes multiple Windows x64 variants. The standard win-x64 build is intended for CPU-only use and does not require a dedicated GPU. The win-x64-cuda12 build is intended for supported NVIDIA hardware and requires current NVIDIA drivers. The win-x64-vulkan build is intended to use suitable AMD, Intel, or NVIDIA graphics for applicable AI workloads, with DirectX 12 used for vision acceleration on Windows.
| Windows package | Choose it when | Important consideration |
|---|---|---|
win-x64 |
The computer has no dedicated GPU, AI acceleration is unnecessary, or maximum compatibility is preferred | This is the standard CPU-only Windows option and avoids GPU runtime requirements |
win-x64-cuda12 |
The server has a compatible NVIDIA GPU and accelerated AI or vision workloads are required | Current NVIDIA drivers are required for the CUDA 12 variant |
win-x64-vulkan |
The server uses suitable AMD, Intel, or NVIDIA graphics and the Vulkan-oriented package matches the intended workload | HomeGenie documents Vulkan for LLM use and DirectX 12 through DirectML for vision on Windows |
Select the release for the machine you actually intend to use. A larger accelerated build is not automatically better for a server that does not have the required graphics hardware or drivers. For an older PC, a headless server, or an installation focused on ordinary automation rather than accelerated local AI, the standard package is the conservative starting point.
Choose a stable installation directory
HomeGenie's release is portable, so the extracted directory is effectively the installation. Put it in a permanent location before creating a Windows service. Do not register a service while the application is still in a temporary download or extraction directory and then move it afterward. A service definition may rely on the executable path, script path, working directory, or files stored alongside the application.
The account that will run HomeGenie needs appropriate access to the extracted directory and any connected resources that HomeGenie must use. Service accounts do not necessarily have the same mapped drives, user profile, environment, interactive desktop, or file permissions as the Windows account used for the initial test. If HomeGenie works when launched manually but not as a service, this difference is one of the first things to investigate.
Plan for safe testing
During installation, test on the local computer first. Then test from another device on the same LAN if LAN access is part of the intended setup. Do not create a public tunnel merely to determine whether the application starts. Also decide who should be able to reach the interface before enabling remote access. A smart-home control surface can expose sensitive operational information and device controls, so public reachability should be treated as a deliberate security decision.
HomeGenie includes automation and AI capabilities that can generate, compile, and execute code. Its project guidance recommends a restricted, sandboxed environment for stronger system security. Do not run the service with broader Windows privileges than its required files, devices, and integrations need.
Install and start HomeGenie on Windows
The initial installation should be performed interactively, even if the final goal is a Windows service. An interactive launch makes startup messages visible and confirms that the selected package works before service isolation adds another layer of variables.
Choose the appropriate Windows release ZIP
Download the Windows x64 archive that matches the computer and its acceleration requirements. Use the standard win-x64 build for CPU-only operation, the CUDA 12 build for a suitable NVIDIA configuration, or the Vulkan build when that graphics path is appropriate. Do not install a GPU-specific package solely because the computer has integrated or dedicated graphics.
Extract the archive to its permanent location
Unzip the complete release rather than running individual files from inside the archive. Keep the extracted directory structure intact. Place it in the directory from which HomeGenie will continue to run so that later service registration does not point to a path that will be moved or deleted.
Launch the supplied Windows startup script
Open the extracted HomeGenie directory and run start.bat. The supplied startup scripts are configured to pass the --start-browser argument, so the interface normally opens as a desktop-style Progressive Web App. Leave the terminal open during this first test and inspect any startup output rather than immediately converting the process into a service.
If HomeGenie is already running and the startup script is launched again, the documented behavior is to open another app window connected to the existing session rather than starting a second server. This helps avoid accidentally creating two competing instances during an interactive test.
To stop an interactively launched instance gracefully, focus the terminal window and press CTRL + C. Do this before switching to service operation so that only one HomeGenie process is expected to own the selected HTTP port.
Optional headless behavior
The default startup scripts include --start-browser. That is convenient for a desktop installation, but it is generally unnecessary for a server expected to run without an interactive user. HomeGenie's documented approach for a traditional server-only or headless launch is to edit the startup script and remove the --start-browser argument from the execution command.
Preserve an original copy before making that change, and retest the edited script interactively. Removing the browser-opening argument should change the desktop launch behavior, not the need for the HomeGenie backend process to start and listen on its HTTP endpoint.
Because HomeGenie is distributed as a portable ZIP, avoid deleting files that appear unrelated to the main executable. Keep the package structure intact unless current HomeGenie documentation explicitly directs a change.
Prepare HomeGenie for Windows service operation
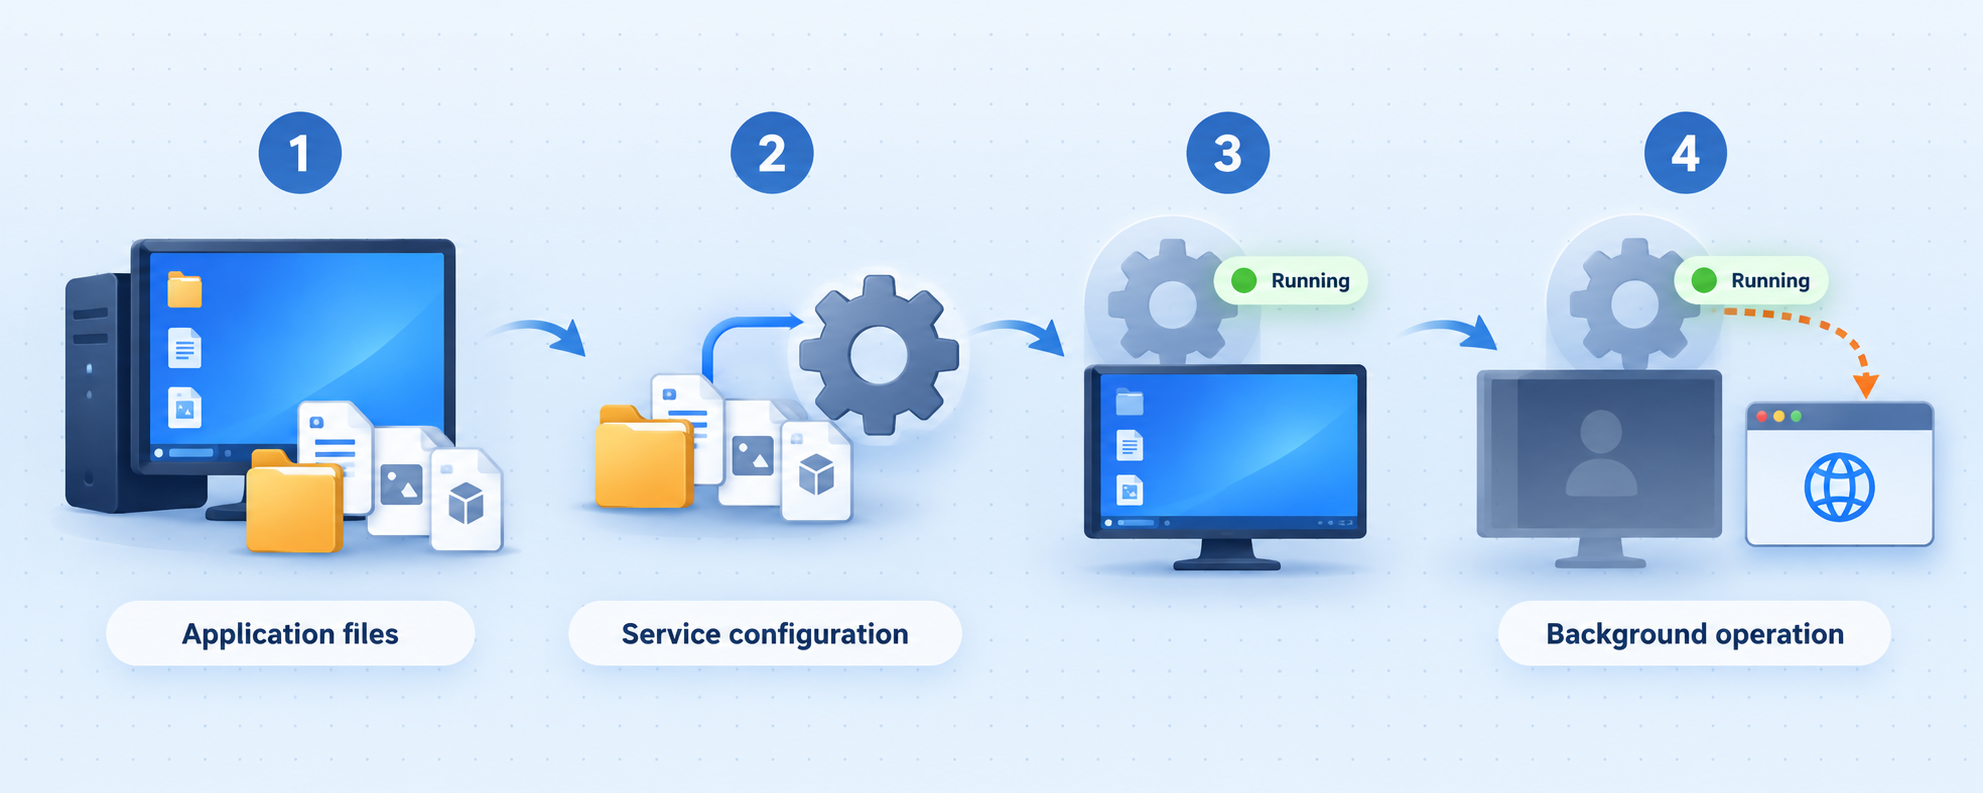
A Windows service is useful when HomeGenie must start with Windows and continue running without an open terminal or logged-in desktop session. However, service installation must use the mechanism documented for the exact HomeGenie release. The available evidence for this article confirms that HomeGenie supports Windows Service setup, but it does not establish the current service installer filename, registration command, service name, or removal command.
We therefore do not provide a guessed PowerShell command, sc.exe command, wrapper configuration, or executable flag. Those details can change between releases, and an incorrect command can register the wrong working directory, use an unsuitable account, or leave a service that cannot be cleanly upgraded. Inspect the documentation and service-related files included with the downloaded release, and use the release's own Windows Service procedure exactly as provided.
What to confirm during service registration
Regardless of the release-specific registration mechanism, validate the resulting service in the Windows Services management console. Confirm that its executable or launcher points into the permanent HomeGenie directory, that the configured account can read and write the files HomeGenie requires, and that the startup mode matches the intended unattended operation.
Start the service and check whether it remains in the Running state. A service that starts and immediately stops usually indicates a startup error, a missing dependency, an invalid path, an inaccessible working directory, a port conflict, or an account-permission problem. Check both the service-specific output provided by the package and Windows event information where appropriate.
Do not keep the interactive start.bat instance running while testing the service. If the first instance owns the HTTP port, the service may fail or choose different behavior. Stop the terminal instance with CTRL + C, verify that its process has exited, and only then start the registered service.
Service account differences
A service can behave differently from an application launched from your desktop account. It may have a different home directory, different environment variables, no access to mapped network drives, and different permissions for serial devices, configuration files, media directories, cameras, or other integrations. Use local paths or explicitly available resources where possible, and grant only the permissions HomeGenie actually requires.
If connected hardware or network resources are involved, test those integrations after switching to the service account. A functioning web dashboard proves that the HTTP server is alive, but it does not prove that every automation device, file path, camera, or external integration remains available in the service context.
The exact service registration and removal commands are not established by the supplied release evidence. Use the instructions bundled with the selected HomeGenie version. Before upgrading or relocating the installation, stop the service and confirm the project's documented upgrade procedure so that paths and application data are preserved.
Find and verify the local HomeGenie HTTP endpoint
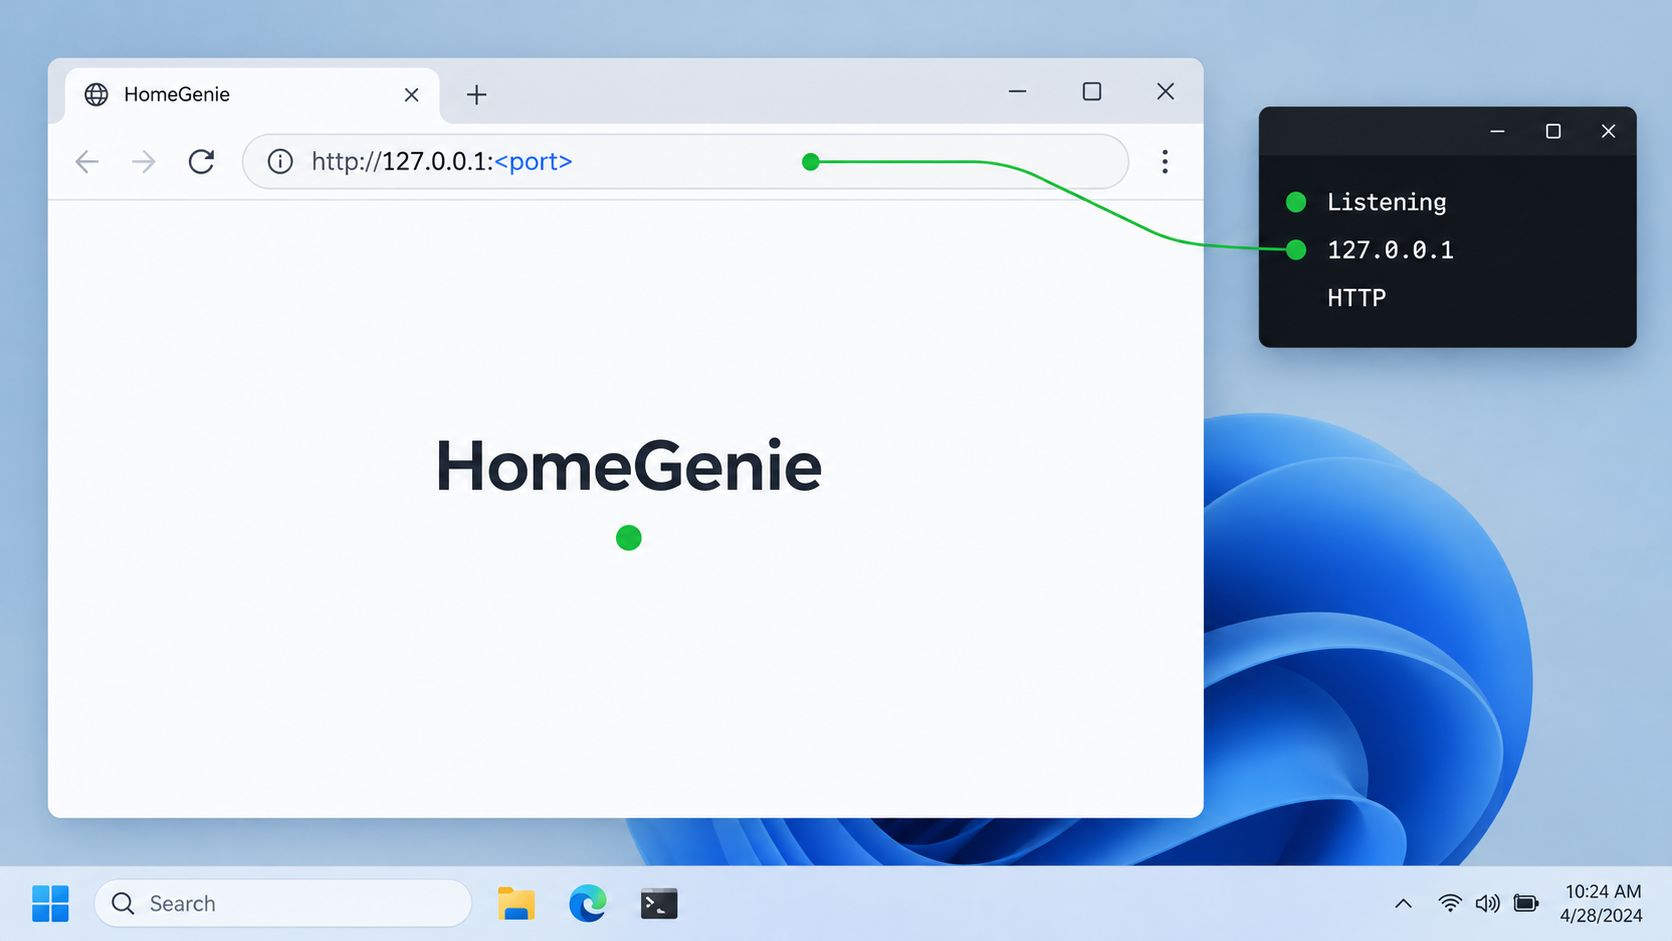
HomeGenie exposes a local address in the form http://<server_ip>:<port>/. Port 80 is the default when it is available. If HomeGenie cannot use that port, it can select the first available port starting from 8080. For that reason, assuming either port 80 or 8080 without checking can produce an incorrect tunnel target.
The exact service address is recorded in serviceaddress.txt. Inspect that file in the HomeGenie installation context after the active instance has started. Treat the recorded address as the authoritative target for the current run, especially when another local web server may already occupy a preferred port.
Test from the Windows host
Open the recorded URL in a browser on the Windows computer. Confirm that the HomeGenie interface loads and remains responsive across repeated refreshes. If the server was converted to a service, perform this test after stopping the interactive process and starting only the service. That verifies the service-hosted instance rather than a leftover terminal session.
If the address uses a wildcard, loopback name, or another representation that is not suitable for tunnel configuration, determine the concrete address reachable from the Localtonet client. When both applications run on the same Windows computer, a local loopback target may be appropriate if HomeGenie listens there. When our client runs on another device, use an address that is reachable across the LAN and ensure HomeGenie listens on an applicable interface. Do not assume that a service bound only to loopback can be reached from a different machine.
Test from the local network when necessary
If the Localtonet client will run on the HomeGenie computer, successful access on that computer is the essential baseline. If our client will run on another device, open the HomeGenie URL from that device or perform an equivalent HTTP connectivity test before creating the tunnel. A failure at this stage is a local routing, listening, firewall, or service issue.
| Verification point | Expected result | If it fails |
|---|---|---|
| Windows service status | The registered HomeGenie service remains running | Review its path, account permissions, working directory, dependencies, port conflicts, and available logs |
serviceaddress.txt |
The file identifies the active local HTTP address | Confirm that HomeGenie completed startup and that you are reading the file from the active installation |
| Browser test on the server | The HomeGenie interface loads using the recorded address | Resolve the HomeGenie startup or local listener problem before configuring a tunnel |
| LAN test from the client device | The endpoint loads from the device that will run Localtonet | Check the target IP, interface binding, Windows firewall, LAN segmentation, and routing |
The Localtonet HTTP tunnel needs the local target that our client can reach. Copy the host and port from the verified HomeGenie endpoint rather than entering the complete public URL or guessing from HomeGenie's usual defaults.
Connect HomeGenie remotely with a Localtonet HTTP tunnel
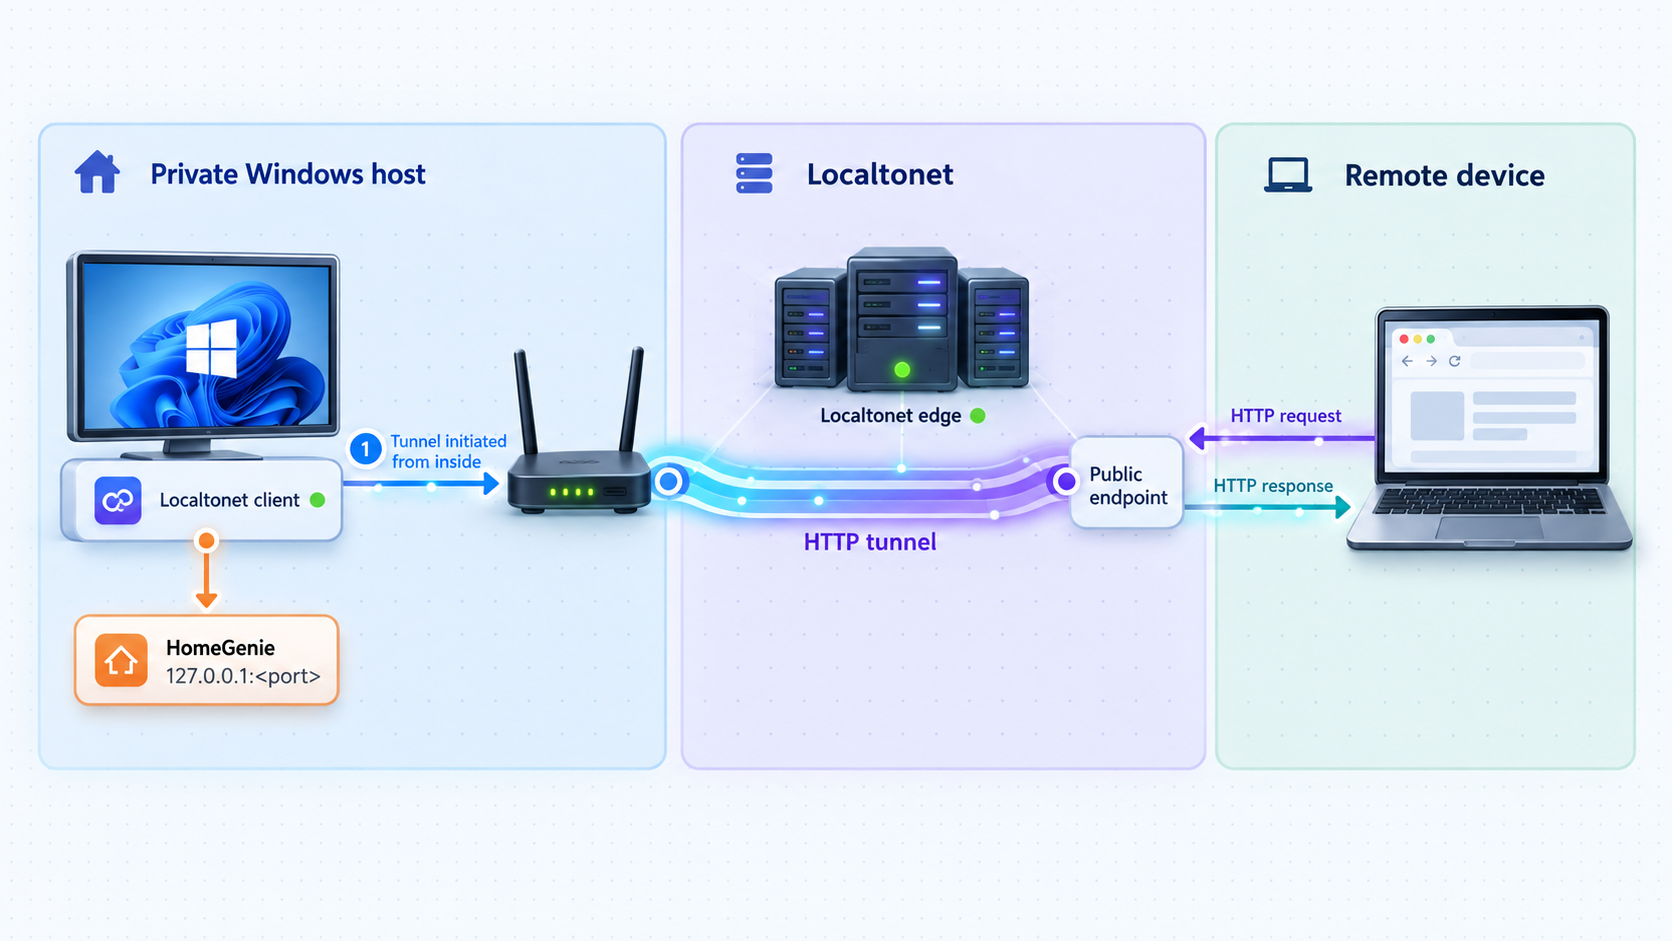
Once the HomeGenie page works locally, create a Localtonet HTTP tunnel. Run our client on the Windows host itself or on another always-on device that can reach the verified HomeGenie address. Running both on the same computer often produces the simplest dependency chain, but a separate client device is valid when local routing and firewall policy permit access.
HTTP tunnels can use a generated random subdomain, a custom subdomain where supported, or a custom domain. These process types serve the same target content at a public HTTPS address. Availability can vary, and custom-domain DNS requirements should always be checked against current Localtonet documentation rather than inferred.
Install and run the Localtonet client
Install our client on the Windows HomeGenie host or another device that can reach it. Keep the client running so it can establish the required outbound connection to a Localtonet relay. No inbound router port-forwarding rule is required for this workflow.
Authenticate and select the client device
Use the device-specific authentication token associated with the intended client and select that device for the tunnel. Treat the token as a secret. Never place it in screenshots, scripts committed to a repository, browser-accessible files, or article examples.
Select an available relay server
Choose a currently available relay server or region from the dashboard. Do not copy a server code from an old tutorial because available values can change and may depend on the current product configuration or plan.
Create an HTTP tunnel for the verified target
Select the HTTP tunnel family and enter the local IP address and port confirmed during HomeGenie testing. Choose the appropriate process type from the options currently available to the account. Do not enter a guessed default port when serviceaddress.txt shows another value.
Start the tunnel and test its assigned address
Creating a tunnel does not start it. Press Start, wait for the selected client and tunnel to show a connected state, and then open the assigned public address from a network outside the HomeGenie LAN. Stop or delete the tunnel when remote access is no longer required.
You can manage tunnels from our dashboard or REST API, but this guide does not provide unverified API calls or commands. For current interface details and supported settings, use the Localtonet documentation. Exact options can vary with product updates, client versions, and subscriptions.
Test the complete remote path
Use a phone with Wi-Fi disabled or another genuinely external connection. Opening the public address while still connected to the home LAN may not prove that remote access works. Confirm that the expected HomeGenie interface appears and that ordinary navigation succeeds.
Also test failure behavior deliberately. Stop the Localtonet tunnel and verify that the public endpoint is no longer available. Restart it and confirm recovery. Then, during a suitable maintenance window, restart the HomeGenie service and confirm that both the local page and remote path return. This separates tunnel lifecycle behavior from application lifecycle behavior.
Secure remote HomeGenie access
A local-first application becomes reachable from the internet when connected to a public tunnel. The tunnel removes the need for direct inbound router configuration, but it does not remove the need to protect the application. Before sharing the address, review HomeGenie's current authentication and authorization configuration, use strong credentials wherever supported, and expose only the service that needs remote access.
Do not assume that an obscure URL is an access-control mechanism. Do not publish HomeGenie merely because it is convenient to reach. Anyone permitted to use the remote interface may be able to view automation state or operate connected devices according to the permissions provided by HomeGenie.
Separate the control plane from the target
The Localtonet dashboard controls tunnel configuration and lifecycle. HomeGenie controls its own users, application behavior, automation data, and connected devices. Protect both layers. A secure Localtonet account does not compensate for weak HomeGenie access controls, and strong HomeGenie credentials do not justify exposing a Localtonet device token.
Avoid excessive Windows privileges
Running HomeGenie as a highly privileged service can increase the impact of an application or automation error. HomeGenie's programmable features make careful isolation especially important. Use a restricted account where practical, limit write access to unrelated directories, and avoid granting broad administrative rights merely to make an initial startup problem disappear.
Keep the installation current
Review HomeGenie release notes before updating. Stop the Windows service, protect application data and configuration according to the project's current upgrade guidance, and verify the local endpoint again after the update. A release may change files, dependencies, startup behavior, or service integration. Do not assume that replacing binaries while the service is running is safe.
Home automation interfaces can operate lights, sensors, cameras, relays, locks, heating, or other equipment depending on the installation. Apply strong access controls, avoid sharing the tunnel URL publicly, and verify behavior carefully before relying on remote operation for safety-sensitive systems.
Routine operation and troubleshooting
Recommended startup order
After a Windows restart, HomeGenie must start successfully, the Localtonet client must connect, and the tunnel must be running. If HomeGenie starts more slowly than the client, the public address may briefly exist while the local target is still unavailable. Test again after HomeGenie finishes initialization rather than immediately modifying the tunnel.
A practical health check follows the same order as installation: confirm the service, read the recorded local address, open the local page, confirm the Localtonet client connection, verify the tunnel state, and finally test the public address.
The public address does not load
First open the exact local address recorded by HomeGenie from the Localtonet client device. If that fails, the tunnel is not the root cause. Confirm the HomeGenie service is running, verify its port, and check whether the address changed after a restart. If HomeGenie selected a different available port because of a conflict, update the tunnel target only after verifying the new endpoint.
If the local endpoint works, check whether the correct Localtonet device is connected and whether the tunnel has been started. Remember that creating a tunnel is not sufficient. Then compare the tunnel's local IP and port with the working HomeGenie target.
HomeGenie works manually but not as a service
This pattern usually points to execution-context differences. Check the service executable path, working directory, service account, file permissions, environment, and access to connected resources. Ensure that the interactive instance was fully stopped before the service attempted to claim the port. Use the service setup supplied with the exact HomeGenie release rather than a generic wrapper copied from an unrelated tutorial.
The interface opens on an unexpected port
Port 80 may already be occupied or unavailable. HomeGenie can select the first free port starting at 8080, so inspect serviceaddress.txt after startup. Do not repeatedly force a port based on assumption. Identify the other listener if a fixed port is operationally required, then follow HomeGenie's current configuration guidance before changing anything.
The tunnel worked before a restart
Confirm that Windows did not put the computer to sleep, that HomeGenie started as expected, and that the Localtonet client reconnected. Check whether the tunnel itself is running. Then verify that HomeGenie's address and port still match the saved tunnel target. A new port selection caused by a temporary conflict can break an otherwise valid tunnel configuration.
The page loads locally on the server but not from another client device
The application may be listening only on a loopback address, Windows Firewall may block LAN traffic, or the two devices may be isolated by network segmentation. If Localtonet runs on the HomeGenie computer, a locally reachable target can still be used. If our client runs elsewhere, it must be able to reach the service over the LAN. Resolve that local path before retrying the public URL.
The HomeGenie desktop window does not appear
A Windows service runs without the normal interactive desktop experience, so the absence of a PWA window does not necessarily mean the backend failed. Open the recorded service address manually in a browser and check the Windows service state. The --start-browser behavior is intended for interactive startup and is not a reliable service-health indicator.
| Symptom | Likely area | Next check |
|---|---|---|
| Service stops immediately | HomeGenie startup or Windows service configuration | Check the registered path, working directory, permissions, dependency requirements, and port conflicts |
| Local browser cannot connect | HomeGenie process or listener | Read serviceaddress.txt, confirm the service state, and test the recorded address |
| Local access works, public access fails | Localtonet client, tunnel state, or target | Confirm the selected device is connected, press Start, and compare the configured IP and port with the working endpoint |
| Public access fails after reboot | Startup sequence or changed target | Verify both processes restarted and confirm HomeGenie's active address has not changed |
| Devices or files disappear under service operation | Service account context | Check permissions, user-profile assumptions, mapped drives, hardware access, and network resource availability |
Frequently asked questions
What is HomeGenie's default HTTP port?
HomeGenie uses port 80 by default when it is available. If it cannot use that port, it can select the first available port starting from 8080. Read serviceaddress.txt after startup instead of assuming a port.
Can Localtonet run on the same Windows computer as HomeGenie?
Yes. Running our client on the HomeGenie host can simplify local connectivity because the tunnel target is on the same machine. The client may also run on another reachable device, but that device must be able to connect to HomeGenie's local IP address and port.
Does this require router port forwarding?
No. The Localtonet client establishes an outbound connection to our relay, so this workflow does not require an inbound router forwarding rule, a public IP address, firewall port exposure, or VPN setup.
Why does this guide not provide a Windows service installation command?
HomeGenie supports Windows Service setup, but the supplied evidence does not establish the exact current installer filename, command syntax, service name, or uninstall command. Guessing those details could create an incorrect or unsafe service definition. Use the service instructions bundled with the exact HomeGenie release you downloaded.
Should I use the CPU, CUDA, or Vulkan Windows package?
Use the standard win-x64 package for CPU-only operation or when compatibility and simplicity are the priority. Use win-x64-cuda12 for a suitable NVIDIA GPU with current drivers. Use win-x64-vulkan when the supported Vulkan and DirectX 12 acceleration path matches the Windows hardware and intended AI workloads.
Does creating a Localtonet tunnel make it active immediately?
No. Creating the configuration does not mean the tunnel is running. The assigned client must be connected and the tunnel must be started with the Start button. It can later be stopped or deleted.
Will the remote address work while the Windows computer is asleep?
No. HomeGenie must be running and the selected Localtonet client must remain connected. If Windows sleeps, shuts down, loses network connectivity, or stops either process, the remote HomeGenie endpoint becomes unavailable.
Is a Localtonet HTTP tunnel the same as a VPN?
No. An HTTP tunnel publishes a specific local web service through a public address. Localtonet VPN Manager is the separate feature for a private mesh VPN and LAN bridging workflow.
Connect your verified HomeGenie server with Localtonet
Start HomeGenie on Windows, confirm the exact address in serviceaddress.txt, and then use that working IP address and port as the target of a Localtonet HTTP tunnel. Keep the device token private, start the tunnel only when needed, and test the result from outside your local network.


