

Run HackerAI's development stack from source, verify every required service, and then test controlled remote access
This tutorial covers HackerAI's source-based development workflow, not a general desktop installation or a production deployment. You will prepare the documented tools and hosted services, run the repository setup, start Next.js and Convex, add the Trigger.dev worker for Agent mode, and verify the application locally. Only after those checks will we map the confirmed web endpoint to a Localtonet HTTP tunnel. We also explain which remote behaviors remain dependent on HackerAI's public-origin, authentication, cookie, streaming, and development-server configuration.
📋 What's in this guide
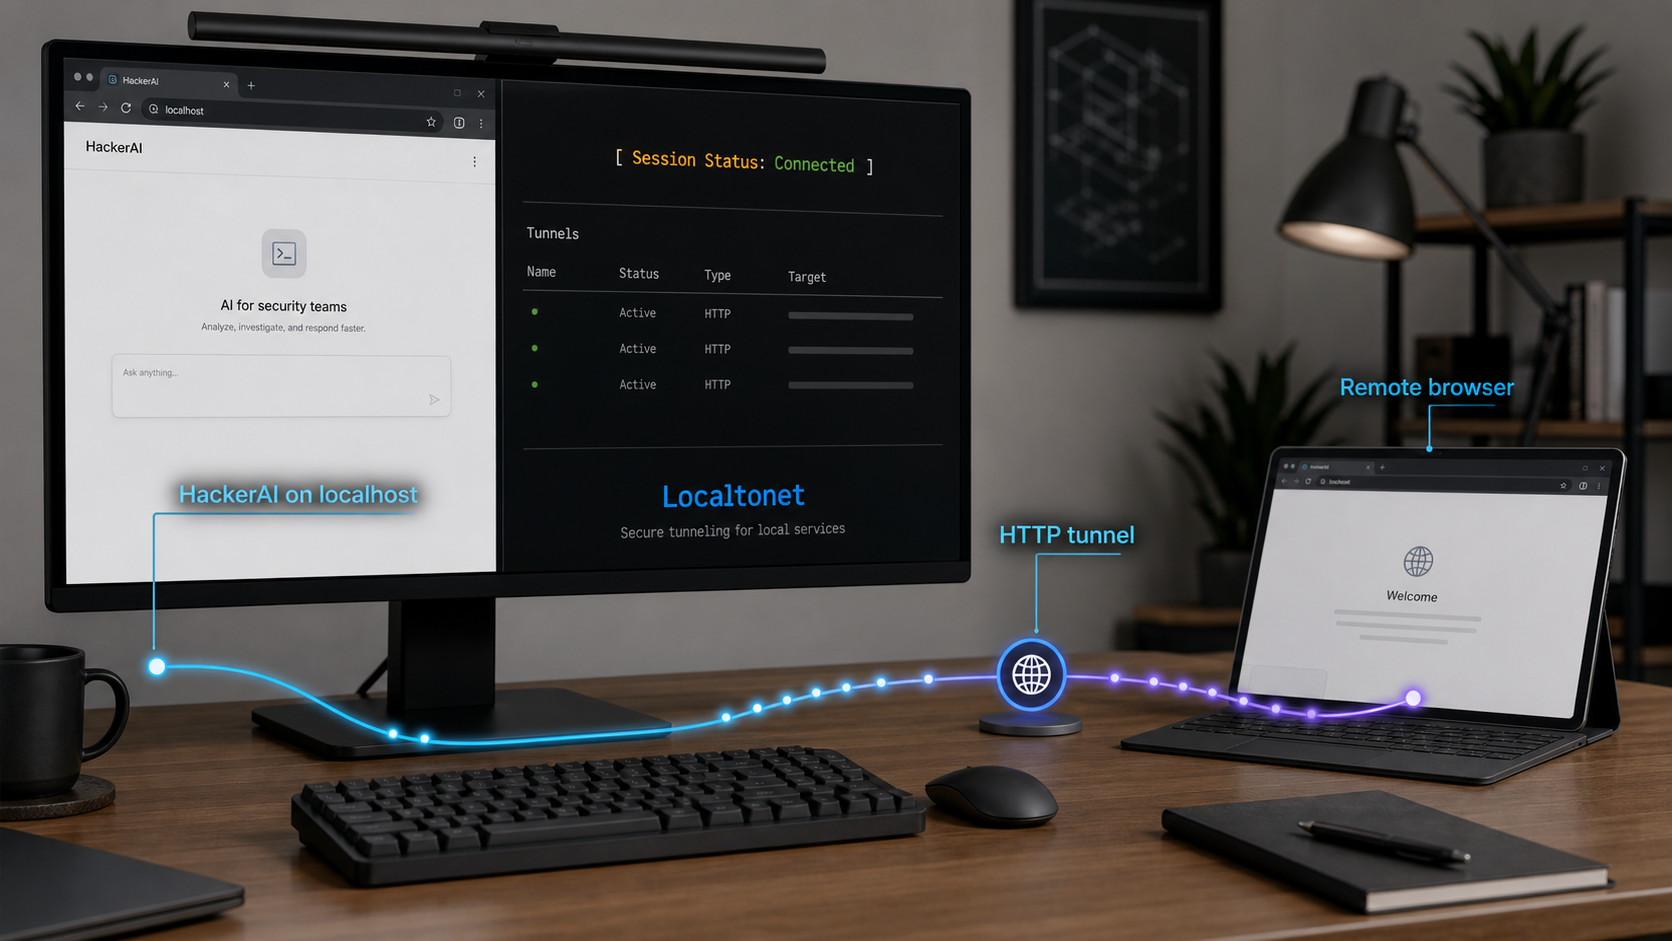
What this HackerAI installation provides
HackerAI describes itself as an AI-powered penetration testing assistant for finding and fixing vulnerabilities by working with AI. The procedure in this guide follows the development instructions in the current HackerAI source repository. It clones the source, installs its pnpm-managed dependencies, runs the repository setup process, and starts a Next.js development server together with a Convex development server.
This is not a completely offline installation. The repository identifies several hosted services as required: OpenRouter for AI model access, OpenAI for content moderation, E2B for isolated cloud execution in Agent mode, Convex for the database and backend, WorkOS for authentication and user management, and Trigger.dev as the durable runtime for agent tasks. Optional integrations include Amazon S3, Perplexity, Jina AI, Redis, Upstash Redis, PostHog, and Stripe.
HackerAI also has a separately released desktop distribution. Current release evidence includes HackerAI Desktop version desktop-v0.0.59. That release is distinct from the source-based web development workflow described here. The available evidence does not establish that the desktop application exposes an HTTP endpoint suitable for a Localtonet tunnel, so this tutorial does not attempt to tunnel the desktop application. Localtonet is connected only to the web endpoint printed by the source-based Next.js development process.
Penetration testing tools can generate requests, run tasks, and interact with systems in disruptive or legally restricted ways. Test only systems you own or environments for which you have clear written permission. A Localtonet tunnel provides network reachability. It does not grant authorization to test a third-party system, bypass application permissions, or disregard another service's policies.
Prepare the local tools and hosted service accounts
Complete the tool checks before cloning the repository. HackerAI's current README documents Git, pnpm commands, and the required service accounts. The supplied repository extract confirms that package.json, pnpm-lock.yaml, pnpm-workspace.yaml, and .env.local.example exist, but it does not expose the current contents of package.json or the environment example. Therefore, this article cannot safely quote a Node.js engine constraint, a pinned pnpm version, or every environment variable from those files.
Before installing dependencies, inspect the current repository's package.json for an engines field and a packageManager declaration. If either is present, use those declared versions. If the current file does not declare a version, the project has not provided a machine-readable constraint in that field, and you should not infer one from a framework default or an older tutorial.
Install Git
Install Git using the official installer for your operating system or your operating system's maintained package manager. Windows users can use the Git for Windows distribution, macOS users can use the platform developer tools or a maintained package manager, and Linux users can use their distribution package manager. Confirm that the executable is available:
git --versionInstall a compatible Node.js runtime
Install Node.js from the official Node.js distribution, a supported operating-system package, or a Node version manager. A version manager is useful when the repository declares a specific engine range because it lets you switch versions without replacing unrelated projects. After checking package.json, activate a Node.js release that satisfies the declared constraint and verify it:
node --versionDo not assume that the newest release or a remembered long-term support release is compatible. The repository metadata at the commit you are installing is the correct source for a declared constraint.
Install the repository-compatible pnpm release
Use the package manager declared by HackerAI rather than replacing pnpm with npm or Yarn. If package.json contains a packageManager entry, activate that pnpm release through a supported pnpm installation method such as Corepack or the pnpm installer. If no version is declared, follow pnpm's current official installation guidance and record the version used for reproducibility.
pnpm --versionConfirm all three tools in the same shell where you will run HackerAI. This avoids a common situation where Node.js or pnpm works in one terminal profile but is unavailable in another.
Create the required service accounts
| Service | Documented role | When to verify it |
|---|---|---|
| OpenRouter | Required AI model provider | Before testing chat or Agent responses |
| OpenAI | Required content moderation service | Before sending a test chat request |
| E2B | Required isolated cloud execution for Agent mode | Before running an Agent task |
| Convex | Required database and backend | During setup and local backend verification |
| WorkOS | Required authentication and user management | Before testing local and public sign-in |
| Trigger.dev | Required durable runtime for agent tasks | Before starting the Agent worker |
Create credentials only in the corresponding service dashboards. Keep them out of command history, screenshots, support messages, browser URLs, and version control. Use development credentials and least-privilege service roles where the provider supports them.
Understand setup and environment configuration
HackerAI instructs users to run pnpm run setup after dependency installation. The current README extract does not enumerate the setup script's prompts or state exactly which entries it writes to .env.local. It would be unsafe to invent a prompt sequence. Run the script interactively, read every prompt presented by the checked-out revision, and obtain requested values from your own service projects.
The repository contains .env.local.example, but its current contents were not included in the supplied evidence. Treat that file in your checked-out revision as the authoritative inventory for web-process variables. Compare it with the generated or edited .env.local after setup. Do not assume that completion of the setup script means every optional integration or every Agent worker variable has been configured.
Exact Trigger.dev variables documented by HackerAI
The README does document the Trigger.dev portion precisely. Create a project in Trigger.dev and copy its development secret, which uses the tr_dev_… form, into the local .env.local file under this exact name:
TRIGGER_SECRET_KEY=REDACTED
Do not use the literal word REDACTED in a working configuration. It is shown only to identify where your private value belongs.
In the Trigger.dev dashboard for the project, add the variables needed by the worker. The README explicitly names:
NEXT_PUBLIC_CONVEX_URLCONVEX_SERVICE_ROLE_KEYOPENROUTER_API_KEYOPENAI_API_KEY- Configuration for one cloud sandbox provider
- Any optional keys used by the task, including
PERPLEXITY_API_KEY,JINA_API_KEY, or applicable S3 configuration
The README does not provide exact variable names for the cloud sandbox provider or every S3 setting in the supplied extract. Use the names in the current .env.local.example and relevant project configuration instead of guessing.
Separate browser-visible values from secrets
In Next.js conventions, a variable prefixed with NEXT_PUBLIC_ can be included in browser-delivered code. The documented NEXT_PUBLIC_CONVEX_URL should therefore be treated as browser-visible configuration, not as a secret. By contrast, service-role keys, provider API keys, and the Trigger.dev secret must remain server-side and private.
| Variable or category | Visibility | Handling rule |
|---|---|---|
NEXT_PUBLIC_CONVEX_URL |
Browser-visible configuration | Use the correct project URL, but do not treat the prefix as secret storage |
TRIGGER_SECRET_KEY |
Secret | Keep in local server-side configuration and never expose in captures or client code |
CONVEX_SERVICE_ROLE_KEY |
Secret | Configure for the worker and keep out of browser-visible variables |
OPENROUTER_API_KEY and OPENAI_API_KEY |
Secrets | Store only in the server or worker environments that require them |
| Optional provider keys | Usually secrets | Add only when the corresponding feature is used and follow the provider's scope controls |
Do not commit .env.local, paste its contents into an issue, or include it in a tunnel screenshot. Before sharing terminal output, inspect it for tokens, project identifiers, private URLs, user data, and request payloads. Redact values rather than partially masking them in a way that leaves usable credentials.
Install HackerAI from source
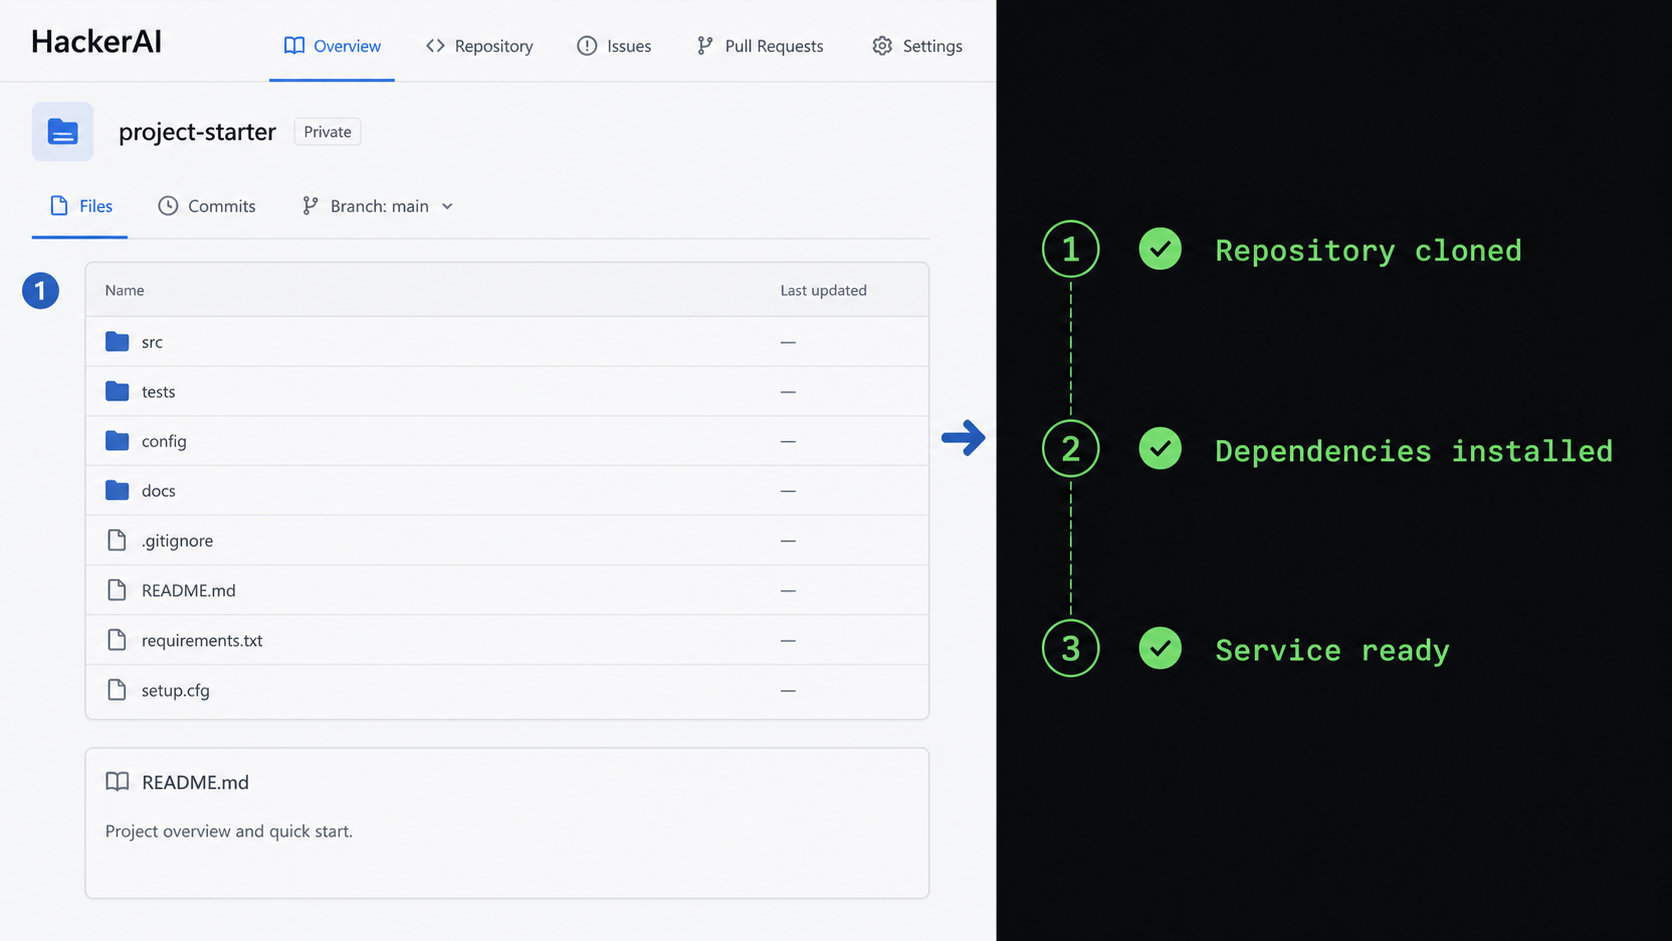
Use the documented order below. Keep the repository private to your development environment if it contains local configuration, and review the active branch and changes before running code obtained from any public repository.
Clone the official repository
Clone HackerAI from its official public GitHub location.
git clone https://github.com/hackerai-tech/hackerai.gitEnter the project directory
Run subsequent commands from the cloned project root.
cd hackeraiCheck the declared runtime and package-manager metadata
Open package.json and check its engines and packageManager fields. Align Node.js and pnpm with any declared constraints, then confirm their versions in the current shell.
node --version
pnpm --versionInstall dependencies with pnpm
Use the repository's documented package manager so dependency resolution follows its workspace configuration and lockfile.
pnpm installRun the repository setup script
Start the interactive setup and follow the prompts produced by your checked-out revision. The supplied README does not document those prompts individually, so do not copy answers from an older installation. Compare the resulting configuration with the current .env.local.example.
pnpm run setupStart Next.js and Convex together
Run the combined development command. The HackerAI README states that this starts both the Next.js and Convex development servers.
pnpm run devRun Next.js and Convex separately when diagnosing startup
The repository also provides separate commands. Open two terminals in the HackerAI project directory so each process has an independent log:
pnpm run dev:nextpnpm run dev:convexThis separation is useful when the browser server starts but backend synchronization fails, or when one process exits while the other continues running.
Start the Trigger.dev worker for Agent mode
After adding TRIGGER_SECRET_KEY locally and configuring the worker variables in Trigger.dev, start the default worker in a third terminal:
pnpm dev:triggerThe repository also documents an explicitly routed branch:
TRIGGER_DEV_BRANCH=my-local-agent pnpm dev:triggerUse that override only when the request path is configured to target the same stable Trigger.dev branch. A mismatch can leave the interface available while Agent tasks fail to reach the intended worker.
Verify HackerAI locally before creating a tunnel
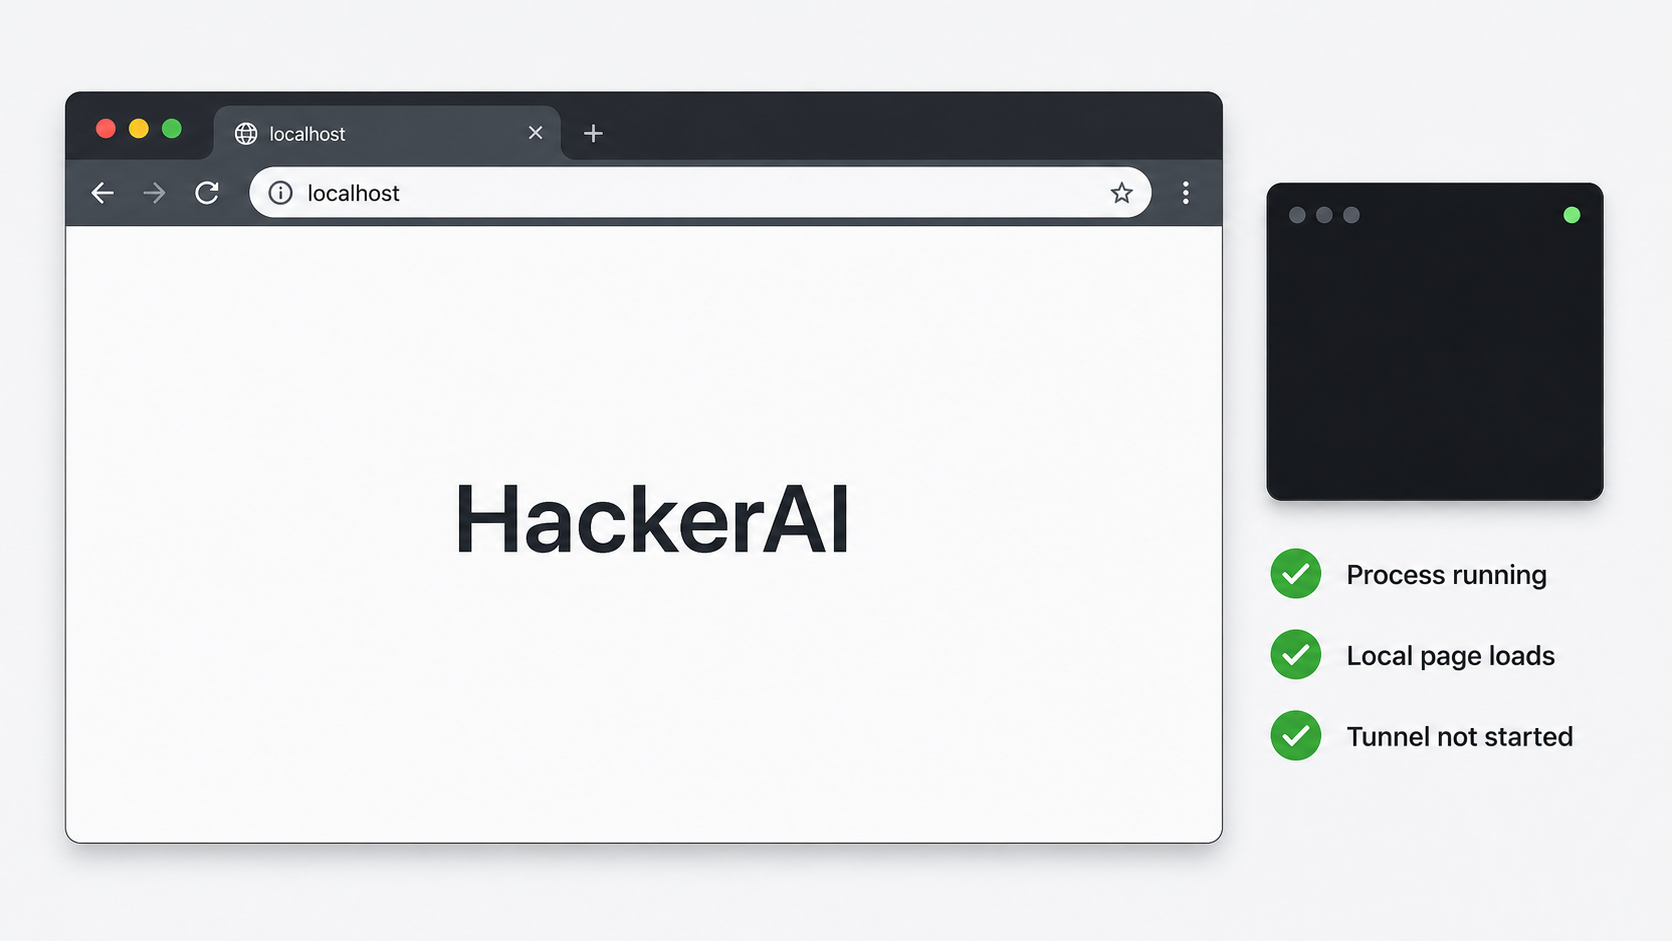
Read the URL printed by the active Next.js process. The supplied HackerAI evidence does not establish a fixed host or port, so this guide intentionally does not assume a framework default. Another process, repository setting, or environment value may change the address.
Open that exact URL in a browser on the development machine. A rendered page is only the first check. Verify the application path you intend to use remotely while watching all active process logs.
The initial HTML can load even when Convex, authentication callbacks, AI provider calls, moderation, streaming responses, or Trigger.dev tasks are failing. Verify the actual functions you plan to use before introducing another hostname and HTTPS origin.
Check whether the public HTTPS origin is compatible
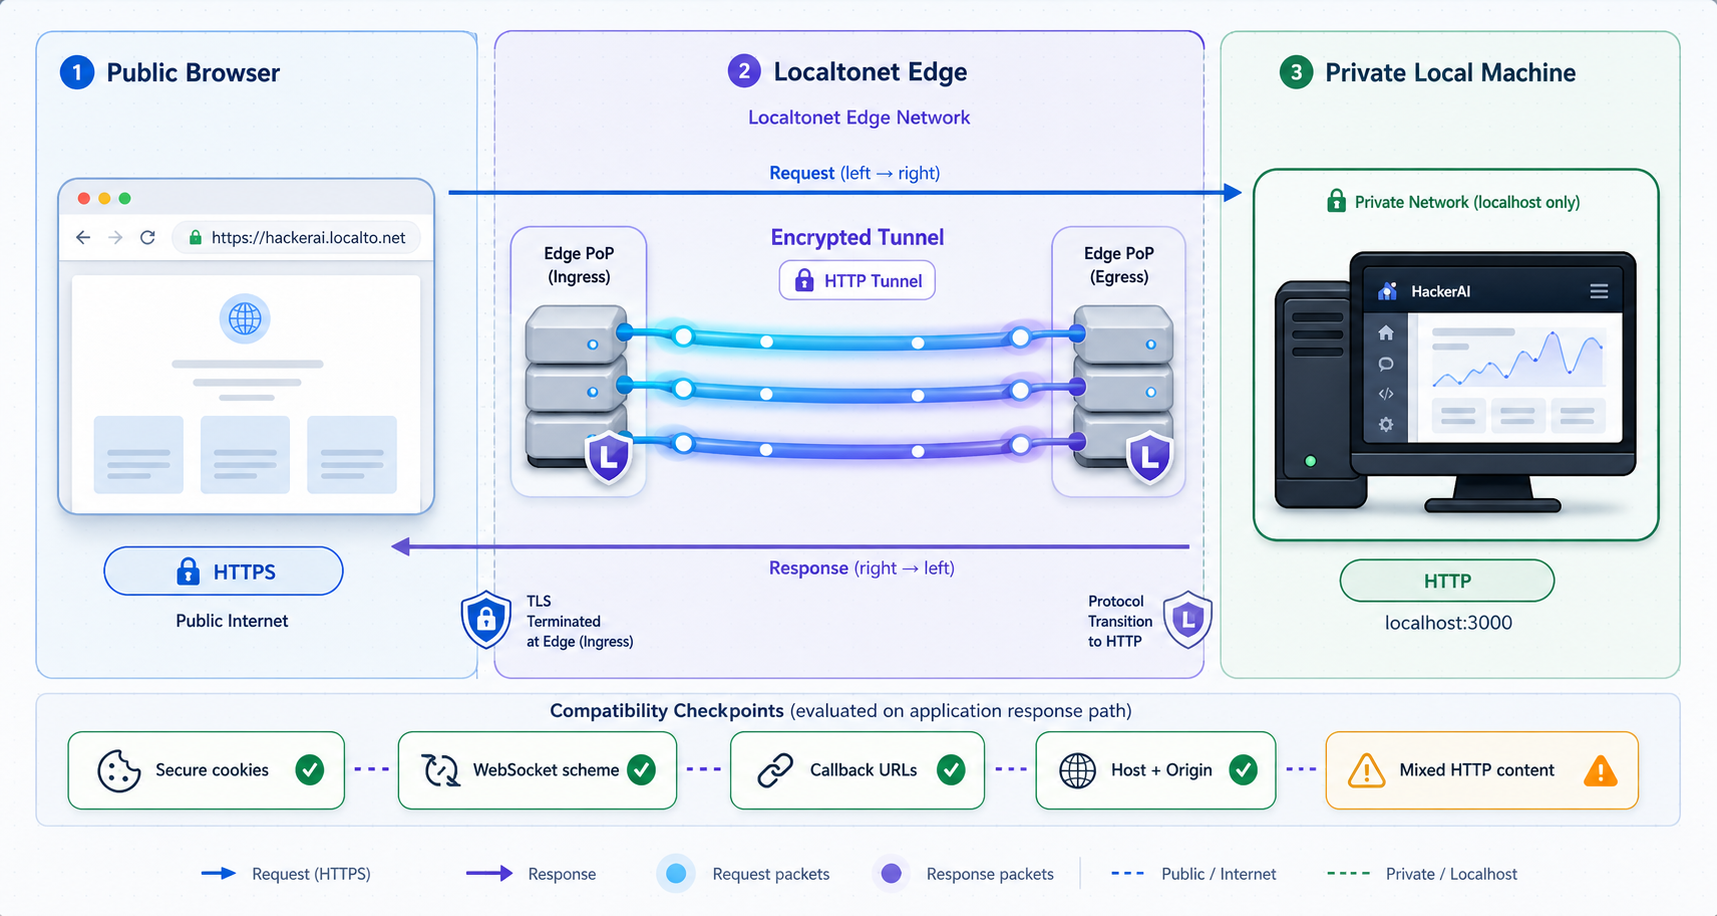
A Localtonet HTTP tunnel forwards browser traffic to the local Next.js target, but the public browser uses a different origin from the local development URL. For example, the browser sees an assigned public HTTPS hostname while the application process may see requests forwarded to a local HTTP listener. Applications that depend on configured callback URLs, allowed hosts, cookie attributes, origin checks, or generated absolute URLs can require additional project configuration.
The supplied HackerAI evidence does not document a dedicated public-base-URL variable, a WorkOS redirect variable, an allowed-host setting, or a supported reverse-proxy configuration. It also does not confirm how its development server handles forwarded host information, secure cookies, streaming through a public origin, or Agent callbacks. These points are unresolved until tested against the current checked-out revision and the associated WorkOS and service dashboards.
| Behavior | Why the public origin matters | Required validation |
|---|---|---|
| WorkOS sign-in | The callback may need to match a registered public HTTPS URL | Register only the exact authorized callback required by the current HackerAI configuration, then complete sign-in through the public URL |
| Session cookies | Secure, SameSite, domain, and origin rules can differ between localhost and public HTTPS | Confirm the session persists after callback, refresh, and navigation |
| Host and origin handling | A development server or application middleware may reject an unfamiliar host or origin | Check browser and Next.js logs for host, CSRF, CORS, or origin errors |
| Streaming chat responses | A page can load even when a long-lived response fails or disconnects | Send an authorized test message through the public URL and wait for completion |
| Agent mode | The interface, Trigger.dev branch, worker environment, and cloud sandbox must all agree | Run a safe Agent task remotely and inspect both the web and worker logs |
| Generated links and redirects | The application may generate a local URL instead of the public hostname | Inspect redirects and links after authentication without exposing tokens |
Do not promise users full remote functionality after testing only the landing page. Validate sign-in, chat completion, streaming, and any Agent task you intend to use. If HackerAI requires a public URL setting, obtain the exact variable name from the current repository configuration rather than inventing one.
Same-machine and separate-device targeting
If the Localtonet client runs on the same machine as HackerAI, a Next.js listener on loopback can usually be addressed through the loopback IP and printed port because the client shares that machine's network namespace. Use the exact working address as the basis for the Local IP and Local Port fields.
If the Localtonet client runs on another device on the same LAN, localhost refers to that other device, not the HackerAI computer. The HackerAI server must listen on an address reachable from the LAN, the operating-system firewall must permit that local connection, and the Localtonet client device must be able to open the HackerAI LAN address directly.
The supplied repository evidence does not document a supported Next.js host-binding override. Do not invent a startup flag. If you need a separate Localtonet device, first determine the supported binding configuration from the current HackerAI scripts and Next.js setup. From the Localtonet device, open the LAN URL directly before creating the tunnel. If that direct test fails, use the same-machine placement or resolve the local binding and firewall issue.
Configure a Localtonet HTTP tunnel
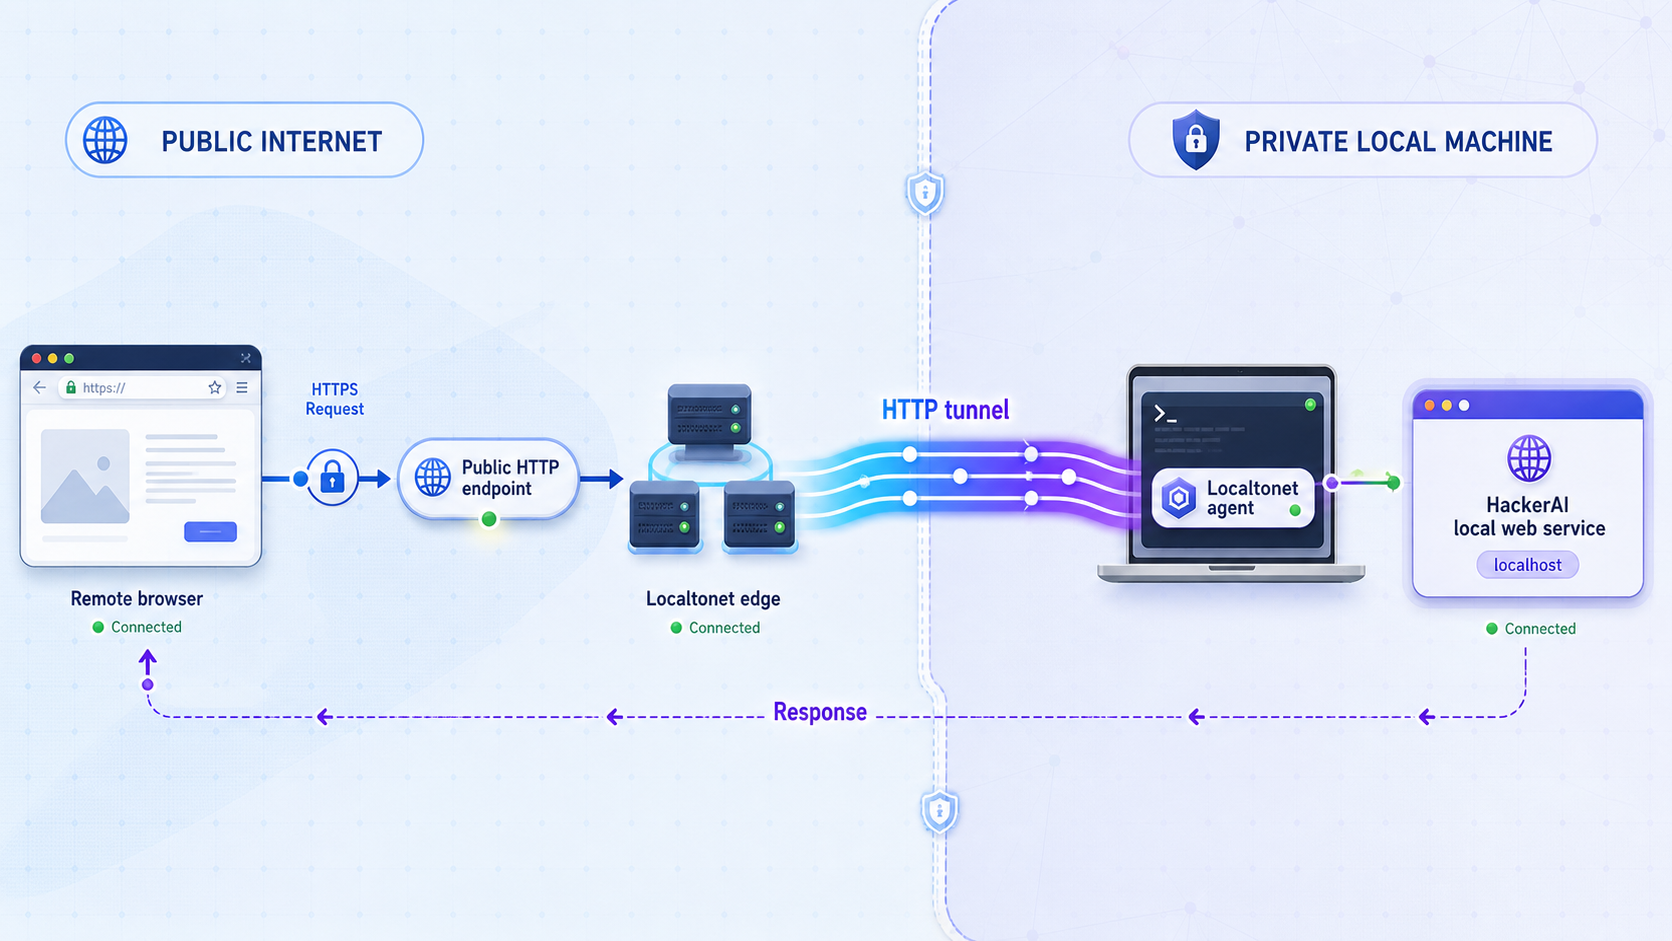
HackerAI presents a browser-based Next.js interface, so use an HTTP tunnel for this workflow. Our client establishes an outbound connection to a Localtonet relay server and provides a public URL without inbound router port forwarding, firewall changes, VPN setup, or a public IP address. The tunnel remains available only while the selected client is connected and the tunnel is running.
Follow the current Localtonet HTTP tunnel documentation alongside the dashboard. Available relay servers, regions, process types, and account options can vary, so select values currently offered to your account rather than copying a hardcoded server code.
Install and run the Localtonet client
Use the installation path presented by the current Localtonet documentation for your operating system. Run the client on the HackerAI machine when possible, or on a LAN device that has already reached the HackerAI LAN URL directly.
Open the HTTP tunnel configuration
In the Localtonet dashboard, create an HTTP tunnel. HTTP and File Server tunnels can use Random Sub Domain, Custom Sub Domain, or Custom Domain process types, subject to the options currently available for your account.
Select the client device and relay server
Select the device-specific AuthToken for the running Localtonet client, then select an available relay server or region. Never expose the token in a screenshot, terminal capture, article, or support message.
Map Local IP and Local Port
Set Local IP to the address that the selected Localtonet client uses to reach Next.js. Set Local Port to the port printed by the running HackerAI development server. On the same machine this may be a loopback address. On a separate LAN device it must be the tested LAN address, not that device's localhost.
Create and start the tunnel
Save the configuration and use the Start button. Creating a tunnel does not mean it is running. Confirm that the selected client is connected and that the tunnel reaches its running state.
Test the assigned public HTTPS URL
Open the assigned URL from an authorized remote browser. Test page rendering, WorkOS sign-in, session persistence, a safe chat response, streaming completion, and an Agent task if Agent mode is in scope.
Translate the working endpoint into tunnel fields
| Placement | Local IP | Local Port |
|---|---|---|
| Localtonet and HackerAI on the same machine | The exact local address reachable by the client, commonly the tested loopback address when Next.js listens there | The port printed by Next.js |
| Localtonet on another LAN device | The tested LAN address of the HackerAI machine | The same Next.js port, provided the server is bound to the LAN and locally permitted |
| Next.js restarted on a different port | The currently working address | The new printed port, followed by an update to the tunnel target |
Complete the pre-exposure security checklist
An authenticated development server is not automatically production-ready. Development processes can expose verbose errors, test data, source details, debugging behavior, or credentials configured with broader privileges than intended. Treat the Localtonet address as internet-facing even if you plan to send it to only one person.
- Confirm that every penetration test is limited to assets covered by explicit authorization.
- Use development service projects and least-privilege credentials where available.
- Verify that
.env.localand service keys are not committed to Git. - Keep WorkOS authentication enabled and test it before sharing the URL.
- Remove unused optional integration credentials from the current environment.
- Review Next.js, Convex, and Trigger.dev logs for sensitive output before screen sharing.
- Do not include the Localtonet device token or private account data in dashboard captures.
- Test the public URL from a clean browser session so an existing local session does not hide authentication problems.
- Limit the tunnel lifetime to the authorized remote session.
- Stop or delete the tunnel immediately after testing.
Localtonet forwards traffic to the selected local service. It does not convert a Next.js development server into a hardened production service, validate HackerAI's authorization model, or change the privileges of credentials used by the application. Use this workflow for controlled development and testing only.
Operate, restart, and close the environment
During a normal source-development session, keep the required processes open and monitor their logs. Closing a terminal, suspending the machine, changing networks, or stopping the Localtonet client can interrupt part of the workflow.
Processes that must remain available
- Next.js: serves the browser interface targeted by the HTTP tunnel.
- Convex development process: supports the backend and database workflow.
- Trigger.dev worker: required when testing local Agent requests.
- Localtonet client: maintains the outbound connection to our relay.
- Localtonet tunnel: must be started, not merely created.
If you used pnpm run dev, restart that command to bring Next.js and Convex back together. If you used the separate scripts, restart each in its own terminal. Restart pnpm dev:trigger when Agent mode is required. Then read the newly printed Next.js address because the port may have changed.
Retest after configuration changes
After changing environment values, provider projects, authentication callbacks, Trigger.dev variables, or branch routing, restart the affected processes. Test the local URL first. Once local sign-in, chat, and any required Agent task work again, verify that the Localtonet Local IP and Local Port still match the active server. Finally repeat the public test from a fresh browser session.
Close remote access
When the authorized session ends, stop the tunnel in the Localtonet dashboard. If you no longer need the configuration, delete it. You can then stop the Localtonet client and terminate the development processes. Stopping Next.js makes the target unavailable, but explicitly stopping or deleting the tunnel is the clearer operational boundary.
Troubleshoot HackerAI and Localtonet by symptom
pnpm install fails
Confirm that Node.js and pnpm are available in the current shell. Recheck package.json for declared engine and package-manager constraints. Make sure the command is running from the project root containing pnpm-lock.yaml and pnpm-workspace.yaml. Read the first meaningful dependency or runtime error rather than only the final exit line. Do not switch package managers merely to bypass a lockfile or workspace error.
The setup script stops or asks for an unfamiliar value
Verify that all required service accounts exist and that the credential comes from the correct development project. Compare the prompt with the current .env.local.example and repository code. The supplied README does not document every setup prompt, so do not rely on guessed answers from an older revision. Never post the real value when asking for help.
Next.js starts but the page reports configuration errors
Check that .env.local exists in the project root and uses exact variable names from the current example file. Restart Next.js after changing server-side environment values. Review the terminal and browser console while keeping secrets redacted. A malformed URL, missing provider key, or value copied from the wrong service project can allow startup while breaking requests.
Convex does not connect
Run pnpm run dev:convex separately so its output is isolated. Verify that setup completed for the intended Convex project and that NEXT_PUBLIC_CONVEX_URL corresponds to that project. Check for authentication, deployment, schema, synchronization, and network errors. Do not create a tunnel until the local browser can use the backend reliably.
WorkOS sign-in works locally but fails publicly
Inspect the redirect shown by the browser and the error reported by WorkOS. The public HTTPS callback may need to be registered in the WorkOS project, and the application may need a matching public-origin setting. The exact HackerAI variable for that setting is not established by the supplied evidence, so inspect the current environment example and authentication code. Also check cookie domain, Secure, SameSite, host, CSRF, and origin errors. Remove obsolete public callback URLs when the tunnel is retired.
The page loads publicly but chat does not complete
Retest the same message locally. Watch Next.js and Convex logs for provider, moderation, authorization, or backend errors. Confirm that OpenRouter and OpenAI credentials belong to active projects. If the response begins but stops, investigate streaming behavior through the public origin rather than assuming the tunnel is fully compatible because the initial page loaded.
Agent mode fails while standard chat works
Confirm that pnpm dev:trigger is still running. Check that TRIGGER_SECRET_KEY is present in local server-side configuration and that the Trigger.dev worker environment includes NEXT_PUBLIC_CONVEX_URL, CONVEX_SERVICE_ROLE_KEY, OPENROUTER_API_KEY, OPENAI_API_KEY, and one cloud sandbox provider. If using TRIGGER_DEV_BRANCH, confirm that the request path targets the same branch. Add optional keys only for features actually invoked by the task.
The Localtonet public URL does not connect
Verify that the selected Localtonet client is online, the correct device token was selected, and the tunnel was started. Confirm that its Local IP and Local Port match the currently working Next.js endpoint. If Next.js restarted, compare the newly printed port with the tunnel configuration. Also verify that the selected relay is currently available.
The tunnel targets localhost from another LAN device
On a separate Localtonet device, localhost points back to that device. Replace it with the tested LAN address of the HackerAI machine only after confirming that Next.js is listening on a LAN-reachable interface. Test the LAN URL from the Localtonet device before updating the tunnel. If it cannot connect directly, resolve binding, local firewall, or network isolation first.
The public page returns a host or origin error
The development server or application middleware may not accept the public hostname. Review Next.js output and the browser console for explicit host, origin, CORS, CSRF, or redirect messages. The current supplied HackerAI evidence does not confirm a supported host override, so consult the checked-out configuration before changing startup behavior. Do not disable origin or authorization checks broadly just to make the page load.
The tunnel stopped after the machine slept or changed networks
Restore connectivity, restart the Localtonet client if necessary, and verify the selected device reports connected. Confirm the HackerAI processes are still running and locally reachable. Start the tunnel again if it is stopped, then repeat authentication and application checks through the public URL.
Frequently asked questions
Does this guide install the HackerAI desktop application?
No. It installs HackerAI's source-based development environment and tunnels its Next.js web endpoint. A separate HackerAI Desktop release exists, but the supplied evidence does not establish that the desktop application exposes a tunnel-compatible HTTP service.
Is HackerAI fully self-contained when run from source?
No. The documented development setup requires OpenRouter, OpenAI, E2B, Convex, WorkOS, and Trigger.dev accounts. Optional features can require additional hosted services.
Which Node.js and pnpm versions should I use?
Use the constraints declared in the current repository's package.json, particularly its engines and packageManager fields. The supplied evidence confirms that the file exists but does not provide those values, so this article does not guess them. If the current file declares no constraint, record the versions used and treat compatibility as something to verify during installation.
What port does HackerAI use?
The supplied repository evidence does not establish a fixed port. Use the address and port printed by the active Next.js process. Recheck them after every restart before assuming the existing tunnel target is still correct.
Does the Trigger.dev secret belong in the browser?
No. TRIGGER_SECRET_KEY is private server-side configuration. Keep it out of client code, browser URLs, screenshots, and public logs. The documented NEXT_PUBLIC_CONVEX_URL is browser-visible configuration, but service-role and provider API keys remain secret.
Do I need the Trigger.dev worker for Agent mode?
Yes. HackerAI's README states that Agent mode runs its agent loop on a Trigger.dev task. For local Agent requests, start pnpm dev:trigger in another terminal and configure the documented worker variables.
Can a Localtonet client on another computer target HackerAI localhost?
No. Localhost always refers to the machine on which the client is running. A separate LAN device must target the HackerAI machine's tested LAN address, and Next.js must be bound and permitted to accept that LAN connection.
Does a successful public page load prove HackerAI works remotely?
No. You must also test WorkOS sign-in and callbacks, session cookies, Convex-backed actions, chat responses, streaming completion, and Agent tasks when applicable. Each can fail even when the initial page renders.
Does creating a Localtonet tunnel start it automatically?
No. Creating the configuration and running it are separate lifecycle states. Use the Start button, keep the selected client connected, and confirm that the tunnel is running. Stop or delete it when remote access is no longer required.
Does Localtonet make the HackerAI development server production-ready?
No. Localtonet provides remote reachability to the selected target. It does not harden the development server, configure HackerAI's authorization, validate its public-origin behavior, or change the privileges of its service credentials.
Connect your verified HackerAI development endpoint
After local authentication, chat, Convex, and any required Agent tasks work correctly, use our HTTP tunnel workflow to test authorized remote access without opening an inbound router port.
Get Started Free →

