

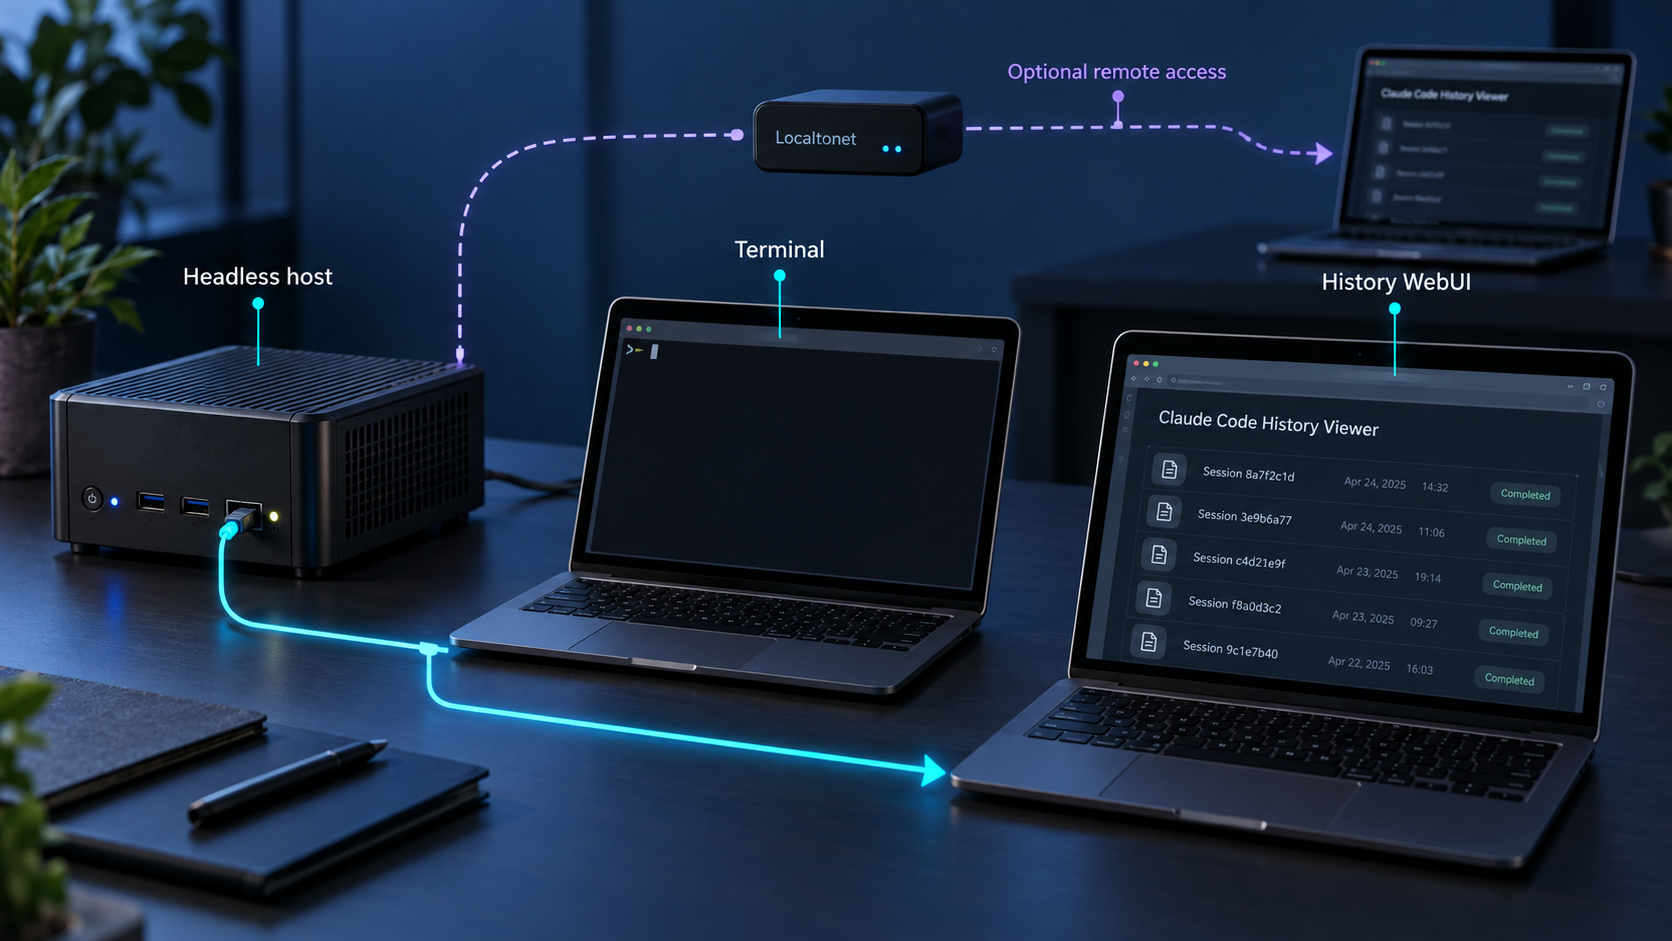
Run your conversation-history WebUI on a headless machine and reach it from a browser
Claude Code History Viewer can run as a headless server that reads supported AI coding-assistant histories and presents them through a browser-based interface. This guide installs the official cchv-server package, starts the documented WebUI on http://localhost:3727, verifies that local conversation data is visible, and explains the authentication boundary. Once the local server works, we show how to publish it through an optional Localtonet HTTP tunnel without configuring inbound router port forwarding or requiring a public IP address.
📋 What's in this guide
What Claude Code History Viewer headless mode does
Claude Code History Viewer, commonly shortened to CCHV, is an open-source viewer for conversation histories created by AI coding assistants. Its interface supports browsing projects and sessions, searching conversations, reviewing tool activity, and analyzing information such as token usage. Although the project also ships as a desktop application, headless server mode is the appropriate installation path when the conversation files live on a server, workstation, home lab machine, or VPS without a graphical desktop.
The headless package installs the cchv-server executable. Starting it with the documented --serve option launches a WebUI at http://localhost:3727. A browser becomes the interface, while the server process reads conversation files available to the operating-system account under which it runs.
For Claude Code specifically, the documented history location is ~/.claude/projects/. The tilde refers to the home directory of the user running the viewer. This detail matters on a multi-user or headless system. A service launched as one user will not automatically see another user's home-directory history. Install and run the viewer in the correct account context, or deliberately arrange filesystem access according to your operating system's permission model.
~/.claude/projects/.
Headless mode versus the desktop application
Choose the desktop application when the history is on the computer in front of you and you want a native local interface. Choose headless mode when the data is on a machine that is better managed through a browser. The headless process still needs direct filesystem access to the history being viewed. It does not retrieve arbitrary histories from another computer merely because a browser can reach the WebUI.
| Access model | Best for | Important boundary |
|---|---|---|
| Desktop application | Interactive use on a local macOS, Windows, or Linux computer | The native application opens histories available on that computer |
| Headless WebUI on localhost | Local administration, SSH-assisted workflows, and initial verification | The documented endpoint is available at http://localhost:3727 on the server |
| Headless WebUI with Localtonet | Optional browser access from outside the server's local network | The CCHV server, Localtonet client, and tunnel must be running, and CCHV authentication should remain enabled |
Coding-assistant transcripts can contain source code, filesystem paths, tool output, prompts, error logs, repository details, and accidentally pasted secrets. Treat the WebUI as sensitive administrative access. Keep its authentication enabled, use a strong credential according to the project's current server-mode controls, and stop remote access when it is no longer required.
Prerequisites for a reliable headless installation
Before installing the package, identify the machine and operating-system account that actually hold the conversation data. The viewer cannot display a Claude Code history that is absent, unreadable, or stored under a different home directory unless you separately provide the required filesystem access.
For the workflow documented here, prepare the following:
- A headless machine on which you can run shell commands.
- A supported conversation history already present on that machine. For Claude Code, verify that the intended user's data is under
~/.claude/projects/. - Permission for the selected user to read the relevant history files and traverse their parent directories.
- Either Homebrew or the ability to download and execute the project's official installation script.
- A browser that can initially reach the server locally, through an approved administration path, or from the same machine.
- For optional public access, a Localtonet account and our client running on the machine that can reach
localhost:3727.
Confirm the correct user context
On Unix-like systems, ~ changes according to the current user. If Claude Code was used as account developer but CCHV is started as root, the viewer will normally resolve a different home directory. This can make an otherwise healthy installation appear empty.
The safest initial setup is to start cchv-server as the same user who owns the conversation history. Avoid broad permission changes merely to make the viewer work. Granting every local user access to private coding transcripts creates an unnecessary security risk.
Select an installation route
The project's quick-start documentation provides two server installation routes: the Homebrew formula jhlee0409/tap/cchv-server and the project's install-server.sh script. Both lead to the same documented startup command. Use one route, not both.
Homebrew is convenient when it is already part of the machine's package-management workflow. The shell installer is useful when Homebrew is not the chosen route. Because the provided command downloads a remote script and sends it directly to a shell, evaluate that trust decision before running it.
The official quick start provides a compact curl | sh command. That pattern executes downloaded content immediately. On production or security-sensitive systems, retrieve and inspect the current script before execution if required by your organization's change-management and software-supply-chain policies. Do not run a copied or modified installer from an untrusted location.
Install and start Claude Code History Viewer
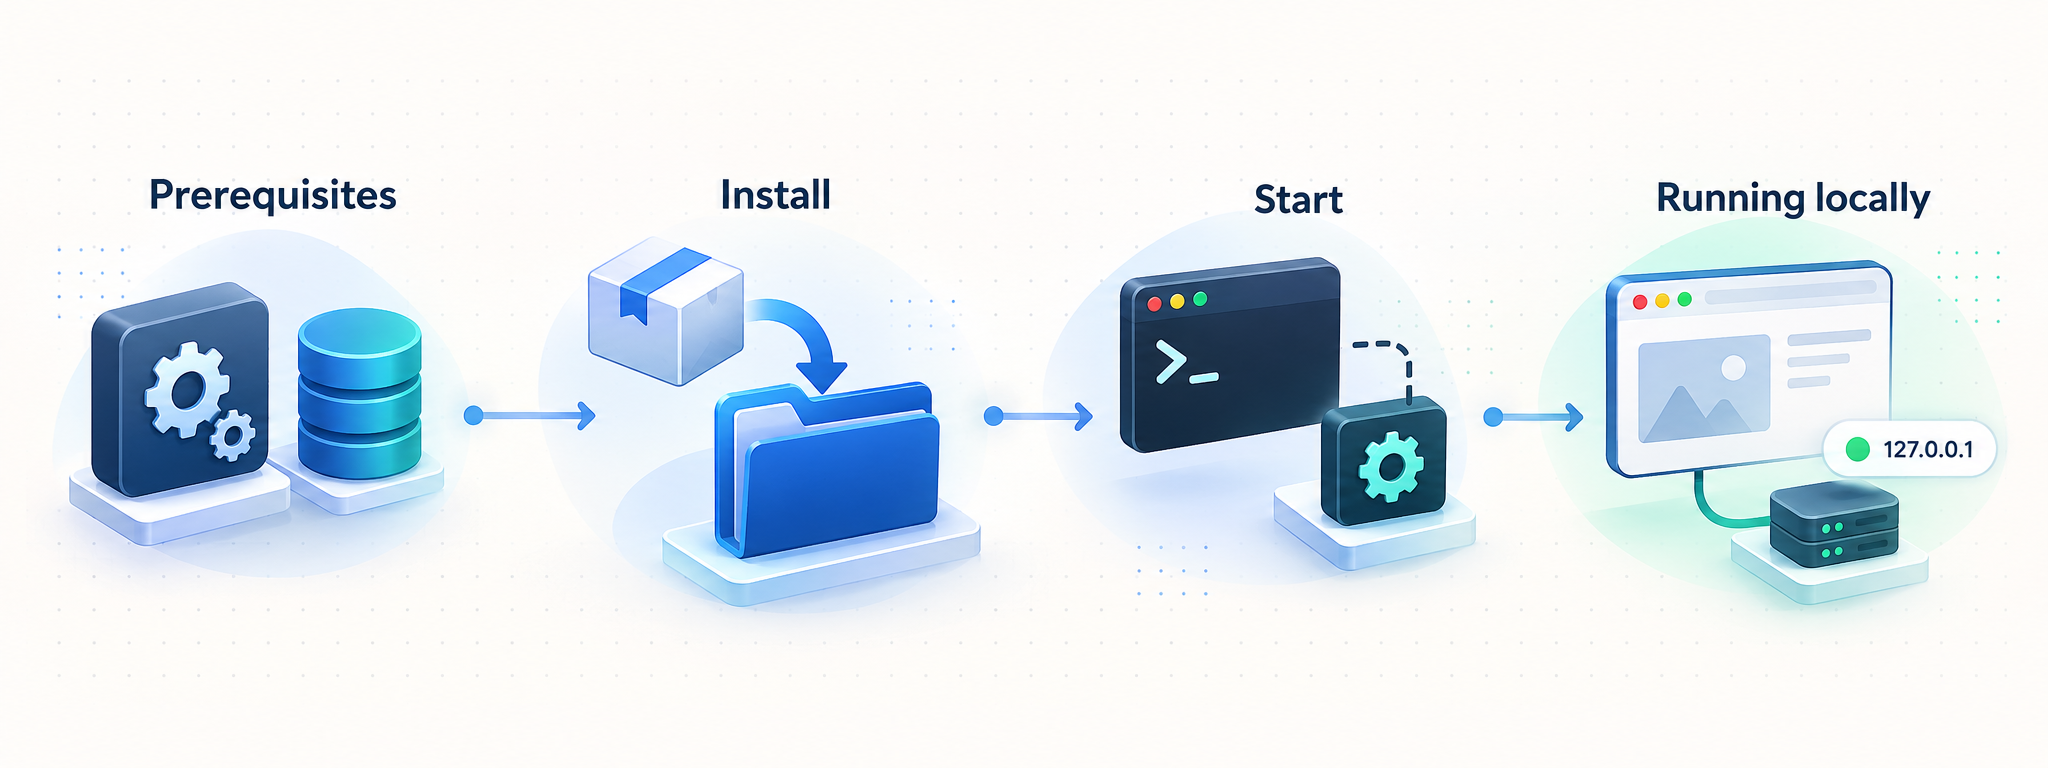
Follow either the Homebrew path or the official installation-script path below. Do not install the desktop cask when your goal is the dedicated headless server. The desktop Homebrew command and the cchv-server formula are separate packages.
Option 1: Install the headless server with Homebrew
Install the cchv-server formula
Run the exact Homebrew command documented by the project:
brew install jhlee0409/tap/cchv-serverStart headless server mode
Launch the installed executable with the documented server option:
cchv-server --serve
The expected local WebUI address is http://localhost:3727.
Option 2: Install with the official server script
Run the official installation script
If you accept the remote-script execution model, use the command published in the project's quick start:
curl -fsSL https://raw.githubusercontent.com/jhlee0409/claude-code-history-viewer/main/install-server.sh | shStart headless server mode
Once installation finishes, start the same server executable:
cchv-server --serve
Keep the process running while you test the WebUI at http://localhost:3727.
The project identifies server-mode guidance for Docker, VPS, and systemd deployments. The supplied verified material does not establish the current Docker invocation, Compose fields, persistent mounts, systemd unit, environment variables, or supported command-line overrides. We therefore do not reproduce guessed examples. Use the two verified installation paths above for this workflow, or validate those deployment definitions against the exact CCHV release you intend to operate.
Keep authentication enabled before allowing remote access
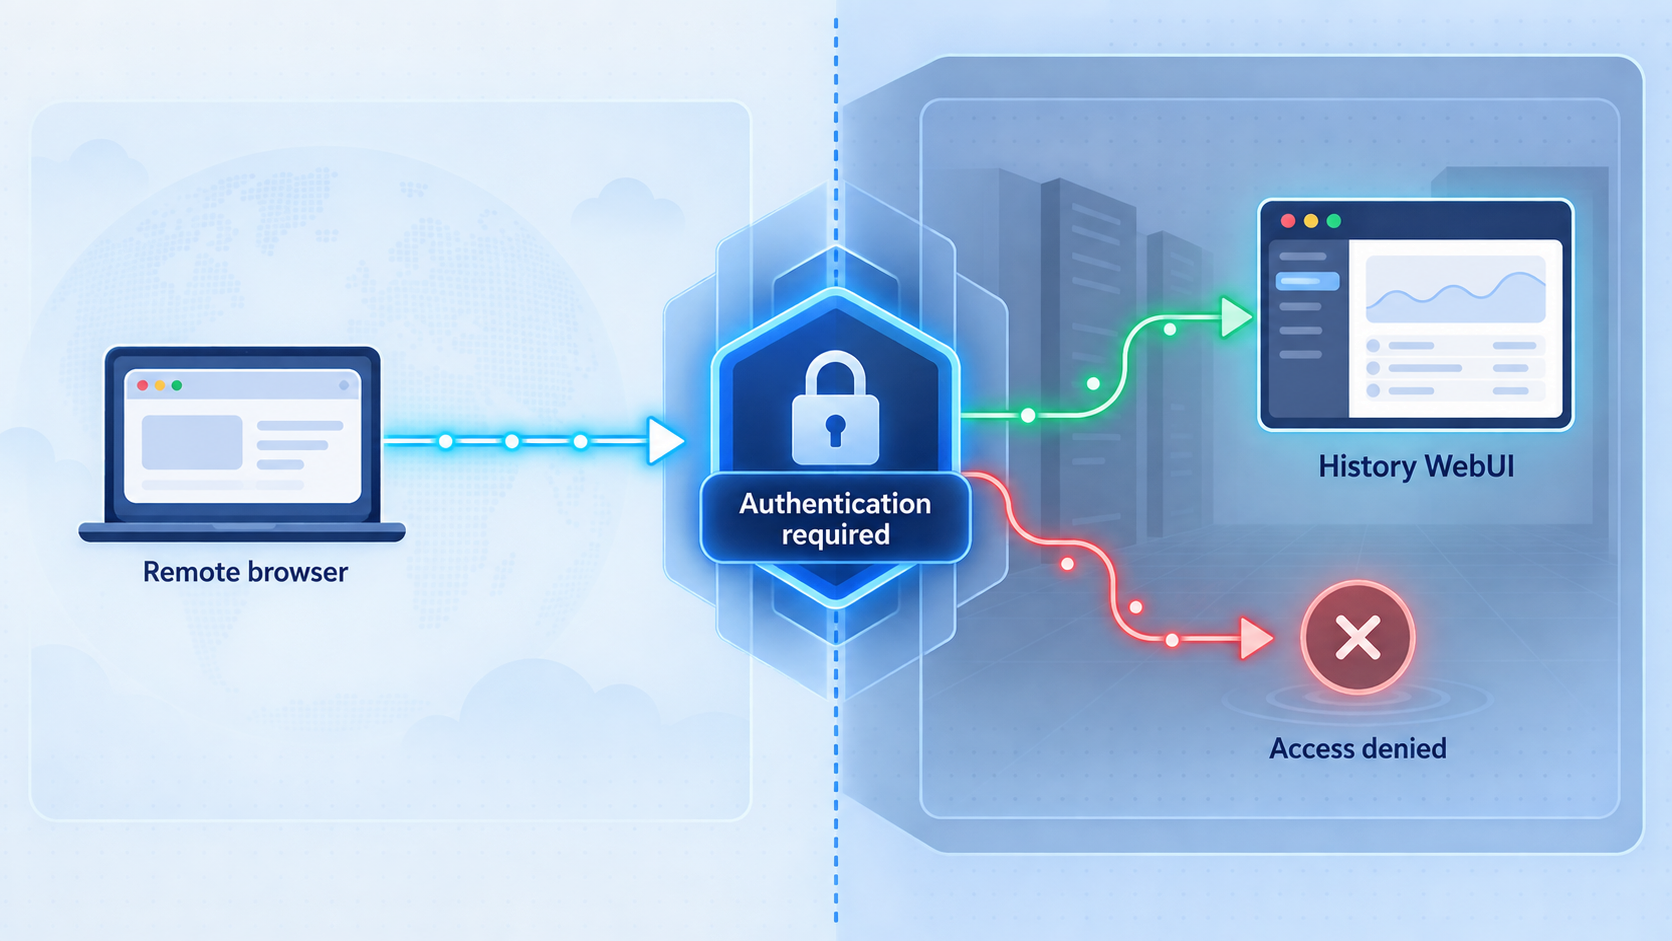
The project's headless-mode guidance explicitly says to keep authentication enabled. That requirement is especially important because the WebUI can expose complete AI-assistant conversations and associated development metadata.
Authentication and network encryption solve different problems. Authentication determines who may enter the application. Transport protection helps protect traffic while it crosses a network. A Localtonet HTTP tunnel can provide a public HTTPS address for the local HTTP service, but that public endpoint does not make CCHV application authentication optional.
The verified project extract supplied for this article does not define the current authentication configuration command, credential file, environment-variable names, default credential behavior, password-reset workflow, or exact login screens. These details must not be guessed because an invented option could leave a server unprotected. Confirm the authentication controls displayed or documented by the exact installed CCHV release before exposing the WebUI beyond a trusted local administration path.
Open http://localhost:3727 and verify that the expected authentication boundary is active before creating a tunnel. If the interface opens directly when your release should require authentication, stop and review that release's server-mode configuration. Do not assume that an unverified default is safe.
Practical access-control checklist
- Use a strong, unique credential where the current CCHV release provides credential configuration.
- Do not place passwords, Localtonet device tokens, or other secrets in shell history, screenshots, public repositories, or this WebUI's conversation records.
- Run CCHV under a dedicated or appropriately limited operating-system account where practical.
- Give that account access only to histories it needs to read.
- Keep the host and CCHV release maintained according to your normal update process.
- Start remote access only when needed, and stop the Localtonet tunnel afterward if continuous access is unnecessary.
Verify the server locally before creating a tunnel
Local verification separates CCHV installation problems from remote-connectivity problems. Do not add Localtonet until the application itself is running and usable at its documented local endpoint.
Keep the server process running
After running cchv-server --serve, leave that process active. If the process exits, the WebUI cannot answer on port 3727.
Open the documented local endpoint
From a browser with approved access to the server, open http://localhost:3727. The use of localhost means the request originates on the same host as the CCHV process.
Confirm authentication behavior
Verify that the authentication behavior matches the current CCHV release's documented configuration. Do this before testing any public URL.
Open a known conversation
Select a project and session that you know exists. Confirm that messages render and that expected browsing or search functions work. This proves more than loading the initial page because it tests access to the underlying history files.
If the server is remote and only listens on localhost
A service available at localhost is generally intended for connections originating on the same machine. That is a useful safe starting point. You do not need to change the application's bind behavior merely to use Localtonet when our client runs on that same server, because the client can target the local service from the machine itself.
Avoid opening port 3727 on a router or exposing it broadly through a host firewall just to complete verification. First verify the service locally. Then use an intentional remote-access layer with authentication and a clear shutdown procedure.
What a successful verification should prove
- The
cchv-serverexecutable starts without immediately exiting. - The browser reaches
http://localhost:3727. - The authentication boundary behaves as intended for the installed release.
- The expected provider and project appear in the navigation.
- A known conversation opens and contains expected data.
- Search or navigation operates against the available history.
Operate the headless server safely
An interactive shell is adequate for the first test, but long-running access requires process supervision appropriate to the host. If an SSH session closes and its child process terminates, CCHV will become unavailable. A reboot also stops an unsupervised process until it is started again.
The project points readers to systemd and VPS guidance, but the verified evidence available here does not include the current unit-file fields, executable path, working directory, restart policy, or environment configuration. Copying a speculative service definition would be unsafe. If you convert this installation into a background service, derive the unit from the exact installed binary path and the current project's documented server-mode example.
Preserve the intended home directory
A process manager can change the effective user and environment. If the managed service runs under a different account from your successful manual test, ~/.claude/projects/ will resolve differently. This is a common reason for a viewer to work interactively but show no sessions after being moved into a system service.
Confirm all of the following when transitioning from manual startup to managed operation:
- The service account is the account you intended to use.
- Its home directory corresponds to the history location.
- It can read the relevant files without overly broad permissions.
- The executable path used by the process manager matches the installed binary.
- The process remains running after the administrative shell closes.
- Authentication remains enabled under the managed environment.
Updates and backups
Review the project's release information before upgrading, particularly when the server is used by a team or exposed remotely. The supplied evidence does not establish one universal upgrade command for both installation methods, so this guide does not invent one. Follow the update procedure associated with the installation route and release you selected.
CCHV is a viewer for histories stored by other tools. Back up important conversation data using a method suitable for those underlying files and databases rather than treating the WebUI as the backup itself. Before changing permissions, migrating accounts, or moving provider directories, make a recoverable copy according to your normal data-protection policy.
Optionally expose the WebUI with Localtonet
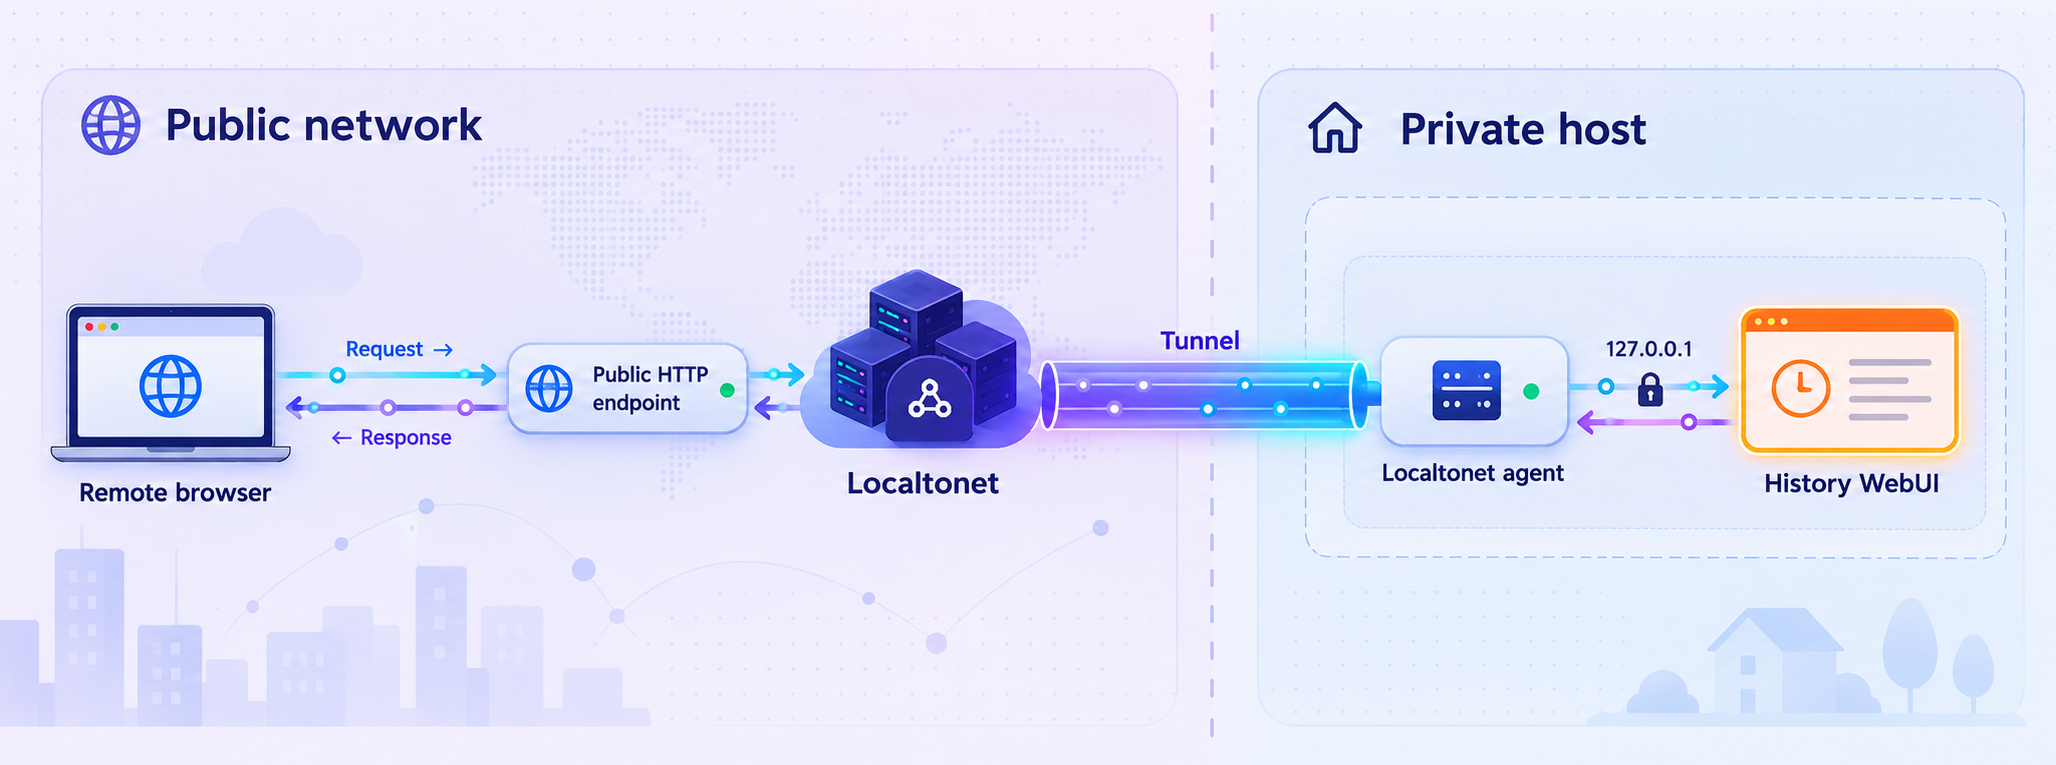
Once CCHV works at http://localhost:3727, an HTTP tunnel can make that local web application reachable through a public address. With Localtonet, our client establishes an outbound connection to a relay server. This means the normal workflow does not require inbound router port forwarding, a public IP address, a VPN setup, or a firewall rule that directly publishes port 3727.
The Localtonet client must run on the CCHV host or another device that can reach its local address and port. For the simplest setup, run both on the same machine and use 127.0.0.1 with port 3727 as the local HTTP target.
Creating the configuration does not start it. Select the appropriate client device, complete the HTTP tunnel configuration, and use the Start action. The public endpoint remains available only while the selected client is connected and the tunnel is running.
Install and run our client
Install the Localtonet client on the machine that can reach the working CCHV service. Keep cchv-server --serve running during tunnel setup.
Authenticate or select the device
Use the device-specific Localtonet authentication token through the supported client workflow, then select that device for the tunnel. Treat the token as a secret and never place it in an article, public command transcript, repository, or screenshot.
Select an available relay server
Choose from the server or region values currently offered in your Localtonet dashboard. Availability can vary, so do not copy a hardcoded server code from an old tutorial.
Create an HTTP tunnel to the local WebUI
Configure the local target as IP address 127.0.0.1 and port 3727. Use an HTTP tunnel because CCHV is serving a browser-based HTTP application at that endpoint.
Start the tunnel and test its public address
Start the tunnel, then open the assigned public HTTPS address in a separate browser session. Confirm that CCHV authentication is still enforced and that a known conversation can be viewed after sign-in.
Stop or delete access when it is no longer needed
Stop the tunnel to make the public endpoint unavailable while retaining the configuration, or delete it if the configuration is no longer required. Also stop CCHV if the local WebUI itself is not needed.
HTTP tunnels can use a generated subdomain, a selected subdomain where supported, or a custom domain. The available choices and plan applicability must be checked in the current dashboard. Custom-domain DNS details can change and are not established by the evidence supplied for this guide, so we do not provide guessed DNS records.
For current product setup information, consult our
Localtonet documentation.
The key target values for this specific application remain the local HTTP address 127.0.0.1 and documented CCHV port 3727.
Verify the complete remote path
A complete test should exercise the application, not only load its landing page. Open the assigned public address, pass the CCHV authentication check, choose a known project, and open a conversation. If the public page fails while http://localhost:3727 still works, focus troubleshooting on the Localtonet client, selected device, local target, and tunnel lifecycle. If the local endpoint also fails, repair CCHV first.
CCHV describes its core history workflow as local and offline, but publishing the WebUI creates network access to that local data. Share the address only with intended users, keep application authentication enabled, avoid exposing secrets in conversation records, and stop the tunnel when remote access is unnecessary.
Troubleshoot common installation and access problems
The shell says cchv-server is not found
First confirm that the chosen installer completed successfully. If you used Homebrew, make sure Homebrew's binary directory is included in the current user's PATH. If you used the installation script, review its output for the installed location and any shell-profile instruction it provided. Do not assume that installing as one account makes the executable available to every account or service manager.
You can check whether the current shell can resolve the executable without starting it:
command -v cchv-serverIf this prints no path, correct the installation or shell path before continuing. Avoid creating speculative symbolic links until you know where the installer placed the actual executable.
The browser cannot open localhost:3727
Confirm that cchv-server --serve is still running. If the process exited, inspect the error displayed in the terminal. The endpoint localhost also refers to the machine on which the browser runs. Opening http://localhost:3727 on your laptop does not contact a separate headless server unless the browser itself is running there or another approved forwarding mechanism is already in place.
The verified project material establishes port 3727 but does not establish a supported port-override flag. If another process occupies that port, identify and resolve the conflict according to the host operating system or consult the current CCHV server-mode documentation. Do not invent a command-line option.
The interface loads but no Claude Code sessions appear
Check the user context first. Claude Code history is documented under ~/.claude/projects/, and the tilde belongs to the account running CCHV. Confirm that the directory contains the expected data and that the current user can read it.
If manual startup shows sessions but a managed service does not, compare the effective user and home directory. Also confirm that a containerized deployment, if used, actually mounts the history into the container. Exact Docker mount paths are not provided here because the verified material does not establish the project's current container configuration.
Local access works but the public address does not
Check each layer in order:
- Confirm that CCHV still works at
http://localhost:3727on its host. - Confirm that the Localtonet client on the selected device is connected.
- Confirm that the tunnel targets
127.0.0.1and port3727. - Confirm that the tunnel has been started rather than merely created.
- Use the currently assigned public address shown for that tunnel.
If Localtonet runs on another device, 127.0.0.1 refers to that other device, not the CCHV server. In that topology, the Localtonet client must target an address through which it can legitimately reach CCHV. The simplest configuration is to run our client on the same host as CCHV.
The public page opens without the expected login
Stop the tunnel and verify the current CCHV authentication configuration. Do not use obscurity of the URL as access control. The supplied project evidence says authentication should remain enabled in headless mode but does not provide enough detail to state release-specific configuration fields safely.
The service disappears after logout or reboot
An interactive server process may end when its terminal or SSH session closes, and it will not normally survive a reboot unless managed by a service supervisor. Move it to a process-management method supported by the host and the current project documentation. Preserve the same user context and authentication configuration that worked during local testing.
The Localtonet tunnel exists but is offline
Tunnel configuration and tunnel operation are separate states. The selected Localtonet client device must be connected, and the tunnel must be started. If either the client disconnects or the tunnel stops, the assigned endpoint will not forward traffic to CCHV.
Frequently asked questions
What address does Claude Code History Viewer use in headless mode?
The documented server command is cchv-server --serve, and its documented local WebUI endpoint is http://localhost:3727. Verify that endpoint locally before adding any remote-access layer.
Where does the viewer find Claude Code history?
Claude Code history is documented under ~/.claude/projects/. The home directory belongs to the account running CCHV, so starting the viewer under the wrong user can produce an empty interface even when another account has valid history files.
Does the headless server require the desktop application?
No. The project provides a dedicated cchv-server package for browser-based headless operation. The native desktop application is a separate installation mode.
Can I run CCHV on a server without a graphical desktop?
Yes. Headless mode is intended for browser, VPS, and remote-access scenarios. The server process hosts the WebUI, while you interact with it from a browser.
Do I need to open port 3727 on my router?
Not when using Localtonet for remote access. Our client establishes an outbound connection to a relay server and forwards the assigned public endpoint to the local CCHV service. This avoids inbound router port forwarding and does not require a public IP address.
Should I disable CCHV authentication because Localtonet provides HTTPS?
No. HTTPS transport and application authentication serve different purposes. Keep CCHV authentication enabled so that possession of the public URL alone does not grant access to conversation history.
Why does the viewer work manually but show no history as a service?
The managed service may be running as a different operating-system user with a different home directory. Check its effective user, home directory, filesystem permissions, and access to ~/.claude/projects/.
Does creating a Localtonet tunnel immediately make CCHV available?
No. The selected Localtonet client must be connected, and the tunnel must be started. CCHV must also remain running at the configured local target. Stop or delete the tunnel when remote access is no longer needed.
Connect your verified CCHV server with Localtonet
After Claude Code History Viewer works locally at 127.0.0.1:3727 and its authentication is confirmed, create an HTTP tunnel to reach the WebUI without inbound router port forwarding.


