

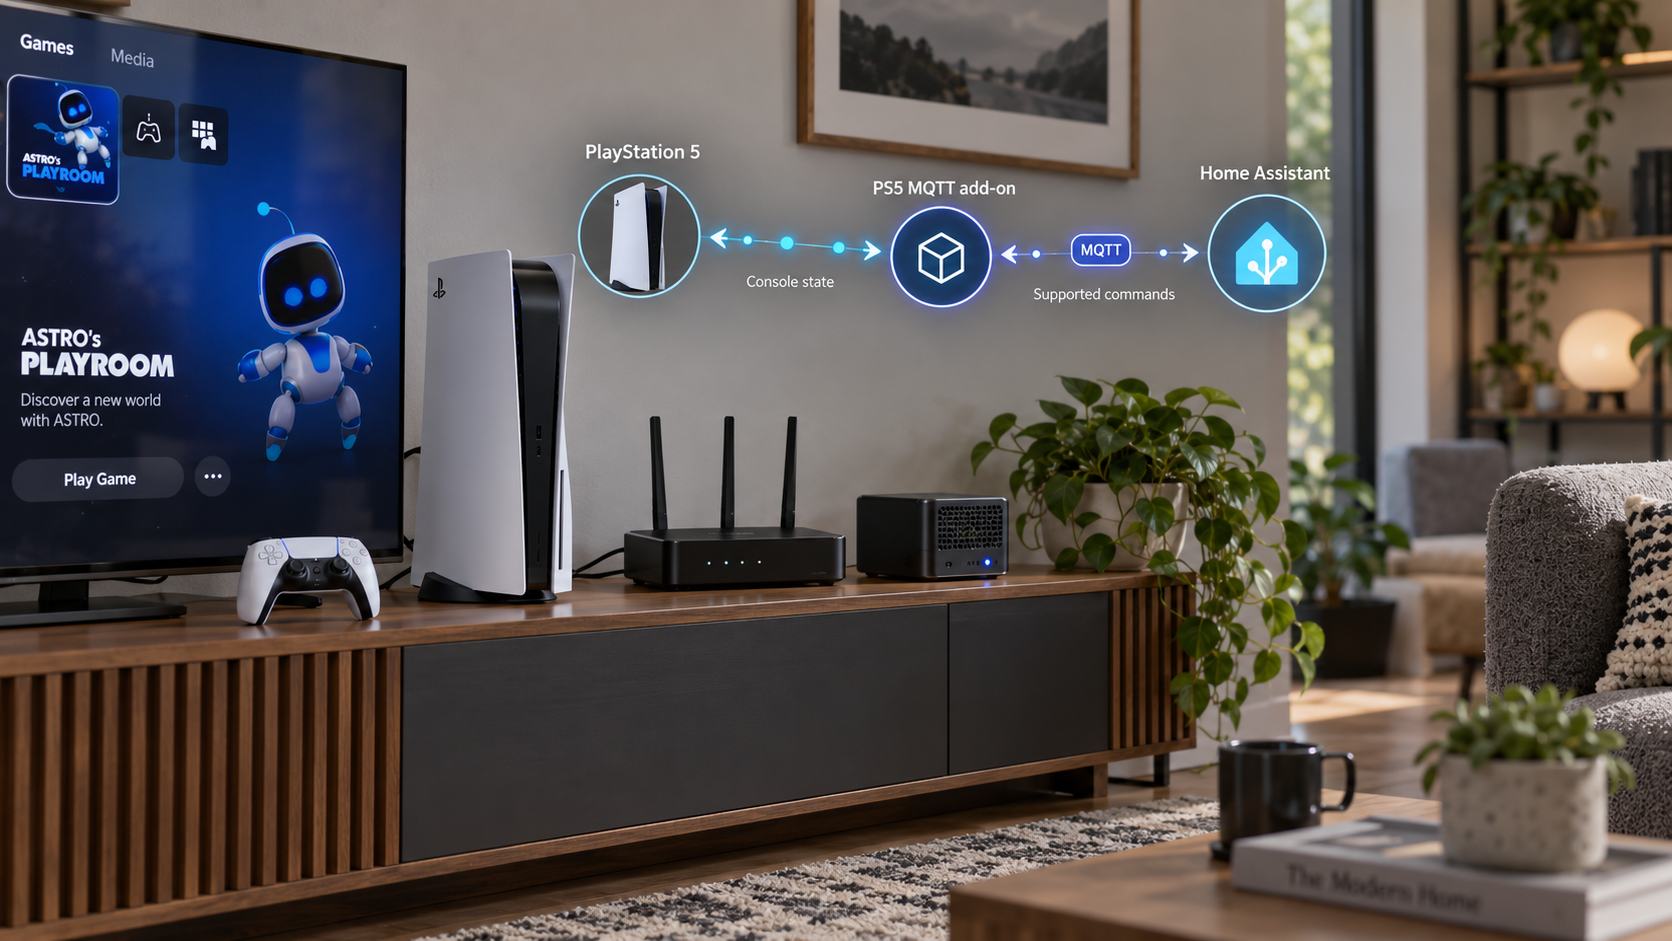
Connect PlayStation 5 power controls to Home Assistant through MQTT
PS5 MQTT discovers PlayStation devices on your local network, authenticates them through an included web interface, and publishes compatible entities to Home Assistant through MQTT discovery. This guide explains the supported add-on installation sequence, the roles of the MQTT broker and local console discovery, console authentication, verification, routine operation, and common failure modes. After the local integration works, we also explain how an HTTP tunnel with Localtonet can provide carefully controlled remote access to a reachable web endpoint. Because the documented PS5 MQTT material does not establish a fixed web UI port, URL path, or supported behavior outside the LAN, those values must be confirmed in your own installation rather than guessed.
📋 What's in this guide
How PS5 MQTT fits into Home Assistant
PS5 MQTT is an add-on designed to integrate Sony PlayStation 5 devices with Home Assistant by using MQTT. Its documented capabilities include discovering PlayStation 5 consoles on the local network, acquiring console credentials through a web UI, matching PlayStation Network account activity to a device, and controlling supported power transitions. The implemented power behavior is Wake and Standby, where Standby refers to rest mode.
The workflow contains several separate systems. The PlayStation 5 is the device being discovered and controlled. PS5 MQTT performs local discovery and communicates with the console. An MQTT broker carries messages between PS5 MQTT and Home Assistant. Home Assistant consumes MQTT discovery messages and creates entities for newly discovered devices when MQTT auto-discovery is enabled.
Understanding those boundaries makes troubleshooting much easier. Installing the add-on does not by itself guarantee that a console can be found. A working broker does not prove that the console has been authenticated. Successful console authentication does not guarantee that Home Assistant discovery is enabled. Verify each layer independently rather than repeatedly reinstalling the entire stack.
What remote access does not change
An HTTP tunnel does not replace PS5 MQTT's local-network relationship with the console. The console still needs to be discoverable and reachable from the environment running PS5 MQTT. Publishing the add-on's web interface does not make Localtonet the discovery transport, MQTT broker, or console-control protocol.
In most installations, Home Assistant remains the normal ongoing control interface. The PS5 MQTT web UI is principally documented as the place where credentials are acquired for each console. That makes remote exposure a specialized administrative step rather than a requirement for ordinary Home Assistant control.
Complete broker setup, add-on startup, console discovery, authentication, and Home Assistant entity verification on the local network before adding any tunnel. This separates integration problems from remote-access problems and avoids exposing an endpoint that has not yet been tested.
Prerequisites and decisions before installation
Begin with a functioning Home Assistant installation that supports the add-on workflow described by the PS5 MQTT project. You also need a PlayStation 5 reachable on the relevant local network and an MQTT broker available to both Home Assistant and PS5 MQTT. If MQTT is already used by other devices, verify that it is healthy before changing the PS5 integration.
The project also points Home Assistant Core Docker users to separate documentation. The supplied official project evidence does not include the Docker commands, container image settings, volume mappings, network mode, ports, or environment variables required for that path. We therefore do not reproduce speculative Docker instructions here. The step sequence below covers the documented Home Assistant add-on installation.
| Requirement | Why it is needed | What to confirm |
|---|---|---|
| Home Assistant add-on environment | Hosts and manages the documented PS5 MQTT add-on installation | You can add a repository, install an add-on, configure it, start it, and inspect its logs |
| MQTT broker | Carries MQTT messages between the integration and Home Assistant | The broker is running and Home Assistant can connect to it |
| MQTT auto-discovery | Allows PS5 MQTT entities to be created automatically | Discovery is enabled before expecting entities to appear |
| Local PlayStation reachability | PS5 MQTT discovers and communicates with consoles locally | The console and add-on environment are not separated by rules that block required local discovery or communication |
| Required console remote-play settings | Needed for supported wake and standby operations | The necessary remote-play features are enabled on the console |
| Administrative access | Required to add the repository, configure the add-on, and authenticate devices | You can complete setup without sharing credentials or tokens |
Prepare the MQTT layer
Install and configure an MQTT broker if you do not already have one. The PS5 MQTT project makes this the first installation requirement. Broker products and Home Assistant deployment models differ, and the supplied evidence does not establish a single required broker, broker port, username format, certificate mode, or installation command. Use the broker configuration appropriate to your Home Assistant environment.
Before proceeding, check that Home Assistant itself can connect to the broker. If your broker requires authentication, enter only credentials created for your environment and keep them out of screenshots, logs, shared configuration snippets, and public support posts. Do not copy example credentials into a production system.
Check the local network path
Discovery is explicitly local. If Home Assistant, the add-on environment, and the PlayStation are on different VLANs or subnets, discovery may require network behavior that is not established by the supplied project documentation. Do not assume that opening a public tunnel will resolve this. A tunnel creates public reachability to a selected local service, while console discovery remains a local networking concern.
Avoid broadly disabling firewalls, guest isolation, or segmentation. First confirm whether the Home Assistant host and console are intended to communicate. Apply the narrowest permitted local-network rule supported by your environment, and keep untrusted or guest devices separated.
Install and configure the PS5 MQTT add-on
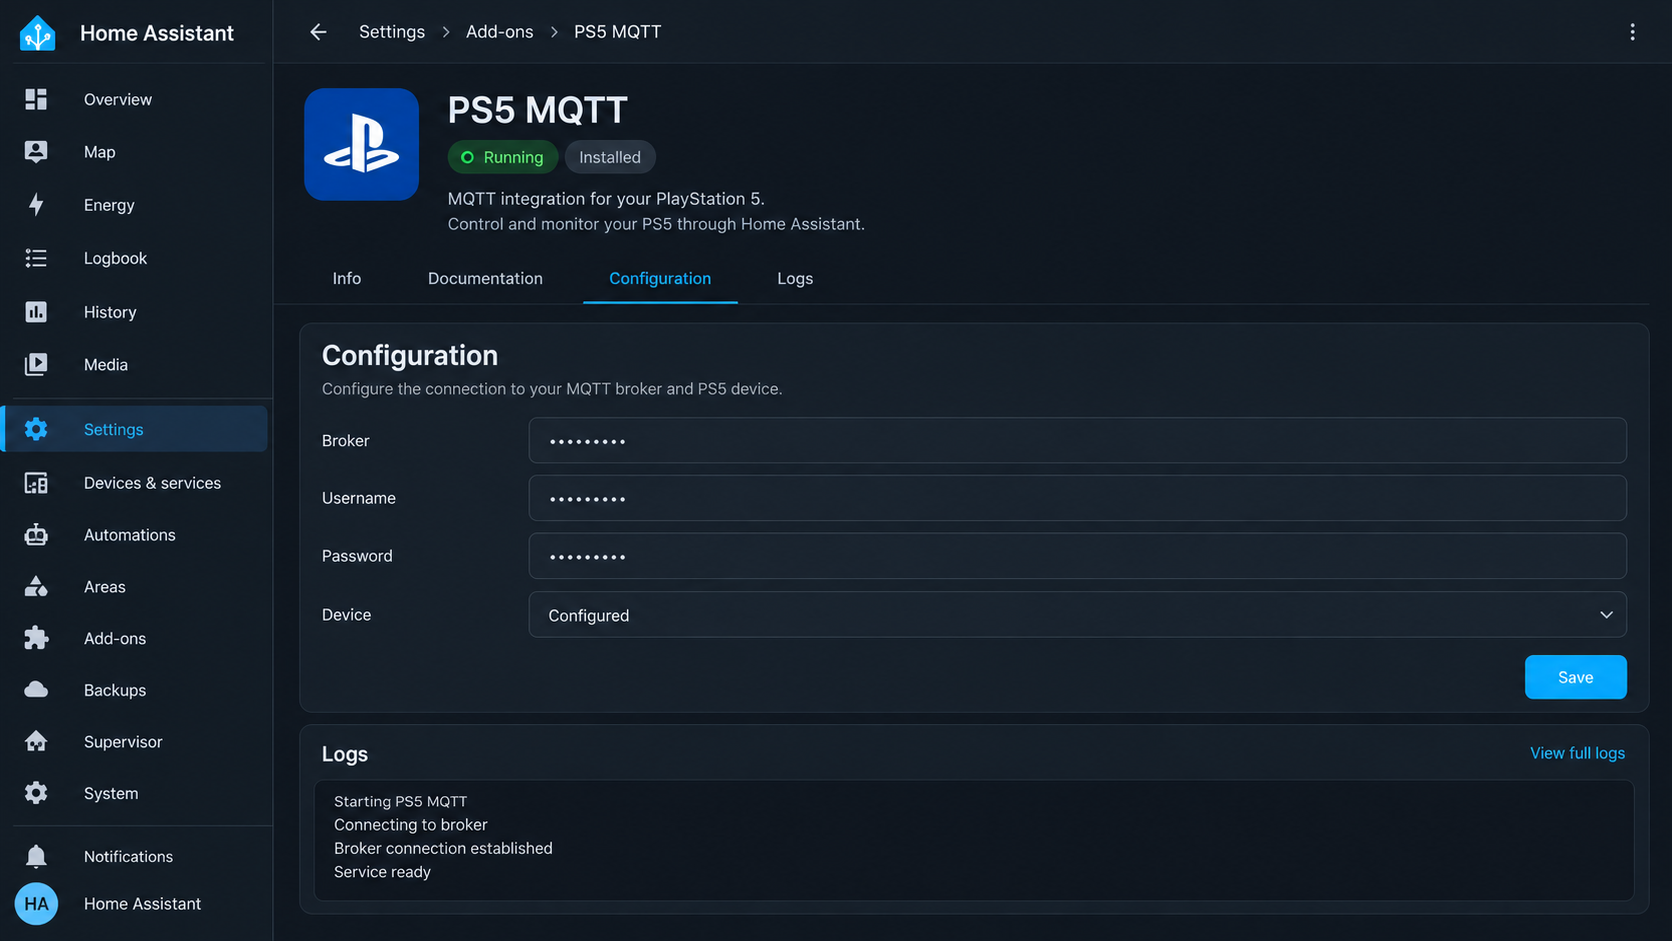
The official project describes a six-part installation sequence. Follow it in order. In particular, use the normal PS5 MQTT add-on rather than the edge version. The edge build is not the installation selected by the project's standard instructions.
Install and verify an MQTT broker
If no broker is currently available, install one using the supported method for your Home Assistant environment. Confirm that the broker is running and that Home Assistant can connect before adding PS5 MQTT. The project evidence does not mandate a particular broker product or publish universal connection values.
Add the PS5 MQTT repository to Home Assistant
Add the repository using its repository URL, https://github.com/FunkeyFlo/ps5-mqtt, through the repository-management interface available in your Home Assistant add-on environment. Wait for the repository contents to become available before trying to install the add-on.
Install the normal PS5 MQTT add-on
Select and install PS5 MQTT from the newly added repository. Use the regular add-on, not the edge version. Do not start it until you have reviewed the available configuration requirements.
Configure the add-on
Complete the add-on configuration for your broker and installation. The extracted official material confirms this configuration step but does not provide the option names, schema, default values, broker URL syntax, credential fields, or version-specific examples. Use the configuration documentation included with the installed add-on, and do not invent keys or retain placeholder credentials.
Start PS5 MQTT
Start the add-on after saving a valid configuration. Inspect its status and logs for startup failures, broker connection errors, or discovery problems. A running add-on is necessary, but it is not yet proof that a console has been discovered and authenticated.
Authenticate every PlayStation device
Open the included web UI and complete authentication for each console you intend to integrate. Repeat the authentication workflow separately for additional devices. Once a new device is discovered, its MQTT entities should be created automatically when Home Assistant MQTT auto-discovery is enabled.
The project evidence confirms that the add-on must be configured, but it does not establish the current option names or valid values. Review the documentation presented with the exact installed add-on version. This is safer than copying an old configuration that may no longer match the schema.
What a successful startup should establish
At this stage, the add-on should remain running rather than immediately stopping or restarting. Its logs should not show a persistent inability to connect to the MQTT broker. The PlayStation should be discoverable on the local network, and the add-on's web UI should be available through the local mechanism provided by the installed version.
No fixed web UI port or URL path is stated in the supplied project evidence. Do not assume a value from an unrelated add-on, an old forum post, or a different deployment method. Use the endpoint displayed by your current Home Assistant and add-on installation.
Authenticate the PlayStation 5 and enable supported control
Open the PS5 MQTT web UI from your local Home Assistant environment and follow its credential-acquisition flow for the console. The purpose of this step is to establish the credentials PS5 MQTT needs for its supported console interaction. If you own multiple consoles, authenticate each one rather than assuming that credentials from one device apply to another.
The PlayStation also needs the required remote-play features enabled. The project's troubleshooting guidance specifically associates missing remote-play setup with HTTP 403 errors when attempting to turn a console on or off. If discovery works but commands return 403, inspect console-side remote-play settings before changing MQTT or exposing the web interface publicly.
Use it only from trusted devices and networks during initial setup whenever possible. Do not publish screenshots containing account data, console identifiers, broker credentials, authentication material, private URLs, or Localtonet device tokens. If the interface does not provide an authentication or access-control layer suitable for public exposure, keep it local.
Understand the supported power states
PS5 MQTT implements Wake and Standby control. It cannot power a device on or off from or to arbitrary modes. The project explains that this limitation comes from the underlying Sony remote-play protocol. In practical terms, prepare the console to use rest mode if you expect supported wake and standby automation.
Avoid building automations that assume the add-on can perform unsupported transitions. A command failing from a fully powered-off state does not necessarily indicate an MQTT or tunnel problem. Test the documented Standby and Wake workflow first.
Verify the integration from console to Home Assistant
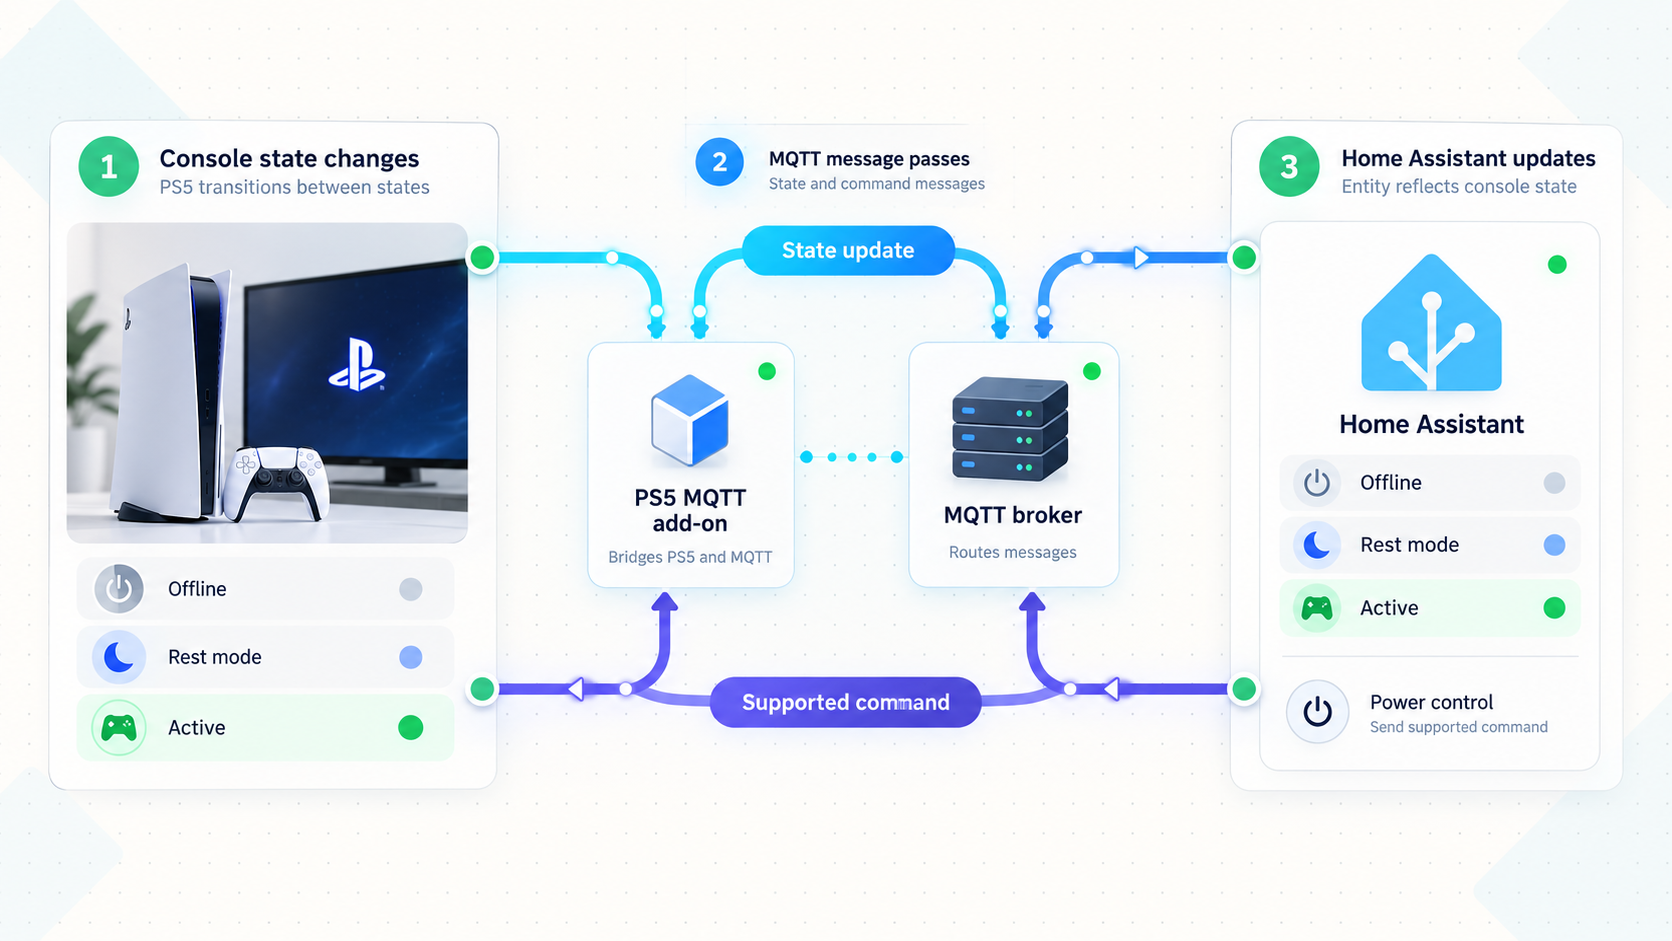
Verification should move through the stack in order. This gives each test a clear meaning and prevents a failure at one layer from being mistaken for another.
Confirm the add-on remains running
Check its current state and recent logs. Resolve configuration or startup errors before testing the console.
Confirm broker connectivity
Verify that Home Assistant and PS5 MQTT can use the configured MQTT broker. Repeated connection or authentication errors indicate a broker-layer issue.
Confirm local console discovery
Check that the intended PlayStation appears in the add-on workflow. If it does not, focus on local network reachability and segmentation rather than remote tunneling.
Complete and confirm authentication
Make sure the credential-acquisition flow has been completed for the specific console under test. Repeat it for each additional console.
Look for automatically created MQTT entities
After discovery, inspect Home Assistant for the corresponding entities. If they do not appear, confirm that MQTT auto-discovery is enabled and that the broker path is working.
Test Standby and Wake deliberately
Start from a supported state, issue one command, and observe both the physical console and its Home Assistant state. Test the reverse transition only after the first result is understood.
Use state changes as evidence
A useful final verification is that Home Assistant reflects the console's actual state when the device changes between awake and standby. Test one manual console transition and one supported Home Assistant command. If control succeeds but state does not update, examine MQTT discovery and message flow. If state updates but commands fail, examine authentication and remote-play settings.
Keep the first automation simple. For example, verify a direct entity action before connecting console state to broader scenes, media equipment, lighting, or shutdown routines. This prevents unrelated automation logic from hiding the root cause.
Operate and maintain the integration safely
Once PS5 MQTT is working, the usual control surface should be Home Assistant rather than the credential-acquisition web UI. Build automations only around the capabilities you have verified. Account for startup ordering after host reboots: the broker must be available, PS5 MQTT must connect to it, and Home Assistant must process discovery and state messages.
Review logs without leaking secrets
Logs are valuable for broker failures, discovery issues, authentication errors, and HTTP 403 responses. Before sharing a log excerpt, remove credentials, tokens, account information, local addresses when they are sensitive, and any public tunnel hostname that should remain private. Redaction should preserve error messages and timestamps while removing reusable secrets.
Update deliberately
The supplied release evidence identifies version 1.7.4 as a release whose noted change corrected the GitHub link in the header. It does not establish that every installation should pin to that version or that no newer release exists when you read this guide. Review the release presented by your repository, back up relevant configuration through your normal Home Assistant process, and inspect add-on logs after an update.
Limit administrative access
Keep the web UI local unless there is a specific operational reason to reach it remotely. If temporary remote access is necessary, start the tunnel only for the required maintenance window and stop it afterward. A hard-to-guess public URL is not a replacement for authentication or authorization.
Add optional HTTP access with Localtonet
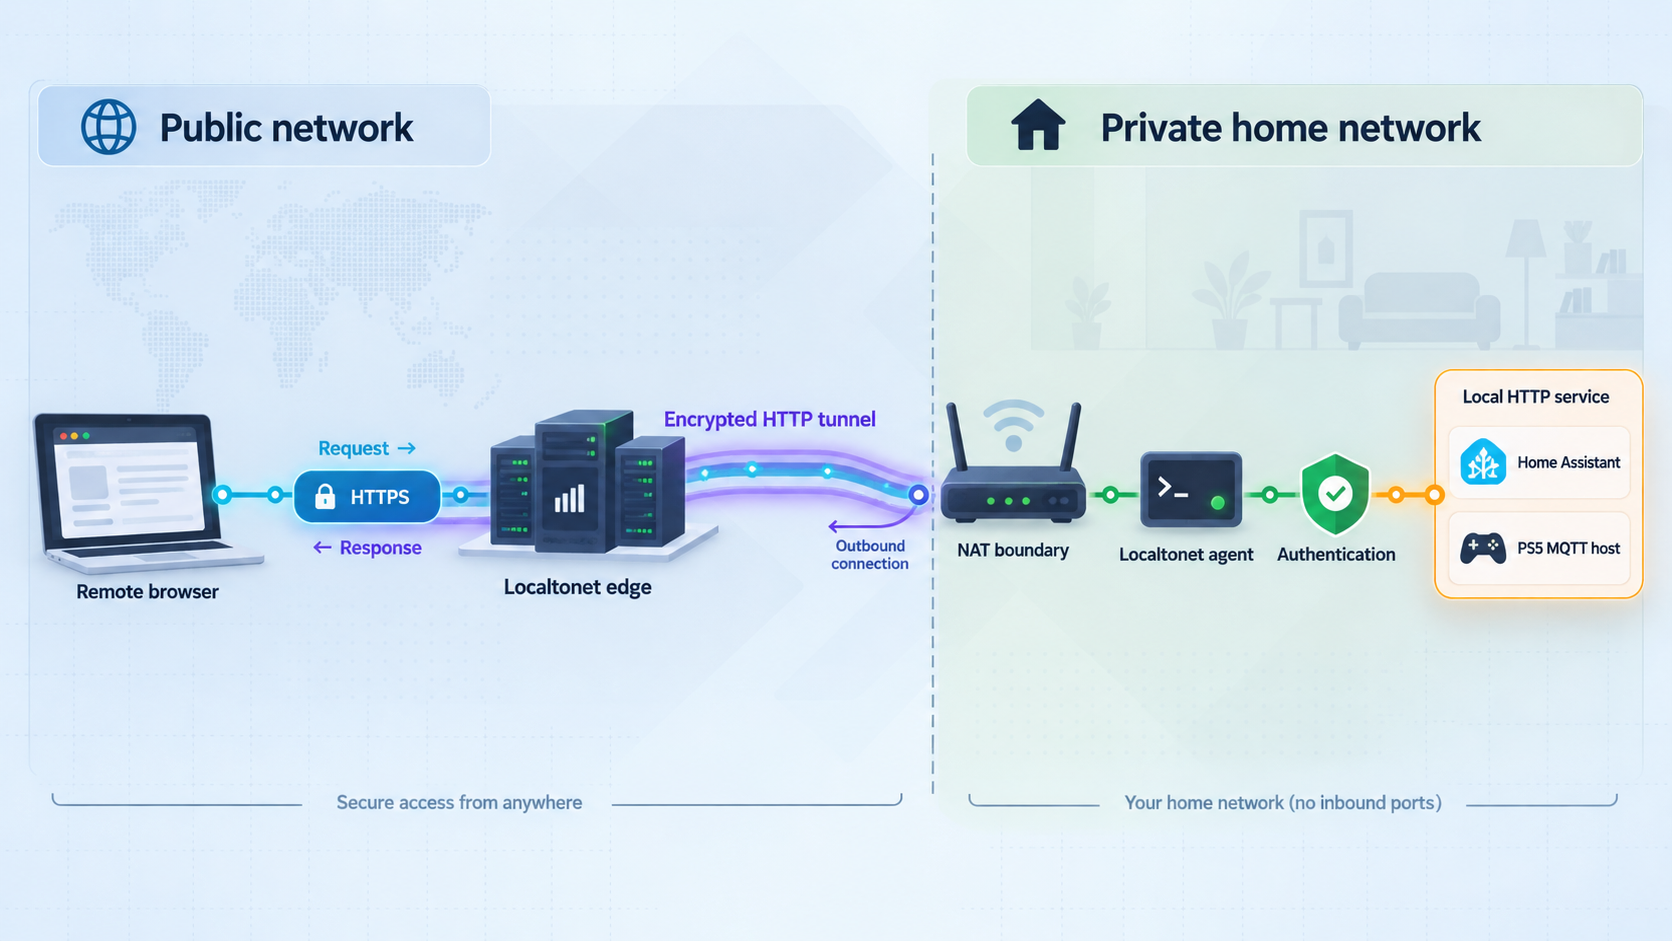
Only begin this section after PS5 MQTT works locally. With Localtonet, the client application on a device establishes an outbound connection to one of our relay servers. An HTTP tunnel can then provide a public HTTPS address for a local HTTP service without inbound router port forwarding, firewall changes, VPN setup, or a public IP address.
For this workflow, the possible target is the PS5 MQTT web interface used for credential acquisition. Remote-access relevance is limited because console discovery remains local and the normal ongoing interface is Home Assistant. An HTTP tunnel should not be presented as a requirement for PS5 MQTT, and it should not be used to compensate for broken local discovery.
The available project evidence does not document whether this interface is designed for operation outside the LAN, what authentication protects it, or whether all flows work through a public URL. Test cautiously and keep it private if adequate access controls cannot be confirmed. Never expose it solely because it is technically reachable.
Identify the local HTTP target first
A Localtonet HTTP tunnel needs a local IP address and port reachable from the device running our client. The project evidence does not establish a universal PS5 MQTT port, URL path, or bind address. Obtain those details from the running add-on and the current Home Assistant interface. Confirm the endpoint locally from the intended Localtonet client device before creating the tunnel.
If the service is reachable only inside an isolated container network or exclusively through an internal Home Assistant route, it may not be directly targetable by another device. Do not guess container addresses or publish unrelated Home Assistant ports. Determine the actual supported local endpoint for your deployment.
Install and run the Localtonet client
Run our client on the Home Assistant host when supported by that environment, or on another trusted device that can reach the verified PS5 MQTT HTTP endpoint. The selected device must remain online for the tunnel to remain available.
Authenticate or select the client device
Use the device-specific Localtonet auth token through the supported client workflow. Keep the token secret and never place it in an article, screenshot, shell history shared with others, or public configuration repository.
Select an available relay server
Choose a currently available server or region from the Localtonet dashboard. Availability can vary, so this guide does not hardcode a server code.
Create an HTTP tunnel for the verified endpoint
Enter the local IP address and port that you confirmed for the PS5 MQTT web UI. HTTP process types can use a Random Sub Domain, Custom Sub Domain, or Custom Domain, and all serve the same target content at a public HTTPS address. Use only options available in your current dashboard and plan.
Start and test the tunnel
Creating a tunnel does not start it. Select Start, then open the assigned public URL from a separate network and verify that it reaches the intended interface. Do not proceed with credential operations if the page, routing behavior, or security controls differ from the local result.
Stop or delete access when it is no longer needed
Stop the tunnel after the administrative task is complete, or delete it if it will not be reused. The public endpoint is available only while the selected client device is connected and the tunnel is running.
You can review our current tunnel documentation at Localtonet documentation. Check the current dashboard and documentation before configuring plan-dependent options, relay selection, or custom-domain DNS. Exact custom-domain DNS instructions are intentionally not included here because they must be confirmed against the current product workflow.
| Access approach | Best fit | Important limitation |
|---|---|---|
| Keep PS5 MQTT local | Normal setup and credential acquisition from a trusted LAN | No direct access to its web UI from outside the local environment |
| Use Home Assistant remotely | Ongoing interaction with the entities after integration | Depends on the separate remote-access design and security of the Home Assistant installation |
| Use a temporary Localtonet HTTP tunnel | Controlled access to a confirmed local HTTP endpoint for a specific task | Does not replace local console discovery and should not expose an inadequately protected administrative UI |
Troubleshooting PS5 MQTT and remote access
The add-on does not start
Reopen the installed add-on's configuration documentation and compare it with the saved configuration. Look for missing required values, obsolete keys, malformed values, or broker settings that do not match your environment. Because exact configuration keys are not present in the supplied evidence, avoid applying unverified examples from another version.
The add-on cannot connect to MQTT
Confirm that the broker is running, that Home Assistant can reach it, and that PS5 MQTT has the correct connection details for your deployment. Check broker-side logs as well as add-on logs. An MQTT connection failure occurs before console entity discovery can complete, so changing PlayStation settings will not repair this layer.
The PlayStation is not discovered
Verify that the console is powered in a state relevant to discovery and that the add-on environment shares the necessary local network path. Review VLANs, guest networks, wireless client isolation, container network boundaries, and firewall rules. Do not assume that public HTTP access helps local discovery.
No entities appear in Home Assistant
First confirm that PS5 MQTT has discovered the console and connected to the broker. Then confirm that MQTT auto-discovery is enabled. Automatic entity creation explicitly depends on discovery being enabled. Restarting or reinstalling repeatedly is less useful than finding which of these prerequisites is missing.
Wake or Standby returns a 403 error
Check that all required remote-play features are enabled on the PlayStation. The project's FAQ directly identifies this as the first check for 403 errors during power operations. If the settings are correct, review whether authentication completed successfully for that particular console.
The console will not wake from a fully powered-off state
Test from Standby or rest mode. The documented control scope is Wake and Standby, and the underlying protocol does not support arbitrary transitions from or to other modes. This is a capability boundary, not necessarily an installation error.
The Localtonet public URL does not open
Confirm that the Localtonet client device is connected and that the tunnel has been started. Then test the same target IP address and port from that client device. If the client cannot reach the local endpoint, the relay cannot make that endpoint work. Check whether the add-on UI uses an internal-only route rather than a directly reachable IP and port.
The public URL opens the wrong service
Stop the tunnel immediately and verify the target. A wrong port can expose an unrelated local application. Reconfirm the endpoint from the current PS5 MQTT installation rather than trying common Home Assistant or add-on ports.
The local web UI works, but the remote flow does not
The interface may rely on local routing, origin behavior, callbacks, or browser assumptions not documented for external use. The supplied project material does not guarantee off-LAN operation. If the page or authentication flow behaves differently through the public URL, keep it local rather than attempting insecure workarounds.
Frequently asked questions
Does PS5 MQTT require an MQTT broker?
Yes. Installing an MQTT broker is the first step in the documented installation sequence if one is not already available. Home Assistant and PS5 MQTT must be able to use the broker for discovery and entity communication.
Should I install the PS5 MQTT edge add-on?
No, not for the standard installation covered here. The project specifically instructs users to install the normal PS5 MQTT add-on rather than the edge version.
Why did no PS5 entities appear automatically?
Automatic entity creation requires a discovered console, a working MQTT path, and MQTT auto-discovery enabled in Home Assistant. Check those conditions in that order.
Can PS5 MQTT turn a console on from any power state?
No. The documented functionality is Wake and Standby, with Standby corresponding to rest mode. The underlying Sony remote-play protocol does not support arbitrary power transitions from or to other modes.
What causes 403 errors when controlling the console?
The project recommends checking whether all required remote-play features have been enabled on the PlayStation. Also confirm that authentication was completed for the console being controlled.
Do I need Localtonet to use PS5 MQTT?
No. PS5 MQTT is fundamentally a local integration between the console, MQTT broker, and Home Assistant. Localtonet is an optional next step when you have a specific reason to expose a confirmed local HTTP endpoint remotely.
Which port should I enter in a Localtonet HTTP tunnel?
Use the actual port of the locally reachable PS5 MQTT web endpoint shown by your current installation. The supplied project evidence does not establish a universal port or URL path, so we do not guess one. Verify the endpoint from the Localtonet client device before creating the tunnel.
Does an HTTP tunnel make PlayStation discovery work across the internet?
No. The tunnel publishes a selected local HTTP service. PS5 MQTT console discovery still occurs on the local network, so segmentation or discovery problems must be resolved locally.
Can I follow this guide for Home Assistant Core in Docker?
The PS5 MQTT project provides a separate Core Docker documentation path, but the supplied evidence does not include its commands, image settings, volumes, ports, network mode, or environment variables. This article therefore covers the documented Home Assistant add-on workflow and does not invent Docker instructions.
Connect a verified local PS5 MQTT endpoint with Localtonet
After the broker, console discovery, authentication, and Home Assistant entities all work locally, use our platform to create temporary HTTP access without configuring inbound router port forwarding. Confirm the exact endpoint and its access controls first, then stop the tunnel when the administrative task is complete.
Get Started Free →

