

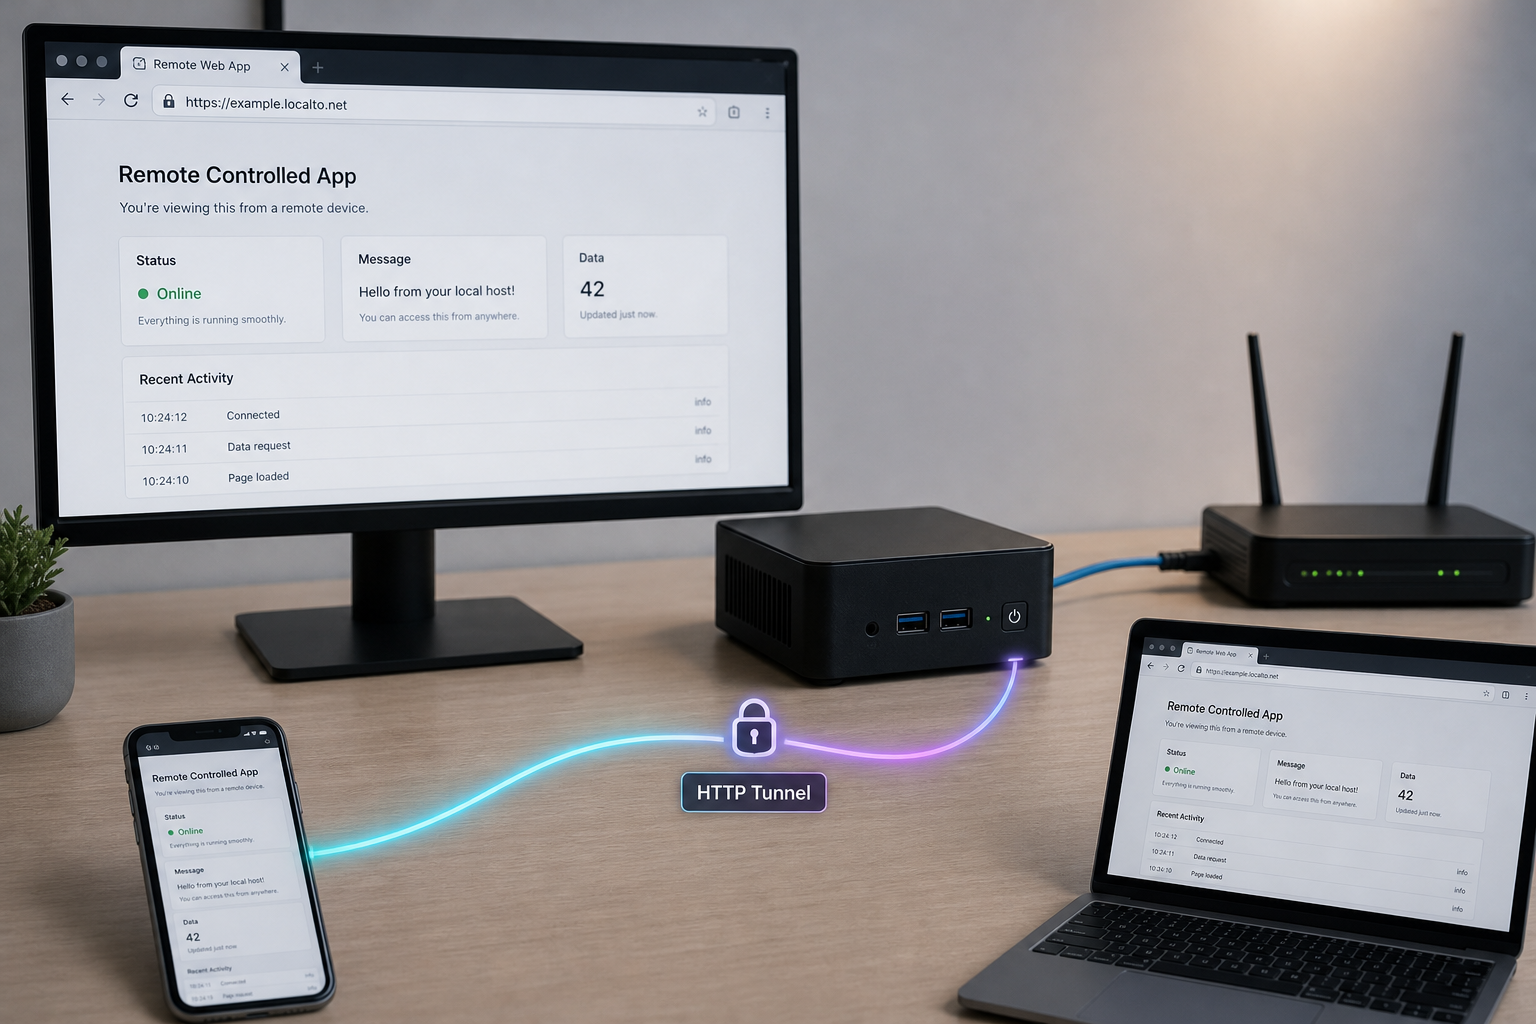
Run a real browser for your AI agent on your own machine, then reach its dashboard, MCP endpoint and human takeover screen from anywhere you choose
auto-browser is an open-source, MCP-native browser control plane: a shared Playwright browser that an AI agent and a human operator can both drive. By default it runs entirely on your own host and binds every published port to 127.0.0.1, which is safe but means you cannot reach it from a laptop on another network. This guide installs it with Docker Compose, verifies the dashboard, the MCP endpoint and the noVNC takeover screen locally, and then, as a separate step, publishes the HTTP services with a Localtonet HTTP tunnel. We spend real time on the security side, because a tunnel to a live, logged-in browser is something you must protect carefully.
📋 What's in this guide
Why self-host auto-browser, and why a tunnel afterwards
Most AI agents that browse the web only fetch HTML. That fails on single-page applications, login walls, file downloads and anything that needs a human to click through a consent screen. auto-browser takes a different approach. It describes itself as an MCP-native browser control plane for authorized workflows: MCP clients, LLM agents and human operators share one Playwright browser. Around that browser it provides screenshots, DOM summaries, OCR excerpts, tab controls, downloads and network inspection, plus operator-safety features such as approval gates, operator identity headers, audit events, PII scrubbing, Witness receipts and protection profiles.
The feature that makes this guide worth writing is human takeover. When a site gets brittle, or a login needs a person, the same live session is available through noVNC, a browser-based VNC viewer, so you can step in, fix the flow and hand control back. You can also log in once, save the session as a named auth profile, and open fresh sessions that are already signed in.
A note on naming before we start. This guide covers the open-source project published on GitHub as LvcidPsyche/auto-browser, which you run with Docker Compose. Other products use a similar name, including browser extensions that run an AI agent in a side panel. They are different software and nothing in this guide applies to them.
The remote access problem
The default deployment is local-first. All published ports bind to 127.0.0.1, so the dashboard, the API, the MCP endpoint and the noVNC screen are reachable only from the machine running Docker. That is the right default. It becomes a limitation when your MCP client runs on another machine, when you want to approve agent actions from a phone, or when a colleague needs to take over a session on a box in an office or a home lab.
Traditional answers are router port forwarding, firewall changes or a VPN. With Localtonet you avoid all three. The Localtonet client on the host opens an outbound connection to a Localtonet relay server, and the tunnel gives you a public HTTPS address that forwards to the local port. The tunnel exists only while the client is connected and the tunnel is running, so you can start it for a task and stop it afterwards.
auto-browser controls a real browser that may be logged in to your accounts. Anyone who can reach the API with a valid token can drive that browser, and anyone who can reach and authenticate to noVNC can see and operate its desktop. Install and verify everything locally first, set strong credentials, and only then publish a port. Section "Lock it down before you expose anything" lists what to do.
Prerequisites
The project's quickstart is deliberately short, and the evidence we reviewed lists no extensive dependency matrix. Here is what the documented workflow implicitly needs, along with what we could not confirm.
docker compose command, so you need a Docker installation that provides Compose. All services are built and run as containers.
What the evidence does not establish
We could not confirm a supported-operating-system list, minimum CPU or RAM, or the required Docker version from the material we reviewed. The prebuilt images are published for linux/amd64 only, so on other CPU architectures the prebuilt path is not an option, and whether a source build works there is not something we can state. The project also notes that make doctor must be run from a normal terminal with local Docker access and permission to open localhost sockets. If you run Docker in a restricted environment, such as a sandboxed shell or a CI runner, that check may fail for reasons unrelated to the project.
Also check that ports 8000 and 6080 are free on the host. These are the ports the documented URLs use. Whether and how to change them is not covered by the evidence we reviewed, so we do not recommend remapping them in this guide.
Install auto-browser with Docker Compose
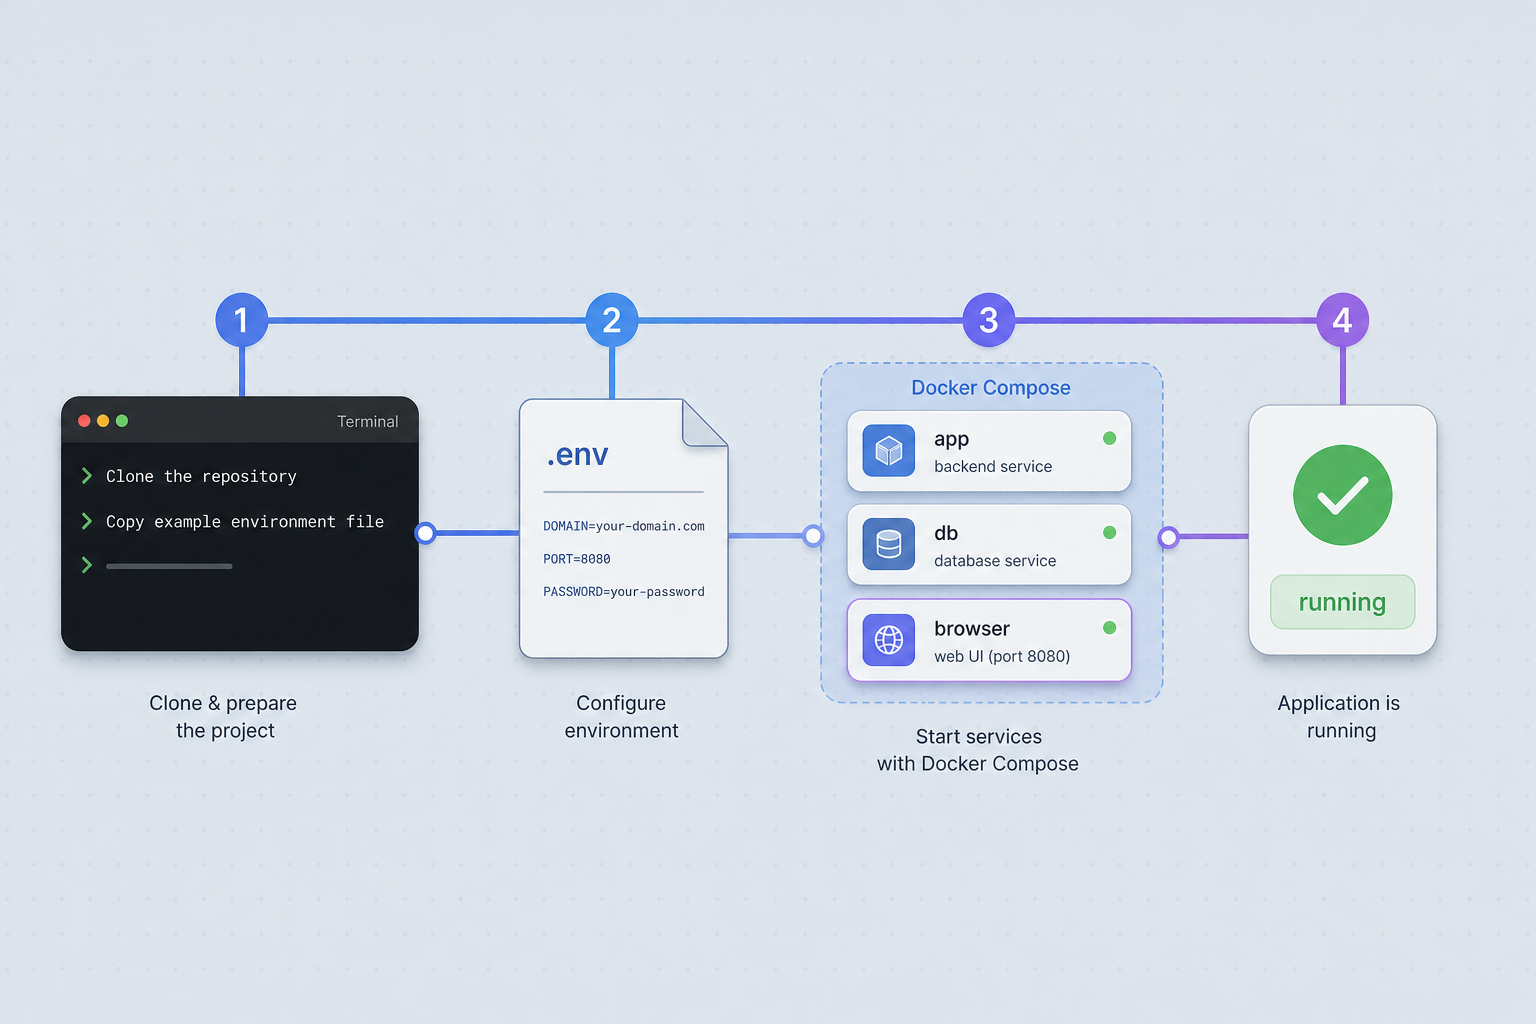
The documented path is a clone and a single Compose command. The project says this is enough for local development with the default settings. Optional steps are a copied environment file and a diagnostic check.
Clone the repository and enter it
Run the clone, then change into the new folder. All following commands run from this folder, which matters because the API token file is stored relative to it.
Optionally copy the example environment file
The repository ships .env.example. Copying it to .env gives you one place to set options such as a bearer token or a VNC password. You can skip this for a first local run.
Optionally run the doctor check
The Makefile provides make doctor. Run it from a normal terminal that has Docker access and can open localhost sockets.
Build and start the stack
Run docker compose up --build. The first build takes a while because the images are built from source. Leave the terminal open to watch logs, or add -d to run detached once you are comfortable.
Find the generated API token
On first start the controller generates an API token and saves it to data/api-token inside the project folder. Git ignores that file. Every API and MCP request must send it as Authorization: Bearer <token>.
git clone https://github.com/LvcidPsyche/auto-browser.git
cd auto-browser

# optional
cp .env.example .env
make doctor

# build and start
docker compose up --build
The v1.11.2 release is described as a security release. One of its four advisories (rated high) covered a web page reaching the browser desktop through VNC on port 5900 and bypassing noVNC's Origin check. In 1.11.2 the compose file no longer publishes port 5900, and noVNC on 6080 is the supported way in. If you clone the main branch you get the current code. If you pin prebuilt images by tag, use 1.11.2 or newer, and if you set ISOLATED_BROWSER_IMAGE explicitly, point it at a browser-node image of that version or later.
Alternative: prebuilt images from GHCR
Every release is also published to the GitHub Container Registry, so you can skip the local build:
docker compose -f docker-compose.yml -f docker-compose.images.yml up -d
The AUTO_BROWSER_IMAGE_TAG variable selects the version: latest (the default), a specific release number, or edge for the current main branch. The images are linux/amd64, and each carries an SBOM and a build provenance attestation that you can check with the GitHub CLI. The controller image leaves out the agent command-line tools, so if you want a *_AUTH_MODE=cli setup you must build from source with INSTALL_AGENT_CLIS=true.
If you use optional per-session isolation, the order of compose files matters. Name docker-compose.images.yml last so isolated sessions also start from the published browser image:
docker compose -f docker-compose.yml -f docker-compose.isolation.yml -f docker-compose.images.yml up -d
In the opposite order the isolation overlay's default wins, and isolated sessions run a local auto-browser-browser-node:latest, which may be a stale build or may not exist at all. For this guide you do not need isolation, so the simple two-file command is enough.
Alternative: GitHub Codespaces
The project also supports Codespaces, which provisions the stack automatically and usually has the dashboard and noVNC tabs ready in about 90 seconds. That is a hosted demo path. It does not give you a self-hosted machine, so the rest of this guide assumes a host you control.
Verify the install locally
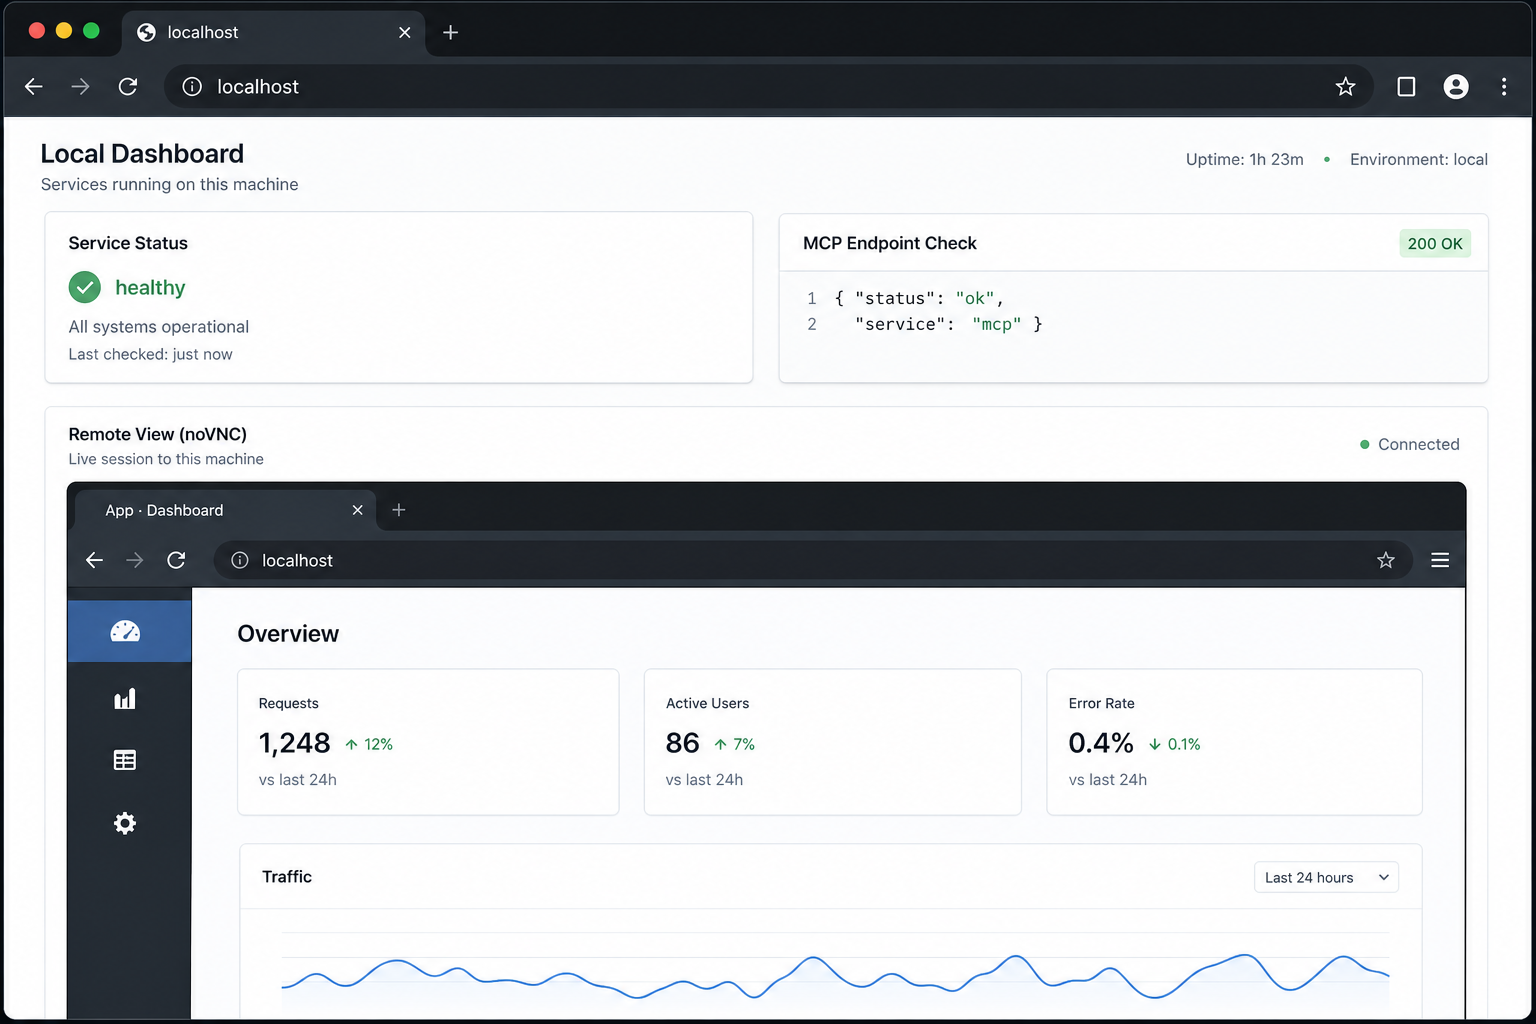
Do not touch Localtonet until everything below works on 127.0.0.1. If a service fails locally, a tunnel only adds a second thing to debug.
Check the containers
docker compose ps
docker compose logs --tail=100
You are looking for running containers and no restart loops. The logs are also where you confirm that the controller generated its token.
Open the four documented local endpoints
| Endpoint | URL | What it is |
|---|---|---|
| API docs | http://127.0.0.1:8000/docs | Interactive API documentation. It needs no token on a loopback deployment, while an exposed one answers 401. Swagger UI loads its assets from cdn.jsdelivr.net, so the page needs outbound internet access in your browser. |
| Operator dashboard | http://127.0.0.1:8000/dashboard | Includes the queue of actions waiting for your approval. It asks for the token once. You can also open the dashboard with the token in the URL fragment, in the form #token=<token>. |
| MCP over HTTP | http://127.0.0.1:8000/mcp | The endpoint MCP clients connect to. Requests must carry the bearer token. |
| Visual takeover (noVNC) | http://127.0.0.1:6080/vnc.html?autoconnect=true&resize=scale | The live browser desktop for a human to take over. It asks for VNC_PASSWORD when you have set one. |
Open the dashboard first and paste the token from data/api-token when it asks. The fragment form is convenient, but a token in a URL can end up in browser history and screenshots, so avoid it on shared machines.
Create a session and observe it
The project's own smoke test is two curl calls. From the auto-browser folder:
AUTH=(-H "Authorization: Bearer $(cat data/api-token)")

curl -s "${AUTH[@]}" http://127.0.0.1:8000/sessions \
  -X POST \
  -H 'content-type: application/json' \
  -d '{"name":"demo","start_url":"https://example.com"}' | jq
The response describes the new session, including its id. If you set API_BEARER_TOKEN yourself, use that value in place of the file contents. Then ask for an observation of the page:
curl -s "${AUTH[@]}" http://127.0.0.1:8000/sessions/<session-id>/observe | jqReplace the placeholder with the id from the previous response. A successful observation confirms the controller, the browser node and the token all work together. Now open the noVNC URL from the table above. You should see the browser desktop that the session is using, and you should be able to click inside it. That is the human takeover path working locally.
Try the headline workflow
The project's recommended first useful demo is: create a session, log in manually if the site needs a human, save the session as a named auth profile, open a new session from that profile, and continue without logging in again. The repository's examples/login-and-save-profile.md walks through it. This is worth doing locally now, because it exercises exactly the dashboard and takeover features you are about to make reachable remotely.
Lock it down before you expose anything
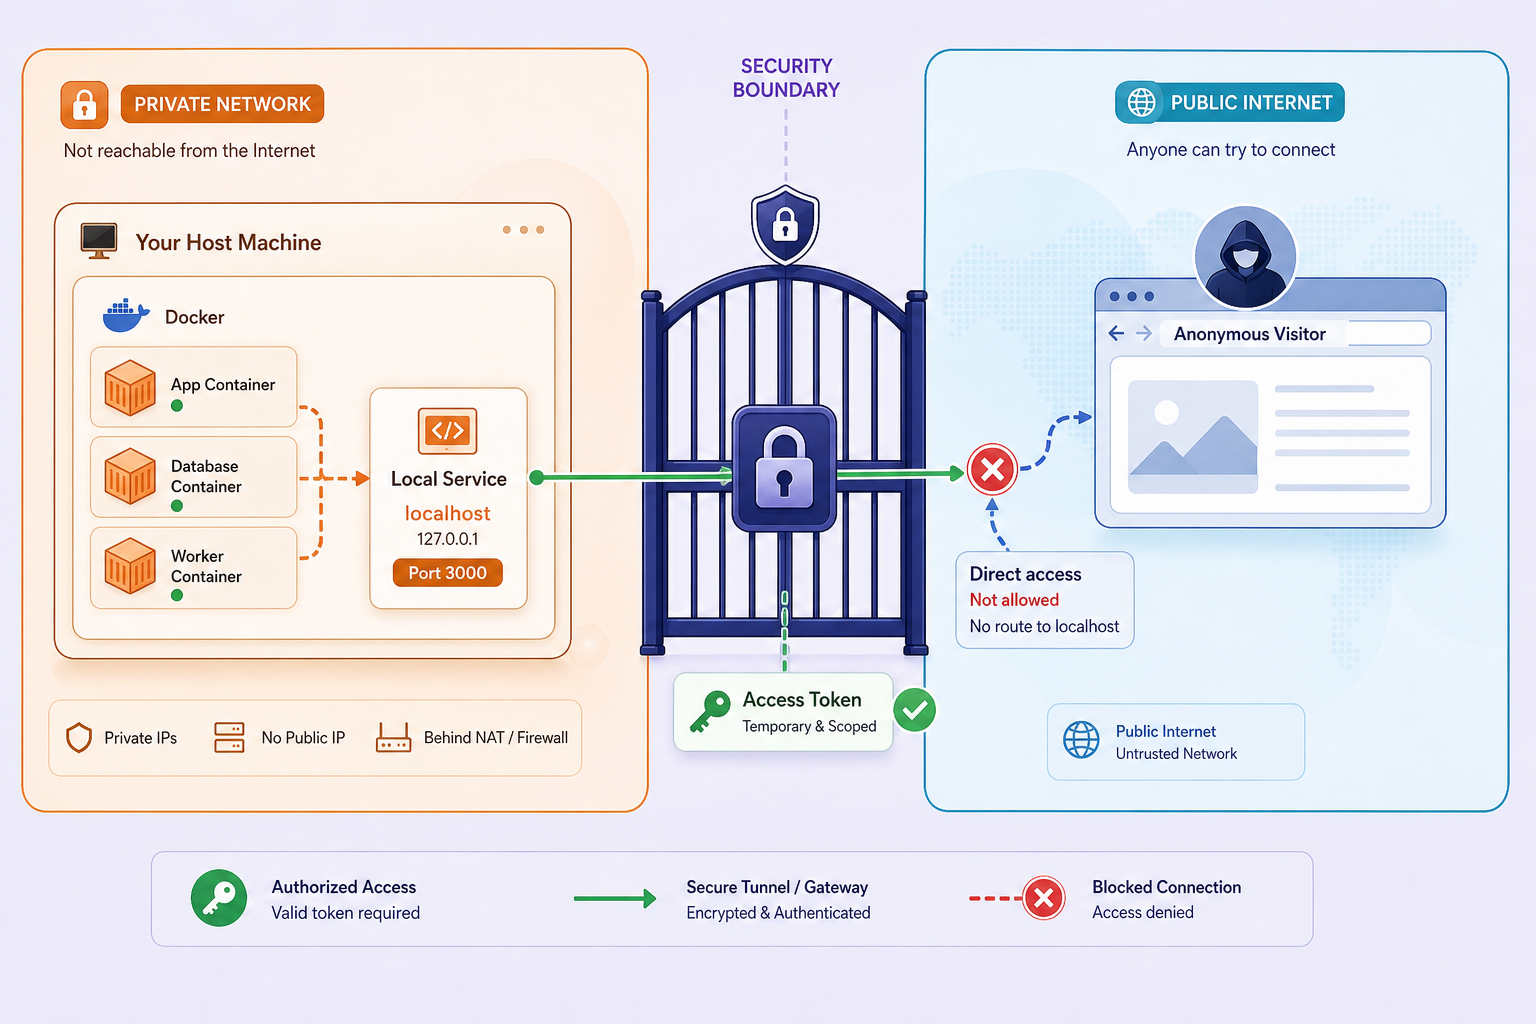
Everything above runs behind 127.0.0.1. A tunnel changes that, so decide your credentials before you create one. The points below come from the project's production-hardening notes and the v1.11.2 release notes, followed by our own general networking reasoning, which we label as such.
Use a strong bearer token you control
The hardening notes say startup refuses to boot without API_BEARER_TOKEN of at least 32 characters whenever the API is reachable off-box, which is the case when API_BIND_SCOPE=exposed. That value is the default for any deployment that does not declare otherwise. The token may alternatively be placed in API_TOKEN_FILE. The shipped base compose file declares loopback scope to match its 127.0.0.1 publish mapping, and in that mode, without API_BEARER_TOKEN, the controller generates a token and writes it to the token file. That generated token is what you used above.
For a tunnel, set your own long random token in .env instead of relying on the generated one, and keep it out of chat logs and commit history. The hardening document we reviewed was truncated, so we cannot tell you everything it says about how bind scope should be declared for a tunneled deployment. Read docs/production-hardening.md and docs/deployment.md in your checkout, in particular the "Gateway recommendations" part of the deployment document that the release notes point to, before you decide whether to change API_BIND_SCOPE.
API_ALLOW_TOKENLESS_LOOPBACK=true runs the controller without a token, and the project itself warns that any container on the compose network can then drive the browser. Our own reasoning adds a second reason: a tunnel client running on the same host forwards remote requests to the service from the local machine, so a rule that trusts loopback origins could end up trusting internet traffic. We cannot confirm how the controller classifies tunneled requests, so do not rely on loopback trust at all. Keep token authentication on.
Set a VNC password
noVNC asks for VNC_PASSWORD when one is set. Since the takeover screen shows and controls the entire browser desktop, put a strong, unique value in your .env before you publish port 6080 anywhere. We recommend treating the noVNC password and the API token as separate secrets, and not reusing either elsewhere. Confirm the variable name in your copy of .env.example after you update, since options can change between releases (for example, VNC_PORT was removed in 1.11.2).
Understand the origin check uncertainty
The security advisory mentions that noVNC enforces an Origin check. We have no evidence about how that check treats a request arriving through a differently named public hostname, whether it accepts a custom allowed-origin setting, or whether the takeover URL that sessions report can point at a public address. If the noVNC page loads through the tunnel but the connection fails or is refused immediately after the password prompt, an origin mismatch is a plausible cause, and the deployment documentation in the repository is where to look for the supported fix. We deliberately do not invent a configuration variable here.
Know what the application layer protects
API_BEARER_TOKENS, saved auth state, exported archives, uploads and approvals belong to the operator who made them, per the 1.10.0 notes. Useful if several people share one instance.
ALLOWED_HOSTS as restricting which sites the agent can work with. Set it deliberately, because the agent can only be as constrained as this list makes it.
AUTONOMOUS_APPROVALS=true lets the agent approve certain calls itself. For a tunneled instance, we suggest leaving it off unless you have read the approval documentation in docs/mcp-clients.md and understand the consequences described in the release notes.
Create the Localtonet HTTP tunnel
auto-browser's dashboard, API and MCP endpoint are served over plain HTTP on port 8000, and noVNC is served over HTTP on port 6080. Both are HTTP services, so the HTTP tunnel type is the natural fit. The tunnel terminates HTTPS at the public side and forwards to the local HTTP port, which means you get an https:// address without configuring certificates in auto-browser.
The tunnel workflow follows the same six-part flow Localtonet uses for HTTP tunnels in general. For exact field labels and the latest screens, keep the Localtonet HTTP tunnel documentation open, because the dashboard can change and we do not reproduce every field here.
Decide where the Localtonet client runs
The client must run on a device that can reach the local service. The simplest and most reliable choice is the same host that runs Docker. auto-browser publishes its ports on that host's 127.0.0.1, so the target is simply 127.0.0.1 with port 8000. Do not run the Localtonet client inside a container and point it at 127.0.0.1, because inside a container that address means the container itself, not your Docker host. If you do run the client on a different machine on the LAN, auto-browser's loopback-only publishing means it will not be reachable there unless you deliberately change the port bindings, which we do not recommend.
Install and run the Localtonet client on the Docker host
Install the Localtonet client application for your operating system, following the current installation instructions in our documentation, and keep it running on the machine that hosts auto-browser.
Authenticate the device with its auth token
Select that device with its token from your Localtonet account. The token is specific to the device, so treat it like a password and never paste it into articles, tickets or repository files.
Select an available relay server
Choose a server or region from the options your dashboard currently offers. Available values change, which is why we do not hardcode them here.
Create an HTTP tunnel to the controller port
In the HTTP tunnel configuration, choose a Process Type (Random Sub Domain, Custom Sub Domain or Custom Domain), select your device and server, and set the local target to IP 127.0.0.1 and port 8000. For a first test, a random subdomain is the least effort. Custom domains need DNS steps that you should take from the current documentation.
Start the tunnel and copy the public address
Creating a tunnel does not start it. Press the Start button, then copy the public HTTPS address that Localtonet shows for it.
Stop or delete the tunnel when you no longer need it
The tunnel is reachable only while the client is connected and the tunnel is running. Stopping it is the quickest way to close remote access again.
Add a second tunnel for noVNC
The takeover screen is a separate service on port 6080, so it needs its own HTTP tunnel with the target 127.0.0.1 and port 6080. Repeat steps 4 and 5 for that tunnel. You then have two public addresses: one for the controller on 8000 (dashboard, API, MCP) and one for noVNC on 6080. You open the takeover page by appending the documented path, /vnc.html?autoconnect=true&resize=scale, to the second address.
If you only need an MCP client or the approval queue remotely, skip the second tunnel. Keeping noVNC unpublished until you actually need a takeover is a sensible least-exposure habit.
noVNC streams the desktop over a WebSocket connection, which is a general fact about how browser-based VNC viewers work. The Localtonet context we work from does not state WebSocket behavior for HTTP tunnels in either direction, so we cannot promise that the takeover screen works through a tunnel. Test it as part of the remote verification below, and if it fails, treat the origin check described in the security section as the other main suspect.
Which tunnel for which job
| Goal | Local target | Remote path to use |
|---|---|---|
| Approve actions from another device | 127.0.0.1:8000 | The public address plus /dashboard, then paste the bearer token |
| Connect a remote MCP client | 127.0.0.1:8000 | The public address plus /mcp, sending Authorization: Bearer with the token |
| Call the REST API from scripts | 127.0.0.1:8000 | The public address plus paths such as /sessions, with the same header |
| Human takeover of a live session | 127.0.0.1:6080 | The second public address plus /vnc.html?autoconnect=true&resize=scale, then the VNC password |
Verify remote access end to end
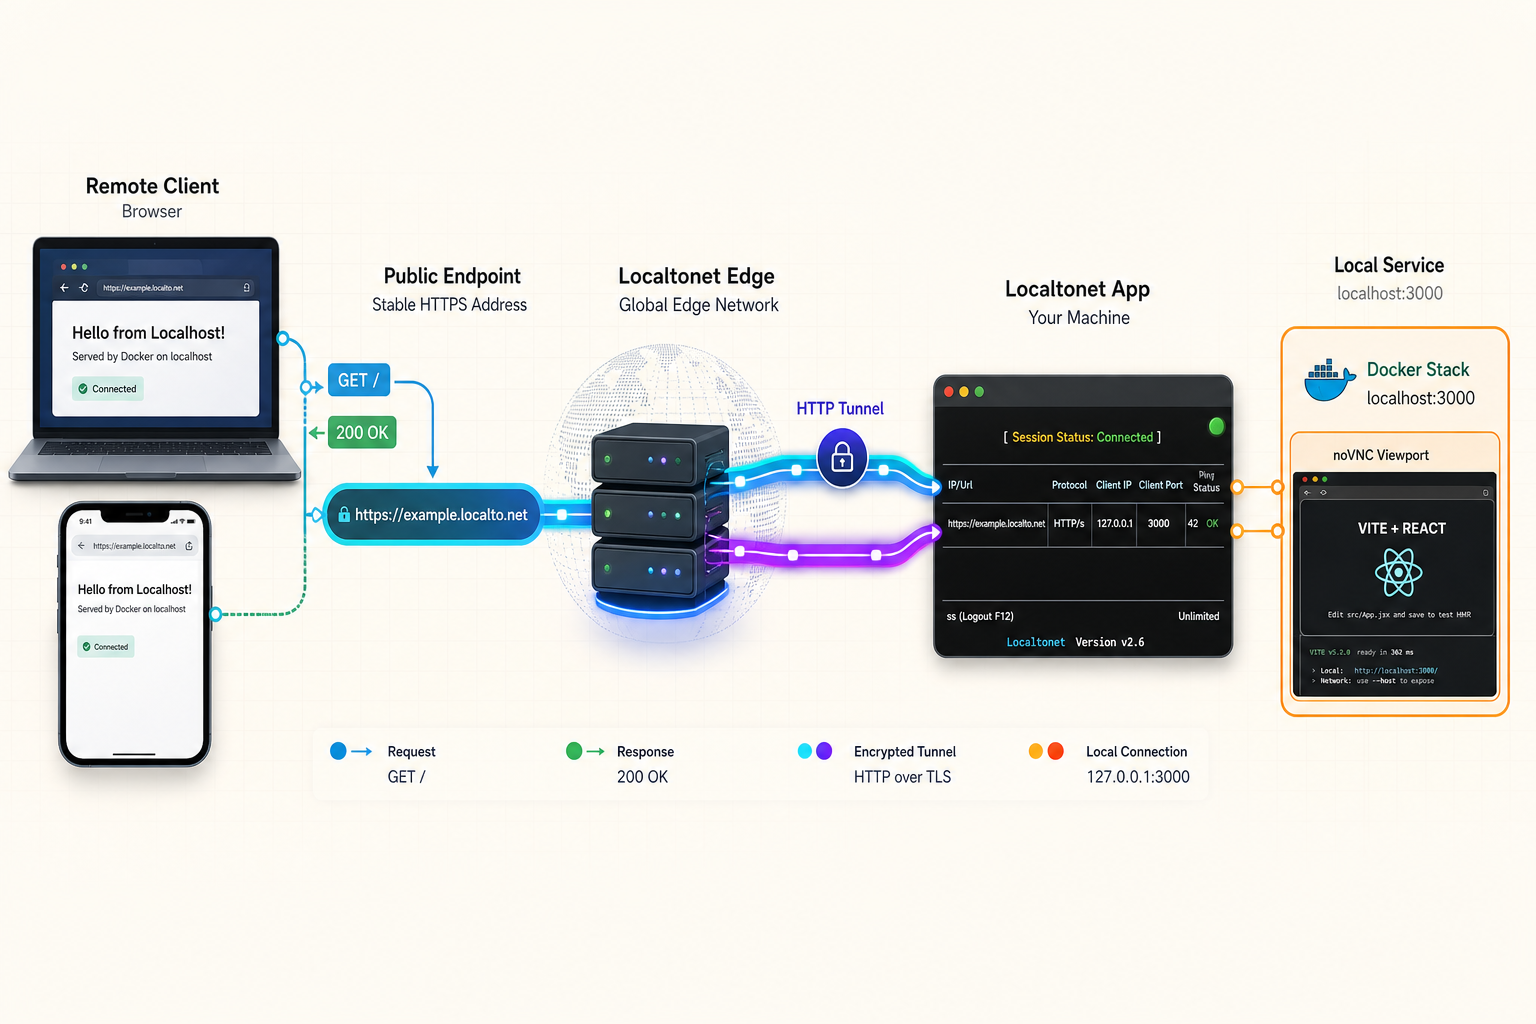
Test from a different network if you can, such as a phone on mobile data. A test from the same machine proves that the tunnel works but not that a remote user sees what you expect.
1. Confirm the controller answers publicly
Replace the placeholder with the public address Localtonet gave you, and the token with your own value. Do not paste a real token into shared terminals or scripts committed to a repository.
TOKEN="paste-your-token-here"

curl -s -H "Authorization: Bearer $TOKEN" \
  https://YOUR-PUBLIC-HOST/sessions \
  -X POST \
  -H 'content-type: application/json' \
  -d '{"name":"remote-demo","start_url":"https://example.com"}' | jq
A JSON session description means the whole chain works: public HTTPS, tunnel, local controller, token check. Now run the same request with a deliberately wrong token. You should get a refusal rather than a session. If a wrong or missing token still creates a session, stop the tunnel immediately and re-check your authentication settings.
2. Open the dashboard
Browse to the public address plus /dashboard. It should prompt for the token. After you paste it, the approval queue should load. The API docs page at /docs behaves according to the controller's bind scope: the project says an exposed deployment answers 401 there, while a loopback one needs no token. Either result is informative, but note it, because a docs page that opens without a token on a public address deserves a closer look at your configuration.
3. Check the MCP endpoint
The project says Claude Code, Codex, Google Antigravity, Cursor and VS Code can connect directly over HTTP, and Claude Desktop uses a bundled stdio bridge. The exact per-client configuration lives in the repository's docs/mcp-clients.md, which we do not reproduce because we have not reviewed its content. In general, point the client's HTTP MCP URL at the public address plus /mcp and configure it to send the bearer token. If you also use our own tooling, see our posts on exposing an MCP gateway with Localtonet and on the Localtonet MCP server for managing tunnels from an AI assistant for the separate topic of letting an assistant manage tunnels.
4. Test the takeover screen
Create a session, then browse to the noVNC tunnel address plus /vnc.html?autoconnect=true&resize=scale. Enter the VNC password when asked. You should see the same desktop you saw locally and be able to click in it. Close the tab afterwards. If it fails, jump to the troubleshooting section.
Sessions report a takeover URL (the 1.11.2 notes call it takeover_url). In a local deployment this points at the local noVNC address. We have not established whether it can be made to show your public address. Do not forward an agent's local URL to a remote colleague, and do not share the public noVNC address together with the VNC password in the same message.
Daily operations
Start, stop and inspect
# start in the background
docker compose up -d

# status and recent logs
docker compose ps
docker compose logs --tail=100

# stop the stack (keeps your data folder)
docker compose down
These are ordinary Docker Compose commands, not project-specific features. If you started with the prebuilt-image overlay, include the same -f arguments on every command so Compose sees the same configuration.
Close the tunnel when idle
The best control you have over remote exposure is not running the tunnel. Stop the Localtonet tunnels when nobody needs remote access, and start them again for the next task. The auto-browser stack can keep running locally the whole time.
Update safely
The project ships frequent releases and has treated security fixes seriously, including the 1.11.2 release with four advisories. To update a source checkout, pull the new code and rebuild:
git pull
docker compose up --build -d
If you use the prebuilt images, pull the new tag instead. Read the release notes before upgrading, because some releases change behavior that matters for operators. The 1.11.2 notes, for example, say that a VNC viewer pointed at port 5900 no longer connects, that approvals stored before the upgrade need to be requested again, and that you should close isolated sessions started before the upgrade and recreate the containers. When the release says to update both the controller and the browser-node image, update both. Updating only the client or bridge packages does not deploy server-side fixes.
Protect the data folder
The generated token lives in data/api-token, and the data folder is also where the project keeps state. The hardening notes mention that Witness receipts are signed with a key that sits beside the receipts. We cannot enumerate everything in that folder from the evidence, so treat the whole folder as sensitive: restrict file permissions, exclude it from public backups and rotate your token if it leaks. Auth profiles you save are designed to reopen signed-in sessions, which makes them valuable to an attacker too.
Make the setup survive reboots
The repository includes an ops/systemd folder, which suggests an official way to run the stack as a service. We have not reviewed what is in it, so check that folder in your checkout rather than rely on our description. On the Localtonet side, the client has to be running for the tunnel to work, so plan how it starts on boot using the client documentation.
Troubleshooting
| Symptom | Likely cause | What to do |
|---|---|---|
make doctor fails |
No Docker access or no permission to open localhost sockets | Run it from a normal terminal on the Docker host, not from a restricted shell or sandbox. |
| Port 8000 or 6080 already in use | Another process is bound to the documented port | Stop the conflicting process. Changing the project's ports is not covered in the evidence we reviewed, so check the repository documentation before remapping. |
| 401 on API or MCP calls | Missing or wrong bearer token | Send Authorization: Bearer with the value from data/api-token or your own API_BEARER_TOKEN. |
| Controller will not start after you changed the environment | A token shorter than 32 characters while the API is treated as reachable off-box | Use a longer token, and re-read the hardening notes about bind scope. |
| API docs page loads blank | Swagger UI loads assets from cdn.jsdelivr.net | Make sure your browser can reach that host, or use curl and the dashboard instead. |
| A VNC client on port 5900 cannot connect | Port 5900 was removed from the compose file in 1.11.2 | Use noVNC on port 6080 instead. |
| Image pull fails on an ARM machine | Published images are linux/amd64 | Use an amd64 host. A source build on other architectures is not something we could confirm. |
| Public address does not respond | Tunnel created but not started, or the Localtonet client is not running | Check that the client shows as connected and that the tunnel has been started. |
| Tunnel connects but gets a gateway-style error | Wrong local IP or port, or the client runs in a container where 127.0.0.1 is not the host | Run the client on the Docker host and target 127.0.0.1 with the right port. Confirm locally first. |
| Dashboard loads remotely but takeover screen does not connect | Unverified WebSocket handling, the noVNC Origin check, or a wrong VNC password | Confirm the password locally, then read the deployment documentation for the supported origin configuration. |
A general approach that saves time: test the same request at three levels. First against 127.0.0.1 on the Docker host, then against the public address from the same machine, then from a different network. The first level that fails tells you which layer to inspect: auto-browser, the tunnel, or the outside network.
When agent approvals behave oddly
The release notes describe approvals as spent when a call claims them, before the action runs. If an action fails after claiming its approval, the same approval id is refused on retry, and the agent has to ask for a new approval. That is intentional, because the action may already have taken effect. Check the page state before approving a repeat. The details, including which endings give an approval back, are in the project's docs/mcp-clients.md.
Frequently asked questions
How do I install auto-browser with Docker?
Clone https://github.com/LvcidPsyche/auto-browser.git, change into the folder and run docker compose up --build. That is enough for local development with default settings. Optionally copy .env.example to .env and run make doctor. You can instead use the prebuilt GHCR images with docker compose -f docker-compose.yml -f docker-compose.images.yml up -d.
Which URLs should work after installation?
The API docs at http://127.0.0.1:8000/docs, the operator dashboard at http://127.0.0.1:8000/dashboard, the HTTP MCP endpoint at http://127.0.0.1:8000/mcp and noVNC at http://127.0.0.1:6080/vnc.html. All published ports bind to 127.0.0.1 by default, so they are reachable only from the Docker host until you add a tunnel.
Where is the API token, and do I need one?
Yes. On first start the controller generates a token and saves it to data/api-token in the project folder. Every API and MCP request must send it as a bearer token. You can set your own with API_BEARER_TOKEN, which must be at least 32 characters when the API is reachable off-box.
Can I use a Localtonet HTTP tunnel for the MCP endpoint?
The MCP endpoint is an HTTP path on port 8000, so an HTTP tunnel to 127.0.0.1:8000 publishes it at a public HTTPS address plus /mcp. Your MCP client must still send the bearer token. We have not tested every MCP client against a tunneled endpoint, and per-client setup is documented in the project's docs/mcp-clients.md.
Is it safe to publish the noVNC takeover screen?
Only with precautions. It exposes a live browser desktop that may be signed in to real accounts. Set a strong VNC_PASSWORD, keep the tunnel stopped when it is not needed, use a release that includes the 1.11.2 fixes, and do not share the address together with the password. Whether the noVNC Origin check accepts a tunneled hostname is not established in the evidence we reviewed.
Does a Localtonet tunnel make this a VPN?
No. An HTTP tunnel forwards one local HTTP service to a public address. It does not join your devices into a private network. Our separate VPN Manager feature is the actual mesh VPN product, and it is not needed for this workflow.
Why do I need two tunnels?
The controller (dashboard, API, MCP) listens on port 8000 and noVNC listens on port 6080. A tunnel forwards to one local IP and port, so each service needs its own tunnel. You can run only the first one if you do not need remote takeover.
Start with Localtonet
Get auto-browser running and verified on your own machine first, then create an HTTP tunnel to reach its dashboard and MCP endpoint from anywhere. Create a Localtonet account to try it, and stop the tunnel whenever you are done.
Get Started Free →