

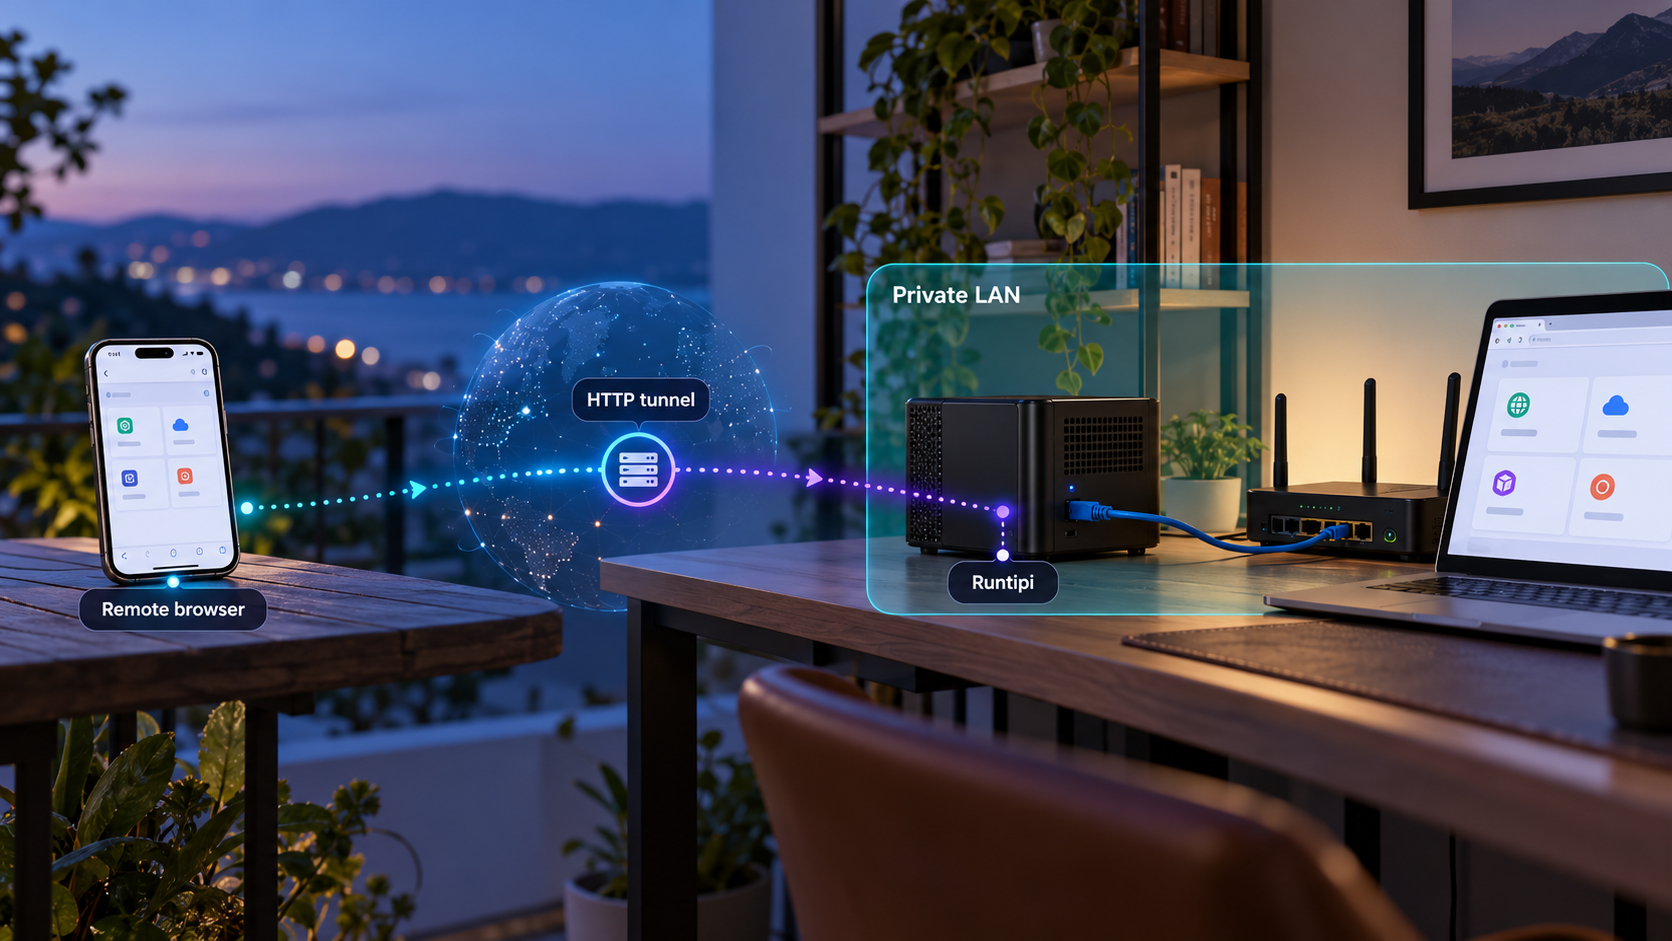
Build a practical home-server dashboard first, then make it reachable without opening an inbound router port
Runtipi is a Docker-based personal home-server orchestrator for installing and managing self-hosted applications through a web dashboard. This guide walks through its official Linux installation path, explains what must be checked before installation, shows how to verify the dashboard locally, and covers routine management and troubleshooting. After the local deployment works, we add remote access with a Localtonet HTTP tunnel. Exact system requirements, the local dashboard address, and its listening port can change, so they must be confirmed from the current Runtipi installer and runtime configuration rather than guessed.
📋 What's in this guide
What Runtipi does and where Localtonet fits
Runtipi is a free and open-source personal home-server orchestrator. It is designed to run and manage multiple self-hosted services on one server, using Docker containers and a browser-based management interface. Instead of manually assembling every application stack, users can browse an application catalog, supply any required settings, install applications, monitor the system, apply updates, adjust configuration, and manage backups from the dashboard.
The project describes support for most 64-bit Linux systems, but that statement is intentionally broad. It does not establish that every Linux distribution, processor, virtual machine, container host, or storage arrangement is supported. Before installing, compare the machine with the current compatibility information shown by Runtipi and pay close attention to any warnings produced by the installer.
Runtipi and Localtonet solve different parts of the workflow. Runtipi installs and orchestrates applications on the Linux server. Localtonet provides connectivity to a service that is already running locally. Our client establishes an outbound connection to a Localtonet relay server, so the selected local service can receive traffic through a public address without inbound router port forwarding, firewall changes, VPN setup, or a public IP address.
This separation is important. A tunnel does not install Runtipi, start its containers, repair an unhealthy application, or configure dashboard authentication. It forwards requests to the local target you select. The correct order is therefore to install Runtipi, confirm that its management interface works from the local network, understand which local address and port it uses, and only then configure remote access.
Publishing the Runtipi management dashboard is not the same as publishing an application installed through Runtipi. Each service may have its own local endpoint, authentication model, data sensitivity, and network requirements. Create a tunnel only for the specific endpoint that needs remote access.
Prerequisites and installation decisions
Start with a dedicated or carefully managed Linux machine that you control. Runtipi advertises compatibility with most 64-bit Linux systems and uses Docker for its application workloads. The supplied project material does not provide a complete distribution matrix, minimum CPU count, minimum memory, minimum disk capacity, required filesystem, or supported Docker version. We will not invent those values. Check the current Runtipi requirements for the exact release you intend to install, especially when using ARM hardware, a virtual machine, a cloud server, or an unusual Linux distribution.
The host also needs working internet access during setup so that it can retrieve the installer and required software or container images. Ensure that DNS resolution and outbound HTTPS access work. If the host is subject to an organizational proxy or egress policy, confirm that the installation is permitted before running it.
Plan persistent storage before adding applications. Containerized services may store databases, media, documents, credentials, and configuration that must survive restarts and upgrades. Estimate storage from the workloads you intend to run rather than from Runtipi alone. A small utility and a large media library have very different capacity requirements.
You should also decide who administers the server. The person running the installer needs sufficient permission to perform the system-level operations requested by the official installation process. Do not assume that every command should be run as the root account, and do not add sudo automatically. Follow the installer’s current permission guidance and review its output.
| Requirement | What is established | What you must verify |
|---|---|---|
| Operating system | Runtipi is intended for most 64-bit Linux systems. | Confirm that your exact distribution, release, architecture, and deployment model are supported. |
| Container platform | Runtipi is based on Docker and runs services in Docker containers. | Use the current Runtipi guidance to determine whether Docker must already exist or is handled by the installer. |
| Compute resources | Requirements depend on Runtipi and the applications being installed. | Check current minimums and size CPU and memory for the intended workloads. |
| Storage | Applications can maintain persistent data, configuration, and backups. | Choose adequate durable storage and establish a backup destination and retention plan. |
| Local networking | The management interface is browser-based. | Record the exact local scheme, IP address, hostname, and port reported by the installed configuration. |
| Remote access | A Localtonet HTTP tunnel needs a reachable local IP address and port. | Confirm that the Localtonet client device can reach the Runtipi endpoint before creating the tunnel. |
The official quick-start command downloads a script and sends it directly to a shell. That is convenient, but it also means the retrieved content executes with the permissions of the current session. Confirm that the hostname is correct, use a trusted network and DNS environment, and review the current project instructions before proceeding. If your security policy requires downloading and auditing scripts separately, follow the project’s approved manual or reviewed installation path rather than modifying the command by guesswork.
Install Runtipi using the official Linux workflow
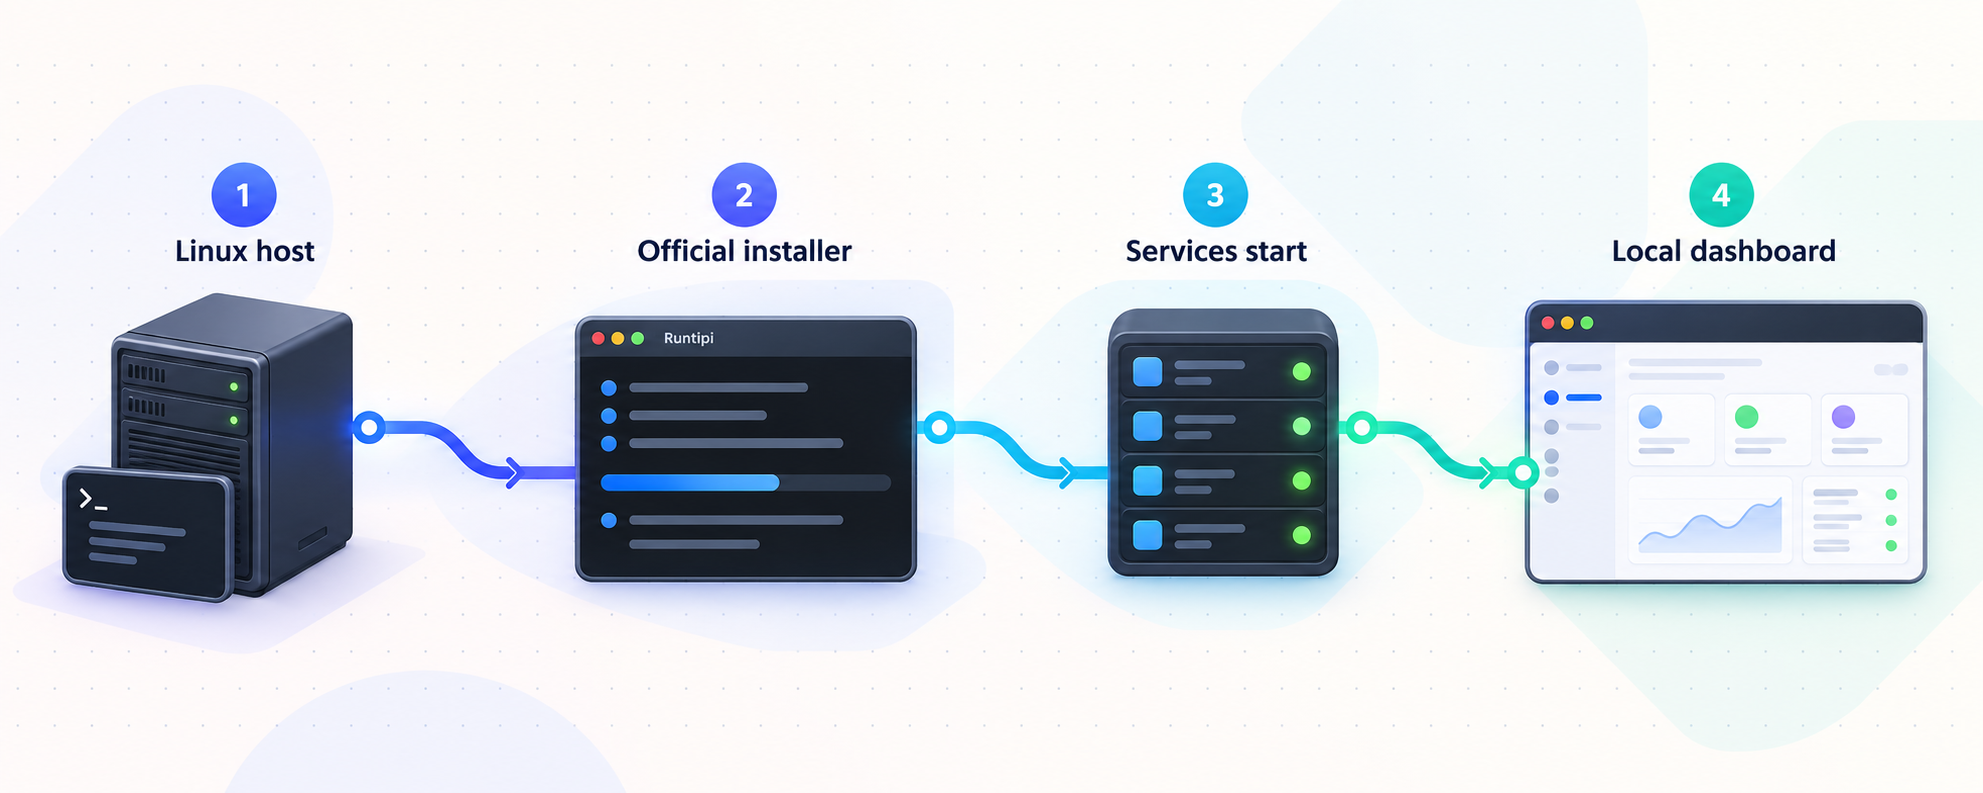
The official Runtipi website presents a one-command Linux setup. Run the installation from the Linux host that will operate as the home server, not from an unrelated desktop unless that desktop is the actual target server.
Open a terminal on the target Linux server
Connect locally or through an administration method you already trust. Confirm that you are operating on the intended machine and that its network, storage, and architecture match the current Runtipi requirements. If the server contains important data, create a tested backup before allowing an installer to alter it.
Run the official setup command
The Runtipi homepage currently provides the following command. Do not add undocumented flags, change its destination, or combine it with unrelated Docker setup commands unless the current official instructions explicitly require that change.
curl -L https://setup.runtipi.io | bashRead the installer output and complete any requested actions
Watch the terminal for compatibility checks, prompts, warnings, failures, and the resulting access information. The supplied evidence does not establish every prompt or whether the flow is identical on every supported Linux system, so follow the current installer rather than relying on screenshots or instructions from an older release.
Record the actual dashboard endpoint
Save the exact local URL or listening details shown by the installation and runtime configuration. In particular, identify whether the dashboard uses HTTP or HTTPS, which address it binds to, and which port it listens on. These values are intentionally not hardcoded here because they are not established by the supplied project evidence and may vary.
Do not treat a completed command as proof that every container is healthy. Installation may finish while a service is still starting, downloading an image, waiting for a dependency, or encountering a host-specific problem. Local verification is the next required stage.
The available evidence confirms that Runtipi has a web dashboard, but it does not establish a universal local address, port, or scheme. Supplying a familiar-looking port would risk directing requests to the wrong service. Use the endpoint reported by your installation or documented in its current configuration.
Verify the Runtipi dashboard on the local network
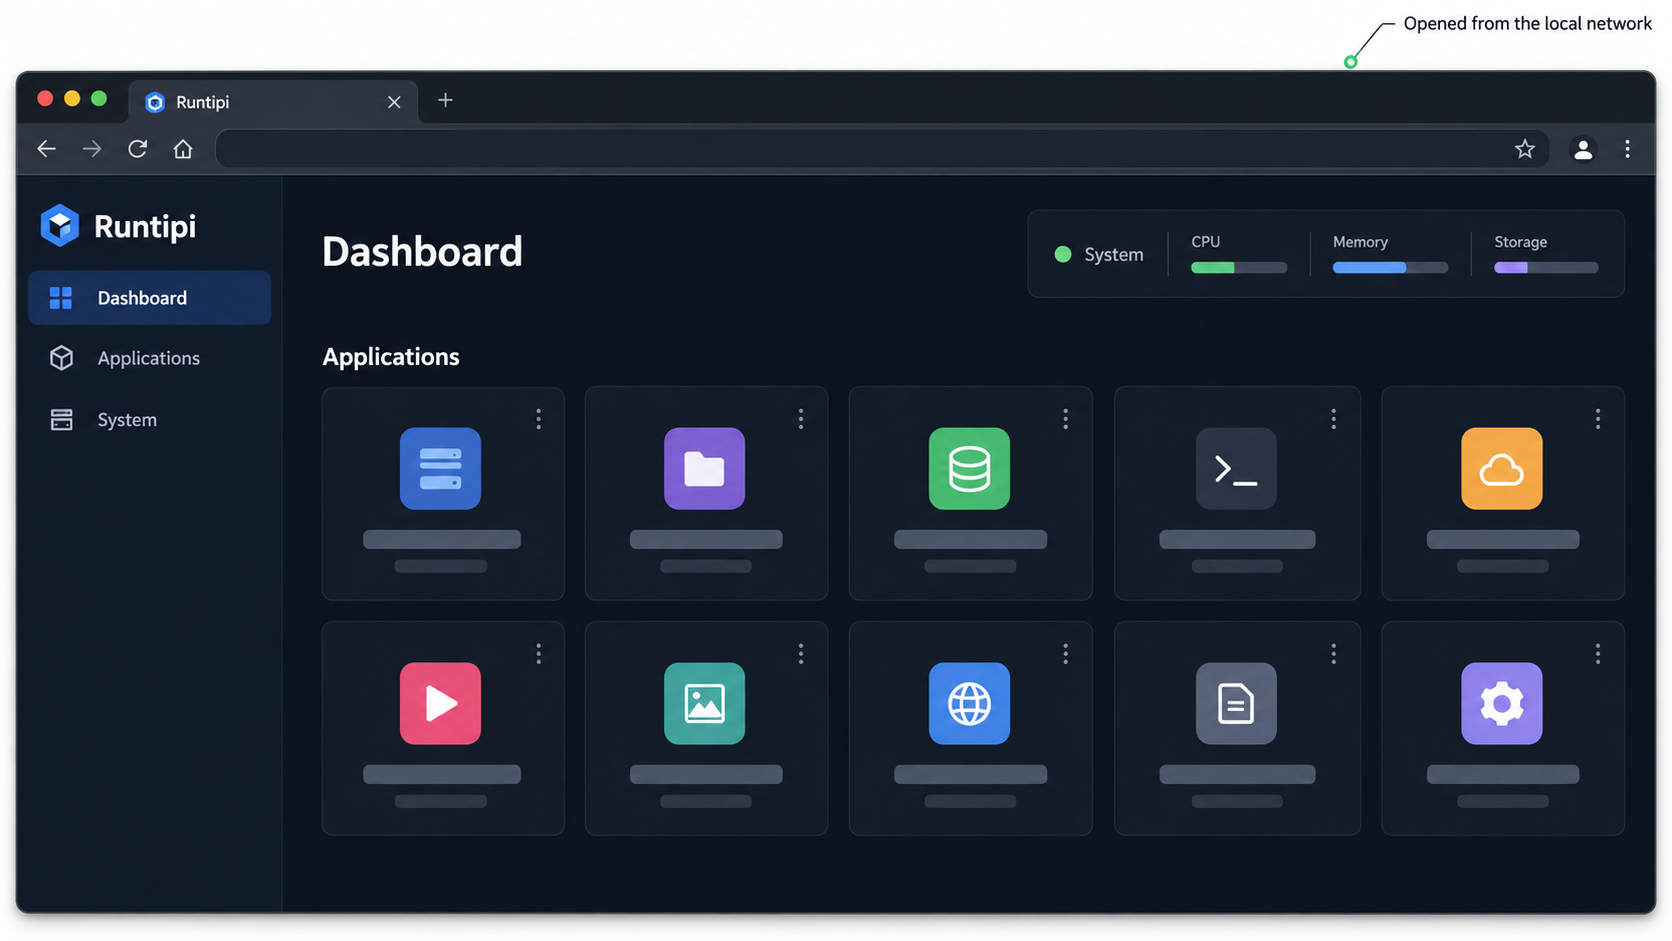
Before installing applications or exposing anything remotely, open the recorded dashboard address from a browser that can reach the server. Use the complete endpoint, including the scheme and non-default port if one is present. A successful connection should display the Runtipi interface rather than a generic proxy page, a different service, a directory listing, or an unrelated administration console.
Complete any first-run setup presented by the installed version. Create strong, unique credentials if the interface requests an administrator account. The exact first-run screens and credential requirements are not established by the supplied evidence, so they should be followed as displayed rather than predicted here.
Once signed in, confirm that the dashboard can display system status and application-management controls. Navigate through the interface without immediately changing advanced settings. This basic check distinguishes a usable deployment from one where only the front-end page loads while backend operations fail.
Verify from the server and from another local device
If practical, test in two places. First, test from the Linux host itself or through a local browser environment. Second, test from another device on the same trusted network. The second test is particularly useful for Localtonet because our client must be able to reach the target over the address you provide.
A dashboard that works only through a loopback address such as 127.0.0.1 may still be tunnelable when the Localtonet client runs on that same host. It will not be reachable through that loopback address from a separate client device. Conversely, a dashboard listening on a LAN address can potentially be targeted by a Localtonet client running elsewhere on the same reachable network. Choose the client location accordingly.
Perform a small functional test
Confirm that dashboard actions produce expected responses. For example, check the system-status view and inspect the available application catalog. If you install a test application, read its requirements before proceeding and verify it locally as a separate service. An application may expose a different port or protocol from the Runtipi dashboard, and it may need its own tunnel if remote users must reach it.
Avoid using the public Runtipi demonstration environment as evidence that your local deployment works. A public demo can illustrate the interface, but it does not test your server, storage, Docker environment, network, or application containers.
Install applications, maintain the server, and handle updates
After the dashboard works, Runtipi can be used to install and manage applications from its catalog. The project describes nearly 300 available applications, but the catalog and individual versions can change. Review each application’s form, storage behavior, exposed ports, authentication, and dependencies before installation. A one-click installation reduces repetitive setup, but it does not remove the need to understand what an application stores or exposes.
Treat every installed application as its own service. Some applications contain personal documents, media libraries, API keys, or administrative controls. Others may be intended only for local automation. Do not automatically expose every installed application simply because the dashboard makes installation easy.
Back up before significant changes
Runtipi provides application backup and restore functionality. Use it before upgrades, major configuration changes, or migrations. A backup is useful only if it includes the data required by the application and can be restored successfully, so periodically test restoration rather than relying only on the presence of backup files.
Also consider host-level recovery. Application backups may not replace backups of the broader server configuration, encryption keys, external mounts, manually customized files, or data stored outside the paths covered by an application backup. Document where important data resides.
Apply updates deliberately
Runtipi supports update notifications and dashboard-driven updates. Advanced administrators can also use the project CLI where a release explicitly documents a command. For example, the supplied v4.10.2 release instructions specify running the following from the root directory of an existing Runtipi installation:
./runtipi-cli update v4.10.2This command is specific to that release instruction. It should not be interpreted as a universal command for every future version, and it should not be run from an arbitrary directory. The same release notes direct installations coming from version 3 or earlier to use a migration guide. Always read the release notes for the source and target versions, create a backup, and account for breaking changes before updating.
The v4.10.2 release notes state that application updates pull target images before stopping the current deployment and attempt to preserve the application’s previous running state. They also describe restoration of previous application files, environment, network assignment, and containers where possible after a failed application update. If automatic recovery also fails, a protected recovery snapshot and manual cleanup path may remain. These behaviors are useful safeguards, but they are not a substitute for independent backups or post-update verification.
Use customization carefully
Runtipi supports customization of application settings and Docker Compose files, with project guidance stating that custom Compose changes can remain through updates. Record every customization and explain why it exists. Persistent customization is valuable, but it can also preserve an obsolete option or create differences from the standard application definition.
After changing an application, test its local endpoint again. If an update changes a listening port, scheme, container state, or reverse-proxy behavior, an existing tunnel can continue pointing at an obsolete target. Localtonet forwards to the configured local address and port; it does not automatically infer application-level configuration changes.
Access the working Runtipi dashboard remotely with Localtonet
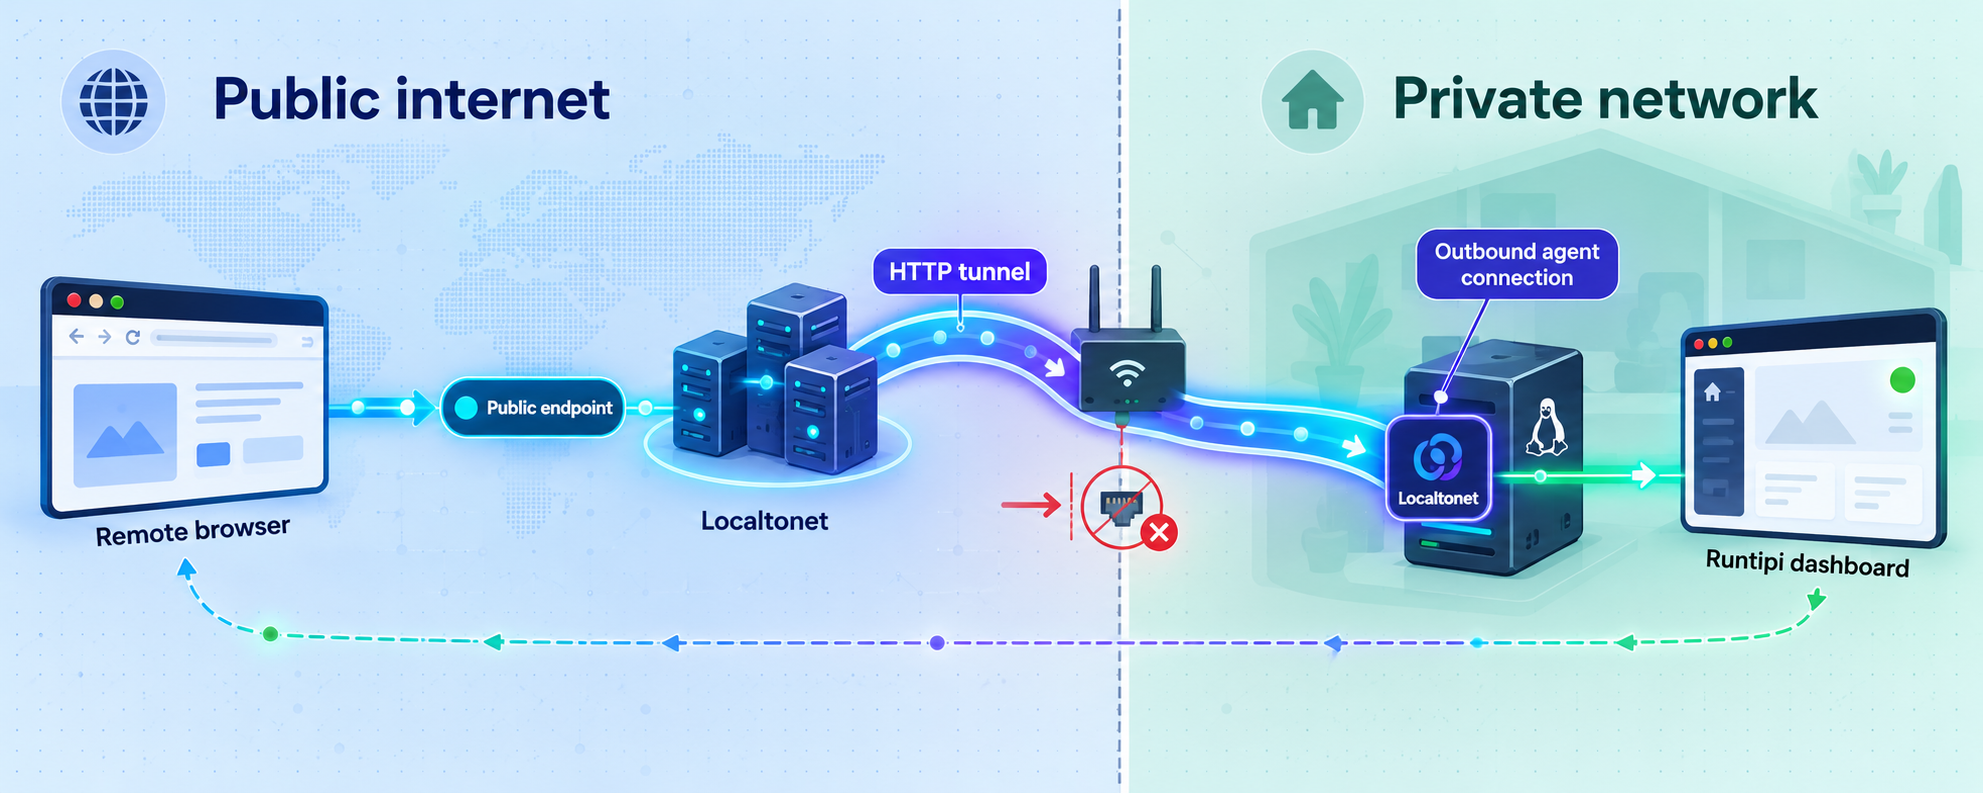
Add remote access only after local verification succeeds. For a browser-based Runtipi dashboard, an HTTP tunnel is the appropriate starting category. The exact local target must come from your installed Runtipi configuration. If the dashboard locally uses HTTPS rather than HTTP, confirm the appropriate current tunnel configuration in our documentation instead of silently substituting a different scheme.
Install and run the Localtonet client on the Runtipi server or on another device that can reach the dashboard. Running the client on the same server often allows it to target a loopback-bound service, while a separate client requires a network-reachable server address. The tunnel remains available only while the selected client device is connected and the tunnel is running.
Install and run the Localtonet client
Place the client on the Runtipi host or another device with a confirmed route to the dashboard. Use the current Localtonet installation method for that operating system. Do not copy a device token into scripts, screenshots, or public documentation.
Authenticate or select the client device
Use the device-specific authentication token associated with the client that will carry this tunnel. A token identifies the device and must remain private. Confirm that the selected device appears connected before continuing.
Select an available relay server
Choose a currently available server or region from the Localtonet dashboard. Available server codes can vary and must be obtained from the current product rather than copied from an old tutorial.
Create the HTTP tunnel configuration
Select the HTTP tunnel family and enter the local IP address and port that you already verified for the Runtipi dashboard. For a client running on the same server, use the appropriate locally reachable address. For a separate client device, use an address reachable from that device. Select the required HTTP process type from the currently available generated subdomain, supported selected subdomain, or custom-domain choices.
Start the tunnel
Creating the configuration does not make it active. Press the Start button and wait until the tunnel is running. Our platform then provides the public address associated with that tunnel configuration.
Test the assigned public URL
Open the public URL from a network outside the server’s LAN, such as a mobile connection. Confirm that it reaches the intended Runtipi page and that authentication is required where expected. Stop the tunnel immediately if it exposes the wrong service or displays an unintended setup screen.
For current dashboard details, process types, and field names, consult the Localtonet HTTP tunnel documentation. Exact custom-domain DNS requirements should always be checked against current documentation before changing DNS records.
| Component | Required value | How to validate it |
|---|---|---|
| Client device | The Runtipi host or another device able to reach it | Open the local dashboard endpoint from that device before creating the tunnel. |
| Local IP address | The address where the dashboard is reachable from the client | Use the exact address proven during local verification, not an assumed container address. |
| Local port | The dashboard’s actual listening port | Obtain it from the installer output or current runtime configuration. |
| Tunnel state | Started and attached to a connected client | Confirm both the client connection and running tunnel in the dashboard. |
| Public result | The assigned public URL | Test from an external network and verify the page identity and authentication behavior. |
A public URL can make the selected local service reachable from the internet. Complete first-run setup, configure strong application authentication, apply available security updates, and restrict administrative access as much as the application allows before starting the tunnel. Stop or delete the tunnel when remote access is no longer required.
Security boundaries and safer exposure practices
Container isolation, a public HTTPS address, and an authenticated dashboard address different layers of the system. None of them eliminates the need to maintain the Linux host, update Runtipi, secure application accounts, and protect stored data.
The Runtipi project explicitly warns that it is built and maintained by volunteers, is under active development, and carries no guarantee of support or security. That warning does not mean the project cannot be useful. It means administrators should assess releases, track vulnerabilities relevant to their applications, maintain backups, and avoid treating convenience as a security guarantee.
Expose the smallest possible surface
Decide whether remote users truly need the Runtipi administrator dashboard. In many deployments, users need one installed application but do not need the orchestration interface. Publishing only the required application can reduce exposure of management capabilities. If both an application and the dashboard are needed, treat them as separate targets with separate tunnels and access decisions.
Protect every credential
Use unique passwords for the Runtipi administration account and installed applications. Store them in a password manager and enable stronger authentication mechanisms when supported by the relevant application. Localtonet authentication tokens are device credentials and must not be committed to a repository, pasted into support messages, or embedded in a public command example.
Maintain the host as well as the containers
Keep the Linux operating system and its underlying components updated according to the distribution’s maintenance process. Review disk usage, failed services, container health, and backup results. Runtipi can simplify application management, but the host remains part of the security and availability boundary.
Test exposure from outside the LAN
An internal browser test proves local reachability, while an external test proves the public path. Use an unrelated network and verify the exact hostname, page identity, login requirement, and expected application behavior. Do not stop at a successful HTTP status code because the wrong local service can also return a successful response.
Troubleshooting installation, dashboard, and tunnel problems
The setup command cannot be downloaded
Confirm that the Linux host can resolve setup.runtipi.io and establish outbound HTTPS connections. Check system time, DNS configuration, proxy requirements, and organizational egress controls. Do not work around certificate failures by disabling verification. If the endpoint is unavailable, wait or use only an alternative installation method explicitly documented by Runtipi.
The installer reports an unsupported environment
Stop and compare the host with the current project requirements. Verify the CPU architecture, Linux distribution, operating-system release, available storage, and any virtualization restrictions. “Most 64-bit Linux systems” is not the same as every system. Avoid forcing the installation past a compatibility check unless the project specifically documents that procedure.
The dashboard does not open locally
Recheck the exact endpoint reported by the installation. A mistake in the scheme, host, or port can look like an application failure. Confirm that Runtipi and its required containers are running using the project’s current diagnostic workflow. Review the installer or service output for errors, but do not delete containers, networks, volumes, or installation directories blindly because they may contain persistent application data.
The dashboard works on the server but not from another LAN device
The service may be bound only to a loopback address, the server may have a host firewall policy, or the devices may lack a route between their network segments. Confirm the bind address and intended network design. If Localtonet runs on the same server, local loopback reachability can be sufficient for that client. If Localtonet runs elsewhere, the dashboard must be reachable from the client device.
The Localtonet tunnel is configured but unavailable
Confirm that the selected Localtonet client is connected and that the tunnel has been started. Creating a tunnel alone does not start it. The public endpoint also stops being available when the client disconnects or the tunnel stops. Check that the selected authentication token belongs to the intended device and that the current relay selection is valid.
The public URL returns an error
Test the local target again from the Localtonet client device. Verify the local IP address, port, and scheme. If Runtipi changed after an update or configuration edit, update the tunnel target only after confirming the new endpoint locally. A connection error often indicates that the service is not listening where the tunnel expects, while an unexpected page often indicates that the target points to the wrong service.
The public URL displays a different application
Stop the tunnel immediately. Recheck the local port and host. Home servers commonly run multiple web services, so a valid response does not prove the target is correct. Open the local endpoint directly from the client device and compare the page before restarting public access.
An application update fails
Read the Runtipi update result and determine whether automatic recovery restored the previous application state. For releases that support protected recovery snapshots, retain that recovery material until the application is confirmed healthy. Do not repeatedly retry an update without checking disk capacity, image-download failures, configuration compatibility, and release-specific migration requirements.
The dashboard works, but an installed application does not
Verify the application independently. The Runtipi dashboard and an installed application can have different containers, ports, configuration, storage, and authentication. Check the application’s status and required settings in Runtipi, then test its own local endpoint. Do not repoint the dashboard tunnel to an application port unless the goal is specifically to publish that application.
Frequently asked questions
What operating system does Runtipi require?
Runtipi describes support for most 64-bit Linux systems. That does not guarantee every distribution, version, architecture, virtualized environment, or container host. Confirm the current compatibility requirements for the release you plan to install.
What is the official Runtipi installation command?
The official Runtipi homepage provides curl -L https://setup.runtipi.io | bash as its quick-start command. Review the current instructions and the security implications of piping a downloaded script into a shell before running it.
What port does the Runtipi dashboard use?
A universal dashboard port is not established by the supplied project evidence. Use the exact local URL or listening configuration reported by your installation. Do not copy a port from an unrelated tutorial or older release.
Do I need to configure router port forwarding?
Not for the Localtonet workflow described here. Our client establishes an outbound connection to a Localtonet relay server, so the tunnel does not require inbound router port forwarding, firewall changes, VPN setup, or a public IP address.
Should the Localtonet client run on the Runtipi server?
It can run on the Runtipi server, which is useful when the dashboard is reachable only through a local address. It can also run on another device, provided that device can reliably reach the dashboard’s actual IP address and port.
Does creating a Localtonet tunnel make it active?
No. After creating the tunnel configuration, you must start it. The public endpoint is available only while the selected client device remains connected and the tunnel is running.
Can one HTTP tunnel expose every Runtipi application?
An HTTP tunnel points to a specific local target. Installed applications may use different local endpoints and may require separate tunnel configurations. Determine what should be public and verify each target independently rather than assuming the dashboard endpoint represents every application.
Is Localtonet acting as a VPN in this setup?
No. This guide uses a standard HTTP tunnel to publish one web endpoint. Localtonet VPN Manager is a separate private mesh VPN feature and should not be confused with HTTP tunneling.
Is Runtipi guaranteed to be secure and supported?
No such guarantee is stated. The project says it is volunteer-maintained, actively developed, and may contain bugs, with no guarantee of support or security. Administrators should maintain the host, review updates, protect credentials, minimize public exposure, and keep tested backups.
Connect your verified Runtipi dashboard with Localtonet
Once Runtipi works locally and you have confirmed its exact IP address, port, scheme, and authentication behavior, create a Localtonet HTTP tunnel for controlled remote access without opening an inbound router port.
Get Started Free →

