

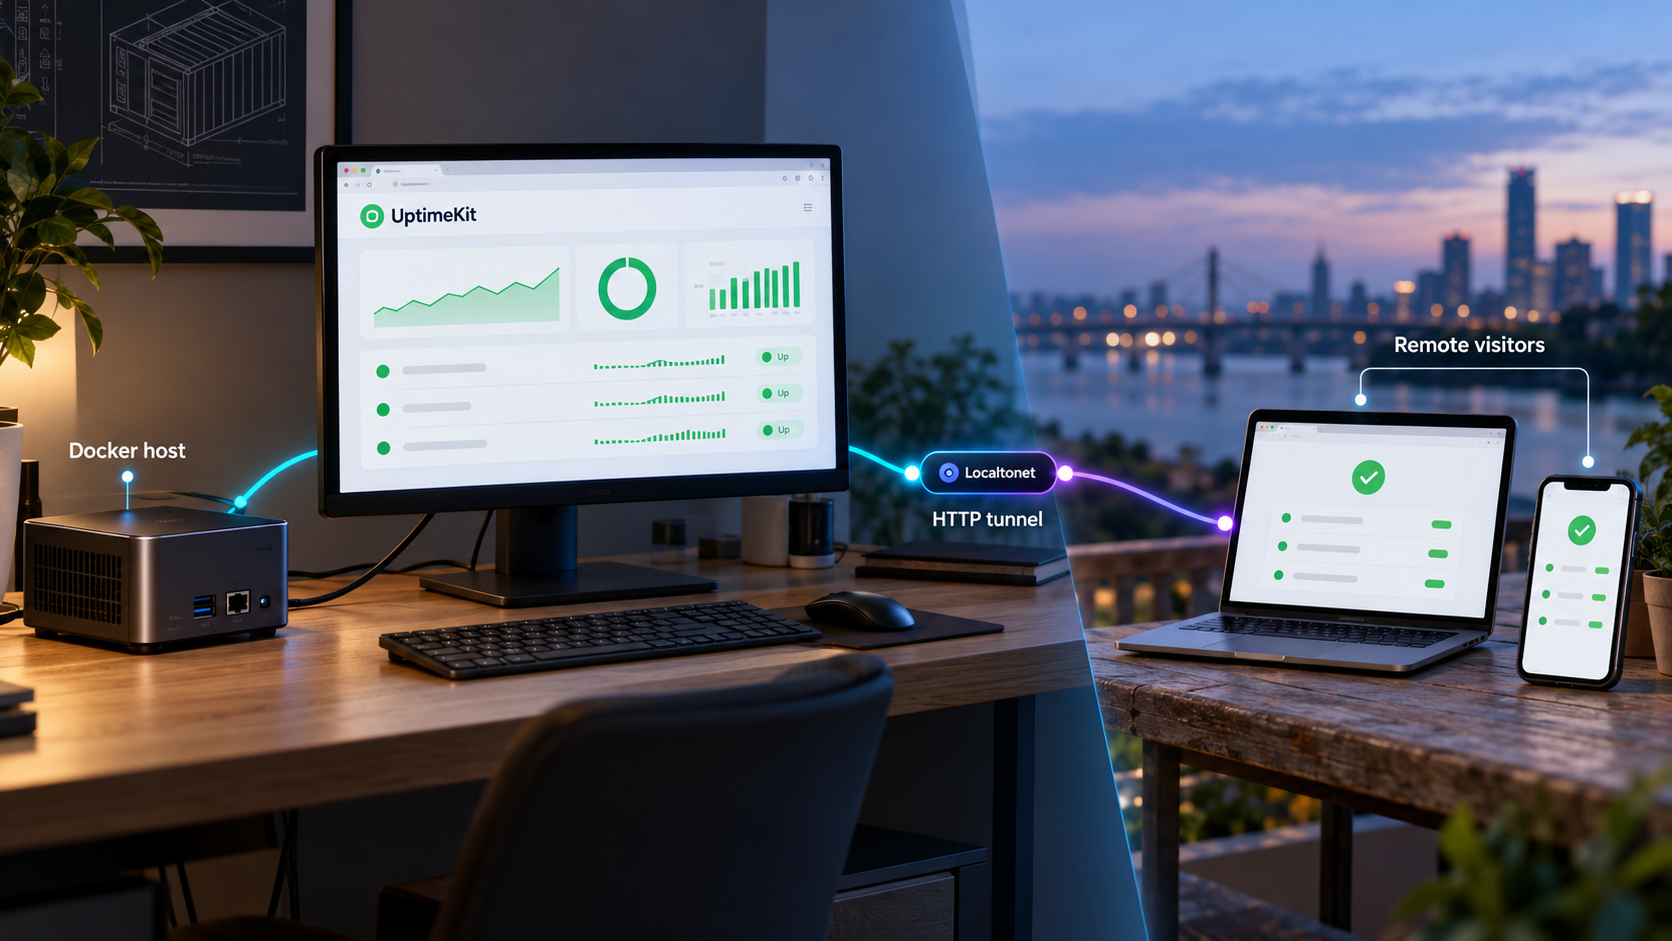
Run your own monitoring dashboard locally, verify the deployment, and make the same web service reachable through a public HTTPS address
UptimeKit is a self-hostable monitoring and status-page application for HTTP and TCP services. This guide starts with the official Docker Compose installation, explains the required environment settings, verifies the service at http://localhost:3000, and covers practical container operations and troubleshooting. After the local deployment works, we connect it to a Localtonet HTTP tunnel so authorized users and status-page visitors can reach it remotely without inbound router port forwarding, firewall changes, VPN setup, or a public IP address.
📋 What's in this guide
Understand the UptimeKit deployment before installing it
UptimeKit combines uptime monitoring, incident communication, analytics, organizations, and customizable status pages in a self-hostable application. It can monitor HTTP and TCP services, collect uptime and response-time information, and provide pages through which users can see service status and incident updates. Its organization support is intended for multi-tenant and team-oriented operation.
The project describes UptimeKit as a distributed monitoring solution. Workers contact the application every 15 seconds to retrieve their assigned monitors and run checks when scheduled. The architecture permits multiple workers and multiple application replicas, although the basic installation in this guide focuses on the official Docker Compose workflow rather than designing a clustered production deployment.
PostgreSQL is a prerequisite for UptimeKit. ClickHouse is optional. The exact services, image references, storage declarations, and networking used by the current installation are defined in the downloaded docker-compose.yml. Because that file is retrieved from the project repository, review it before starting the deployment, especially if you need to understand where persistent data resides or apply your own infrastructure policies.
Both are served by the same UptimeKit container. Publishing the application port therefore makes the UptimeKit web service reachable as a whole. The available evidence does not establish a second port that exposes only public status pages, so this guide does not invent one.
Prepare the Docker host and installation directory
Use a machine that can remain online whenever monitoring and public status access are required. The host must have Docker and the Docker Compose command available. Confirm that the Compose subcommand runs before downloading any project files:
docker compose versionIf that command is unavailable, install Docker with Compose support using the instructions for your operating system. The exact Docker installation method differs between Linux distributions, macOS, and Windows, so it is safer to follow the current platform-specific Docker procedure than to copy a package-manager command intended for a different host.
The official UptimeKit procedure downloads files with curl. Confirm that it is present:
curl --version
You also need an unused local TCP port for the documented application address. The supplied example uses port 3000, resulting in http://localhost:3000. If another program already owns that port, the deployment may fail to bind or may not be the service returned by your browser. This guide retains the documented value rather than guessing at an alternative Compose mapping.
| Requirement | Why it is needed | What to confirm |
|---|---|---|
| Docker with Compose | Runs the UptimeKit deployment and its declared services | docker compose version completes successfully |
| PostgreSQL | Required data store for UptimeKit | Review how the downloaded Compose file provisions or connects to it |
| ClickHouse | Optional component | Do not assume it is mandatory for the basic workflow |
curl |
Downloads the official Compose and environment files | curl --version returns version information |
| Local port 3000 | Provides the documented local UptimeKit endpoint | No unrelated service should occupy the port |
| Persistent storage plan | Protects monitoring, account, status-page, and incident data | Inspect the Compose volumes and database configuration before production use |
Create a dedicated directory and run the remaining commands from it. Keeping the Compose file and environment file together makes subsequent commands predictable:
mkdir uptimekit
cd uptimekit
Treat the resulting .env file as sensitive. It contains the application secret and may contain other deployment settings or credentials supplied by the project. Do not commit it to a public repository, paste it into support messages, or include it in screenshots.
The official download commands retrieve the current files from the repository's main branch. Content on a moving branch can change over time. Read docker-compose.yml and .env before running them, verify that the referenced images and settings meet your requirements, and use an organization-approved pinning process when reproducible deployments are required.
Install UptimeKit with Docker Compose
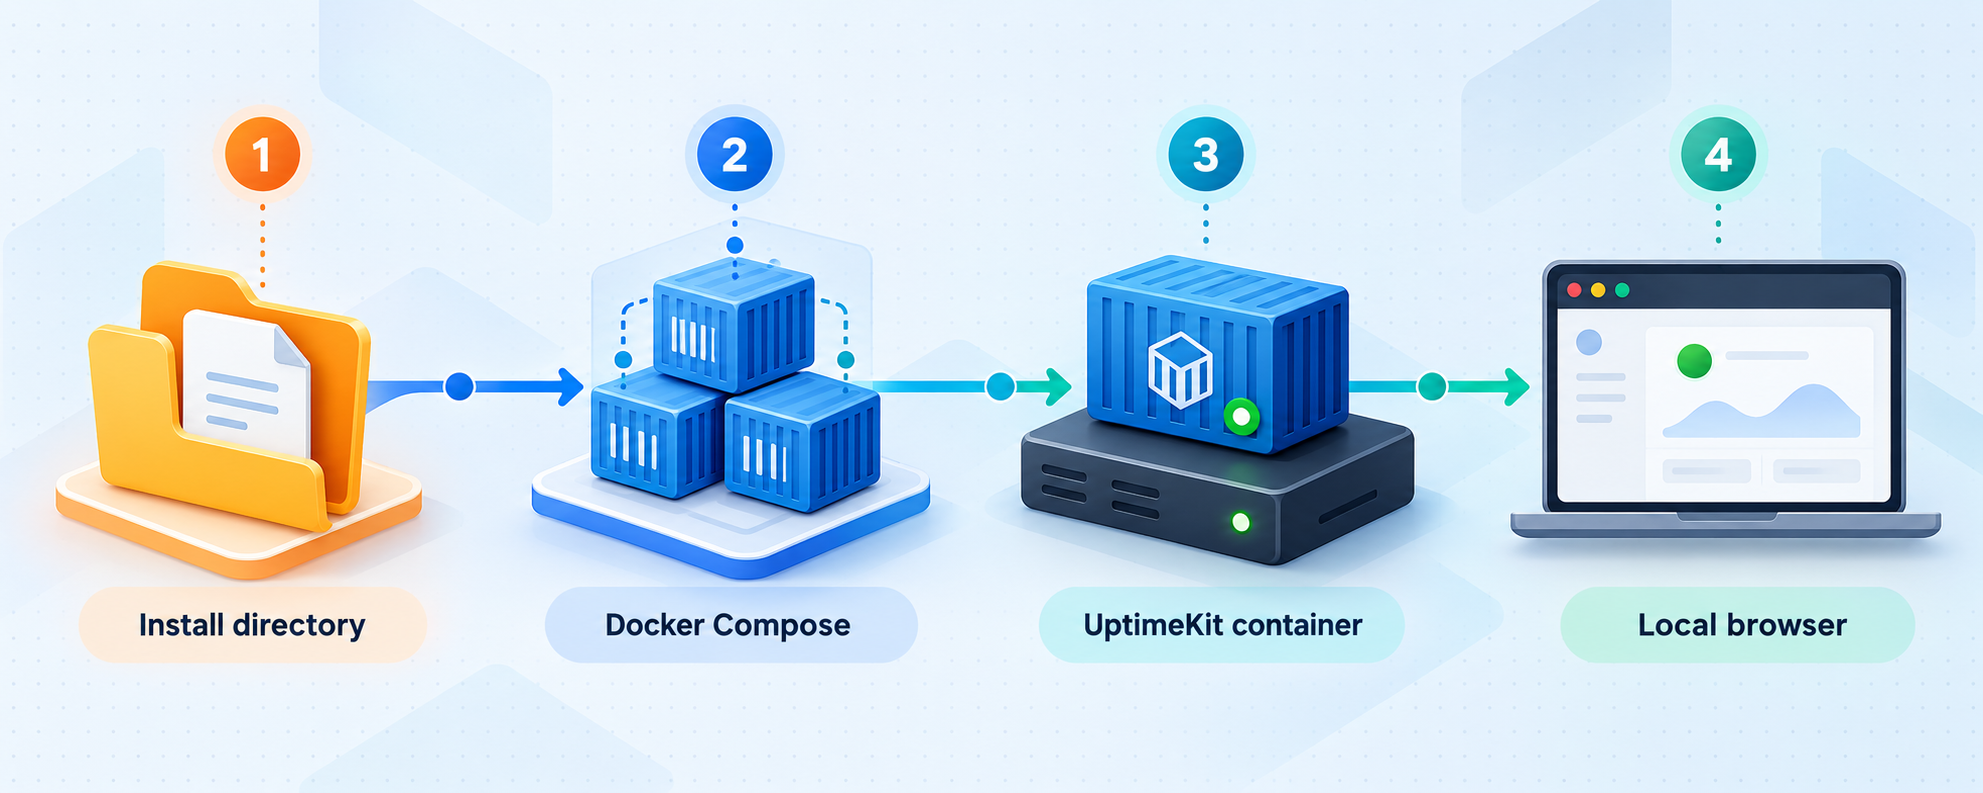
The following sequence follows the project's documented Docker Compose installation. It downloads the current Compose definition and environment example, replaces the placeholder application secret, sets the local application URL, optionally configures a status-page domain, and starts the deployment.
Download the Compose and environment files
From the dedicated installation directory, run the official download command. The environment example is saved locally as .env, which is the filename Docker Compose normally reads for variable substitution.
curl -o docker-compose.yml https://raw.githubusercontent.com/uptimekit/uptimekit/main/docker-compose.yml && curl -L https://raw.githubusercontent.com/uptimekit/uptimekit/refs/heads/main/.env.example -o .envGenerate and set a secure application secret
Open .env, locate APP_SECRET, and replace the placeholder with a unique random value. The project suggests generating a 32-byte hexadecimal value with the following command. Copy only the generated output into the setting and never publish the real value.
openssl rand -hex 32APP_SECRET=replace_with_your_generated_valueSet the initial application URL
For initial local installation and verification, use the documented local URL. This tells the deployment that its application address is http://localhost:3000.
APP_URL=http://localhost:3000Optionally configure a status-page domain
UptimeKit supports the optional APP_STATUS_PAGE_DOMAIN setting. Set it only when you have chosen a real hostname and completed the necessary routing and DNS configuration. The project's example uses status.example.com, which is illustrative and must not be copied as if it belonged to your deployment. The application URL and status-page domain must point at the same UptimeKit service.
APP_STATUS_PAGE_DOMAIN=status.example.comStart the deployment
Save .env, remain in the directory containing both files, and start the Compose project in detached mode.
docker compose up -dDocker may need to download images during the first start, so the application might not respond immediately. Image download and container initialization times depend on the host and network. UptimeKit release v5.2.0 specifically documented Docker images for both amd64 and arm64, but compatibility for any particular host still depends on the image references used by the version you deploy. Inspect those references rather than assuming that every historical or future release has identical architecture support.
APP_SECRET=change_me_to_a_secure_secret is an instruction to replace the value, not a usable production secret. Generate a unique value, store it securely, and avoid changing it casually after users and application data have been created. The available project evidence does not document the consequences of rotating this setting, so plan and test any later rotation before applying it to a production instance.
Verify UptimeKit locally before publishing it
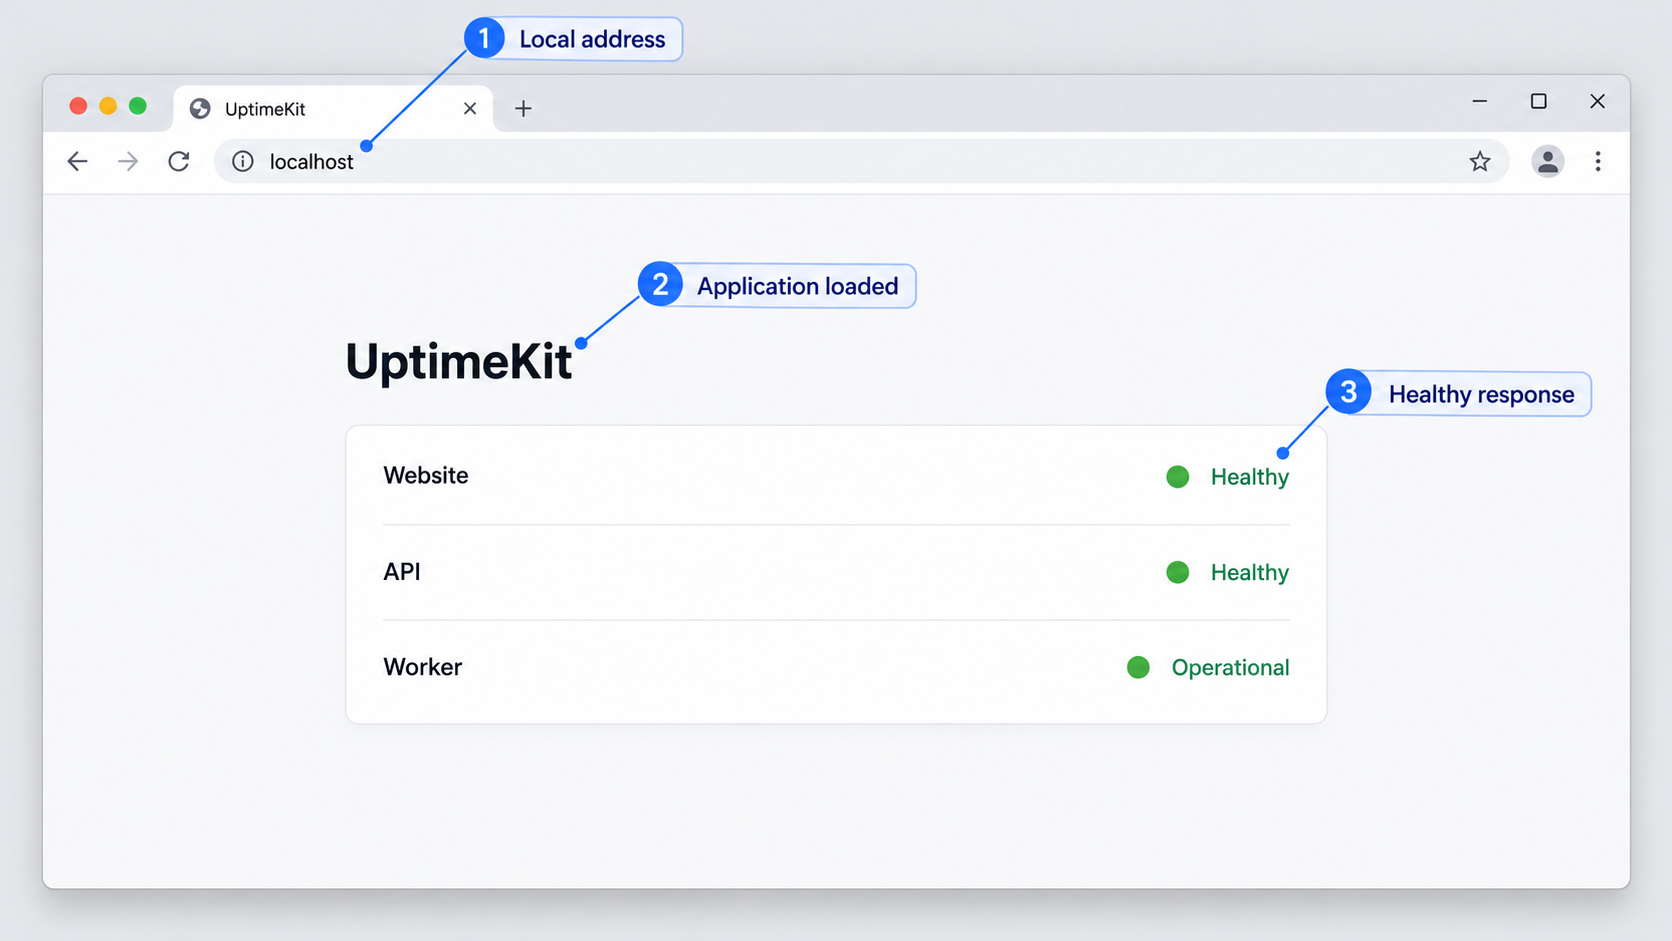
Remote tunneling should come only after local verification. This separation makes troubleshooting much easier: if UptimeKit does not work on the host, a public tunnel cannot repair the application, its database, or its container configuration.
Start by asking Docker Compose for the state of the services:
docker compose psLook for services that remain running instead of repeatedly restarting or exiting. Service names are defined by the downloaded Compose file, so this guide does not invent fixed container names. If startup fails, inspect the project logs:
docker compose logs --tail=200Then open the documented endpoint in a browser on the Docker host:
http://localhost:3000You can also test the HTTP listener from a terminal:
curl -sS -o /dev/null -w '%{http_code}\n' http://localhost:3000An HTTP status code confirms that something answered at that address, but it does not by itself prove that every UptimeKit feature is healthy. A redirect or authentication response may still be normal application behavior. Complete verification in a browser, confirm that the UptimeKit interface loads, and follow the application's on-screen setup steps.
The available project documentation tells users to continue with the steps presented by the application, but it does not establish the exact current sequence, field names, or default credentials for that first-run interface. We therefore do not invent an account name, password, organization name, or setup wizard. Create the requested administrative access through the live interface and use a unique, strong password.
Use a three-layer verification sequence
| Layer | Verification action | What a failure suggests |
|---|---|---|
| Container layer | Run docker compose ps |
An image, process, dependency, or configuration problem |
| HTTP layer | Request http://localhost:3000 |
A port mapping, startup, or listener problem |
| Application layer | Load the interface and complete the on-screen workflow | An application, database, authentication, or initialization problem |
| Remote layer | Open the Localtonet public URL from another network | A tunnel target, client connection, or exposure configuration problem |
Do not move directly to the remote layer if one of the first three layers fails. Record the local HTTP result and relevant container logs before changing multiple settings at once.
Complete the application and status-page configuration
After the interface is available, complete UptimeKit's on-screen configuration. Its documented capabilities include HTTP and TCP monitors, incident management, status pages, organizations, team management, uptime and response-time analytics, and integration that can display monitors from external Instatus pages.
Start with a small test rather than importing an entire production estate. Create the administrative account or equivalent identity requested by the application, establish the required organization context, and add a monitor for an endpoint whose behavior you understand. Confirm that checks run and that the resulting state is plausible before relying on alerts or published status information.
Workers retrieve assigned monitors from the application every 15 seconds. This describes worker coordination, not a promise that every monitor must execute every 15 seconds. The actual monitoring schedule is governed by the configuration exposed by the deployed application. Avoid interpreting the worker polling interval as an independently verified detection-time guarantee.
Plan the dashboard and public status experience together
UptimeKit serves its dashboard and public status pages from the same container. The project explicitly instructs operators to point both APP_URL and APP_STATUS_PAGE_DOMAIN at the same UptimeKit service. This matters when designing remote access because there is no evidenced second container port dedicated to status visitors.
The status-page domain setting is optional. If you are initially using only a Localtonet-generated public URL, first create and start the tunnel so you know the assigned address. Then evaluate whether APP_URL should be changed from its local installation value to the public address used by remote visitors. Because the supplied evidence does not define exactly how UptimeKit uses APP_URL for redirects, cookies, callback URLs, or generated links, test the deployed version rather than assuming those behaviors.
If you change an environment setting, save the file and apply the Compose configuration again:
docker compose up -dRecheck the local interface after any environment change. Then verify login, navigation, monitor pages, and status-page links through the intended external hostname. A browser loading the home page is not sufficient proof that every generated URL is correct.
UptimeKit exposes APP_STATUS_PAGE_DOMAIN, and Localtonet HTTP tunnels can use generated, selected, or custom-domain process types where supported. Exact custom-domain DNS records and availability can change and may vary by configuration. Check the current dashboard and Localtonet documentation before changing DNS. Do not copy a sample domain or guess a DNS target.
Operate, update, and protect the deployment
Self-hosting transfers operational responsibility to you. The application may be straightforward to start, but reliable monitoring depends on the host, containers, database, persistent storage, network, credentials, and upgrade process remaining healthy.
Check status and logs
Run Docker Compose commands from the installation directory so the correct project file and environment are used:
docker compose ps
docker compose logs --tail=200
For an active troubleshooting session, follow new log output:
docker compose logs --follow
Logs may contain URLs, account identifiers, monitor names, internal hostnames, or diagnostic details. Review and redact them before sharing. Do not post the contents of .env.
Restart or reapply configuration
The documented start command is also useful after an environment or Compose change because Docker Compose reconciles the declared project:
docker compose up -dAvoid deleting volumes as a troubleshooting shortcut. A command that removes persistent volumes can destroy database data. The exact volume names and database credentials depend on the downloaded Compose and environment files, so inspect those files before designing backup or recovery commands.
Back up the database and configuration
At minimum, preserve a protected copy of your Compose definition, the non-public deployment settings needed for recovery, and the PostgreSQL data using a backup procedure appropriate to the database configuration. Test restoration on a separate environment. Copying an actively changing database directory is not automatically equivalent to a consistent database backup.
The available UptimeKit evidence establishes PostgreSQL as required but does not document a canonical backup command, database name, volume name, or retention schedule. Those values must come from the Compose file and environment actually deployed. We do not guess them here.
Plan upgrades deliberately
Before upgrading, read the release notes between your current version and the target version, preserve recoverable backups, and review changes to the Compose and environment examples. Test upgrades away from the production monitoring service when possible. Release v5.2.0, for example, included changes related to event throughput, status-page behavior, monitor-name overrides, two-factor authentication repair, accessibility and audit findings, incident behavior, and multi-architecture Docker images. That illustrates why an upgrade can affect more than the container image alone.
The official basic installation downloads files from the main branch and does not, in the evidence supplied for this guide, define a complete version-pinning or rollback workflow. Organizations that require reproducibility should preserve reviewed deployment files and establish their own tested release-control procedure rather than repeatedly downloading mutable files without comparison.
Publish UptimeKit through a Localtonet HTTP tunnel
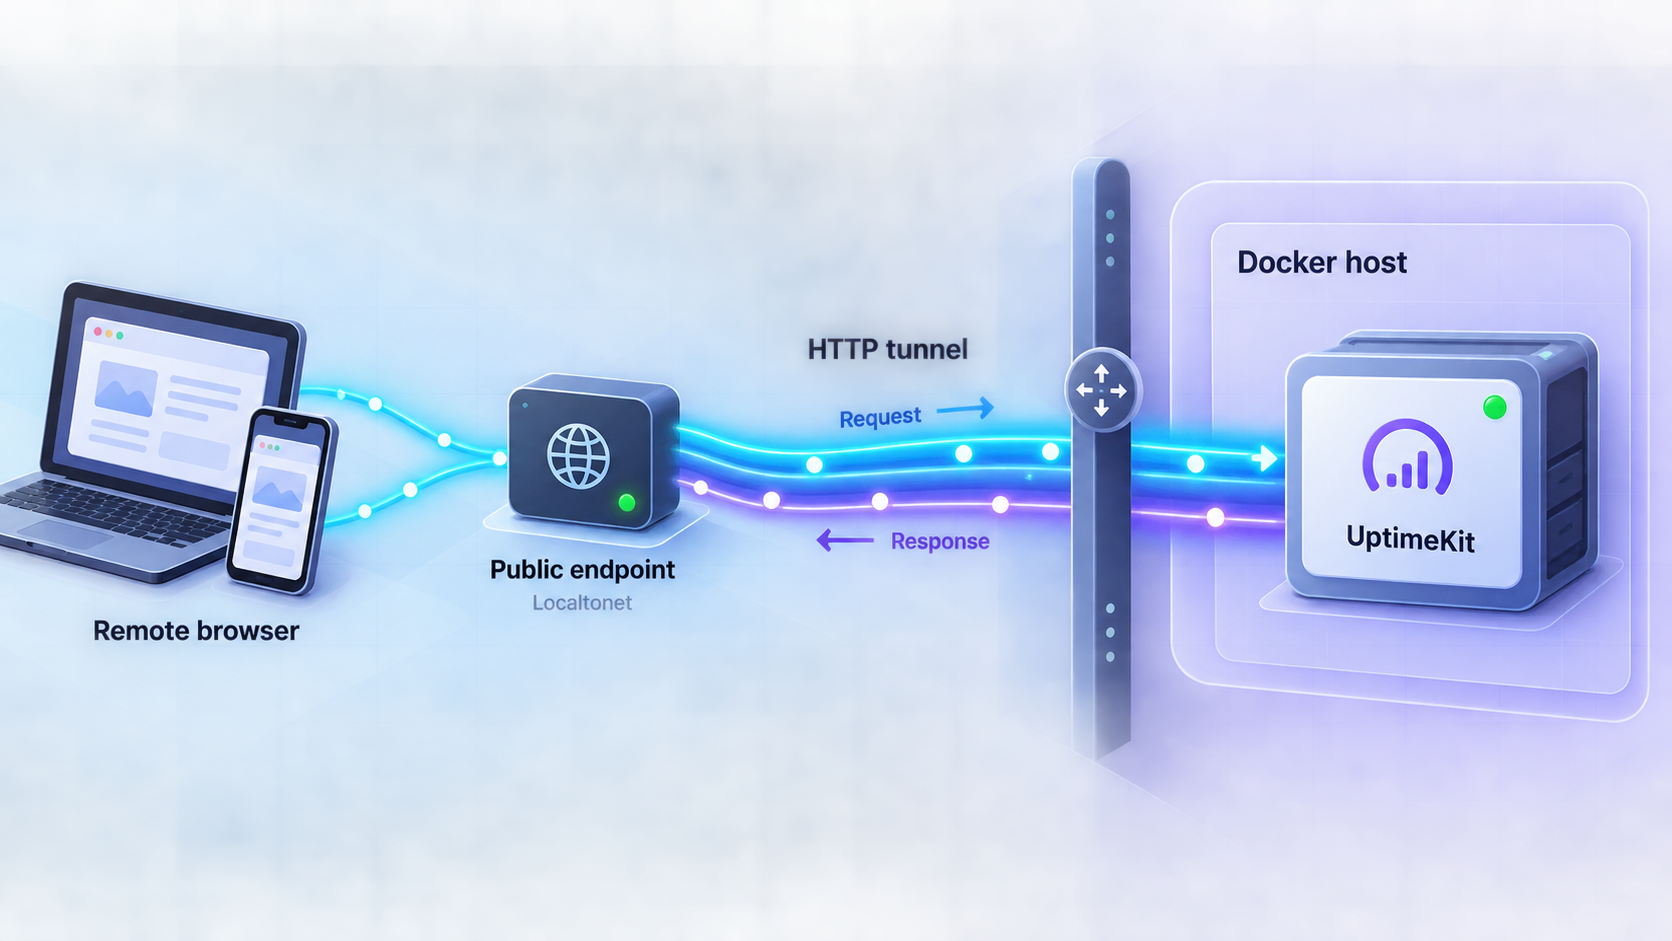
Once http://localhost:3000 works on the host, Localtonet can expose that HTTP service through a public address. Our client establishes an outbound connection to a Localtonet relay server, so the workflow does not require inbound router port forwarding, firewall changes, VPN setup, or a public IP address.
Run the Localtonet client on the UptimeKit host or on another device that can reach the UptimeKit address. Using the same host is the simplest interpretation of localhost:3000. If the client runs elsewhere, localhost refers to that other device, not the Docker host, so the tunnel target must instead be an address reachable from the client. Confirm that address locally before creating the tunnel.
Follow the current Localtonet HTTP tunnel documentation alongside the sequence below. Available relay server codes and interface choices must come from the current dashboard rather than from hardcoded values in an article.
Install and run the Localtonet client
Install our client on the device that can reach the working UptimeKit service. Keep UptimeKit running and confirm that the intended local target responds from that device.
Authenticate or select the device
Use the device-specific authentication token through the supported client workflow, then select that device for the tunnel. Never place the token in documentation, source control, screenshots, or public logs.
Select an available relay server
Choose a server or region offered by the current Localtonet dashboard. Availability may vary, so do not copy a server code from an old guide or another account.
Create an HTTP tunnel to UptimeKit
Select the HTTP tunnel type and point its local target to the verified UptimeKit address and port. When the client runs on the Docker host and the documented mapping is unchanged, that target is 127.0.0.1 on port 3000. Select the appropriate HTTP process type for a generated subdomain, supported selected subdomain, or configured custom domain.
Start the tunnel
Creating a tunnel does not make it run. Press Start and confirm that the selected client is connected. The tunnel remains available only while that client is connected and the tunnel is running.
Test the assigned public URL
Open the assigned HTTPS address from a device or network that is not relying on the Docker host's local loopback connection. Test the dashboard authentication flow and the actual status-page address produced by your UptimeKit configuration. Stop or delete the tunnel when remote access is no longer required.
HTTP and File Server tunnels support Random Sub Domain, Custom Sub Domain, and Custom Domain process types, with all three serving content at a public HTTPS address. The exact options available to you must be confirmed in the current product interface, and this article does not claim that every option, region, or capability is included in every subscription plan.
The tunnel must be started, the selected Localtonet client must remain connected, and UptimeKit must continue listening on the configured local target. If any of these conditions stops, the public service becomes unavailable even if the tunnel configuration still exists in the dashboard.
Secure the dashboard and public status-page workflow
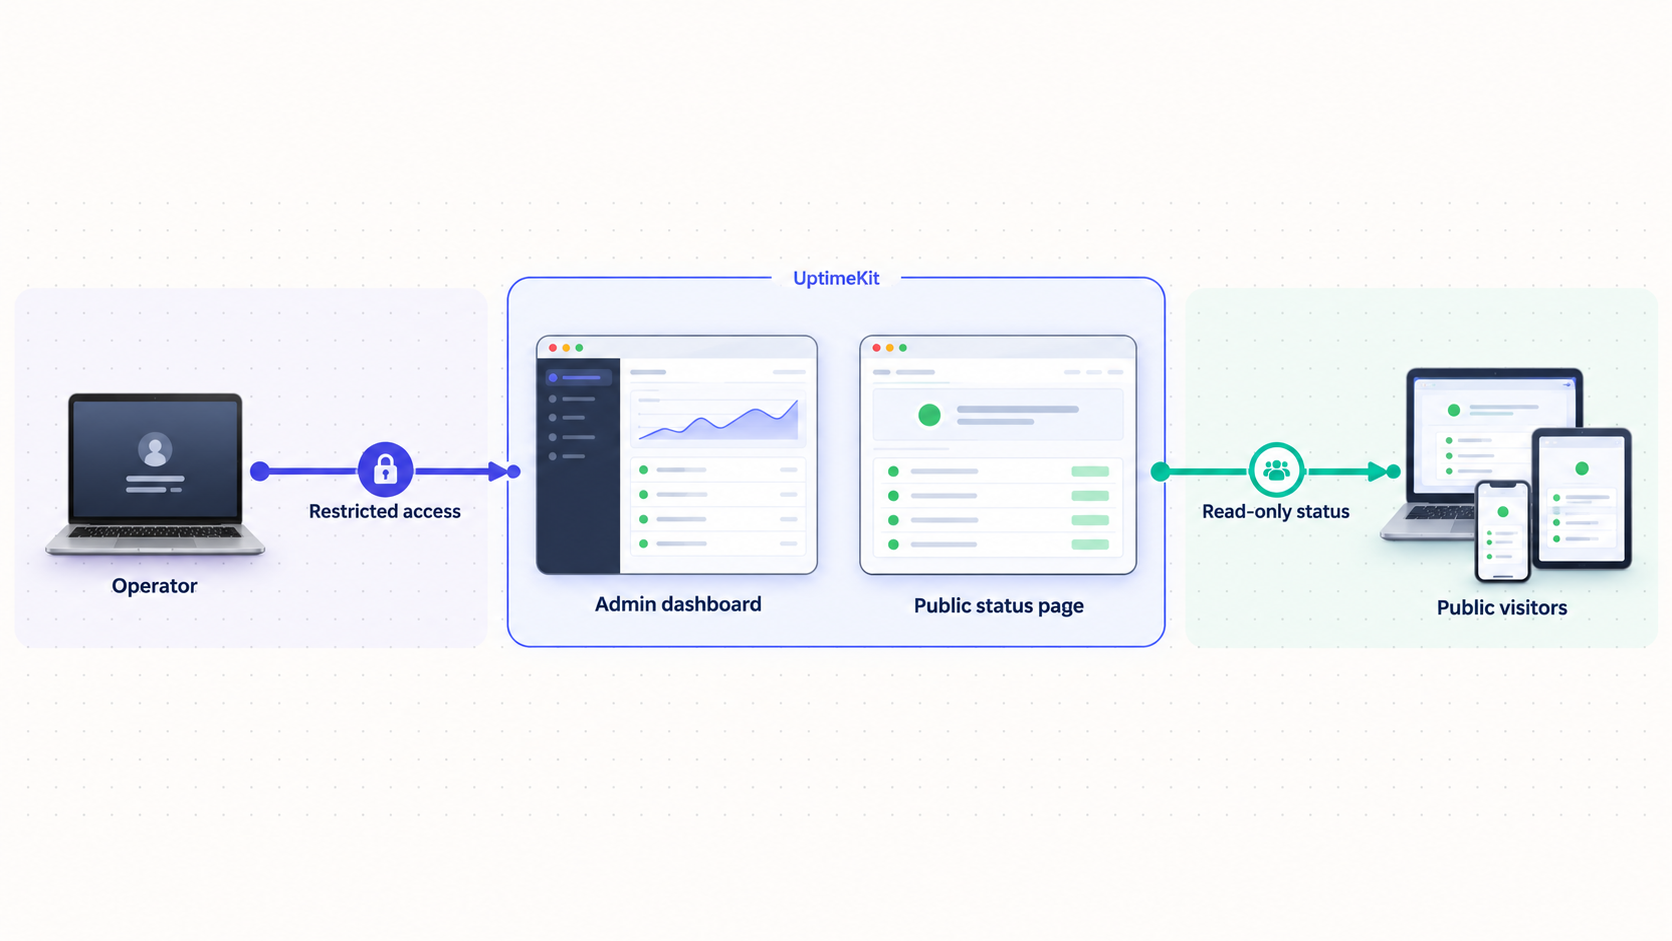
A public status page is intentionally designed for broad visibility, while an administration dashboard is not. Because UptimeKit serves both through the same application service, do not assume that exposing port 3000 publishes only harmless status data. The application's own routing and authentication remain important security boundaries.
APP_SECRET, restrict access to .env, and never include the real value in a tunnel configuration or support post.
Localtonet supplies a public HTTPS address for an HTTP tunnel, but the local target in this workflow is the HTTP listener at 127.0.0.1:3000. Do not describe this as end-to-end application encryption unless you have separately configured and verified encryption on every relevant connection segment. Avoid sending sensitive status or administrative information merely because the browser displays an HTTPS address.
Apply least privilege to host administration, Docker access, database credentials, UptimeKit teams, and Localtonet device tokens. Docker control is highly sensitive because it can provide extensive authority over the host. Keep the operating system and container runtime maintained, and do not expose unrelated administrative services alongside UptimeKit.
Before sharing the tunnel URL, verify that unauthenticated visitors see only information intended for publication and that privileged routes enforce authentication. Do not depend on an obscure URL as an access-control mechanism. If your policy requires network-level restrictions beyond application authentication, validate the currently available Localtonet and application controls before treating the deployment as approved.
Troubleshoot installation and remote-access problems
Docker Compose is not available
If docker compose version fails, resolve the Docker installation first. Be careful not to confuse the current docker compose subcommand with older environments that used a separate docker-compose executable. The documented UptimeKit command uses docker compose.
The download command fails
Confirm that curl is installed, DNS resolution works, HTTPS access to the repository host is permitted, and the current user can write to the installation directory. If the first part of the command fails, the && operator prevents the second download from running. Check that both docker-compose.yml and .env exist and contain readable text before continuing.
Containers exit or repeatedly restart
Run:
docker compose ps
docker compose logs --tail=200
Look for malformed environment values, database startup failures, unavailable images, architecture incompatibility, permission errors, or port conflicts. Correct the first clear error instead of changing unrelated values. Because service names and exact dependencies come from the downloaded Compose file, inspect that file when a log mentions a service not described in this guide.
Port 3000 does not respond
First confirm that the Compose services remain running. Then verify that the downloaded file actually maps the application to the expected host port and that another process is not occupying it. Test from the Docker host using http://localhost:3000. If the service is intentionally running on a remote server, remember that localhost in your laptop's browser points to the laptop, not the server.
The local page works but the Localtonet URL does not
Confirm all four parts of the path: UptimeKit is running, the local target responds from the Localtonet client device, the correct device is connected, and the tunnel has been started. If the client runs in a different machine or container, 127.0.0.1:3000 may point to the wrong network namespace. Use an address reachable from the actual client device and verify it there before updating the tunnel.
The public URL redirects to localhost or produces incorrect links
Review APP_URL. It began as http://localhost:3000 for local verification, but a remotely published deployment may need its externally visible address represented in application configuration. Update only to the real address assigned to your tunnel or custom domain, apply the Compose configuration with docker compose up -d, and retest locally and remotely.
The evidence available for this guide does not document UptimeKit's exact redirect, cookie-domain, or callback behavior, so inspect the browser result and application logs rather than guessing additional environment variables.
The dashboard appears, but the status page does not
Do not search for a separate status-page port. The dashboard and public status pages are served from the same UptimeKit container. Confirm that a status page has been configured through the application, check the generated route or intended hostname, and verify any optional APP_STATUS_PAGE_DOMAIN value. If using a custom hostname, verify its current DNS and Localtonet custom-domain configuration.
Monitoring results are missing or delayed
Confirm that the application and relevant workers remain running and inspect their logs. Workers contact the application every 15 seconds for assignments, but that is not necessarily the configured interval of every monitor. Check the monitor's current configuration, the worker's network access to the monitored destination, and whether the destination permits the check.
The public endpoint disappears after a reboot
Check UptimeKit's Compose services and the Localtonet client separately. A saved tunnel configuration is not sufficient: the selected device must be connected and the tunnel must be running. This guide does not invent operating-system startup commands for either component because service installation differs by platform and client version. Use the supported startup mechanism for your host and verify the complete path after a controlled reboot.
Frequently asked questions
What local port does this UptimeKit installation use?
The documented environment example uses APP_URL=http://localhost:3000, so this guide verifies the application on local port 3000. Review the downloaded Compose file to confirm the actual mapping in the version you deploy.
Does UptimeKit require PostgreSQL and ClickHouse?
PostgreSQL is listed as required. ClickHouse is optional. Review the current Compose definitions before deployment because the exact way these services are provisioned or connected can change with the project files.
Is there a separate UptimeKit port for public status pages?
No separate status-page port is established by the available documentation. The dashboard and public status pages are served from the same UptimeKit container, and both APP_URL and the optional APP_STATUS_PAGE_DOMAIN should point to the same service.
Should I keep APP_URL set to localhost after publishing UptimeKit?
Use the localhost value for initial local verification. For remote operation, evaluate whether the deployed UptimeKit version requires APP_URL to match the public address used by visitors. If you change it, reapply the Compose configuration and test redirects, login, generated links, and status pages. The available evidence does not establish every behavior controlled by this variable.
Can the Localtonet client run on a different machine?
Yes, provided that machine can reach UptimeKit over the network. In that arrangement, do not use 127.0.0.1 unless UptimeKit also runs on the client machine. Configure the tunnel with a reachable local IP address and port, and test that target from the Localtonet client device first.
Does creating the Localtonet tunnel immediately make UptimeKit public?
No. After creating the configuration, you must start the tunnel. It remains reachable only while the selected Localtonet client is connected, the tunnel is running, and UptimeKit is available at the configured local target.
Do I need router port forwarding or a public IP address?
No. Our client establishes an outbound connection to a Localtonet relay server, so this workflow does not require inbound router port forwarding, firewall changes, VPN setup, or a public IP address.
Can I expose only the status page and not the dashboard?
The documented architecture serves both from one container and does not provide a separate status-only port. Application authentication should protect privileged dashboard routes. If strict route-level separation is required, validate a supported design for your deployed UptimeKit version rather than assuming that an HTTP tunnel alone performs path-based authorization.
Is UptimeKit suitable for distributed monitoring?
UptimeKit is designed as a distributed monitoring solution and supports multiple workers and application replicas. Workers check with the application every 15 seconds for assignments. The basic Compose installation in this guide does not by itself define a complete highly available production architecture, so plan shared data, networking, backups, and failure handling separately before scaling.
Publish your verified UptimeKit service with Localtonet
Finish the Docker Compose setup, confirm that UptimeKit works at its local endpoint, and then create an HTTP tunnel to provide a public HTTPS address without opening an inbound router port.
Get Started Free →

