

Run an AI agent orchestration workspace on your own infrastructure, verify every local layer, and publish only the HTTP access you intend to use
EpicStaff is a source-available, self-hosted platform for building AI agent flows through a visual editor backed by Django. This guide follows the project's current Docker Compose quick start for Windows, macOS, and Linux, including its required signing keys and persistent Docker resources. We then verify the local endpoint, explain routine startup and backup operations, and connect the working service to a Localtonet HTTP tunnel without inbound router port forwarding, firewall changes, VPN setup, or a public IP address. Because a new public HTTPS origin affects Django security behavior, we also identify the host, CSRF, forwarded-protocol, authentication, and real-time checks that must be completed before relying on remote access.
📋 What's in this guide
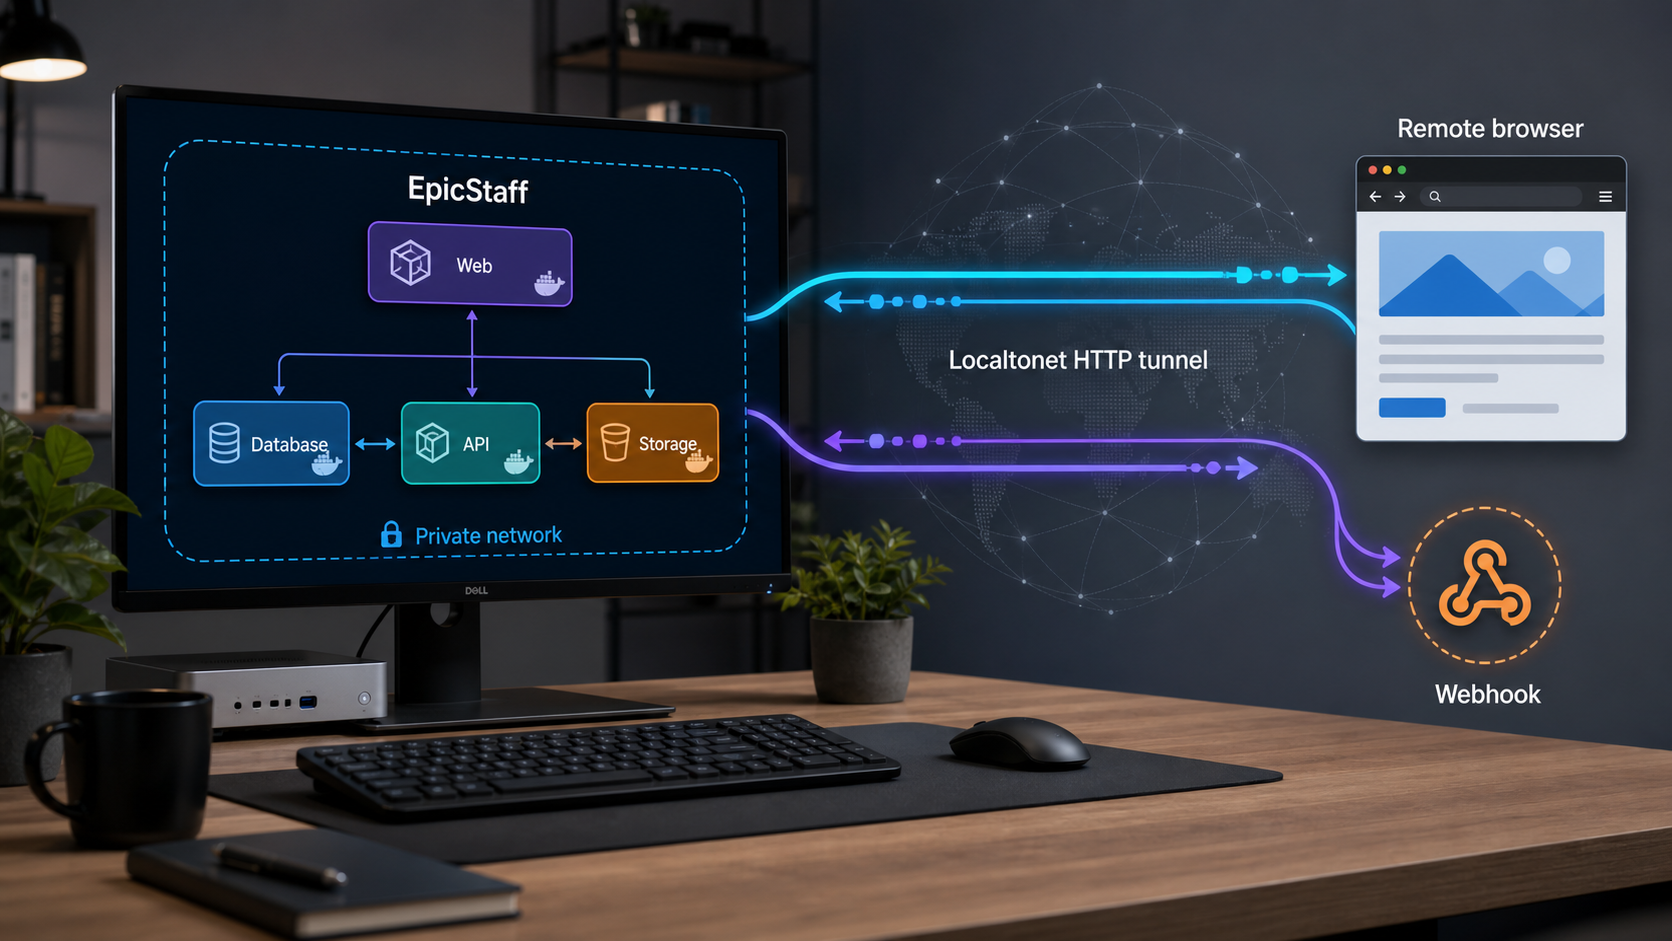
What you are deploying
EpicStaff's current repository describes a self-hosted, source-available platform for building AI agent flows that operations teams can inspect and edit. Its visual editor runs over a Django backend. The project also describes custom Python logic, persistent agent context involving Redis and PostgreSQL, application state, and integrations through mechanisms such as MCP and Python.
This tutorial follows the repository's primary Docker Compose quick start. Docker runs the web application and its supporting services as one Compose project. The setup creates named Docker volumes for persistent resources, an external Docker network named mcp-network, and a host-side savefiles directory referenced through CREW_SAVEFILES_PATH.
Source availability and open-source licensing are not interchangeable terms. Read EpicStaff's current license file before modifying, redistributing, or adopting the software for a commercial, regulated, or production environment.
http://localhost, which means port 80 when no different port is explicitly supplied.
Local health, tunnel state, and application behavior are separate
Treat the deployment as distinct layers. EpicStaff must first build, start, and respond locally. The Localtonet client must then connect to our platform. Finally, the HTTP tunnel must be configured with the correct target and explicitly started. A failure at one layer cannot be corrected by changing an unrelated layer.
This separation is especially important for webhook troubleshooting. A public connection failure is different from an application 404, 403, or CSRF rejection. The first indicates that the request did not successfully traverse the network path. The latter responses show that an HTTP application answered and that investigation should continue at the route, authentication, or Django security layer.
| Layer | Purpose | Verification |
|---|---|---|
| EpicStaff containers | Run the application and supporting services | Inspect Compose status and logs |
| Local HTTP endpoint | Serve EpicStaff on the host | Open http://localhost and inspect the live port mapping |
| Localtonet client | Establish the outbound relay connection | Confirm that the intended device is connected |
| HTTP tunnel | Forward public requests to the local service | Start the tunnel and test its assigned URL |
| EpicStaff route | Process UI actions or webhook requests | Check the HTTP response and application behavior |
Prerequisites for the Docker Compose installation
The official quick start lists Git and Docker Desktop. Git retrieves the repository, while Docker Desktop provides the container runtime and Compose tooling used by the project commands. Docker Desktop must be running, not merely installed. On a Linux host using another supported Docker installation, the daemon must likewise be active and accessible to the deployment account.
The macOS and Linux command blocks also depend on shell tools that are not listed separately in the two-item quick-start summary. Confirm that cp, sed, tr, and OpenSSL are available. The macOS command expects BSD sed behavior, while the Linux command uses GNU-style sed -i. The Windows block depends on PowerShell cmdlets including Copy-Item, Get-Content, Get-Random, and Set-Content.
Check the required tools
On macOS or Linux, run:
git --version
docker --version
docker-compose --version
openssl version
command -v cp
command -v sed
command -v tr
docker info
On Windows PowerShell, run:
git --version
docker --version
docker-compose --version
Get-Command Copy-Item
Get-Command Get-Content
Get-Command Get-Random
Get-Command Set-Content
docker info
A version command confirms that an executable can be found. docker info additionally checks whether the shell can communicate with the Docker daemon. Resolve daemon, permission, or command-path errors before starting the combined setup block.
Confirm port 80 is available
The project tells users to open http://localhost. Under normal HTTP URL rules, omitting the port means host port 80. Check whether another service is already using that port before starting EpicStaff.
On macOS or Linux, a common inspection command is:
sudo lsof -nP -iTCP:80 -sTCP:LISTENOn Windows PowerShell, use:
Get-NetTCPConnection -LocalPort 80 -State Listen -ErrorAction SilentlyContinueThese checks may return no output when the port is free. If another process is listening, identify it and decide whether to stop it or change the deployment according to current EpicStaff configuration guidance. Do not terminate an unknown production service merely to free the port.
Plan storage and ownership
Use the same host account for installation and routine operation. The setup writes a home-directory-based path into CREW_SAVEFILES_PATH. Running it under another account changes the value of $HOME and can point the deployment at a different directory.
Ensure the account can write to the repository directory and its home directory. Plan capacity for source files, container images, build cache, five named volumes, PostgreSQL data, media, configuration, and the host-side savefiles directory. EpicStaff's supplied quick-start evidence does not define universal CPU, memory, or disk minimums, so fixed sizing values should not be guessed. Monitor actual use and leave enough capacity for backups and updates.
The macOS and Linux blocks use &&, so they stop at the first failed operation. The Windows block uses semicolon-separated commands, which can continue after some failures. If setup does not finish, inspect the repository, src/.env, named volumes, network, and running containers before rerunning anything. Do not overwrite working signing keys or delete an existing volume until you know whether it contains data.
Resources created by the quick start
| Resource | Type | Operational significance |
|---|---|---|
sandbox_venvs |
Named Docker volume | Persistent resource required by the documented stack |
crew_pgdata |
Named Docker volume | Persistent PostgreSQL-related data |
graph_data |
Named Docker volume | Persistent graph-related data |
crew_config |
Named Docker volume | Persistent configuration data |
media_data |
Named Docker volume | Persistent media-related data |
mcp-network |
External Docker network | Network expected by the Compose configuration |
$HOME/savefiles |
Host directory | Saved-files path inserted into the environment configuration |
src/.env |
Environment and secrets file | Contains deployment configuration and required signing keys |
Install EpicStaff with Docker Compose
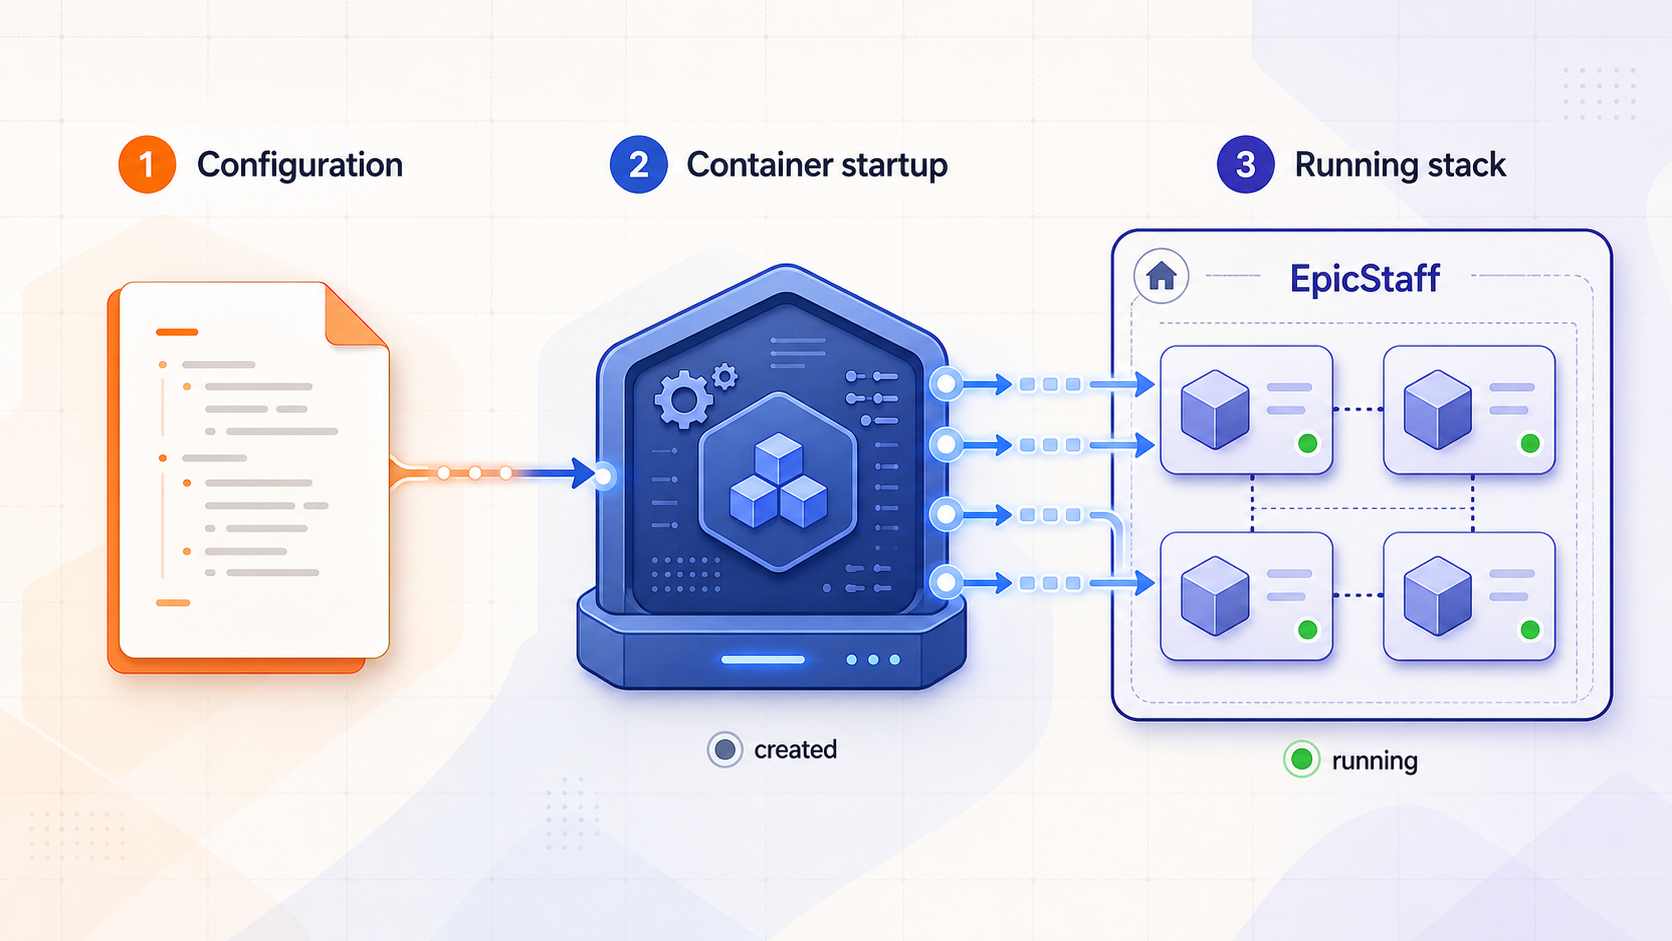
The EpicStaff quick start defines two steps: install the required tools, then run the complete operating-system-specific setup block. The commands below preserve that sequence and the current repository instructions.
Install Git and Docker Desktop
Install Git, install and start Docker Desktop, and verify that your shell can communicate with the Docker daemon. On macOS and Linux, also confirm that OpenSSL, cp, sed, and tr are available.
Download, configure, and start EpicStaff
Run the complete block for your operating system. It clones the repository, creates src/.env, configures the saved-files path, generates SECRET_KEY and JWT_SECRET, creates the required Docker resources, and starts the Compose build.
Windows installation with PowerShell
git clone https://github.com/EpicStaff/EpicStaff.git; cd EpicStaff/src; Copy-Item .env.example .env; $savefiles = "$HOME/savefiles"; $file = ".env"; $key = { -join ((48..57) + (65..90) + (97..122) | Get-Random -Count 60 | % {[char]$_}) }; (Get-Content $file) -replace "CREW_SAVEFILES_PATH=/c/savefiles", "CREW_SAVEFILES_PATH=$savefiles" -replace "^SECRET_KEY=.*", "SECRET_KEY=$(& $key)" -replace "^JWT_SECRET=.*", "JWT_SECRET=$(& $key)" | Set-Content $file; docker volume create sandbox_venvs; docker volume create crew_pgdata; docker volume create graph_data; docker volume create crew_config; docker volume create media_data; docker network create mcp-network; docker-compose up --build
Run this block as the account that will own the deployment. Because PowerShell semicolons do not provide the same stop-on-failure behavior as the macOS and Linux && chains, read the complete output. If cloning or environment-file creation fails, later commands may still run.
macOS installation
git clone -b main https://github.com/EpicStaff/EpicStaff.git && cd EpicStaff && cp src/.env.example src/.env && savefiles="$HOME/savefiles" && sed -i '' "s|CREW_SAVEFILES_PATH=/c/savefiles|CREW_SAVEFILES_PATH=$savefiles|" src/.env && sed -i '' "s|^SECRET_KEY=.*|SECRET_KEY=$(openssl rand -base64 48 | tr -d '=+/')|" src/.env && sed -i '' "s|^JWT_SECRET=.*|JWT_SECRET=$(openssl rand -base64 48 | tr -d '=+/')|" src/.env && docker volume create sandbox_venvs && docker volume create crew_pgdata && docker volume create graph_data && docker volume create crew_config && docker volume create media_data && docker network create mcp-network && cd src && docker-compose up --build
This block uses the macOS-compatible sed -i '' form. OpenSSL generates each signing value, while tr removes selected Base64 characters before the value is written to src/.env.
Linux installation
git clone -b main https://github.com/EpicStaff/EpicStaff.git && cd EpicStaff && cp src/.env.example src/.env && savefiles="$HOME/savefiles" && sed -i "s|CREW_SAVEFILES_PATH=/c/savefiles|CREW_SAVEFILES_PATH=$savefiles|" src/.env && sed -i "s|^SECRET_KEY=.*|SECRET_KEY=$(openssl rand -base64 48 | tr -d '=+/')|" src/.env && sed -i "s|^JWT_SECRET=.*|JWT_SECRET=$(openssl rand -base64 48 | tr -d '=+/')|" src/.env && docker volume create sandbox_venvs && docker volume create crew_pgdata && docker volume create graph_data && docker volume create crew_config && docker volume create media_data && docker network create mcp-network && cd src && docker-compose up --build
The Linux block follows the same deployment sequence but uses GNU-style sed -i. It stops at the first unsuccessful command because each operation is joined with &&.
EpicStaff requires both SECRET_KEY and JWT_SECRET, and the stack refuses to start without them. Changing the keys signs out every user. Keep src/.env private, never commit it, and review EpicStaff's current signing-key guidance before rotating or restoring these values.
Monitor the first build
The final docker-compose up --build runs in the foreground and keeps the terminal attached to container output. Build time depends on the host, network, cache, and current dependencies. Do not assume that successful image creation proves the application is healthy. Wait for startup to settle and investigate repeating errors before testing the browser interface.
Verify EpicStaff locally before creating a tunnel
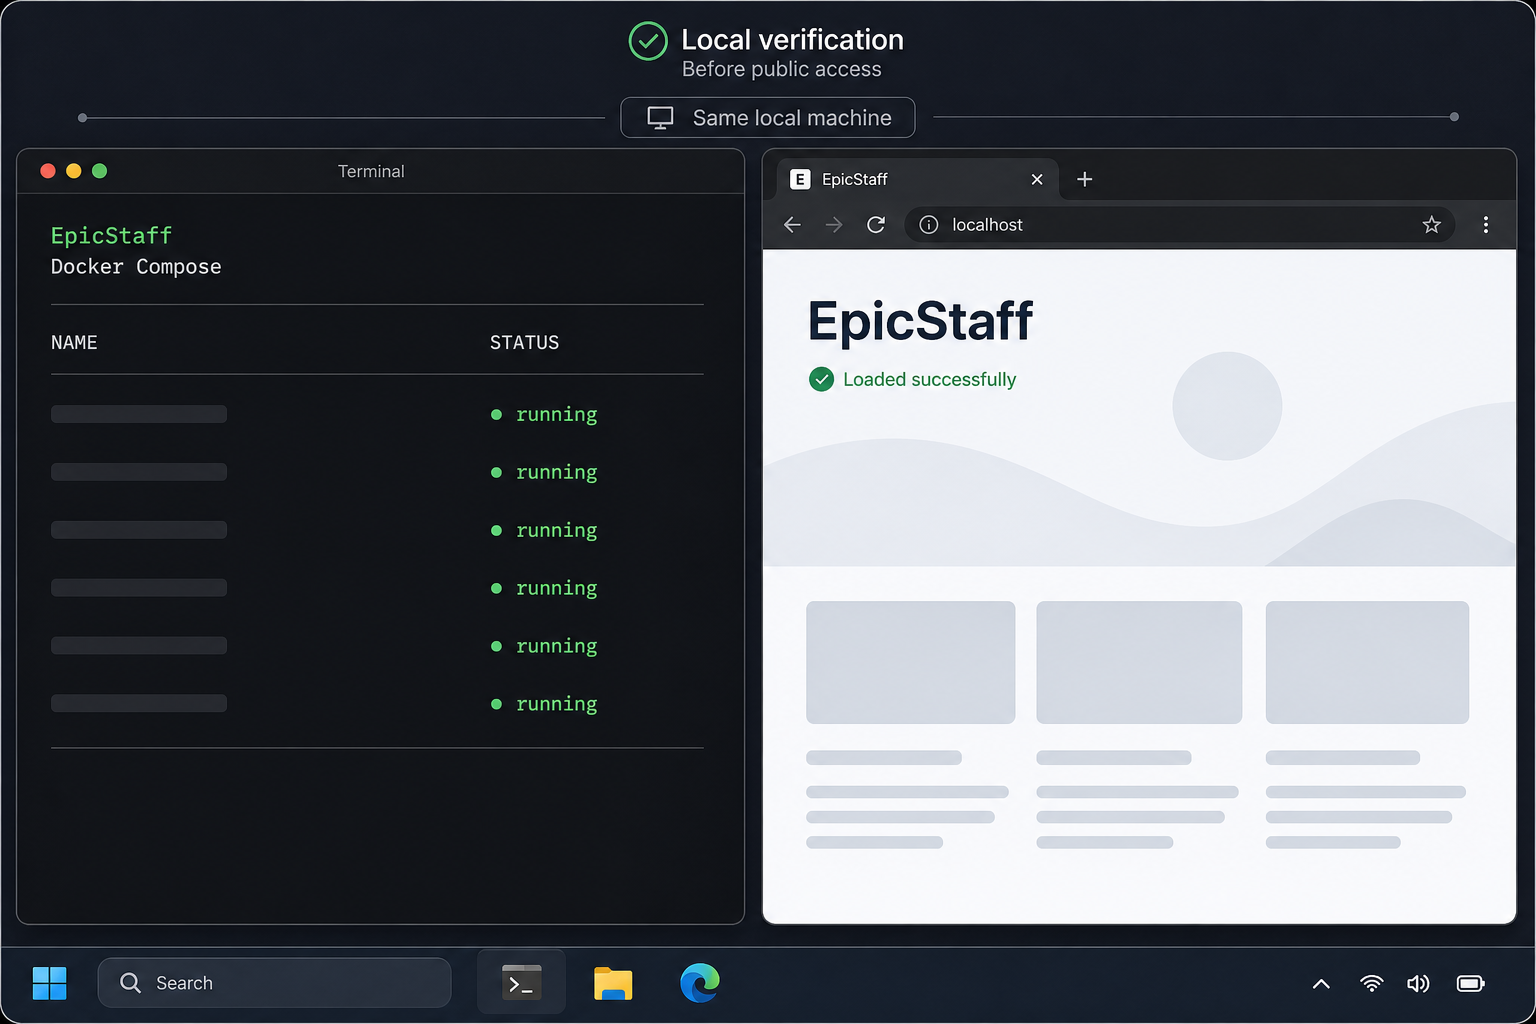
Open the documented endpoint on the EpicStaff host:
http://localhost
Because this URL specifies HTTP without a numeric port, it implies host port 80. That corrects a common misunderstanding: the URL itself does identify the default HTTP port. You should still inspect the live Compose deployment before configuring Localtonet, because a changed Compose file, local customization, port conflict, or future release could publish a different mapping.
From EpicStaff/src, inspect the running project:
docker-compose ps
docker-compose logs --tail=200
In the PORTS output, look for the host-side mapping associated with the web service. A mapping ending in :80 on the host is consistent with http://localhost. Do not use a container-only port that is not published to the host.
On macOS or Linux, perform a repeatable HTTP check:
curl -I http://localhost
curl -sS -o /dev/null -w '%{http_code}\n' http://localhost
On Windows PowerShell:
$response = Invoke-WebRequest -Uri "http://localhost" -UseBasicParsing
$response.StatusCode
A redirect may be normal for a login or first-run page. A connection refusal, timeout, response from an unrelated application, or repeating server error is not a successful EpicStaff verification.
It does not prove that the Localtonet client is connected, that a tunnel is running, or that EpicStaff accepts requests from a new public hostname. Complete those checks separately.
Test from the future tunnel device
If our client runs directly on the EpicStaff host, the verified loopback endpoint can be used as the local target. If our client runs on another device, localhost refers to that other device. Test EpicStaff using the host's reachable LAN address and published port from the machine that will run Localtonet.
http://<epicstaff-lan-address>:<published-host-port>If that address fails while localhost works, investigate the Docker host binding, local routing, operating-system firewall policy, and network segmentation. Do not change security policy blindly. The client device only needs the specific local reachability required for the configured target.
Operate, update, back up, and restore EpicStaff
Run routine Compose commands from EpicStaff/src. Mixing directories can cause Compose to use the wrong project or fail to find the configuration.
Detached startup, status, logs, restart, and stop
docker-compose up -d
docker-compose ps
docker-compose logs --tail=200
docker-compose logs -f
docker-compose restart
docker-compose stop
up -d starts the stack in the background. logs -f follows new output until interrupted. restart restarts the existing services without rebuilding images. stop stops containers while retaining them for a later start.
To remove Compose-managed containers and project resources while retaining the separately created named volumes:
docker-compose down
Do not add --volumes or manually remove the five named volumes unless you have verified their contents, created a tested backup, and intentionally want to remove persistent data.
Create a cold backup on macOS or Linux
EpicStaff's supplied quick-start evidence does not provide an application-native backup command. The following is a generic Docker cold-backup workflow for the named resources created by that quick start. Stopping the stack first avoids copying changing database and application files while they are being written.
Run these commands from EpicStaff/src:
backup_dir="$HOME/epicstaff-backups/$(date +%Y%m%d-%H%M%S)"
mkdir -p "$backup_dir"

docker-compose stop

cp .env "$backup_dir/epicstaff.env"
tar -czf "$backup_dir/savefiles.tgz" -C "$HOME" savefiles

for volume in sandbox_venvs crew_pgdata graph_data crew_config media_data; do
  docker run --rm \
    -v "$volume:/source:ro" \
    -v "$backup_dir:/backup" \
    busybox \
    sh -c "cd /source && tar -czf /backup/$volume.tgz ."
done

ls -lh "$backup_dir"
docker-compose up -d
docker-compose ps
curl -sS -o /dev/null -w '%{http_code}\n' http://localhost
This workflow may pull the standard busybox image if it is not already present. Protect the backup directory because epicstaff.env contains signing secrets and other deployment configuration. Copy the completed backup to storage with access controls appropriate to its sensitivity.
Create a cold backup with PowerShell
Run this from EpicStaff/src:
$stamp = Get-Date -Format "yyyyMMdd-HHmmss"
$backupDir = Join-Path $HOME "epicstaff-backups\$stamp"
New-Item -ItemType Directory -Path $backupDir -Force | Out-Null

docker-compose stop

Copy-Item ".env" (Join-Path $backupDir "epicstaff.env")
Compress-Archive -Path (Join-Path $HOME "savefiles") -DestinationPath (Join-Path $backupDir "savefiles.zip")

$volumes = @("sandbox_venvs", "crew_pgdata", "graph_data", "crew_config", "media_data")
foreach ($volume in $volumes) {
  docker run --rm `
    -v "${volume}:/source:ro" `
    -v "${backupDir}:/backup" `
    busybox `
    sh -c "cd /source && tar -czf /backup/$volume.tgz ."
}

Get-ChildItem $backupDir
docker-compose up -d
docker-compose ps
(Invoke-WebRequest -Uri "http://localhost" -UseBasicParsing).StatusCode
Restore on an empty replacement deployment
Restoration is safest on a replacement host or after confirming that the destination volumes are empty. Restoring an archive into a populated volume can merge old and new files and produce an invalid state. Install Docker, clone the intended EpicStaff version, stop the stack, recreate the documented network, restore the same stable environment file, restore savefiles, and then restore each archive into its matching empty volume.
A macOS or Linux restoration sequence is:
restore_dir="/path/to/verified-backup"

cd EpicStaff/src
docker-compose down

cp "$restore_dir/epicstaff.env" .env
mkdir -p "$HOME/savefiles"
tar -xzf "$restore_dir/savefiles.tgz" -C "$HOME"

docker network inspect mcp-network >/dev/null 2>&1 || docker network create mcp-network

for volume in sandbox_venvs crew_pgdata graph_data crew_config media_data; do
  docker volume create "$volume"
  docker run --rm \
    -v "$volume:/target" \
    -v "$restore_dir:/backup:ro" \
    busybox \
    sh -c "cd /target && tar -xzf /backup/$volume.tgz"
done

docker-compose up -d
docker-compose ps
docker-compose logs --tail=200
curl -sS -o /dev/null -w '%{http_code}\n' http://localhost
Before running this sequence, confirm with docker volume inspect that the destination names do not contain data you need. A successful archive extraction is not sufficient proof of recovery. Test login, representative saved data, flow loading, and any critical integrations before reopening the tunnel.
Update cautiously
Review EpicStaff releases and any release-specific upgrade instructions before changing versions. The available evidence does not establish one universal migration command for every release, so do not assume that pulling source and rebuilding is sufficient for all future upgrades.
Before an update, follow this sequence:
- Record the currently deployed commit or release.
- Check
git statusand preserve intentional local changes. - Create a cold backup of
src/.env,savefiles, and the named volumes. - Review the target release notes for migrations, renamed variables, or deployment changes.
- Obtain the intended source version without replacing the existing signing keys.
- Rebuild using the project's Compose configuration.
- Verify container status, logs, and
http://localhost. - Test authentication and a representative flow before restarting public access.
Where the target release confirms that the existing Compose workflow remains valid, the rebuild and detached startup command is:
docker-compose up -d --build
docker-compose ps
docker-compose logs --tail=200
Do not rerun the original one-line installer over an existing deployment. It copies the environment template and generates new signing keys, creating an avoidable risk of lost configuration and forced sign-outs.
Alternative deployment paths
EpicStaff also publishes a partly local setup for controlled development and testing, plus separate Podman deployment instructions. This tutorial covers the primary Docker Compose path. Do not transfer Docker-specific lifecycle or backup assumptions to another setup without reviewing that setup's current files and storage model.
Review Django and reverse-proxy requirements before public exposure
Local access through http://localhost and public access through a new HTTPS hostname are not equivalent from Django's perspective. Host validation, CSRF origin validation, secure-request detection, cookies, redirects, authentication, and real-time browser connections can depend on the external hostname and proxy behavior.
The current EpicStaff evidence supplied for this tutorial documents the quick start, required signing keys, and local URL. It does not document EpicStaff-specific public-origin values for Django settings such as ALLOWED_HOSTS, CSRF_TRUSTED_ORIGINS, SECURE_PROXY_SSL_HEADER, or USE_X_FORWARDED_HOST. It also does not establish whether the current Compose deployment expects a particular trusted-proxy chain, whether WebSocket or Server-Sent Events connections are required, or which authentication controls are enabled by default in the community deployment.
Adding wildcard hosts, disabling CSRF checks, trusting forwarded headers from every source, or marking requests secure without understanding the proxy path can weaken the application. Consult the current EpicStaff release documentation or maintainers for supported public-origin configuration. If no supported guidance exists for your version, treat public exposure as unverified rather than assuming that every login and state-changing request will work safely.
Inspect the deployed version without changing it
On macOS or Linux, the following repository search can help locate relevant settings or documentation in the checked-out version:
cd EpicStaff
grep -R -n -E "ALLOWED_HOSTS|CSRF_TRUSTED_ORIGINS|SECURE_PROXY_SSL_HEADER|USE_X_FORWARDED_HOST|X-Forwarded-Proto" src docs README.md 2>/dev/null
grep -R -n -E "WebSocket|websocket|EventSource|server-sent" src docs README.md 2>/dev/null
Search results are diagnostic evidence, not permission to edit settings blindly. Determine whether a match is active application configuration, an example, a dependency file, a test, or unused code. On Windows, use your editor's repository search or Select-String over the relevant files.
Test the complete public-origin behavior
After applying only project-supported configuration, test all behavior your deployment needs:
- Open the public HTTPS origin in a fresh browser session.
- Confirm that the expected login or access control is enforced.
- Sign in and sign out without redirect loops or insecure URL redirects.
- Submit a controlled state-changing form and watch for CSRF failures.
- Reload application pages and verify that session cookies continue to work.
- Run a representative flow with non-production credentials and resources.
- Keep the browser open long enough to identify failed real-time connections.
- Review application logs for rejected hosts, CSRF errors, scheme confusion, or connection upgrade failures.
A homepage loading successfully proves only that a basic request reached EpicStaff. It does not validate authentication, forms, API calls, cookies, redirects, or long-lived connections.
Make EpicStaff remotely reachable with Localtonet
Once EpicStaff works locally and its public-origin requirements have been reviewed, create an HTTP tunnel. Our client runs on the EpicStaff host or another device capable of reaching it and establishes an outbound connection to a Localtonet relay server.
HTTP tunnels point to a local IP address and port. Their process types can use a random subdomain, a supported custom subdomain, or a custom domain, and serve the target at a public HTTPS address. Available server choices and options can vary, so select them from the current dashboard rather than copying a hardcoded server code.
Refer to the Localtonet HTTP tunnel documentation alongside the workflow below for the current product interface.
Install and run our client
Run the Localtonet client on the EpicStaff host or another device that can reach the exact local HTTP endpoint you verified.
Authenticate or select the client device
Use the device-specific authentication token for the client that will carry the tunnel. Never publish the token or place it in EpicStaff source, webhook URLs, screenshots, or examples.
Select an available relay server
Choose a currently available server or region in the product interface. Do not hardcode a server code because availability can vary by plan, client version, region, or deployment.
Create the HTTP tunnel configuration
Select an HTTP tunnel and enter the verified local IP address and host-side port. For the documented unmodified http://localhost endpoint, the implied port is 80, but confirm the live Compose mapping before saving the target.
Start the tunnel and test the assigned URL
Creating a tunnel does not start it. Press Start, open the assigned public URL in a fresh browser session, and complete the public-origin tests described above.
Stop or delete access when finished
Stop the tunnel to end forwarding while retaining its configuration, or delete it when it is no longer needed. Access remains available only while the selected client is connected and the tunnel is running.
Confirm that your installed EpicStaff version enforces suitable authentication and authorization before exposing it. Use least-privilege accounts and integration credentials. Do not rely on an unguessable hostname as a substitute for application security.
Use the public HTTP origin for EpicStaff webhook delivery
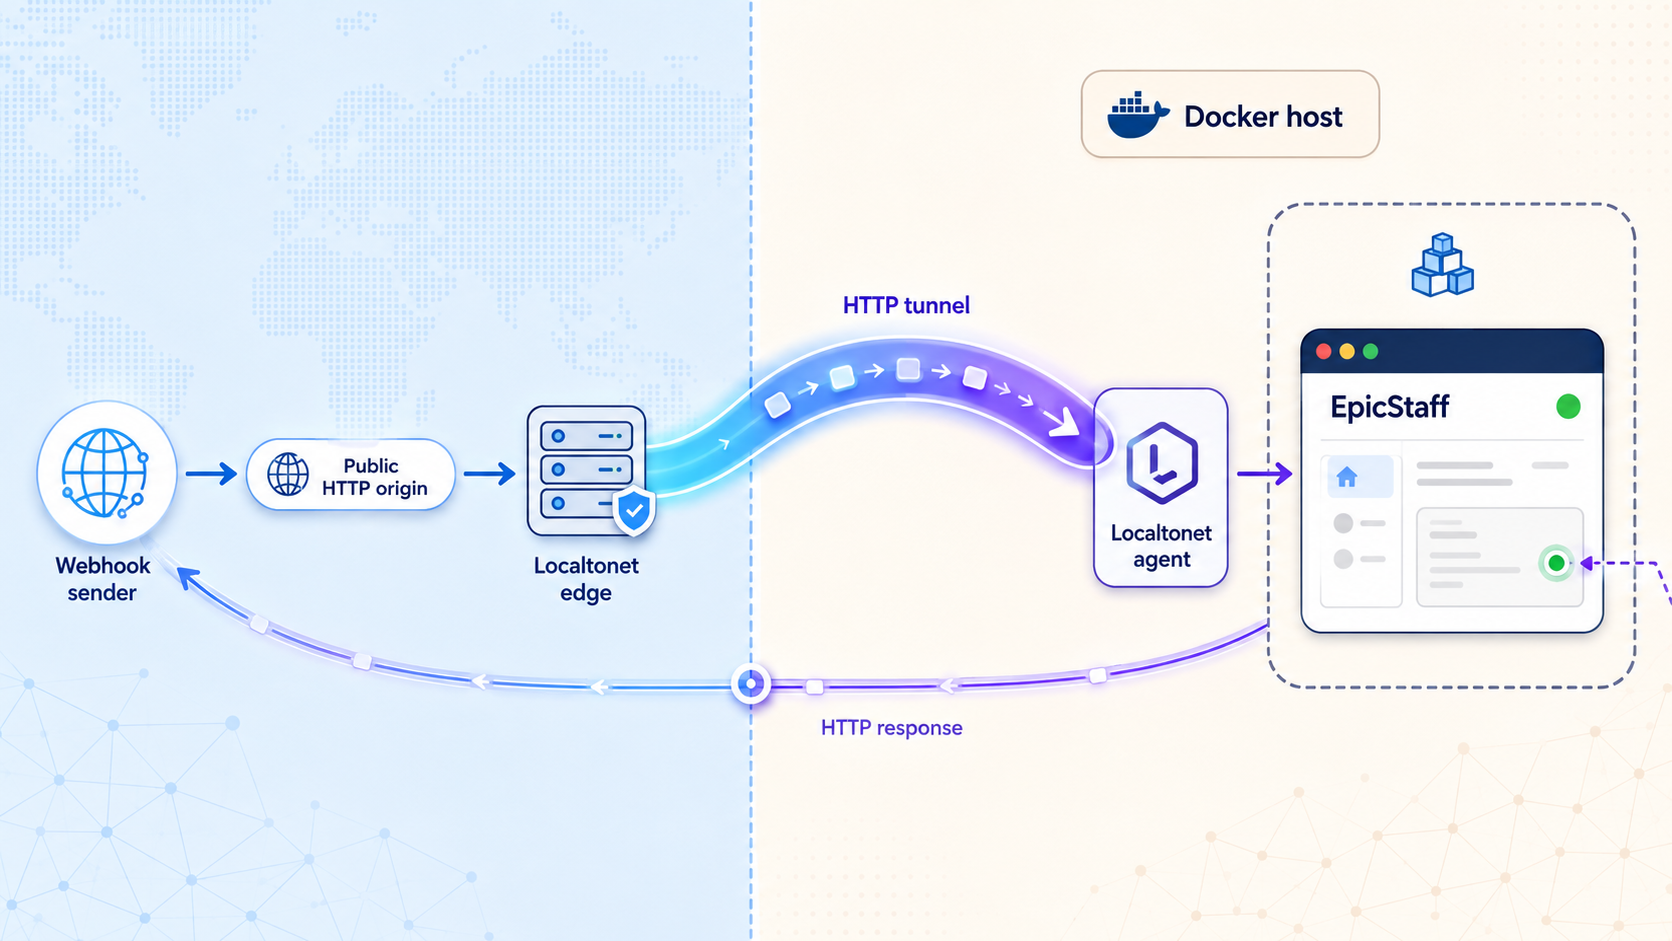
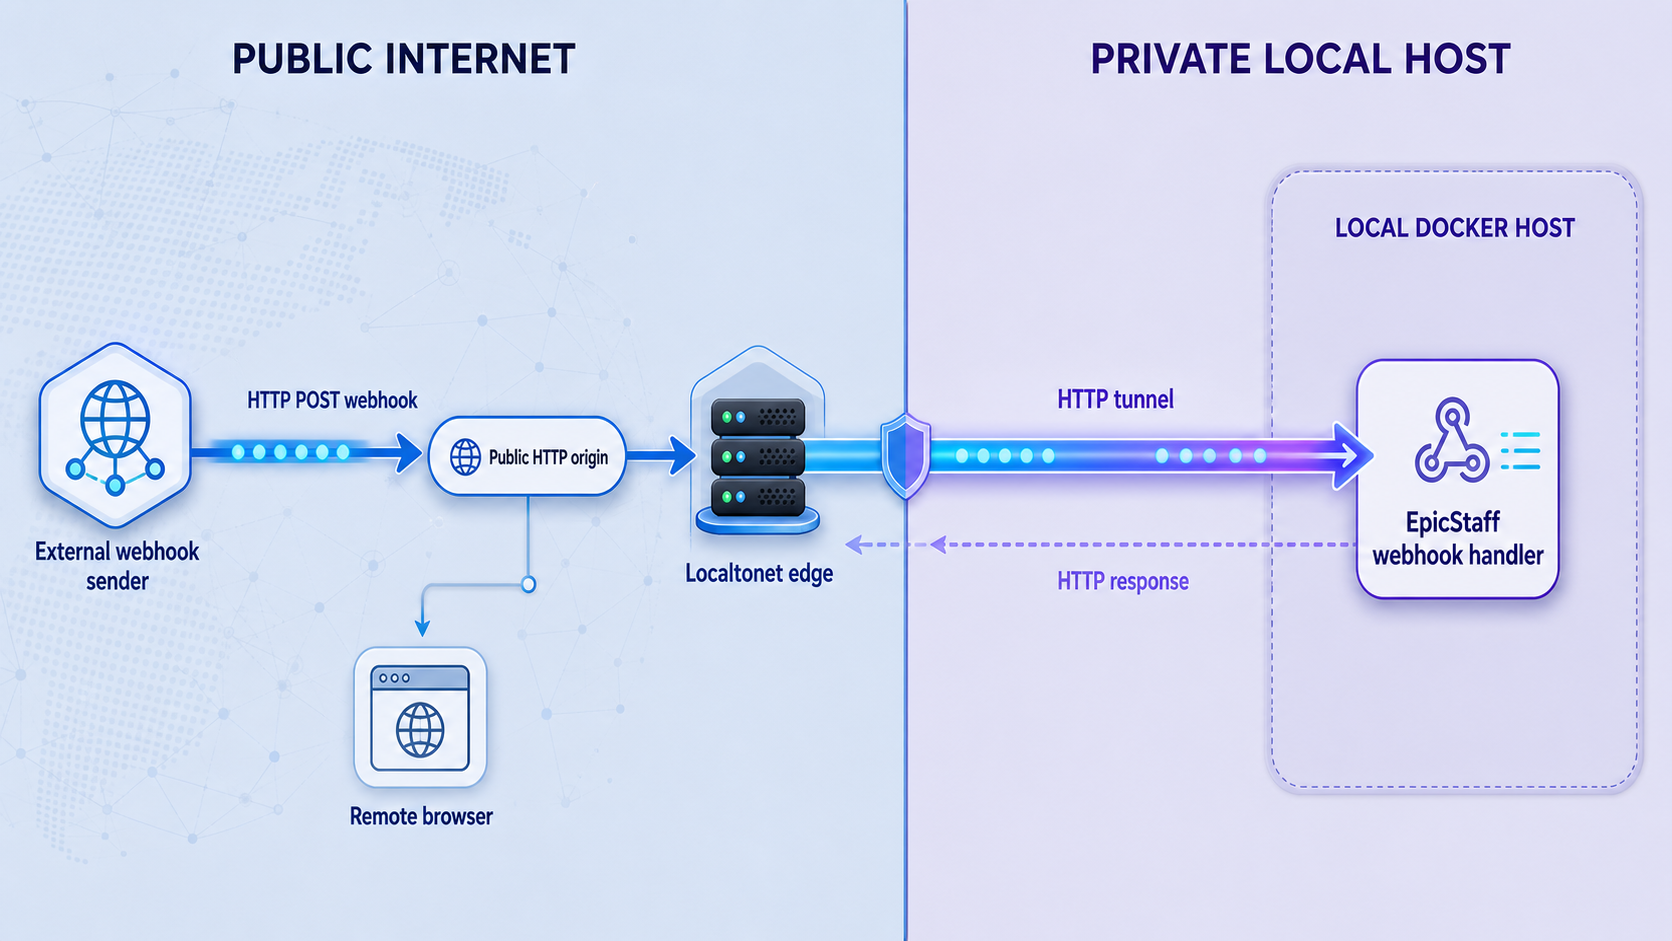
An internet-hosted webhook sender cannot normally reach an application bound only to a local machine. A running Localtonet HTTP tunnel can provide the public HTTPS origin, while EpicStaff remains on the local Docker host.
The available project evidence does not establish a universal EpicStaff webhook path, request method, payload schema, authentication header, signature format, or response contract. These details may depend on the installed release and flow configuration. Do not invent a route such as /webhook or assume that every request uses POST.
https://<assigned-public-host>/<exact-epicstaff-route>Keep EpicStaff application webhooks separate from Localtonet platform webhooks. Localtonet Token/Tunnel webhooks report Connected or Disconnected state for tokens and tunnels in a selected Token Group. They do not deliver EpicStaff business events and should not be confused with an application route exposed through the HTTP tunnel.
URLs can appear in histories, logs, provider dashboards, and screenshots. Prefer the sender's documented header or signature mechanism where supported, and redact credentials before sharing request traces.
Security checklist for a remotely reachable deployment
| Control | Risk addressed | Recommended action |
|---|---|---|
| Signing-key protection | Session invalidation or secret exposure | Keep stable keys in a protected src/.env backup |
| Host and CSRF validation | Untrusted origins or rejected state changes | Use only EpicStaff-supported public-origin configuration |
| Authentication verification | Unauthorized access to the public UI | Test the installed version's actual login and authorization behavior |
| Webhook verification | Forged external events | Validate the sender using a supported authentication mechanism |
| Least privilege | Excessive impact from a compromised flow | Limit user, model, tool, and integration permissions |
| Patch management | Known application or dependency vulnerabilities | Review releases, back up, update locally, and test before exposure |
| Tunnel lifecycle | Unnecessary continuing exposure | Stop or delete the tunnel when remote access is not needed |
| Recovery testing | Unusable or incomplete backups | Test restoration and verify representative application data |
Protect the Localtonet device token as a credential. It identifies the device that runs the tunnel and must not be placed in public examples or source repositories. Likewise, never publish src/.env, backup archives, private endpoints, model credentials, or integration secrets.
Consider separate development and production deployments. Agent flows can execute Python logic and interact with internal systems. Use non-production resources during initial public-origin and webhook testing, and grant each integration only the permissions it needs.
Troubleshoot installation and remote-access problems
The setup block stops or completes only partially
Find the first failed command. Verify the repository directory, src/.env, Docker daemon, required shell utilities, named volumes, and mcp-network. On Windows, remember that later semicolon-separated commands may have run despite an earlier error.
docker volume ls
docker network ls
docker ps -a
docker-compose ps
Do not delete existing resources until you know whether they belong to a prior installation. Continue from the first incomplete operation where safe rather than regenerating signing keys.
EpicStaff reports missing signing keys
Confirm that src/.env exists and that SECRET_KEY and JWT_SECRET contain generated values. Diagnose the failed file substitution locally without printing the secrets into shared output. Review the project's signing-key document before replacing an established key.
http://localhost does not open
docker-compose ps
docker-compose logs --tail=200
curl -v http://localhost
Confirm that the stack remains running, that containers are not repeatedly restarting, and that the web service is published on host port 80 or another configured port. Also confirm that the test is running on the EpicStaff host. On another computer, localhost refers to that computer.
Port 80 serves the wrong application
Another local service may already own the default HTTP port. Inspect active listeners and the Compose PORTS output. Do not point Localtonet at port 80 merely because it is the HTTP default if the live deployment publishes EpicStaff elsewhere.
The public URL does not respond
Confirm that the correct Localtonet device is connected and that the tunnel is running. Then test the configured local target from the client device itself. A tunnel created but not started does not forward traffic.
The public page loads, but login or forms fail
Review EpicStaff logs for rejected host headers, CSRF failures, insecure redirect behavior, cookie problems, and proxy-scheme confusion. Verify only settings supported by the installed EpicStaff release. Do not solve a CSRF error by disabling CSRF protection globally.
The page loads, but live updates fail
Use browser developer tools and application logs to identify failed WebSocket, EventSource, or other long-lived requests. The supplied EpicStaff evidence does not confirm which real-time transport the current interface requires or its reverse-proxy configuration, so capture the failing request and consult version-specific project guidance rather than guessing.
The UI works, but a webhook fails
Check the exact route, method, content type, payload, authentication, CSRF expectations, and installed EpicStaff version. An HTTP 404, 401, 403, or 405 proves that an application responded and should be investigated differently from a timeout or connection refusal.
The deployment fails after an update
Keep the tunnel stopped. Record logs, compare the updated environment template with your preserved configuration without exposing secrets, and review the target release notes. If necessary, restore the previously recorded source version and verified cold backup. After recovery, test local access and representative application data before restarting the tunnel.
Frequently asked questions
Is EpicStaff open-source?
EpicStaff describes itself as source-available. Review its current license for the permissions and restrictions that apply to your intended use rather than assuming that source availability is equivalent to a particular open-source license.
What local port does EpicStaff use?
The documented URL is http://localhost. HTTP without an explicit port uses host port 80. Still inspect docker-compose ps and use the active host-side mapping because local changes or a future deployment version could publish another port.
Does Localtonet require router port forwarding?
No. Our client establishes an outbound connection to a Localtonet relay server, so this workflow does not require inbound router port forwarding, firewall changes, VPN setup, or a public IP address.
Can the Localtonet client run on another device?
Yes, provided that device can reach EpicStaff over the local network. Use the EpicStaff host's reachable address and published port. Do not use localhost, because it would refer to the separate client device.
Does creating a tunnel immediately make EpicStaff public?
No. Creating a tunnel saves its configuration. You must press Start, and the endpoint remains available only while the selected client is connected and the tunnel is running.
What happens if I change SECRET_KEY or JWT_SECRET?
EpicStaff states that changing these keys signs out every user. Generate them once, preserve them securely, and avoid rerunning setup actions that overwrite an established environment file.
Does EpicStaff require ALLOWED_HOSTS or CSRF changes for Localtonet?
A new public HTTPS origin can affect Django host validation, CSRF handling, cookies, and secure-request detection. However, the current EpicStaff evidence supplied for this guide does not document supported public-origin values. Check the installed release and project guidance, and do not add wildcards or disable security controls based on generic Django examples.
Can one HTTP tunnel serve the UI and EpicStaff webhook routes?
An HTTP tunnel forwards requests for its public origin to the configured local HTTP service, so application routes under that service can be reachable through the same origin. Whether a specific EpicStaff webhook route exists and what authentication it requires depends on the installed version and configured flow.
Is the public URL enough to secure EpicStaff?
No. Treat the URL as an address, not authorization. Verify EpicStaff authentication and permissions, protect secrets, validate webhook senders where supported, maintain backups, apply least privilege, and stop the tunnel when public access is unnecessary.
Connect your verified EpicStaff deployment with Localtonet
Once EpicStaff responds locally, its active host port is confirmed, and its public-origin security behavior has been tested, create an HTTP tunnel for controlled remote browser or webhook reachability.
Get Started Free →

