

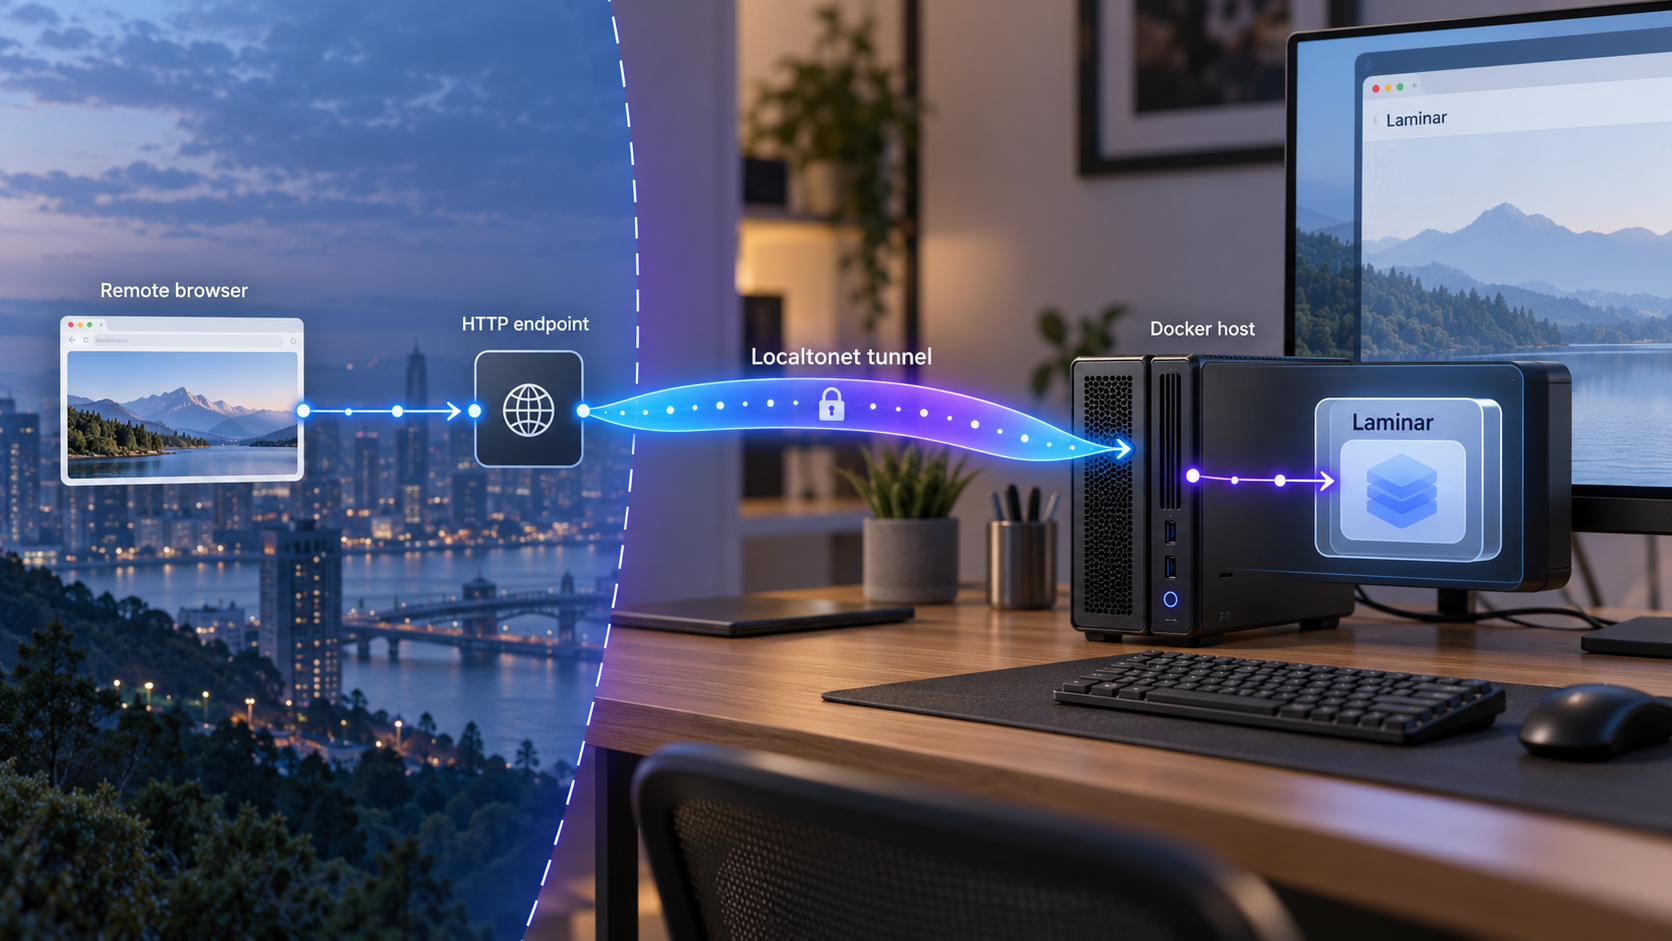
Run an AI observability stack locally, verify it, and make the web interface available remotely
Laminar is an open-source observability platform designed for AI agents, with tracing, evaluations, dashboards, datasets, and failure analysis capabilities. In this guide, we install its lightweight self-hosted stack with Docker Compose, verify the browser interface at its documented local address, and cover the operational checks that matter before allowing remote access. Once Laminar works locally, we configure a Localtonet HTTP tunnel as a separate step so authorized users can reach the web interface without inbound router port forwarding, firewall changes, VPN setup, or a public IP address.
📋 What's in this guide
What you are deploying
Laminar describes itself as an open-source observability platform purpose-built for AI agents. Its capabilities include tracing, Signals for detecting defined behaviors, evaluations, dashboards, data annotation, datasets, and interfaces through which coding agents can investigate observability data. The project is OpenTelemetry-native and is designed to record and analyze activity such as model calls, tool calls, sub-agents, costs, tokens, spans, metrics, and events.
Self-hosting gives you control over where the Laminar stack runs. It also means that you are responsible for the host, containers, storage, updates, credentials, network exposure, and backups appropriate to your environment. This guide focuses on the installation path documented in the Laminar repository: cloning the project and starting its Compose stack.
Laminar provides two relevant Compose entry points. The default docker-compose.yml starts what the project calls a lightweight but full-featured stack. Laminar recommends that option for a quick start or lightweight use. The repository also includes docker-compose-full.yml, which Laminar identifies as the production-oriented Compose option. Laminar additionally recommends its managed platform for production environments, but this article remains focused on self-hosting.
http://localhost:5667.
Local access and remote access are separate concerns
Docker Compose is responsible for creating and starting the Laminar services. Laminar itself must be healthy and reachable on the host before a tunnel can make the interface useful remotely. Localtonet does not install Laminar, repair failed containers, or replace the application’s own authentication and authorization controls. Our platform provides the connectivity layer between an assigned public address and a local HTTP target.
The Localtonet client establishes an outbound connection to a Localtonet relay server. This removes the need to create an inbound router forwarding rule or obtain a public IP address. The public endpoint remains available only while the selected Localtonet client or device is connected and its tunnel is running.
Complete the Laminar installation and open http://localhost:5667 successfully before configuring Localtonet. If the local page does not work, adding a tunnel will not correct the underlying container or application problem.
Prerequisites for self-hosting Laminar
Prepare a machine that can run the Laminar containers and remain online whenever the service is needed. The extracted project documentation does not define a universal minimum CPU, memory, storage, operating system, or container-runtime version for this workflow. Resource needs vary with ingestion volume, retention, concurrent users, and which stack configuration you choose. Do not treat a development laptop that starts the quick-start stack as proof that the same capacity is suitable for production telemetry.
The documented installation commands require the following tools:
- Git: used to clone the Laminar repository.
- Docker: used to run the stack’s containers.
- Docker Compose: the commands in this guide use the current
docker composesubcommand form. - A browser: used to verify the web interface at
http://localhost:5667. - Sufficient host capacity: reserve appropriate CPU, memory, and disk for your expected workload, even though the supplied project evidence does not establish fixed minimums.
Confirm that Git, Docker, and Docker Compose are available before cloning the repository:
git --version
docker --version
docker compose version
These checks only confirm that the commands are present and can report a version. They do not prove that the current user can start containers. If Docker is installed but the daemon is unavailable, or if your account lacks the necessary local permissions, the Laminar startup command will fail.
Choose the deployment profile before you begin
| Deployment option | Command | Documented purpose |
|---|---|---|
| Default Compose stack | docker compose up -d |
Lightweight but full-featured quick start suitable for lightweight usage. |
| Full Compose stack | docker compose -f docker-compose-full.yml up -d |
The project’s production-oriented self-hosted Compose option. |
| Managed Laminar platform | Not a self-hosted command | Also recommended by the Laminar project for production environments, but outside this self-hosting tutorial. |
The full Compose option should not be interpreted as a complete production architecture by itself. Production readiness also depends on capacity planning, backups, monitoring, access controls, credential handling, recovery testing, and your organization’s requirements. The available evidence does not establish a universal production topology or sizing formula, so this article does not invent one.
Compose starts multiple services and may create persistent data, networks, and published ports. Review the checked-out Compose file and environment settings before starting the stack, especially on shared or internet-connected infrastructure. Use an isolated host or environment appropriate to your risk model.
Install Laminar with Docker Compose
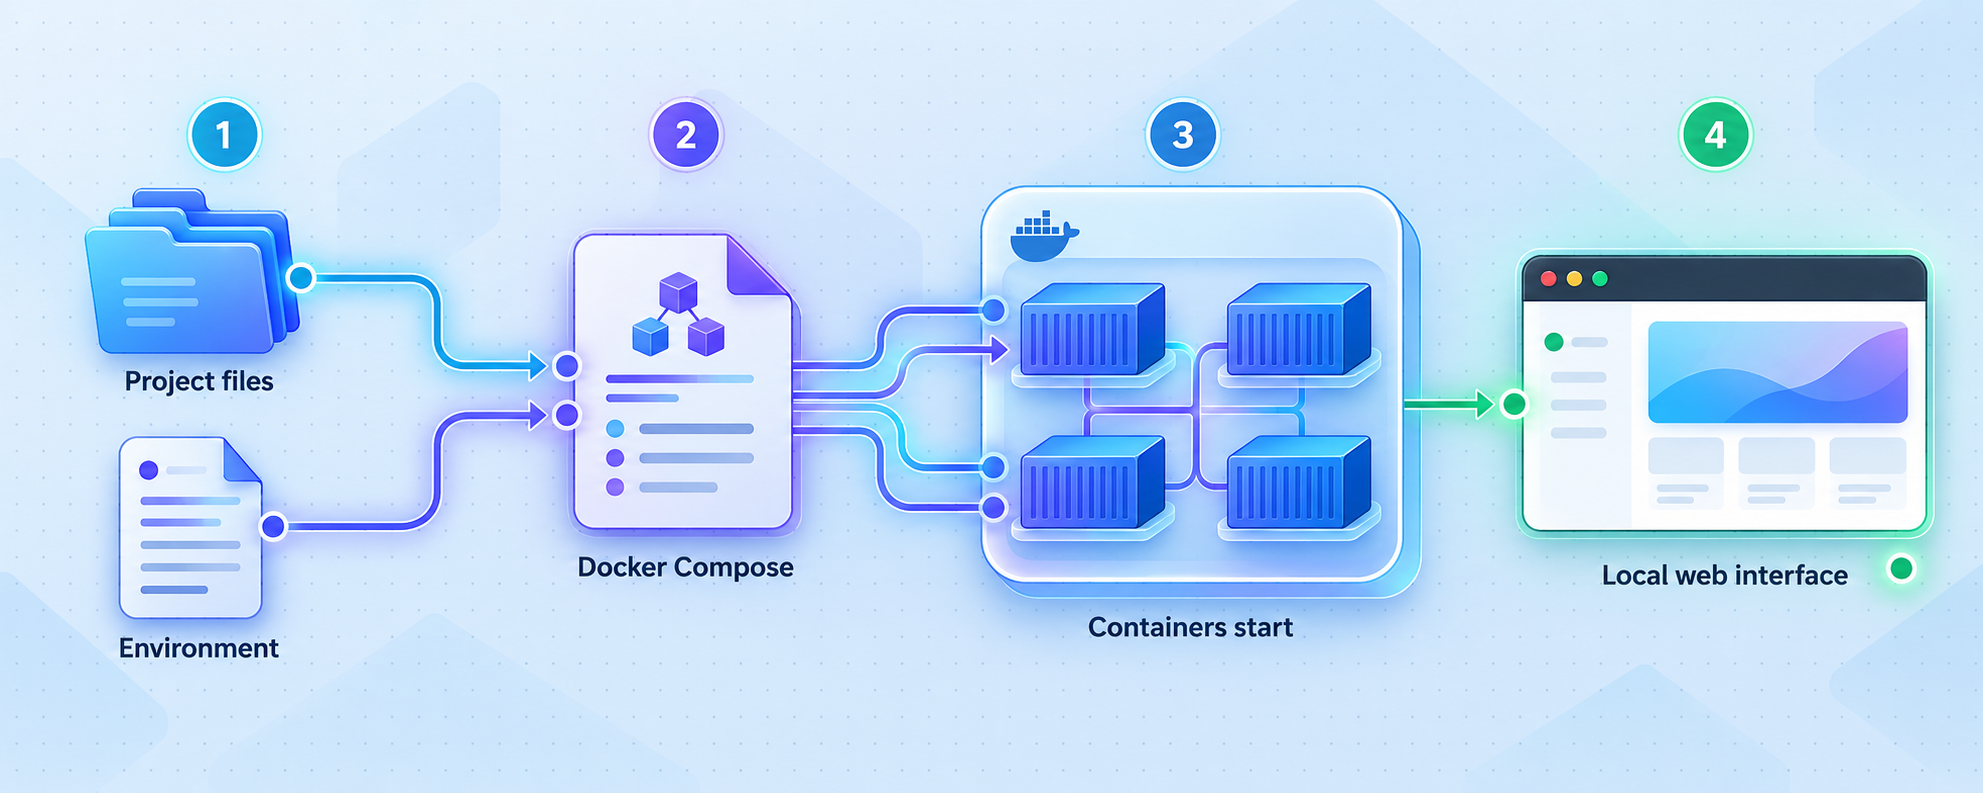
The official quick-start sequence contains three actions: clone the repository, enter its directory, and start the services with Docker Compose. Run the commands from a location where you want the repository checkout to remain.
Clone the Laminar repository
Download the project repository from its official GitHub location. This creates a local directory named lmnr containing the Compose files, environment configuration, application components, and supporting service configuration.
git clone https://github.com/lmnr-ai/lmnrEnter the repository directory
Compose resolves its default configuration from the current project directory, so move into the cloned checkout before starting the services.
cd lmnrStart the lightweight stack
Start the services in detached mode using the repository’s default Compose configuration. Detached mode returns control to your shell while the containers continue running.
docker compose up -dAllow the services time to initialize before testing the interface. A container being started does not necessarily mean that every application dependency is immediately ready. If the page does not respond on the first attempt, inspect the Compose state and logs rather than repeatedly recreating the entire stack without identifying the failure.
Starting the full Compose configuration
If you deliberately selected Laminar’s production-oriented Compose option, use the full file instead of the default startup command:
docker compose -f docker-compose-full.yml up -dKeep track of which Compose file you use. Commands that inspect, restart, recreate, or stop a deployment should address the same Compose configuration. Mixing commands between the default and full files can lead to confusion about which services and containers you are operating.
The quick-start and full Compose files are distinct deployment choices. This guide uses the default file unless a command explicitly includes -f docker-compose-full.yml. If you choose the full file, carry that file selection into later operational commands where required.
Configure optional Laminar features carefully
The repository contains an .env file at its root, and some Laminar features require provider configuration there. Do not assume that every optional feature must be enabled to test the basic browser interface. Start with the smallest configuration needed for your use case, verify the stack, and then add optional integrations deliberately.
Optional LLM provider configuration
Laminar’s frontend AI features, including chat-with-trace and SQL-with-AI, and its server-side AI workers require an LLM provider. The documented providers include Gemini, OpenAI or an OpenAI-compatible gateway, AWS Bedrock using Anthropic Claude, and Azure AI Foundry.
Choose one provider setup rather than combining unrelated examples. The following environment variable names are documented by Laminar. Replace placeholders locally and never commit real credentials to version control.
# Gemini
LLM_PROVIDER=gemini
LLM_API_KEY=your_gemini_key
# OpenAI or an OpenAI-compatible gateway
LLM_PROVIDER=openai
# LLM_BASE_URL=http://localhost:4000
LLM_API_KEY=your_openai_key# AWS Bedrock using AWS credentials
LLM_PROVIDER=bedrock
AWS_ACCESS_KEY_ID=...
AWS_SECRET_ACCESS_KEY=...
AWS_REGION=us-east-1# Azure AI Foundry example
LLM_PROVIDER=azure_chat_completions
LLM_API_KEY=your_azure_key
AZURE_RESOURCE_ID=your_resource_name
# AZURE_API_VERSION=preview
For Azure AI Foundry, the documented provider identifiers also include azure_responses and azure_anthropic. The correct value depends on the API shape used by your deployment. Laminar notes that model identifiers are deployment names in this configuration, so the optional model variables may need to be set unless your deployments use expected model names.
Laminar supports optional LLM_MODEL_SMALL, LLM_MODEL_MEDIUM, and LLM_MODEL_LARGE variables. Provider-specific defaults apply when these are unset. An optional LLM_DEFAULT_HEADERS_JSON value can supply static headers for a provider or gateway that requires them:
LLM_DEFAULT_HEADERS_JSON='{"X-Gateway-Tenant":"tenant"}'
API keys and cloud credentials are secrets. Store them using controls appropriate to your deployment, restrict access to the host and environment file, and avoid including them in screenshots, tickets, logs, shell history, or repository commits. Do not expose the .env file through a web server or file-sharing mechanism.
SDK configuration is a separate task
Starting the Laminar web stack does not automatically configure your applications to send telemetry to it. Laminar states that self-hosted SDKs require the appropriate baseUrl and correct ports. The supplied evidence delegates exact SDK-specific values to Laminar’s self-hosting documentation and does not establish a single universal endpoint for every SDK.
For that reason, this guide does not guess an ingestion URL, exporter port, or language-specific environment variable. Configure each SDK using the current instructions for that SDK and your selected Compose profile. The browser UI address at port 5667 should not be assumed to be the correct telemetry ingestion endpoint.
The documented browser interface uses http://localhost:5667, but Laminar separately requires SDK configuration with the correct baseUrl and ports. Confirm those values for your SDK and deployment instead of reusing the UI URL without verification.
Verify Laminar locally before exposing it
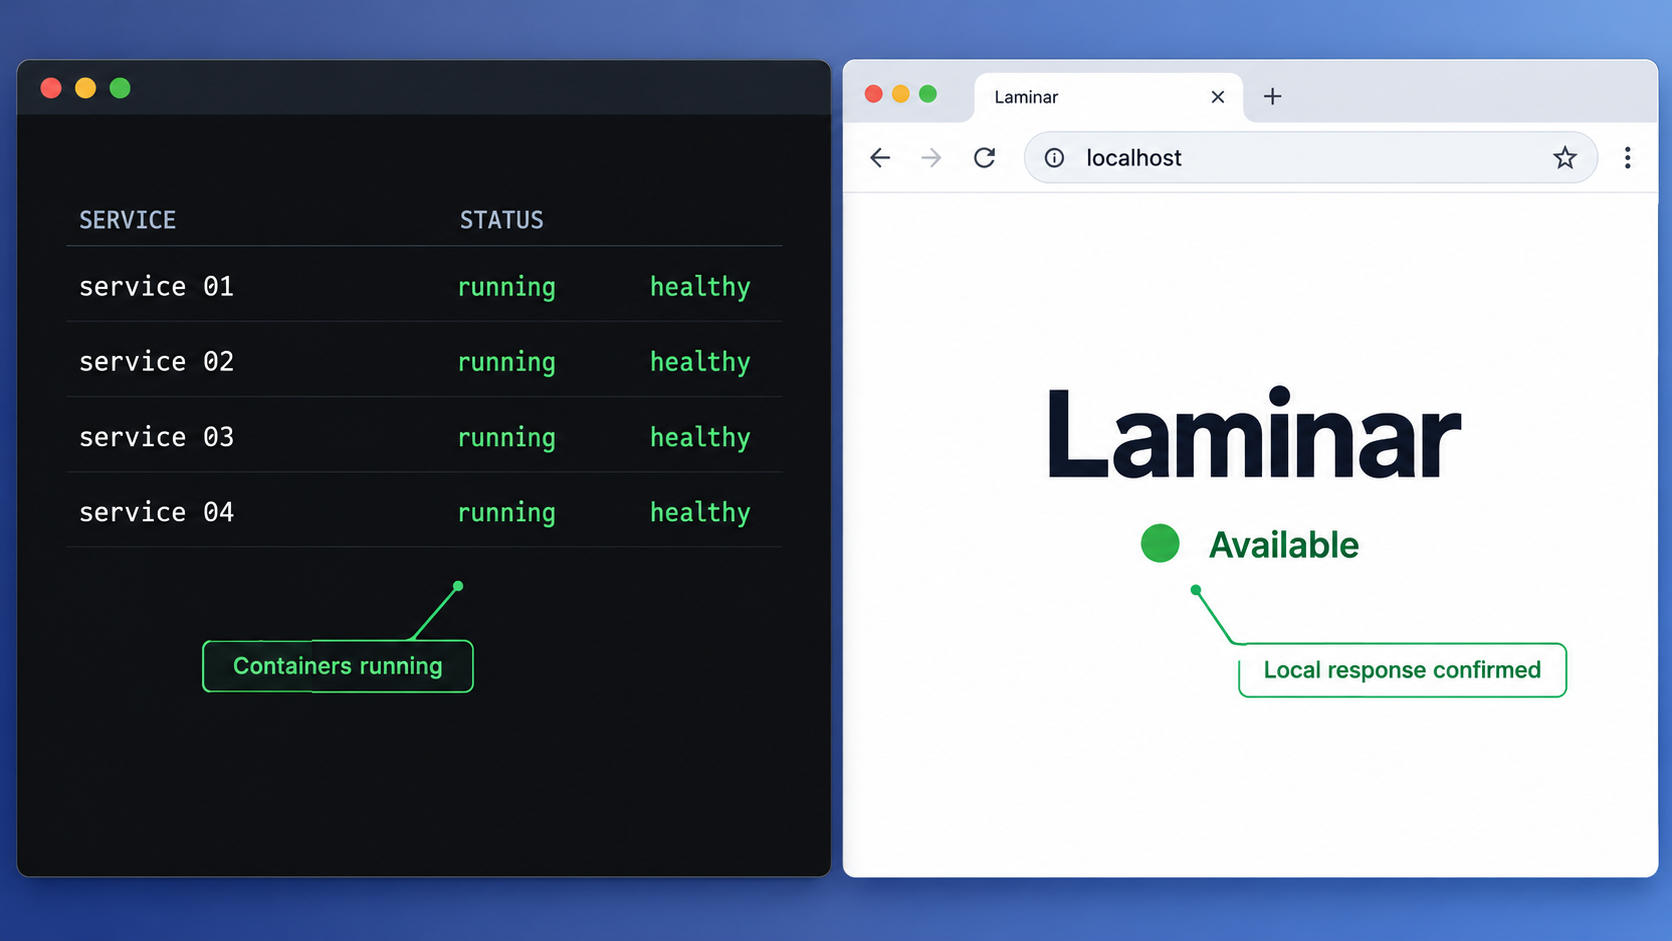
Open the documented local interface in a browser on the Docker host:
http://localhost:5667A successful result means that the browser can connect and the Laminar interface loads. Continue far enough to confirm that the page is functional rather than relying only on an open TCP connection. If the application presents an initialization or sign-in workflow, complete it according to the interface and your intended access policy.
Check the Compose service state
From the lmnr repository directory, use Docker Compose to inspect the current project:
docker compose psIf you started the full configuration, select that file consistently:
docker compose -f docker-compose-full.yml psLook for containers that repeatedly restart, exit, or never become ready. The exact service list can change between Laminar releases, so this guide does not hardcode an expected number of containers or specific service names beyond commands explicitly documented for upgrade handling.
Inspect logs when the page does not load
docker compose logsFor a full Compose deployment, use:
docker compose -f docker-compose-full.yml logsLogs can reveal image download failures, unavailable dependencies, port conflicts, invalid environment values, permission errors, or storage problems. Review the earliest meaningful error rather than only the last repeated message. Before sharing logs, remove secrets, tokens, private addresses, customer data, and provider credentials.
Test from the Localtonet client device
The Localtonet client must run on a device that can reach the local target. If it runs directly on the Laminar host, 127.0.0.1 with port 5667 is the natural target after local verification. If the client runs on another machine, 127.0.0.1 would refer to that other machine, not the Laminar host. In that arrangement, use a local address reachable from the client device and make sure Laminar is intentionally listening on the necessary interface.
localhost and 127.0.0.1 always refer to the device making the connection. Running the Localtonet client on the Laminar host minimizes local network exposure and avoids confusion about which machine owns the loopback interface.
Routine operation and upgrades
Run Compose commands from the repository directory and retain the repository’s configuration files. The Compose project definition is part of the deployment, not a disposable installation artifact. Back up persistent application data and relevant configuration according to the services and volumes defined by the version you deploy.
Stop and start the current containers
Standard Compose lifecycle commands can stop the project’s containers without deleting the project definition and start them again later:
docker compose stop
docker compose start
To apply a changed Compose configuration or recreate services as needed, run the documented startup form again:
docker compose up -d
For the full deployment, add -f docker-compose-full.yml to the corresponding commands. Before using removal commands or deleting volumes, understand where Laminar stores persistent data and make a tested backup. This article does not prescribe destructive cleanup commands because the correct retention decision depends on your deployment and data requirements.
Update the repository deliberately
An upgrade should be treated as a controlled application change. Record the currently deployed revision or release, inspect release notes and configuration changes, back up persistent data, obtain the intended new revision, and then recreate the affected services using the same Compose file as the deployment. Avoid blindly tracking a changing branch in environments that require repeatable releases.
Laminar’s current repository instructions call out a specific ClickHouse configuration change for existing self-hosted installations. That change disables internal telemetry logs that are not useful for a single-node installation and retains query and error logs for three days. After pulling the change, Laminar instructs operators to recreate the ClickHouse container:
docker compose up -d --force-recreate clickhouse
If your deployment uses a different Compose file, Laminar explicitly says to pass -f with the file used by that deployment. For example, the full-stack form is:
docker compose -f docker-compose-full.yml up -d --force-recreate clickhouseDisabling a ClickHouse system log prevents new writes but does not erase an existing table. Laminar documents the following command for truncating the disabled system log tables after ClickHouse restarts:
docker compose exec -T clickhouse clickhouse-client --multiquery <<'SQL'
TRUNCATE TABLE IF EXISTS system.trace_log;
TRUNCATE TABLE IF EXISTS system.text_log;
TRUNCATE TABLE IF EXISTS system.part_log;
TRUNCATE TABLE IF EXISTS system.metric_log;
TRUNCATE TABLE IF EXISTS system.asynchronous_metric_log;
TRUNCATE TABLE IF EXISTS system.background_schedule_pool_log;
TRUNCATE TABLE IF EXISTS system.query_metric_log;
TRUNCATE TABLE IF EXISTS system.query_thread_log;
TRUNCATE TABLE IF EXISTS system.query_views_log;
TRUNCATE TABLE IF EXISTS system.session_log;
TRUNCATE TABLE IF EXISTS system.crash_log;
TRUNCATE TABLE IF EXISTS system.opentelemetry_span_log;
TRUNCATE TABLE IF EXISTS system.zookeeper_log;
TRUNCATE TABLE IF EXISTS system.blob_storage_log;
TRUNCATE TABLE IF EXISTS system.processors_profile_log;
TRUNCATE TABLE IF EXISTS system.asynchronous_insert_log;
SQL
Run the ClickHouse cleanup only when applying the relevant Laminar upgrade and only after confirming that the listed system-log history is no longer required. When ClickHouse applies a new TTL to an existing query_log or error_log, it may rename the old table with a numeric suffix such as query_log_0. Inspect any suffixed table before deciding whether to drop it.
Expose the Laminar web interface with Localtonet
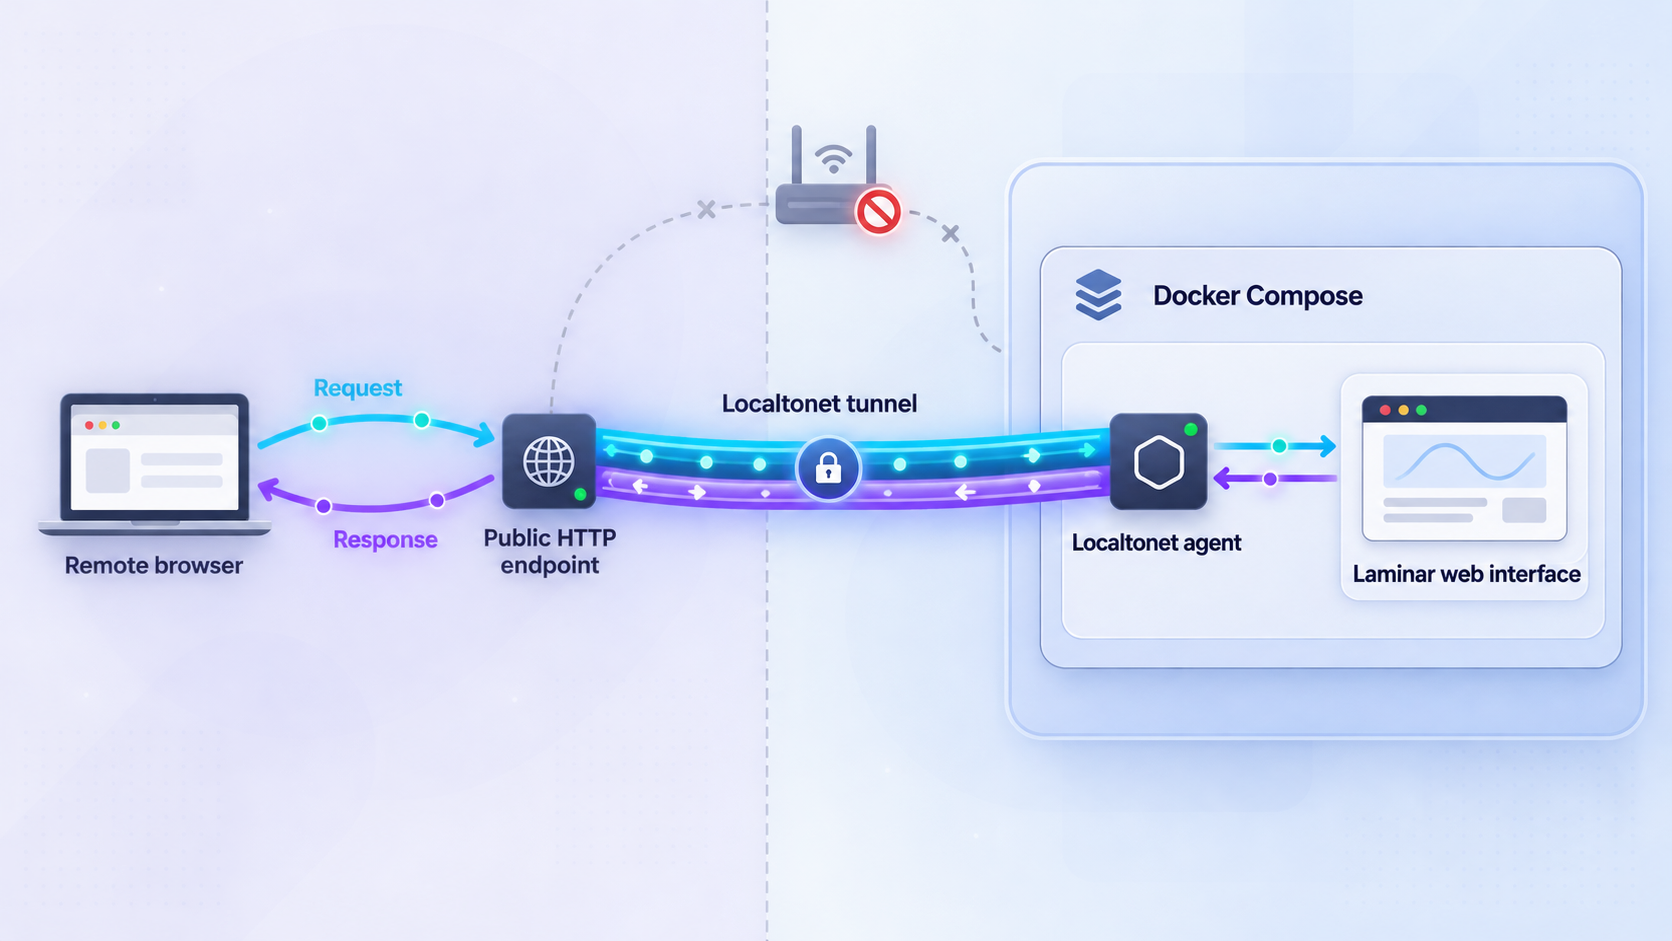
Once Laminar works at http://localhost:5667, an HTTP tunnel is the appropriate Localtonet family for publishing its browser interface. The Localtonet client creates an outbound connection to our relay infrastructure, and the tunnel forwards requests from its assigned public HTTPS address to the configured local HTTP target.
Creating a tunnel configuration does not automatically make it active. You must start the tunnel, and it remains available only while both the selected client device and the tunnel are running.
Install and run the Localtonet client
Install the Localtonet client on the Laminar host or another device that can reach the verified Laminar web interface. Running it on the same host allows the tunnel to target the loopback interface directly.
Authenticate or select the client device
Use the device-specific authentication token supplied through your Localtonet account and select the device that will run the tunnel. Never place this token in source code, screenshots, public instructions, or shared logs.
Select an available relay server
Choose a currently available server or region from the Localtonet dashboard. Available values can vary, so obtain the selection from the current product rather than copying a hardcoded server code from an article.
Create an HTTP tunnel to Laminar
Create an HTTP tunnel and set its local target to the Laminar interface. When the client runs on the Laminar host, use local IP 127.0.0.1 and port 5667. HTTP tunnels can use Random Sub Domain, Custom Sub Domain, or Custom Domain as their Process Type, subject to the options currently available to your account.
Start the tunnel and open its assigned address
Use the Start button after saving the configuration. Open the assigned public URL in a browser and confirm that the same Laminar interface loads through the tunnel.
Stop or delete access when it is no longer needed
Stop the tunnel to make the endpoint unavailable temporarily, or delete it when the configuration is no longer required. Stopping Laminar, disconnecting the selected Localtonet client, or stopping the tunnel also makes remote access unavailable.
For the current dashboard workflow, consult our Localtonet HTTP tunnel documentation. Exact custom-domain DNS requirements should be checked against the current documentation before changing DNS records, because this article does not have enough verified information to prescribe them.
Test the complete request path
Use a browser on a network outside the Laminar host’s local network and open the assigned Localtonet URL. Confirm that the page renders, navigation works, and requests do not fail after the initial page load. Testing from an external network helps distinguish a genuinely working public route from a browser session that is still using the local address.
A useful diagnostic sequence is:
- Verify
http://localhost:5667on the Laminar host. - Verify the same target from the Localtonet client device if the client is on another machine.
- Confirm that the selected Localtonet device is connected.
- Confirm that the HTTP tunnel has been started.
- Open the assigned public URL from an independent network.
Security and exposure considerations
A working public tunnel changes the exposure boundary of the application. A service that was reachable only through loopback can now receive traffic through a public address. Localtonet provides the route, but the application’s authorization, user management, data handling, and session security remain important.
Prefer running the Localtonet client on the same host and forwarding to 127.0.0.1:5667 when that arrangement fits your environment. This allows the web interface to remain bound to the local host while the outbound tunnel provides the remote route. If the client must run elsewhere, protect the local network path between the client device and the Laminar host.
An HTTP tunnel is not the same as Localtonet VPN Manager. Standard tunneling forwards the selected service through a public endpoint. VPN Manager is our separate private mesh VPN feature. Choose the access model that matches your requirements rather than describing an HTTP tunnel as a VPN.
Agent traces may contain prompts, responses, tool arguments, internal identifiers, application data, or user-provided content. Apply appropriate retention, redaction, access control, backup protection, and incident-response policies before collecting production telemetry or exposing its interface remotely.
Troubleshooting the installation and tunnel
The clone command fails
Confirm that Git is installed, the host can reach GitHub, and the destination directory is writable. If a partial lmnr directory already exists, inspect it before deleting or overwriting anything. A failed clone is a repository-access problem and occurs before Docker or Localtonet becomes involved.
Docker Compose cannot start
Run docker version and docker compose version, then confirm that the Docker daemon is running and your user can access it. Review the complete error output. Image download errors, insufficient disk space, permissions, invalid Compose syntax for an outdated implementation, and occupied host ports require different remedies.
Containers start but the UI does not load
Inspect docker compose ps and docker compose logs. Wait for dependencies to initialize, then retry http://localhost:5667. Check whether another process already uses port 5667. Do not change the port blindly because the supplied evidence does not document all configuration relationships that may depend on it.
The public URL returns an error
Return to the local test first. If http://localhost:5667 fails, troubleshoot Laminar. If it works, verify that the Localtonet client is connected, the intended device is selected, the local IP is correct from that device’s perspective, the local port is 5667, and the tunnel is running.
A common addressing mistake is configuring 127.0.0.1 while the Localtonet client runs on a different machine from Laminar. In that case, the tunnel tries to connect to port 5667 on the client machine itself. Either run the client on the Laminar host or provide an intentionally reachable local address for the Laminar host.
The interface loads but SDK data does not appear
Treat UI connectivity and telemetry ingestion as separate paths. The browser interface being reachable proves only that the UI route works. Recheck the Laminar SDK’s documented baseUrl, ports, credentials, and integration instructions for the exact SDK and Compose profile. This guide intentionally does not infer ingestion settings from port 5667.
Optional AI features do not work
Confirm that one supported LLM provider is configured with the correct provider identifier and credentials. For gateways, check any required base URL and static headers. For Azure, ensure that the provider mode matches the deployed API shape and that model variables refer to deployment names where required. Restart or recreate the relevant services after changing environment configuration so that the containers receive the new values.
An upgrade leaves ClickHouse behaving unexpectedly
Verify that you recreated the ClickHouse container using the same Compose file as the deployment. If applying the documented internal-log change, remember that disabling writes does not remove old tables. Inspect existing and numerically suffixed log tables carefully before any destructive cleanup.
Frequently asked questions
What URL does a self-hosted Laminar interface use?
The documented local browser address for the default self-hosted Compose stack is http://localhost:5667. Verify that address on the Laminar host before creating a remote-access tunnel.
Which Docker Compose file should I use?
Use docker compose up -d for Laminar’s lightweight but full-featured quick-start stack. Laminar identifies docker compose -f docker-compose-full.yml up -d as its production-oriented self-hosted Compose option. Production operation still requires independent planning for security, capacity, backups, monitoring, and recovery.
Does Localtonet install or configure Laminar?
No. Docker Compose installs and starts the Laminar services. With Localtonet, you add remote connectivity to a working local service. Laminar must already respond locally before the HTTP tunnel can provide useful remote access.
Do I need router port forwarding or a public IP address?
Not for the Localtonet workflow described here. Our client establishes an outbound connection to a relay server, so the HTTP tunnel does not require inbound router port forwarding, firewall changes, VPN setup, or a public IP address.
Is creating a Localtonet tunnel enough to make it available?
No. Creating the configuration and running it are separate lifecycle actions. Start the tunnel after configuration. The endpoint remains available only while the selected Localtonet client is connected and the tunnel is running.
Can I use the Laminar UI URL as my SDK base URL?
Do not assume so. Laminar states that self-hosted SDKs require the appropriate baseUrl and correct ports, but those values vary by integration and deployment. Follow the current instructions for your specific SDK instead of inferring an ingestion endpoint from the browser UI port.
Is an LLM provider required for the basic installation?
An LLM provider is required for Laminar’s frontend AI features, such as chat-with-trace and SQL-with-AI, and for server-side AI workers. The documented providers include Gemini, OpenAI or compatible gateways, AWS Bedrock, and Azure AI Foundry. Configure only the provider you intend to use and protect its credentials.
Is a Localtonet HTTP tunnel a VPN?
No. The HTTP tunnel in this guide publishes the selected Laminar web service through a public address. Localtonet VPN Manager is our separate private mesh VPN feature. Standard HTTP tunneling should not be described as VPN access.
Access your self-hosted Laminar interface with Localtonet
Install and verify Laminar locally first, then create a Localtonet HTTP tunnel to make the working interface available through an assigned public address without configuring inbound router port forwarding.
Get Started Free →

