

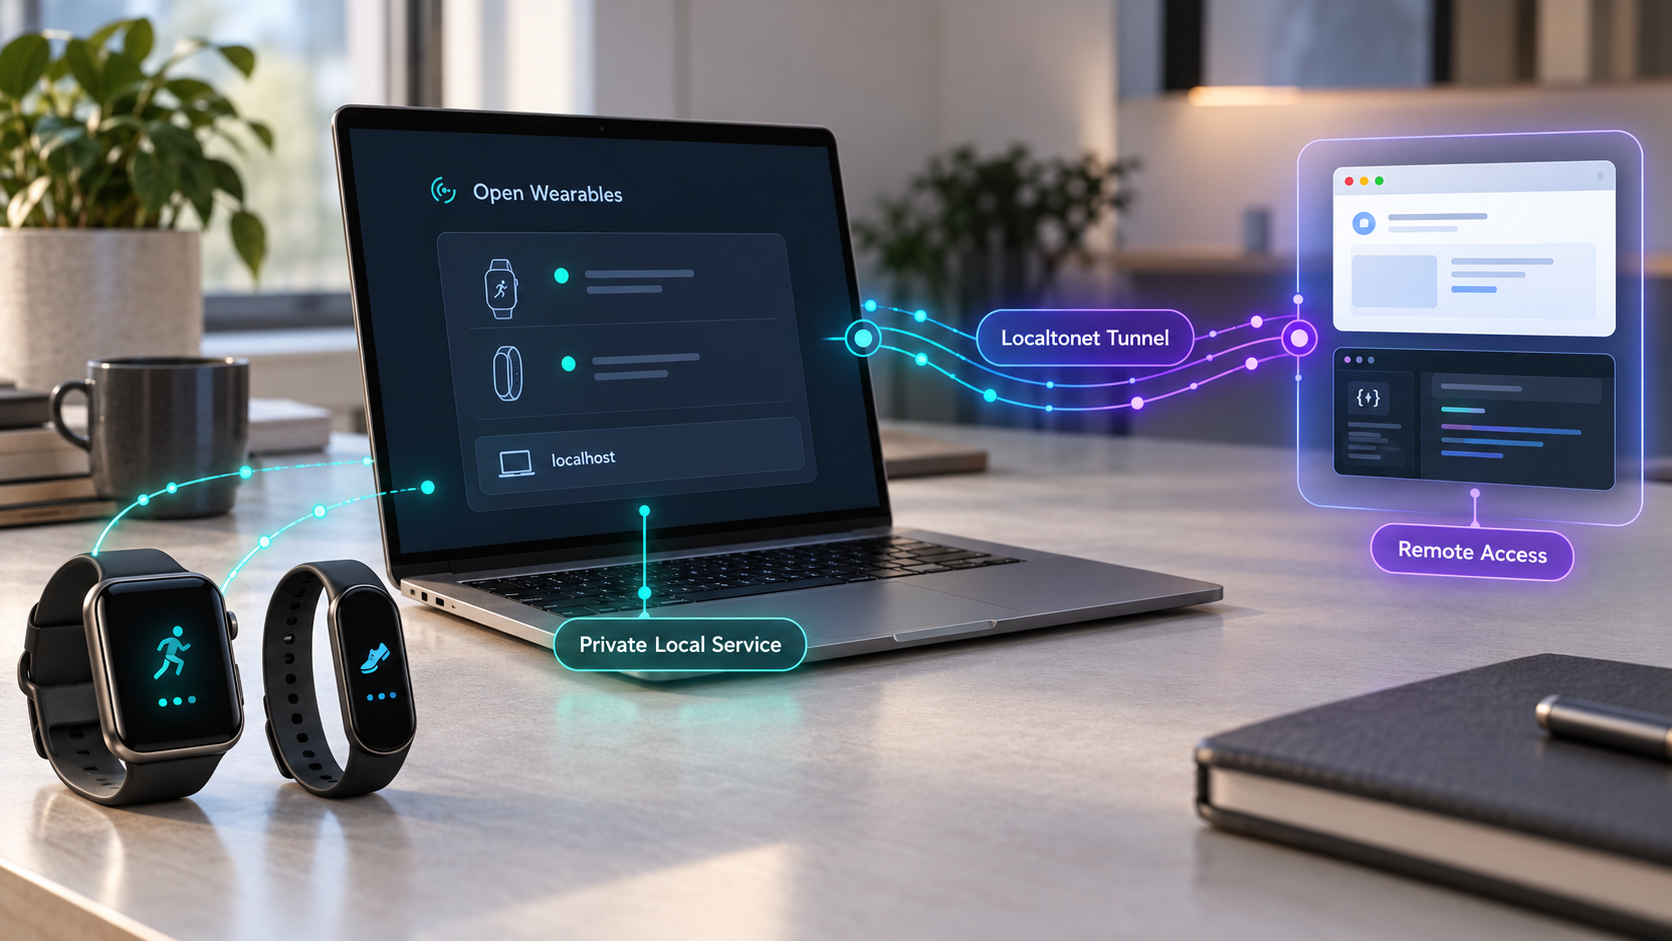
Run your wearable health data platform locally, verify every service, and expose only the endpoint you need
Open Wearables provides a self-hosted developer portal and unified REST API for wearable health data. In this guide, we install the development deployment from the official repository with Docker Compose, configure its environment files, verify the portal and Swagger UI locally, and cover routine container operations and troubleshooting. After the local deployment works, we show how to connect the portal or API to a Localtonet HTTP tunnel without opening an inbound router port. We also explain the additional security and frontend configuration decisions that matter when health-related services become remotely reachable.
📋 What's in this guide
What Open Wearables provides
Open Wearables is an open-source, self-hosted platform that normalizes data from multiple wearable devices and fitness services behind a consistent API. Its documented provider ecosystem includes services and device platforms such as Garmin, Oura, Whoop, Suunto, Polar, Ultrahuman, Strava, Fitbit, Withings, Apple Health, Samsung Health, and Google Health Connect. Provider availability, setup requirements, and data coverage can differ, so connecting a provider is a separate task from installing the core platform.
The main value of this architecture is that an application can work with a unified data model instead of implementing a completely separate data pipeline for each wearable provider. Open Wearables exposes health information such as activity summaries, sleep, workouts, heart rate, heart rate variability, oxygen saturation, weight, and other supported data types. It also includes webhooks, mobile SDK integrations, a developer portal, and a built-in Model Context Protocol server for supported AI workflows.
Individuals can use the same self-hosted platform to keep their wearable data on infrastructure they control. Developers can use it as the data layer for fitness applications, coaching products, healthcare prototypes, research projects, wellness tools, and AI-assisted health experiences. Self-hosting provides infrastructure control, but it also makes the operator responsible for credentials, network exposure, backups, upgrades, provider configuration, and access policies.
Local services used in this guide
The documented Docker Compose development deployment presents two important HTTP endpoints. The developer portal is available at http://localhost:3000, while the backend Swagger UI is available at http://localhost:8000/docs. These addresses are also useful health checks because they verify different parts of the deployment.
| Endpoint | Purpose | Remote-access consideration |
|---|---|---|
http://localhost:3000 |
Open Wearables developer portal | Expose this when authorized users need the browser interface remotely. |
http://localhost:8000/docs |
Backend Swagger UI | This is useful for API exploration but should not be exposed unnecessarily. |
http://localhost:8000 |
Backend HTTP service | Expose this when a remote application must call the REST API, subject to application authentication and access controls. |
In a browser, localhost always refers to the machine running that browser. A portal opened by a remote user cannot reach a backend configured as localhost:8000 unless that backend is also running on the remote user's computer. This distinction becomes important when exposing the frontend and backend separately.
Prerequisites and deployment decisions
The documented quick-start workflow requires Git, Docker, and the Docker Compose command integrated with Docker. Run the deployment on a machine with enough storage and memory for the application containers and the amount of wearable data you plan to retain. Exact resource requirements are not established by the supplied project evidence, so capacity should be measured against your own workload rather than inferred from an unsupported minimum.
You also need permission to clone the public repository, create configuration files, start containers, and bind the documented local ports. If another application already uses port 3000 or 8000, the default Compose deployment may not be able to publish that service. Do not change port mappings blindly because frontend and backend configuration can depend on their addresses.
Confirm the required tools
These commands report whether Git, Docker, and Docker Compose are available. They do not modify the host:
git --version
docker --version
docker compose version
If one of these commands is missing, install that prerequisite using the official instructions for the host operating system. Docker installation and service-management steps vary across Linux distributions, Windows, and macOS, so there is no single safe host-level installation command to reproduce here.
Choose development or production before proceeding
The repository's root docker compose up -d workflow builds from local source and is explicitly intended for development. It is appropriate for evaluating Open Wearables, testing integrations, and following this installation guide. It should not automatically be treated as a hardened production deployment.
For production, the project recommends its official themomentum/open-wearables-backend and themomentum/open-wearables-frontend container images pinned to a stable release tag. Do not deploy nightly, an unpinned moving tag, or an arbitrary build of the main branch when you need predictable production behavior.
A complete production Compose manifest, database architecture, backup configuration, secret store, reverse-proxy policy, and release-specific environment file are not established by the evidence available for this article. We therefore do not invent them. The installation below deliberately follows the supported development quick start, while the production section later explains the decisions that must be resolved before a real deployment.
A successful self-hosted installation does not by itself make the deployment suitable for regulated, clinical, or production use. Determine your own legal, privacy, retention, consent, authentication, backup, and incident-response obligations before processing real user health data.
Install Open Wearables with Docker Compose
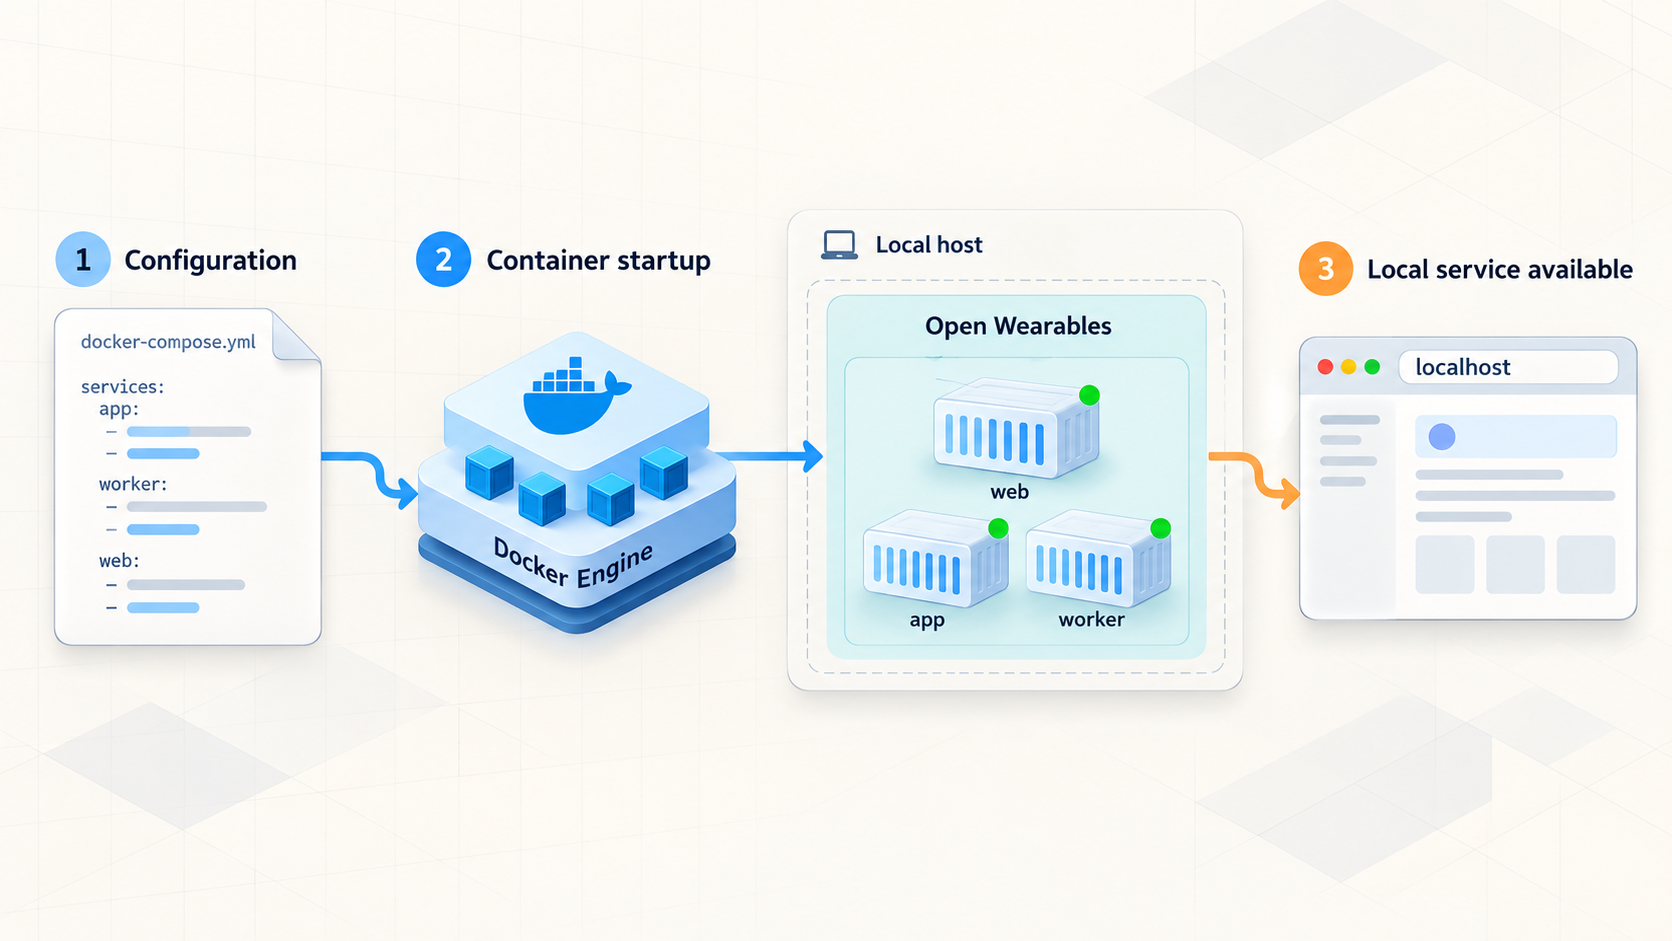
The following sequence follows the project's documented quick start. It clones the repository, creates backend and frontend environment files from the supplied examples, and starts the development deployment with Docker Compose.
Clone the Open Wearables repository
Clone the official repository and change into its root directory. The remaining commands assume the current working directory is open-wearables.
git clone https://github.com/the-momentum/open-wearables.git
cd open-wearablesCreate the backend environment file
Copy the tracked backend example to the active backend environment path. Review the resulting file before starting the application, especially credentials and provider-specific settings.
cp ./backend/config/.env.example ./backend/config/.envCreate the frontend environment file
Copy the frontend example environment file to the active frontend configuration path. The frontend's backend URL becomes particularly important if users will open the portal from another computer.
cp ./frontend/.env.example ./frontend/.envStart the development deployment
Ask Docker Compose to build and start the configured services in detached mode. Initial startup can take longer because Docker may need to download base images and build application containers.
docker compose up -dReview the administrator credentials before login
On initial startup, Open Wearables automatically creates an administrator account from the ADMIN_EMAIL and ADMIN_PASSWORD environment variables. The documented example defaults are admin@admin.com and your-secure-password. These are public defaults and must not be retained on any remotely reachable or meaningful deployment.
The seed operation runs only while the developer table is empty. Once any developer account exists, changing ADMIN_PASSWORD in the environment file does not update that existing account. Change the default password through the developer portal immediately after the first login. Additional accounts can then be invited from the portal.
Complete the first login and replace the default password while access is still local. Changing only the environment variable after the account has already been created does not rotate the existing account password.
Understand what the startup command does
The -d option leaves the services running in the background. It does not prove that every service became healthy or that the browser endpoints are ready. Container startup can fail because of a missing environment value, a port conflict, a build error, an unavailable dependency, or a migration problem. Verification is therefore a required stage, not an optional final check.
Verify the local deployment
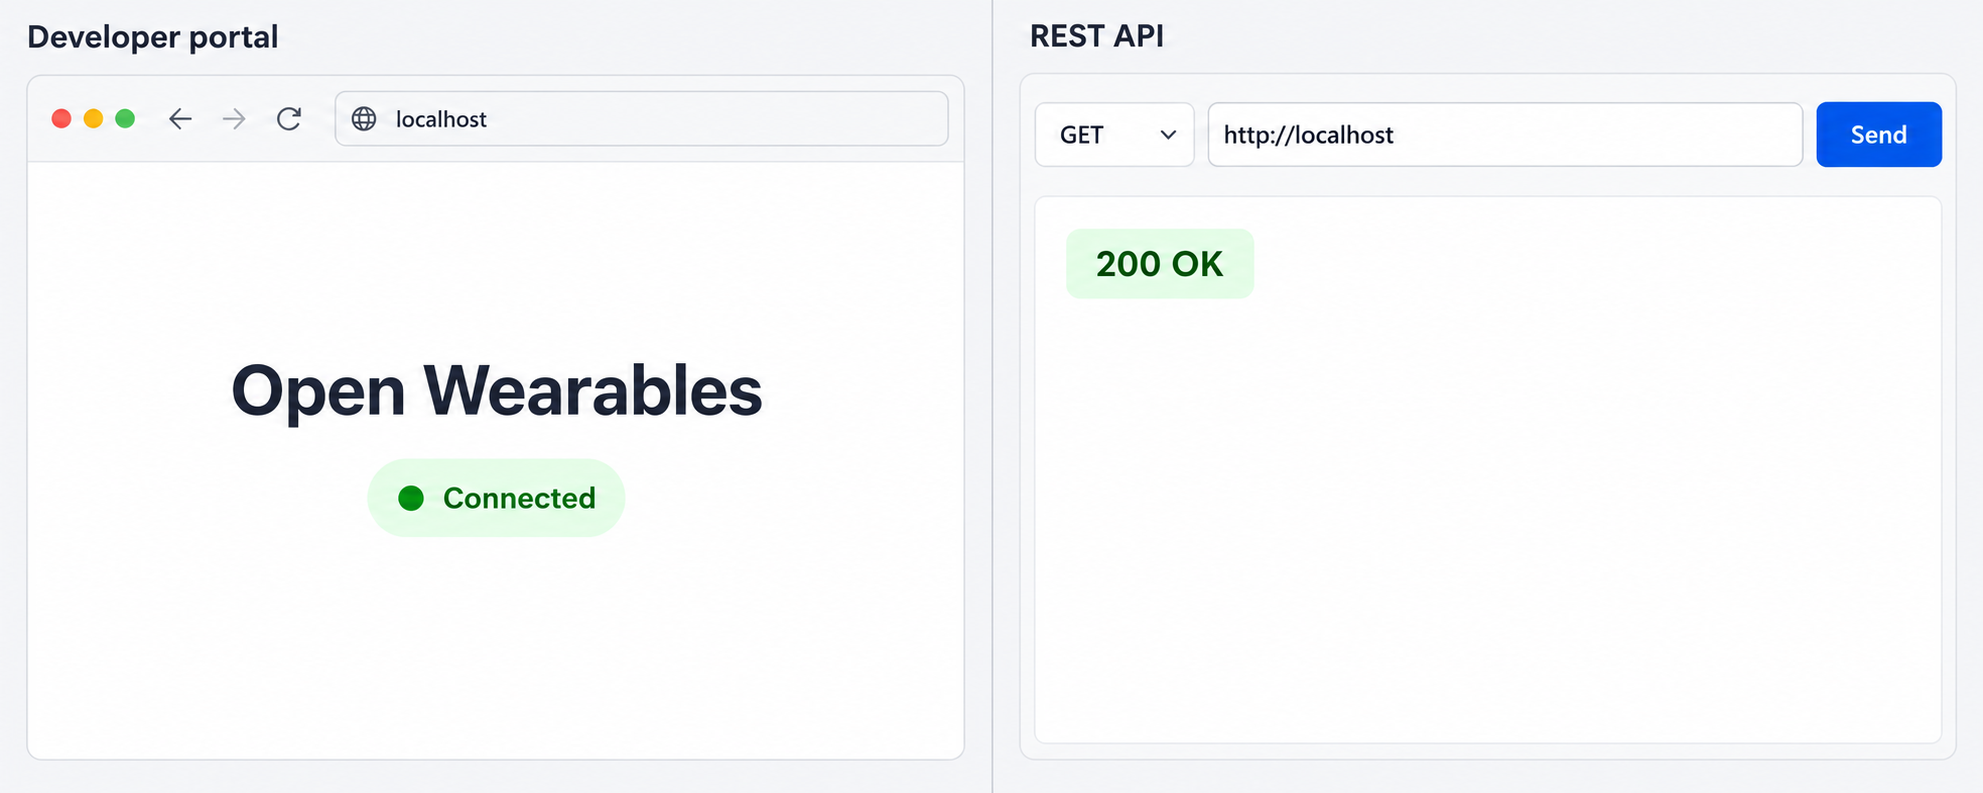
Keep the first verification entirely local. This separates application problems from tunnel configuration and prevents a partially configured administrator interface from becoming publicly reachable.
Inspect the Compose service state
docker compose psReview all listed services rather than checking only one container. A frontend container can be running while its backend or another dependency is failing. If a service is restarting, exited, or absent, inspect logs before attempting remote access.
Open the developer portal
From a browser on the Docker host, open:
http://localhost:3000A functioning page confirms that the frontend is reachable on its documented port. Sign in with the administrator account created during startup, then replace the public default password immediately. The portal can be used to create API keys and administer supported Open Wearables workflows.
Open the Swagger UI
In a second browser tab, open:
http://localhost:8000/docsThis should display the interactive API documentation supplied by the backend. Reaching the Swagger UI verifies that the backend HTTP listener is available. It does not guarantee that every wearable provider, OAuth flow, webhook destination, mobile SDK, or API credential is configured correctly.
Check logs when an endpoint is not ready
docker compose logsTo continue watching new output while reproducing a problem, use:
docker compose logs -f
Stop the live log view with Ctrl+C. This stops the log viewer, not the containers. Look for the earliest relevant error because later failures can be consequences of an initial configuration or dependency problem.
Optionally load sample data
The repository documents an optional seed target for creating test users and sample activity data:
make seedThis is optional and should be used only when sample records are appropriate. Do not run test-data seeding against an environment where synthetic records could be confused with real users or health information.
Port 3000 verifies the browser-facing developer portal, while port 8000 verifies the backend and its Swagger UI. Testing both makes it easier to distinguish a frontend problem from a backend problem.
Routine operation, shutdown, and upgrades
Once the deployment works, record the exact repository revision or release you are running, where its environment files are stored, and which volumes or external services hold persistent data. Do not assume that copying the Git working tree alone creates a complete backup.
Review current status
docker compose psRun this after host restarts, configuration changes, and upgrades. A container can exist without being ready, so pair the status output with application logs and browser checks.
Restart the Compose services
docker compose restartA restart is useful when a running process needs to be recycled without rebuilding its image. It is not a substitute for recreating containers after every environment or image change. Whether a particular setting is read at startup, build time, or runtime depends on that component and release.
Stop and remove the running Compose containers
docker compose downThis stops the project and removes the Compose-managed containers and network. Do not add volume-deletion options unless you have intentionally decided to remove persistent data and possess a verified backup.
Start the existing development configuration again
docker compose up -d
Recheck docker compose ps, the portal, the Swagger UI, and recent logs after each start.
Plan upgrades instead of pulling blindly
Open Wearables releases can contain breaking changes and data migrations. Release 0.10.0, for example, documents changes to calorie nullability, provider-specific energy and activity series, SDK token behavior, webhook payload retention, sync result structure, and stored data migrations. Its first startup after upgrading can take longer while migrations run.
Before upgrading a production-like system, read the release notes between the installed and target versions, back up persistent data, preserve the current configuration, identify API and webhook consumers affected by schema changes, and test the target version against a disposable copy when practical. Pin production images to a stable release rather than depending on a moving image.
| Operation | Command or action | What to verify afterward |
|---|---|---|
| Inspect services | docker compose ps |
All expected services are present and not repeatedly restarting. |
| Read logs | docker compose logs |
No unresolved startup, migration, configuration, or dependency errors. |
| Restart processes | docker compose restart |
Portal and backend return after the restart. |
| Stop the deployment | docker compose down |
Published endpoints are no longer reachable. |
| Upgrade | Follow release-specific instructions | Migrations finish, API consumers still work, and webhook payload changes are handled. |
Provide remote access with Localtonet
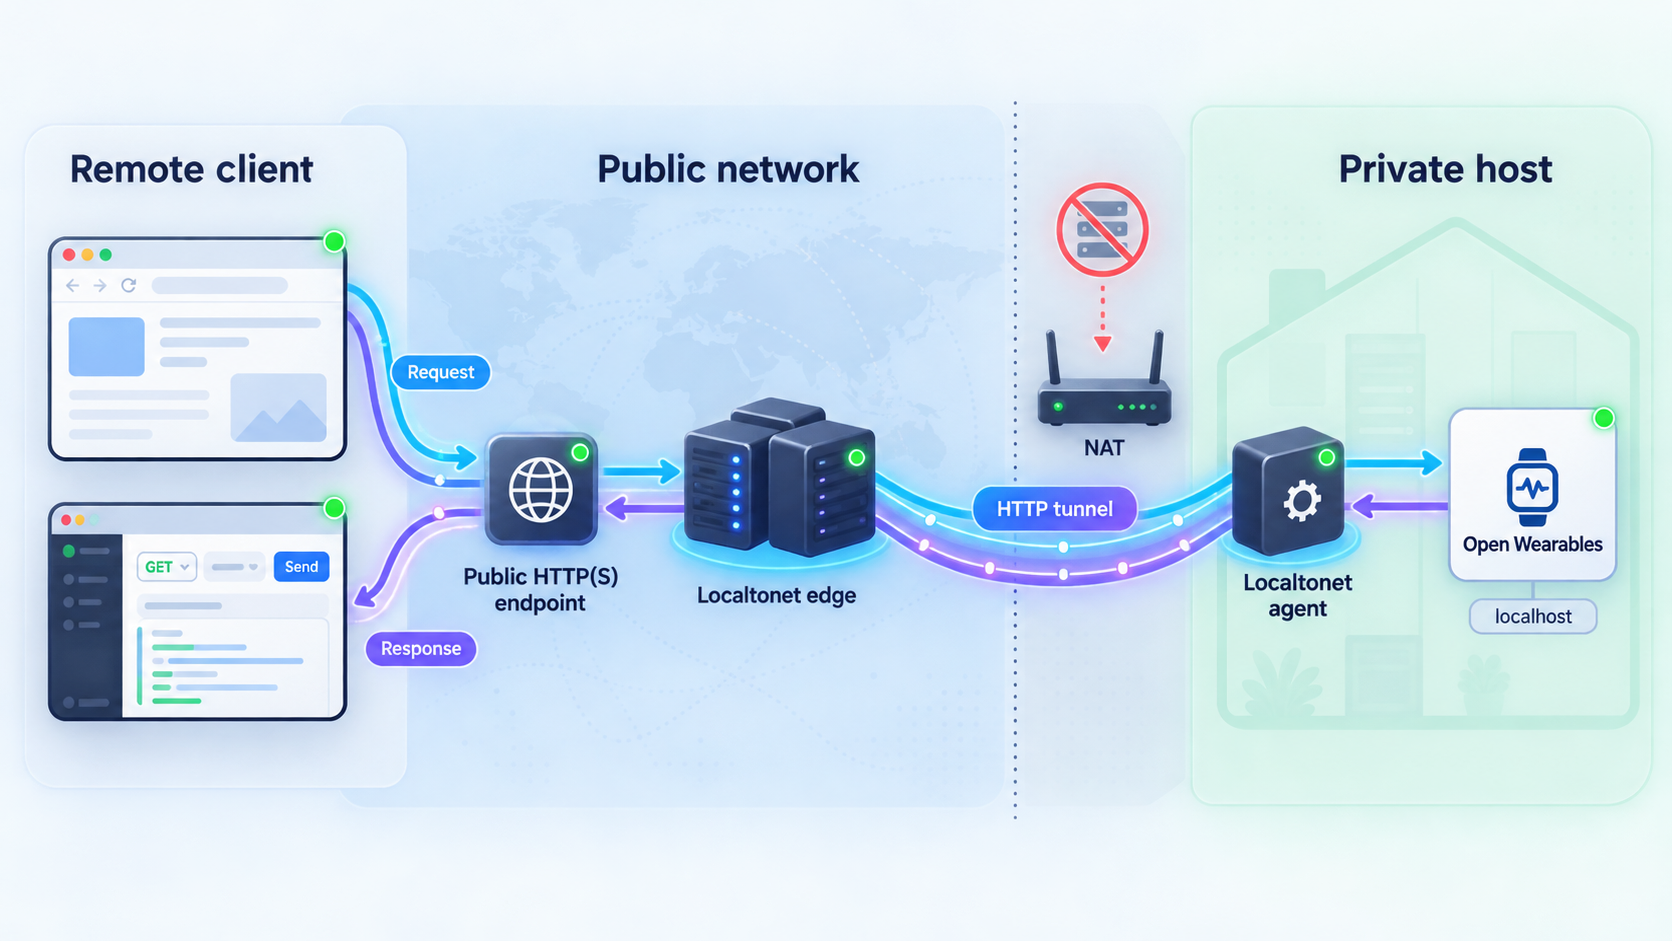
Add remote access only after the Open Wearables endpoint works on the machine where our client will run. With Localtonet, the client establishes an outbound connection to one of our relay servers. This allows the selected local HTTP service to receive traffic through a public HTTPS address without inbound router port forwarding, a public IP address, VPN setup, or inbound firewall changes.
Decide which interface actually needs to be reachable. The developer portal and backend are separate local HTTP targets. If only an automated application needs the REST API, exposing the portal adds unnecessary surface area. If a remote administrator needs the portal, the frontend may also need a remotely reachable backend URL to function fully.
| Goal | Local target | Important consideration |
|---|---|---|
| Remote developer portal | localhost:3000 |
The browser-facing frontend may also require a public backend address instead of a localhost backend URL. |
| Remote REST API | localhost:8000 |
Protect API credentials and expose only the API paths and capabilities your workflow requires. |
| Remote Swagger UI | localhost:8000/docs through the backend tunnel |
Swagger UI is part of the backend service, so exposing the backend can make documentation reachable too. |
Create the HTTP tunnel
Install and run our client on the correct device
Run the Localtonet client on the Open Wearables host or on another device that can reach the selected Open Wearables HTTP endpoint. Confirm the portal or API is already accessible from that device.
Authenticate or select the client device
Use the device-specific authentication token associated with the client that will run the tunnel. Treat this token as a secret and never place it in source control, screenshots, logs, or public examples.
Select an available relay server
Choose a currently available server or region from the dashboard. Available server codes and regions can change and may vary by plan, so this guide does not hardcode one.
Create an HTTP tunnel for the required local service
Set the local target to the address and port reachable from our client. Use port 3000 for the developer portal or port 8000 for the backend. If the client runs on the Open Wearables host, the documented local endpoints use localhost. If it runs elsewhere, use a reachable private address and apply appropriate LAN firewall controls.
Start the tunnel
Creating a tunnel does not start it. Use the Start button, then wait for the selected client and tunnel to show as connected before testing the assigned public HTTPS address.
Test remotely and stop exposure when finished
Test from a device outside the host's local environment. Confirm authentication, portal behavior, API responses, and frontend-to-backend communication. Stop or delete the tunnel when remote access is no longer required.
For the current dashboard workflow and available HTTP process types, consult our HTTP tunnel documentation. HTTP tunnels can use a generated random subdomain, a supported custom subdomain, or a custom domain. Exact custom-domain DNS instructions must be checked against the current documentation rather than inferred from this tutorial.
When both frontend and backend need remote access
Open Wearables 0.10.0 documents that VITE_API_URL is read at runtime by the frontend. It also documents an optional API_URL for cases where the frontend can reach the backend through an internal address, such as services sharing a Docker network. These variables serve different network perspectives and should not be changed without understanding which component uses each address.
A remote user's browser cannot use the Open Wearables host's localhost:8000. If the portal sends browser requests to that address, those requests will target the user's own computer and fail. A remote portal workflow may therefore require a second HTTP tunnel for the backend and a release-appropriate frontend configuration that points browser API traffic to that backend's public URL.
The Open Wearables repository does not provide Localtonet-specific callback or public-hostname settings, and the assigned public address depends on the tunnel configuration. We do not invent an OAuth callback path, webhook URL, CORS setting, or environment value. After Localtonet assigns the relevant public address, apply it only to the exact release-specific Open Wearables setting documented for that integration.
A public URL makes the selected HTTP listener reachable. It does not replace Open Wearables authentication, API-key controls, provider security, account management, least-privilege access, or your own data-protection obligations. Expose only the endpoint required for the workflow.
The public endpoint remains available only while the selected Localtonet client is connected and the tunnel is running. If the host, client, local container, or tunnel stops, remote access stops as well.
Security checklist for wearable health data
Wearable records can reveal sleep patterns, activity, location-related routines, physiology, and other sensitive personal information. Treat remote exposure as a security boundary change, even when the underlying application was already protected by a login.
Replace known defaults before exposure
Change the initial administrator password from the portal before starting a tunnel. Because the administrator seed runs only against an empty developer table, editing ADMIN_PASSWORD after the account exists is not a password-reset mechanism.
Keep secrets out of the repository
The active .env files can contain passwords, provider credentials, callback settings, and other sensitive values. Do not commit them, paste them into support posts, include them in container screenshots, or expose them in build logs. Apply filesystem permissions appropriate to the host and the administrators who genuinely need access.
Use separate credentials for separate consumers
Avoid sharing an administrator login or one API credential across unrelated applications. Separate credentials make rotation and incident response more manageable. Revoke credentials when a user, integration, or test environment no longer needs access.
Expose the minimum service
If a remote integration only calls the backend, do not expose the administrative portal solely for convenience. If remote access is temporary, stop the tunnel when the task ends. If Swagger UI is not needed remotely, account for the fact that it is served by the same backend listener before exposing that listener.
Review provider and callback behavior
Wearable providers can use OAuth redirects, signed requests, webhooks, SDK sessions, or provider-specific credentials. A Localtonet URL does not automatically register itself with those providers. Configure only documented callback URLs, keep provider secrets private, and verify the provider's own production requirements.
Back up data before upgrades
Back up persistent application data and configuration before release changes. A useful backup must be restorable, so test recovery rather than assuming that a copied directory is sufficient. Keep backups protected to the same standard as the live health data.
Troubleshooting the complete workflow
Docker Compose is not recognized
Confirm that docker compose version succeeds. The documented command uses the Compose integration written as docker compose. If Docker itself is missing or its service is unavailable, resolve that host-level problem using the installation procedure for your operating system before returning to Open Wearables.
A container exits or repeatedly restarts
Run docker compose ps, followed by docker compose logs. Check whether both example environment files were copied to their exact documented locations. Read the first relevant error rather than repeatedly restarting the stack, because restarts do not repair invalid values, unavailable dependencies, failed builds, or port conflicts.
Port 3000 or 8000 is already in use
Identify the process or container already bound to the port. Stop it if it is not needed, or plan a deliberate Open Wearables port and URL change using the project's release-specific configuration. Do not edit a single port in isolation without checking frontend API addresses, Compose mappings, provider callbacks, and any Localtonet tunnel target.
The portal loads but cannot reach the API
First verify http://localhost:8000/docs directly on the host. If Swagger UI fails locally, troubleshoot the backend before the frontend. If the API works locally but the remotely opened portal fails, inspect the frontend's configured API URL. A remote browser cannot use the server's localhost address.
The public URL does not respond
Confirm the local target first. Then verify that the selected Localtonet client is connected, the correct device token was selected, the tunnel was explicitly started, and its target port matches the working local service. A created but stopped tunnel is not reachable. Also check whether Open Wearables stopped or restarted after the tunnel was configured.
The public portal appears but login fails
Verify the credentials locally. If the account was already seeded, changing ADMIN_PASSWORD in the environment file does not update it. Use the portal's supported account workflow rather than assuming a container restart will reseed the administrator.
Swagger UI works but an API client receives an authorization error
Network connectivity and API authorization are separate. Reaching Swagger UI proves that the backend listener is accessible, not that a request has valid credentials. Confirm that the client uses an active API key created through the intended Open Wearables workflow, sends it in the documented form, and is calling an endpoint available in the installed release.
A provider connection or OAuth redirect fails
Confirm that the provider's configured callback exactly matches the public address and callback path required by Open Wearables for that release. Do not assume that exposing port 3000 or 8000 automatically updates provider settings. Also check whether the provider requires a verified application, HTTPS callback, approved domain, or separate production credentials.
An upgrade takes longer than expected
Review logs before interrupting it. Some releases perform startup data migrations, and release 0.10.0 specifically warns that the first startup can take longer while data sources are merged and stored rows are relabeled. Stopping an active migration without understanding its state can create additional recovery work.
Webhooks changed after an upgrade
Read the release notes for every version crossed. Open Wearables 0.10.0 includes changes to outgoing webhook event names, synchronization metadata, error fields, and payload retention. Test webhook consumers against the target release and make their processing tolerant of documented schema evolution.
Check container state first, then the local backend, then the local portal, then the Localtonet client, and finally the public endpoint. This order isolates application errors before adding remote networking to the investigation.
Frequently asked questions
Is the documented Docker Compose command suitable for production?
The repository states that its root docker compose up -d workflow builds from local source and is intended for development. Production deployments should use the official backend and frontend images pinned to a stable release, together with a reviewed production configuration, protected secrets, backups, monitoring, and an upgrade plan.
Which Open Wearables ports are used in this guide?
The documented developer portal is available at http://localhost:3000. The backend Swagger UI is available at http://localhost:8000/docs, with the backend HTTP service listening on port 8000.
Should I expose port 3000, port 8000, or both?
Expose port 3000 when authorized users need the developer portal. Expose port 8000 when a remote application needs the REST API. A fully functional remote portal may require both, because browser API requests cannot use the server's localhost address. Expose only what the workflow requires.
Does a Localtonet HTTP tunnel require router port forwarding?
No. Our client establishes an outbound connection to a Localtonet relay server, so the workflow does not require inbound router port forwarding, inbound firewall changes, a public IP address, or VPN setup. The selected client must remain connected and the tunnel must be running.
Does the tunnel replace Open Wearables authentication?
No. The tunnel provides network reachability to the selected local HTTP service. Continue using Open Wearables account controls, strong passwords, API keys, provider credentials, least privilege, and any additional access restrictions required by your environment.
Why did changing ADMIN_PASSWORD not change the login password?
The administrator seed runs only while the developer table is empty. Once a developer account exists, changing the environment variable does not update that account. Change the password through the developer portal using the supported account workflow.
Can I use a custom domain for the Open Wearables tunnel?
Localtonet HTTP tunnels support random subdomains, supported custom subdomains, and custom domains. Domain availability and exact DNS requirements must be checked in the current dashboard and documentation. Do not create provider callback settings until the final public hostname is known.
Can I stop remote access without shutting down Open Wearables?
Yes. Stop the Localtonet tunnel while leaving the local Docker Compose deployment running. The local portal and API can remain available on the host even though the public tunnel address is no longer connected.
Connect your verified Open Wearables service with Localtonet
Once the portal or REST API works locally and its credentials are secured, create an HTTP tunnel for only the endpoint your remote workflow needs. Start locally, test remotely, and stop the tunnel whenever public reachability is no longer required.
Get Started Free →

