

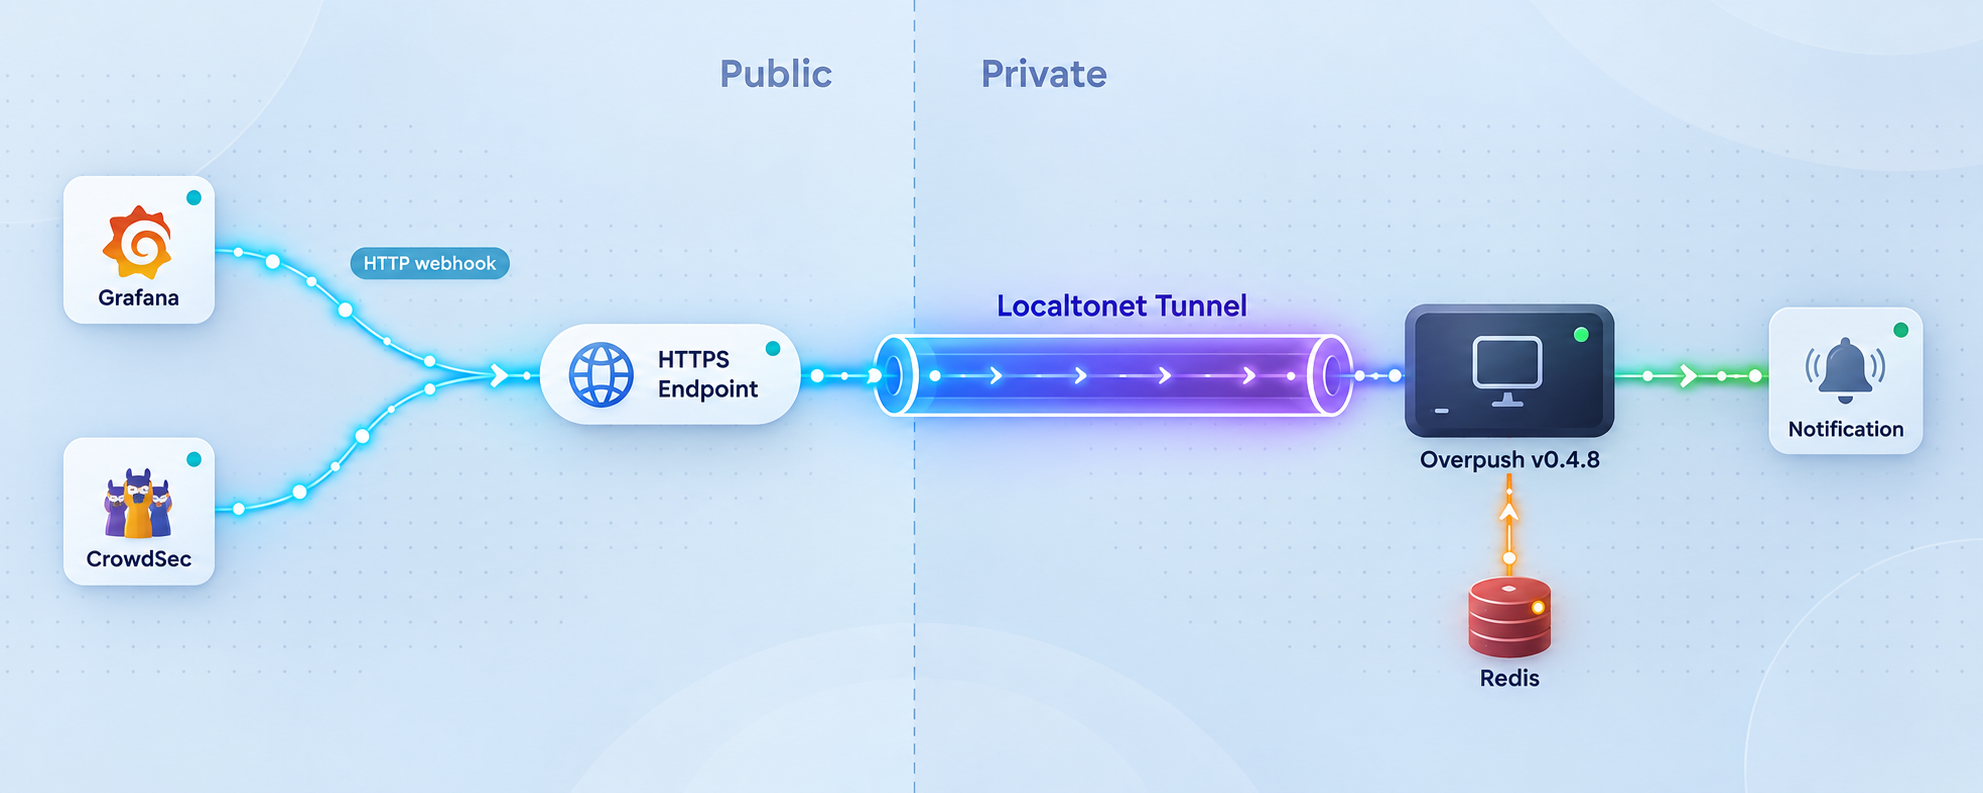
Build a private notification bridge, verify its queue and XMPP delivery path, then expose only the webhook listener
Overpush accepts Pushover-compatible requests and custom webhooks, queues notifications through a Redis-compatible backend, and delivers them through native XMPP or an Apprise-supported service. This guide pins Overpush v0.4.8, produces a predictable executable, configures a local Redis backend, and supplies one complete XMPP-based configuration for Grafana and CrowdSec Security Engine. After the local path works, we publish the HTTP listener through Localtonet without inbound router port forwarding, firewall changes, VPN setup, or a public IP address.
📋 What's in this guide
How the Overpush notification path works
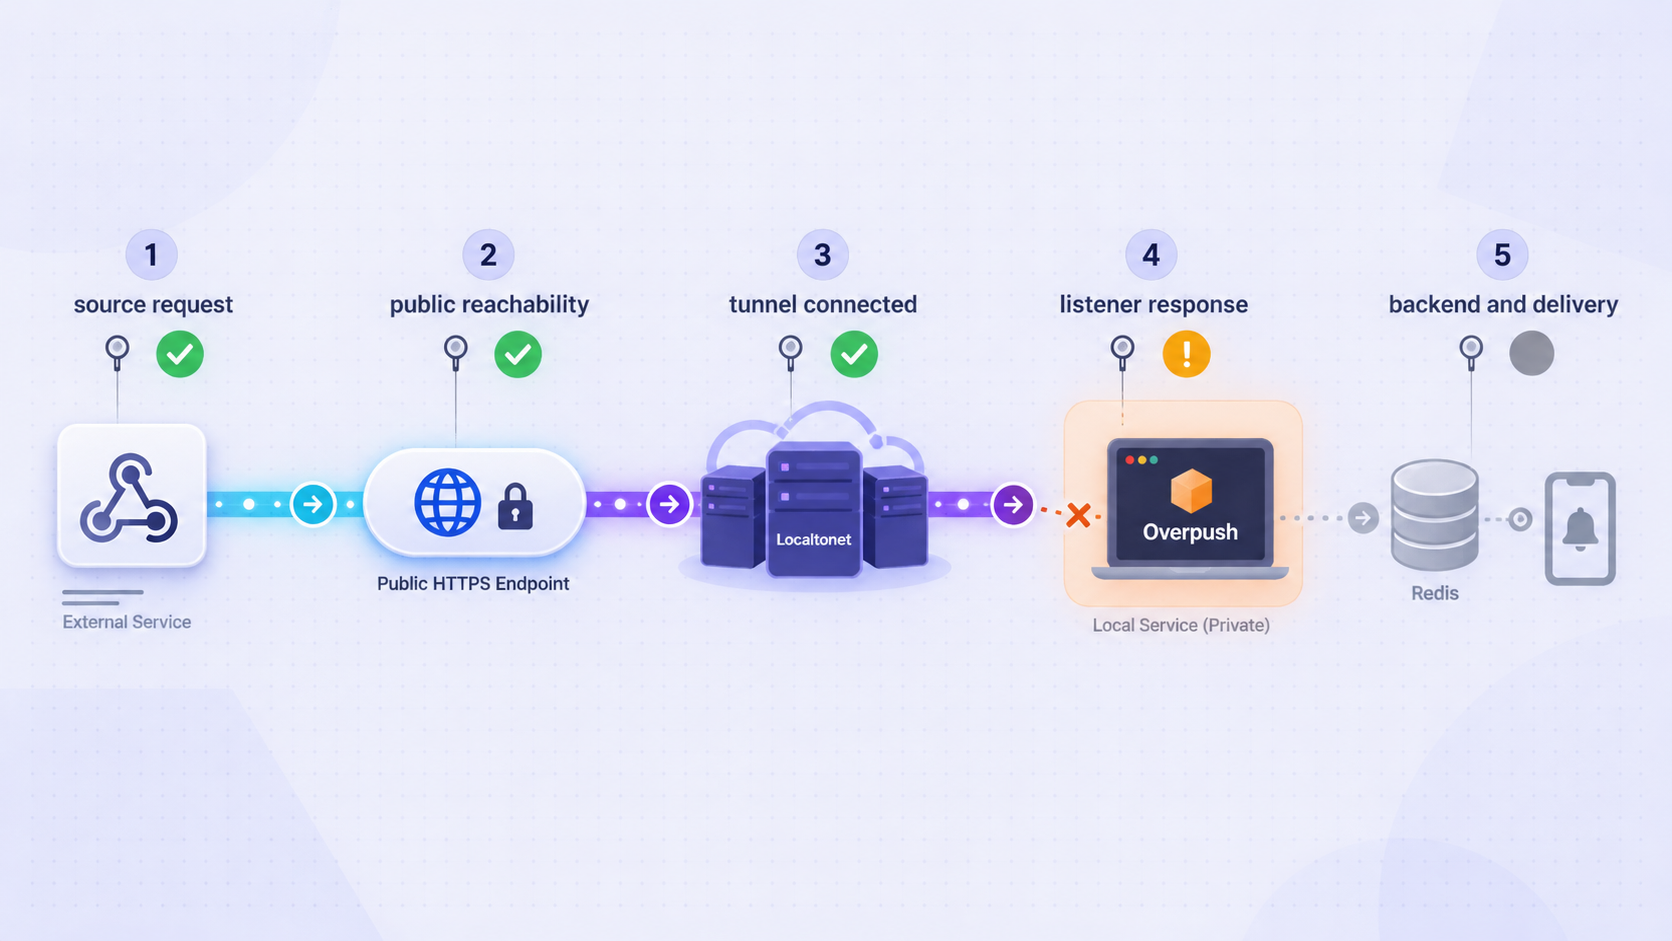
Overpush sits between systems that generate HTTP notifications and the service that ultimately displays those notifications. Grafana or CrowdSec sends an HTTP POST to an application-specific URL. Overpush selects the application from the token in the URL, parses the incoming body, renders the configured Go text/template fields, and submits the resulting notification to a queue backed by Redis.
A background worker consumes that queued work and passes it to the application's selected target. Overpush supports XMPP natively. It can also invoke the Apprise command-line tool for other destinations when Apprise is installed on the same host. This tutorial uses XMPP because that path is built into Overpush and does not require an additional delivery program.
Localtonet belongs at the HTTP boundary. Our client creates an outbound connection to a Localtonet relay and maps a public HTTPS address to the private Overpush listener. Redis and the delivery worker remain local. The tunnel should never point to Redis or expose the rest of the host.
/:token.
| Stage | What to verify | Typical failure boundary |
|---|---|---|
| Grafana or CrowdSec | The sender issues a POST to the correct application URL | Incorrect URL, token, method, TLS setting, or payload |
| Localtonet HTTP tunnel | The client and tunnel are connected and the local target is correct | Stopped client, stopped tunnel, or mismatched local port |
| Overpush API | The listener accepts the request and selects the intended application | Unknown token, invalid body, or inaccessible listener |
| Redis queue | Overpush can enqueue and retrieve work | Backend unavailable, authentication failure, or wrong address |
| Overpush worker | The configured template produces non-empty fields | Payload schema and template do not match |
| XMPP target | The bot account can authenticate and message the destination JID | Invalid credentials, recipient, server, or outbound connectivity |
Overpush also exposes /1/messages.json for software that already speaks the Pushover API. The project does not claim complete Pushover feature parity, so test every field and priority behavior your sender needs before replacing an existing production endpoint. Grafana and CrowdSec use the more flexible application-token route in this tutorial.
Choose the documented deployment scope
This procedure uses the source-build path documented in the Overpush repository and pins the v0.4.8 release. Pinning prevents a later branch update from silently changing the configuration or build while you are deploying it.
Prepare one Linux host with:
- Git and a Go toolchain compatible with the
godirective in the pinned release'sgo.mod. - A local Redis-compatible backend. The concrete path below uses the distribution-provided Redis service on a Debian or Ubuntu host.
- An XMPP account dedicated to Overpush, the XMPP server name, and the recipient's full JID.
curlfor controlled HTTP tests.- The Localtonet client on this host, or on another device that can reach the Overpush listener.
- Administrative access to the Grafana or CrowdSec installation that will send notifications.
Confirm the basic build tools:
git --version
go version
curl --version
Do not substitute a guessed Go version. After checking out v0.4.8, inspect the pinned go.mod and make sure the installed toolchain satisfies its go line before building. The build workflow below includes that check. If your change-control process requires a version number in advance, approve the value from the tagged file itself before provisioning the host.
This guide selects native XMPP as the complete delivery path. Apprise remains a supported alternative, but each Apprise service has its own URL and credential format. Do not combine the XMPP target shown here with an Apprise destination string. If you later migrate to Apprise, follow the target example from the same Overpush revision and test the Apprise CLI independently before changing the application target.
Install and verify one local Redis backend
Overpush cannot process notifications without its queue. For a single-host Debian or Ubuntu deployment, install the packaged Redis server and client tools, enable the service, and test it locally:
sudo apt update
sudo apt install redis-server redis-tools
sudo systemctl enable --now redis-server
systemctl is-active redis-server
redis-cli -h 127.0.0.1 -p 6379 PING
The final command should return:
PONGVerify the listening address before continuing:
sudo ss -lntp | grep 6379For this same-host workflow, Redis should be reachable through loopback. Do not proceed if it is unexpectedly listening on an untrusted public interface. Package defaults and local security policies can vary, so inspect the active Redis configuration rather than assuming installation alone produced the intended network boundary.
The minimal configuration later in this guide assumes a local loopback connection without a Redis password. That is appropriate only when Redis is restricted to the same trusted host and protected from untrusted local users. If your Redis deployment requires authentication, TLS, a username, or a remote address, copy those verified parameters into Overpush and apply the Redis operator's network controls. Never create a Localtonet tunnel to port 6379.
Redis, Valkey, KeyDB, and DragonflyDB are identified by the Overpush project as compatible backend choices. This tutorial does not mix their installation procedures. If you select an alternative, establish its service and obtain a successful backend-specific health check before starting Overpush.
Pin and build Overpush v0.4.8
The documented project build command is go build. We add an explicit output argument so the artifact path is deterministic instead of depending on platform naming behavior.
Clone the source repository
Obtain the upstream source from the project's primary GitHub repository and enter the local checkout.
Check out the v0.4.8 release
Detach the working tree at the release tag and record the resolved revision. The release page associates v0.4.8 with commit 2bb5b4d.
Read the pinned Go requirement
Inspect the go line from this tag's module file and compare it with go version. Upgrade the toolchain if the pinned module requires a newer version.
Build a named executable
Compile the main package to ./overpush. Naming the output removes ambiguity about which file should be launched.
git clone https://github.com/mrusme/overpush.git
cd overpush
git checkout --detach v0.4.8
git rev-parse --short HEAD
grep -E '^go[[:space:]]+' go.mod
go version
go build -o ./overpush .
test -x ./overpush
ls -l ./overpush
Confirm that the revision begins with 2bb5b4d. The grep output is the supported Go language requirement declared by the pinned module. The build should finish without a compiler error, and test -x should succeed.
Building verifies the source and dependencies compile. It does not test configuration parsing, Redis connectivity, XMPP authentication, template rendering, or the HTTP listener.
Create a complete Overpush configuration
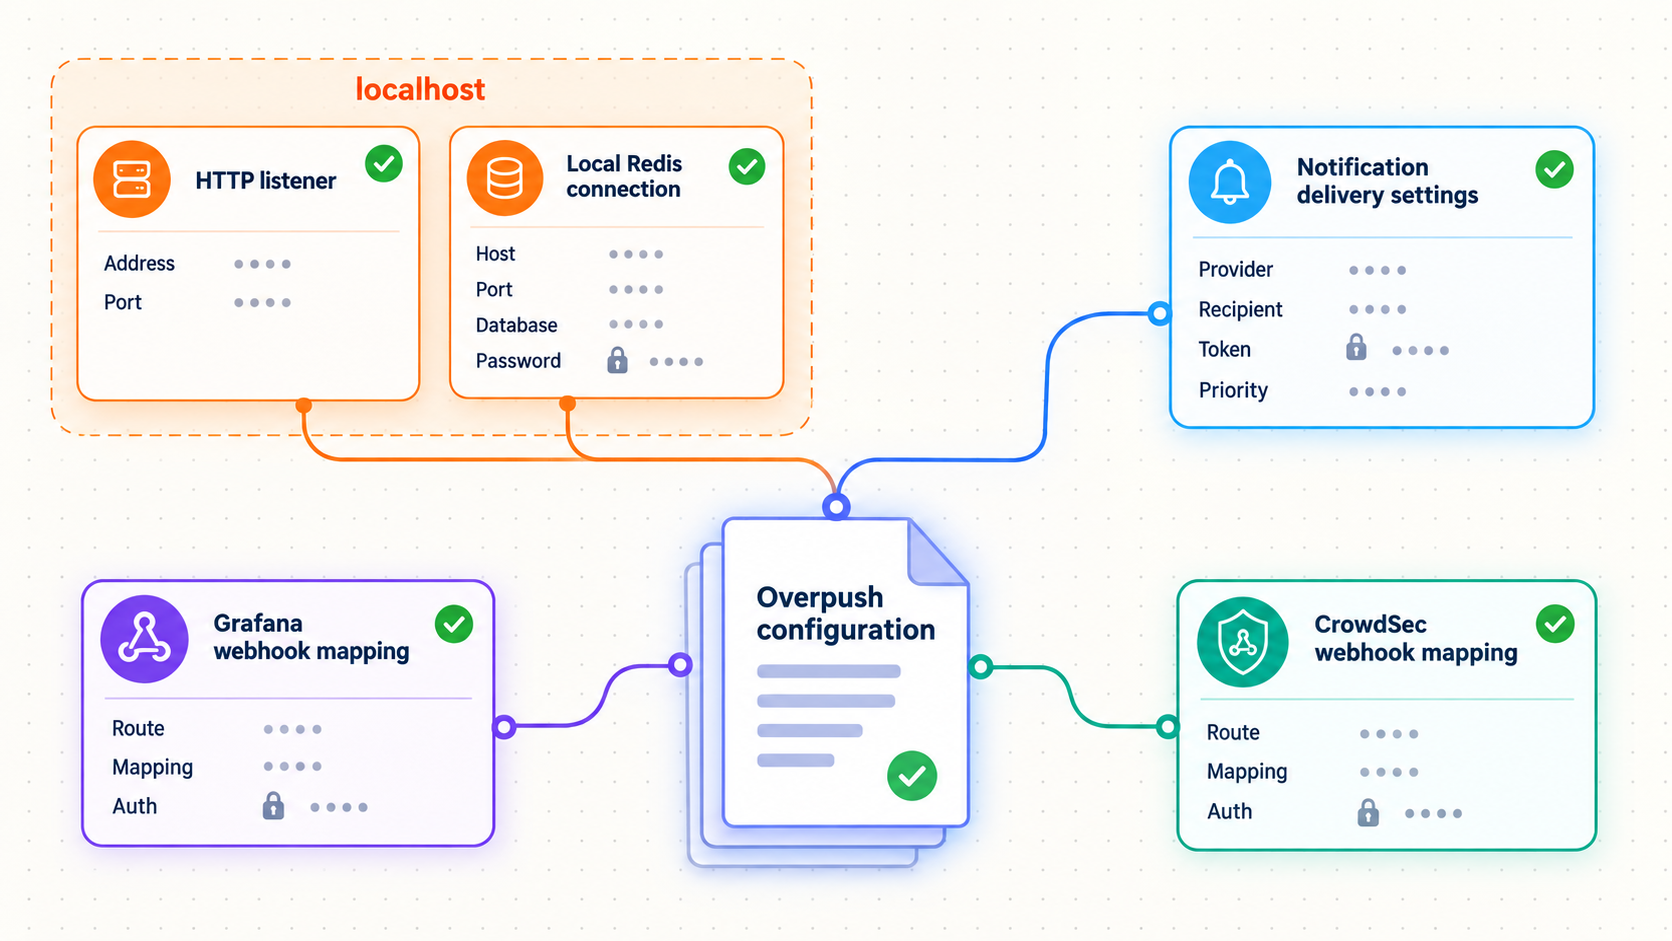
Overpush searches for overpush.toml in these locations:
/etc/overpush.toml
$XDG_CONFIG_HOME/overpush.toml
$HOME/.config/overpush.toml
$HOME/overpush.toml
$PWD/overpush.toml
For the first run, place the file in the repository directory and launch the executable from that directory. This makes the selected configuration path unambiguous. A later service-manager deployment should use a stable account, working directory, and configuration location.
The following file includes the listener, Redis connection, parent user, separate Grafana and CrowdSec applications, and one native XMPP target. Replace every REPLACE_ value. The example binds Overpush to loopback on port 8080 because the Localtonet client is assumed to run on the same host.
[Server]
IP = "127.0.0.1"
Port = 8080

[Redis]
Addr = "127.0.0.1:6379"
Password = ""
DB = 0

[[Users]]
Enable = true
Token = "REPLACE_WITH_UNIQUE_PARENT_USER_TOKEN"
Name = "Local notifications"

[[Users.Applications]]
Enable = true
Token = "REPLACE_WITH_UNIQUE_GRAFANA_TOKEN"
Name = "Grafana"
IconPath = ""
Target = "notification_target"
TargetArgs.Destination = "REPLACE_WITH_RECIPIENT_JID"
Format = "custom"
CustomFormat.Message = '{{ webhook "body.message" }}'
CustomFormat.Title = '{{ webhook "body.title" }}'
CustomFormat.URL = '{{ webhook "body.externalURL" }}'

[[Users.Applications]]
Enable = true
Token = "REPLACE_WITH_UNIQUE_CROWDSEC_TOKEN"
Name = "CrowdSec Security Engine"
IconPath = ""
Target = "notification_target"
TargetArgs.Destination = "REPLACE_WITH_RECIPIENT_JID"
Format = "custom"
CustomFormat.Message = '{{ webhook "body.alerts.0.message" }}'
CustomFormat.Title = 'CrowdSec: {{ webhook "body.alerts.0.scenario" }}'

[[Targets]]
Enable = true
ID = "notification_target"
Type = "xmpp"

[Targets.Args]
server = "REPLACE_WITH_XMPP_SERVER"
tls = "true"
username = "REPLACE_WITH_XMPP_BOT_JID"
password = "REPLACE_WITH_XMPP_PASSWORD"
Save it as overpush.toml, then restrict access:
chmod 600 overpush.tomlUnderstand the three different identifiers
- Parent user token: belongs to the configured Overpush user and is relevant to Pushover-compatible behavior. Generate a private value even if this tutorial primarily uses custom routes.
- Application token: appears in the custom HTTP route. Grafana and CrowdSec must have different application tokens.
- Target ID: connects an application to a configured target. Both applications use
notification_target, which exactly matches the XMPP target'sID.
Generate long random values using your approved secret-management tool. Avoid shell commands that print production secrets into shared terminal logs. Never reuse a Localtonet device token as an Overpush token.
Prepare the XMPP account
Use a purpose-specific XMPP account as username. Set server to the server expected by that account, and set each application's TargetArgs.Destination to the full recipient JID. Confirm independently that the account can authenticate and send a message to that recipient.
Overpush's native XMPP support does not include OTR or OMEMO. TLS in the target configuration protects the connection to the XMPP server, but it should not be described as end-to-end OMEMO or OTR protection.
Keep 127.0.0.1 when the Localtonet client and Overpush run in the same host network. If the client runs on another device, container network, or virtual machine, loopback will not be reachable from it. Bind Overpush to an address reachable by that client and restrict access with the host's normal network controls.
Start Overpush and verify the local delivery path
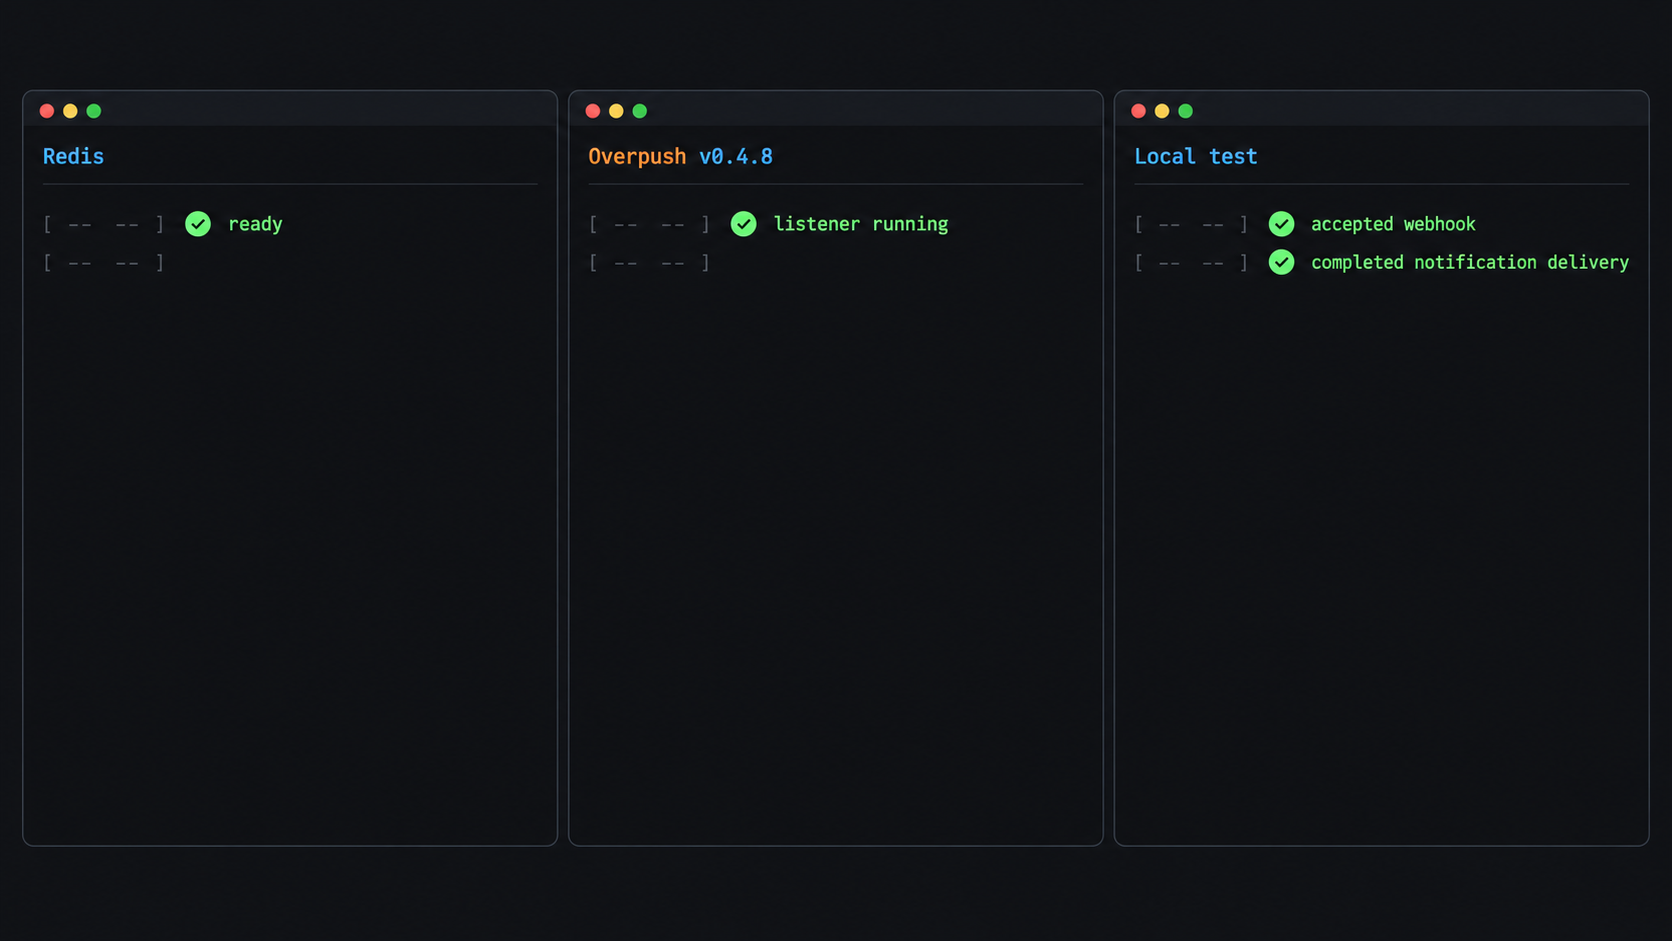
Because the build explicitly created ./overpush and the configuration is in the current directory, start the pinned program with:
./overpushKeep this terminal visible for the first run. A configuration parse error, failed Redis connection, XMPP problem, or listener conflict should be investigated before any public tunnel is created. The process must remain running.
In a second terminal, confirm the listener:
ss -lnt | grep 8080
The result should show a listener on the address and port configured under [Server]. Also confirm Redis is still healthy:
redis-cli -h 127.0.0.1 -p 6379 PINGSend a Grafana-shaped local request
curl -i \
  -X POST \
  -H "Content-Type: application/json" \
  -d '{"title":"Overpush local test","message":"Grafana-shaped delivery is working","externalURL":"https://example.invalid/alert"}' \
  "http://127.0.0.1:8080/REPLACE_WITH_UNIQUE_GRAFANA_TOKEN"
The .invalid domain is intentionally non-routable and is harmless sample content. A complete successful test has three observable results:
- The HTTP connection reaches Overpush instead of failing with a connection or routing error.
- Overpush remains running and does not report a parsing, queue, template, or target failure.
- The recipient receives an XMPP notification with the title
Overpush local testand the messageGrafana-shaped delivery is working.
The available project evidence does not establish one universal response body or status code for every custom-endpoint outcome. Do not treat an HTTP response alone as proof of delivery because queue processing is asynchronous. Verify the final XMPP message.
Send a CrowdSec Security Engine-shaped request
curl -i \
  -X POST \
  -H "Content-Type: application/json" \
  -d '{"alerts":[{"message":"Local CrowdSec HTTP notification test","scenario":"manual-test"}]}' \
  "http://127.0.0.1:8080/REPLACE_WITH_UNIQUE_CROWDSEC_TOKEN"
The expected notification title is CrowdSec: manual-test, and the message is Local CrowdSec HTTP notification test. This confirms that the alerts[0] template matches the selected Security Engine HTTP notification format.
A tunnel cannot correct invalid TOML, a failed Redis connection, an inaccessible XMPP server, incorrect credentials, or a template that references missing fields. Keep the listener private while resolving local application failures.
Connect Grafana and CrowdSec
Configure a Grafana Alerting webhook contact point
In current Grafana navigation, open Alerts & IRM, select Alerting, and open Contact points. Create a contact point, choose the Webhook integration, and use the public Overpush URL that will be created in the next section:
https://YOUR_LOCALTONET_HOST/REPLACE_WITH_UNIQUE_GRAFANA_TOKEN
Keep the HTTP method as POST. Grafana's webhook payload includes fields used by the supplied Overpush template, including title, message, and externalURL. Use Grafana's contact-point test function after the Localtonet tunnel is running, then associate the contact point with the appropriate notification policy.
Consult Grafana's
contact-point documentation
for navigation and notification-policy behavior in the Grafana version you operate. The older repository-specific path /alerting/notifications/receivers/new should not be used as the primary setup instruction because UI routes can change.
Grafana OnCall OSS is a separate product path from ordinary Grafana Alerting contact points. Grafana states that OnCall OSS is archived as of March 24, 2026, with active development continuing in Grafana Cloud IRM. Existing OnCall deployments can use outgoing or personal notification webhooks, but a new deployment should evaluate that archived status before adopting OnCall OSS.
Configure the CrowdSec Security Engine HTTP notification
The following path applies to a package-based CrowdSec Security Engine installation on a systemd Linux host. It does not describe CrowdSec Console webhooks.
Edit /etc/crowdsec/notifications/http.yaml. Some source-based or non-package installations use /usr/local/etc/crowdsec/notifications/http.yaml, but the commands below deliberately select the package path:
type: http
name: http_default
log_level: info
format: |
  {"alerts":{{.|toJson}}}
url: https://YOUR_LOCALTONET_HOST/REPLACE_WITH_UNIQUE_CROWDSEC_TOKEN
method: POST
headers:
  Content-Type: application/json
The wrapper around {{.|toJson}} is important. It produces the alerts array consumed by body.alerts.0.message and body.alerts.0.scenario in the Overpush application.
Ensure the applicable entry in /etc/crowdsec/profiles.yaml references the notification by name:
notifications:
  - http_default
Preserve the rest of the existing profile and its filters. The fragment above is not a replacement for the complete profiles file.
For the selected systemd installation, validate the CrowdSec configuration, restart the service, verify its state, and invoke the named notification test:
sudo crowdsec -t -c /etc/crowdsec/config.yaml
sudo systemctl restart crowdsec
sudo systemctl is-active crowdsec
sudo cscli notifications test http_default
Do not restart after a failed configuration test. A successful notification test should produce a request at the Overpush CrowdSec route and ultimately an XMPP message. If your installed CrowdSec release does not support the shown test subcommand, inspect that release's cscli notifications --help rather than fabricating an alert or applying commands from another packaging path.
The {"alerts":[...]} body above belongs to the local Security Engine HTTP notification plugin. CrowdSec Console webhook events use documented event-specific objects such as metadata and details. Do not send a Console event to this application and expect the alerts[0] template to work. Create a separate Overpush application and template for the exact Console event schema.
CrowdSec Console webhook setup is performed under Settings > Integrations > Webhook, followed by creation of a notification rule. It supports custom bearer-style headers or Basic Authentication, sends POST requests, and can retry failures up to five times with increasing waits. Review the CrowdSec Console webhook documentation before building a separate Console integration.
Use the public HTTPS URL supplied by the Localtonet HTTP tunnel. Do not disable certificate verification as a routine workaround for an incorrect hostname, private endpoint, or unrelated certificate problem.
Publish the verified listener with Localtonet
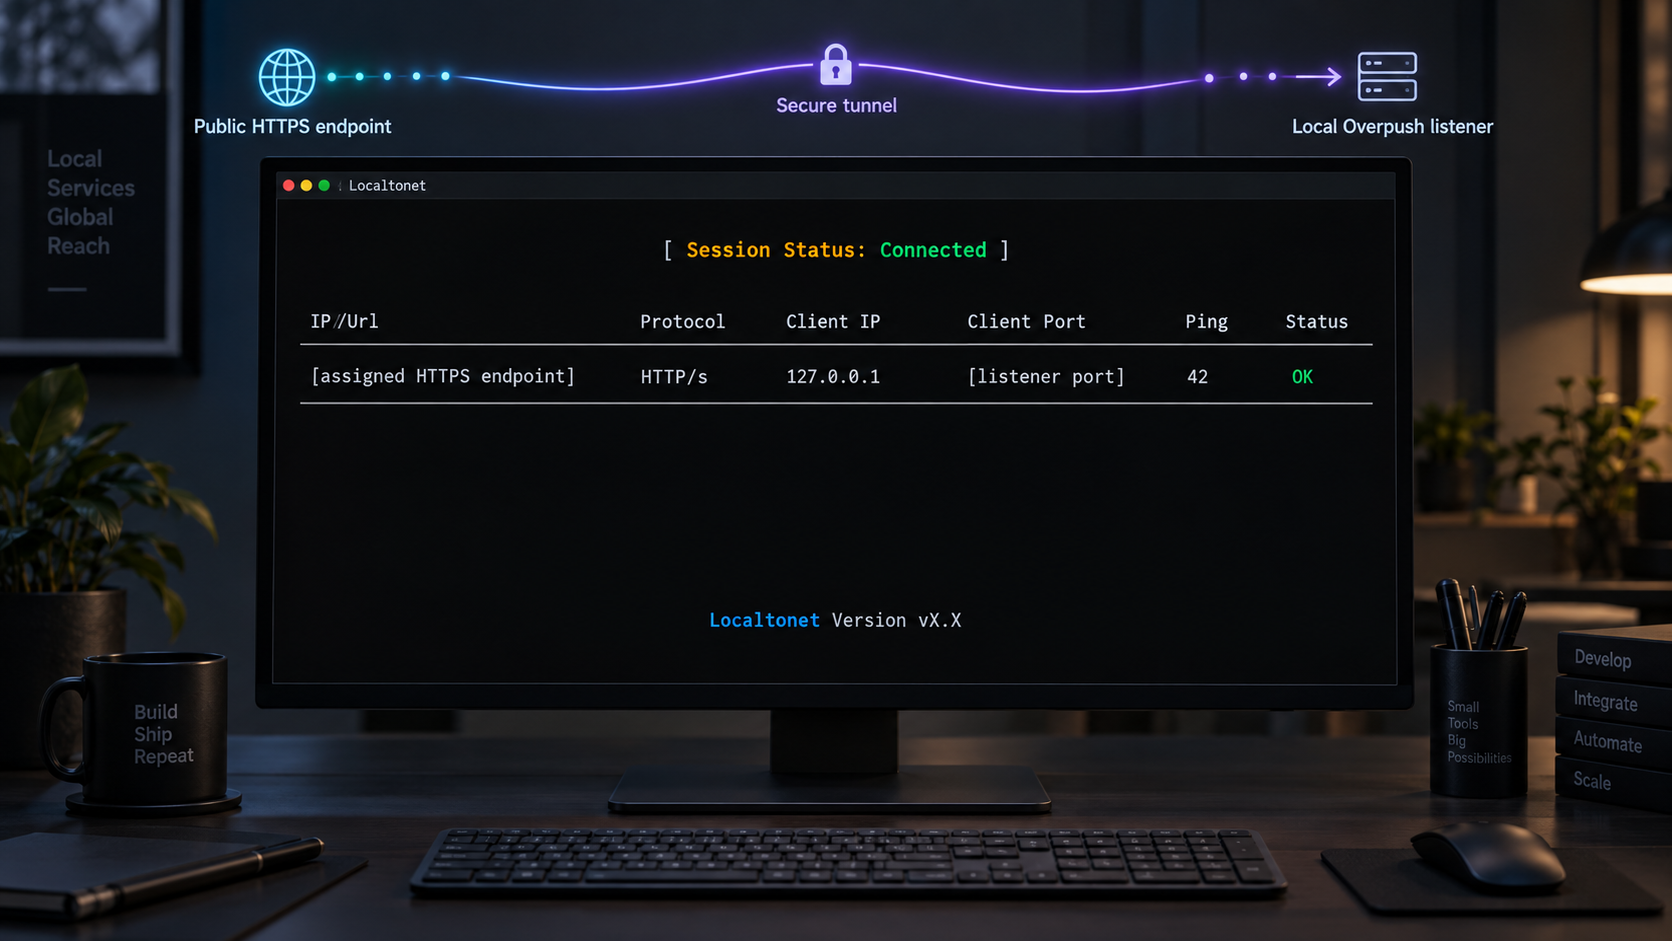
Install and run the Localtonet client on the Overpush host or another device that can reach the selected listener. The client establishes an outbound connection to our relay, so you do not need inbound router port forwarding, firewall changes, VPN setup, or a public IP address.
Follow the current Localtonet HTTP tunnel documentation while using these deployment-specific values.
Install and run the Localtonet client
Use the client for the operating system on the device that can reach Overpush. For the loopback configuration in this tutorial, run the client on the same host and confirm it remains connected.
Select the authenticated device
Select the device associated with its device-specific authentication token. Keep that token private and do not place it in Overpush, Grafana, CrowdSec, URLs, screenshots, or shared logs.
Select an available relay server
Choose a currently available server or region from the dashboard. Do not copy a hardcoded server code from another deployment because available values can change.
Create the HTTP tunnel configuration
Set the local target IP to 127.0.0.1 and the local target port to 8080, matching the verified Overpush listener. Select Random Sub Domain, Custom Sub Domain, or Custom Domain as appropriate and currently available.
Start the tunnel
Creating a tunnel does not start it. Use the Start button and wait until the selected client and tunnel are connected. Then copy the assigned public HTTPS address.
Repeat the controlled public test
Replace only the scheme and host in the working local request. Keep the same application token and JSON body, verify XMPP delivery, and then place the tested URL in Grafana or CrowdSec.
The resulting routes have this form:
https://YOUR_LOCALTONET_HOST/REPLACE_WITH_UNIQUE_GRAFANA_TOKEN
https://YOUR_LOCALTONET_HOST/REPLACE_WITH_UNIQUE_CROWDSEC_TOKEN
https://YOUR_LOCALTONET_HOST/1/messages.json
Test the Grafana application through the tunnel:
curl -i \
  -X POST \
  -H "Content-Type: application/json" \
  -d '{"title":"Overpush public test","message":"Localtonet delivery is working","externalURL":"https://example.invalid/alert"}' \
  "https://YOUR_LOCALTONET_HOST/REPLACE_WITH_UNIQUE_GRAFANA_TOKEN"
Confirm final XMPP delivery before changing any production sender. A successful local test followed by a failed public test narrows the problem to the Localtonet lifecycle, public hostname, tunnel target, or external request path.
The public endpoint works only while Overpush, Redis, the Localtonet client, and the tunnel are running. Creating a tunnel does not start it. Stopping a tunnel is also different from deleting its configuration.
Secure and operate the deployment
An application token in a URL is a routing secret. URLs can appear in sender configuration, screenshots, shell history, reverse-proxy records, diagnostic exports, and application logs. Give every sender a unique high-entropy token, redact request paths from shared logs, and rotate only the affected application if a token is exposed.
Protect overpush.toml because it contains XMPP credentials and application tokens. Keep it out of source control, restrict file access to the account that runs Overpush, and protect any backup containing it. Do not store the Localtonet device token in this file.
Apply least privilege to every component. Overpush needs its executable, configuration, Redis connection, and outbound XMPP access. It does not need broad administrative access. Redis should be reachable by Overpush but not by untrusted networks. The XMPP identity should be dedicated to notifications where the service supports that operating model.
| Risk | Control | Verification |
|---|---|---|
| Application token disclosure | Use distinct random values and redact URL paths | Rotate the affected application token and update only its sender |
| Public Redis access | Bind Redis to trusted interfaces and never tunnel port 6379 | Inspect the active listener after installation and maintenance |
| Credential leakage | Restrict configuration permissions and backups | Review repository history and deployment artifacts for secrets |
| Template mismatch | Use separate applications for distinct payload schemas | Test representative firing and recovery payloads |
| Unexpected outage | Supervise Redis, Overpush, and the Localtonet client | Send a synthetic end-to-end notification after maintenance |
| Unnecessary exposure | Publish only the Overpush HTTP listener | Confirm the tunnel target is the tested IP and port |
Once the manual workflow is stable, place the exact verified ./overpush invocation under the service manager used by the host. Use a dedicated unprivileged account where practical, set an intentional working directory or configuration location, and define restart and log-retention behavior. Do not copy a generic service unit without adjusting its executable path, process account, and file permissions.
Routine maintenance should include reviewing upstream Overpush releases, rebuilding from an approved revision, checking Redis health, validating the CrowdSec configuration after changes, testing Grafana's contact point, and sending a public synthetic notification. Stop the Localtonet tunnel during maintenance when external requests should not reach Overpush.
Troubleshoot one boundary at a time
The pinned build fails
Confirm that the checkout is at v0.4.8 and that the installed Go toolchain satisfies the go directive printed from the pinned go.mod. Read the first module or compiler error. Do not switch back to the moving default branch merely to hide a version mismatch.
Overpush does not load overpush.toml
Start it from the directory containing overpush.toml, or move the file to one of the documented search locations. Under a service manager, verify the process account's home directory, XDG_CONFIG_HOME, working directory, and read permissions.
The process exits immediately
Read its visible output for the first configuration, Redis, listener, or target error. Check TOML quoting, table nesting, duplicate ports, Redis availability, and XMPP values. Confirm that another process is not already using port 8080.
The HTTP connection is refused
Use ss -lnt to verify the actual listener. Confirm that the request uses the configured address and port. A listener on 127.0.0.1 is reachable only from the same network namespace. A Localtonet client in another container or device needs a reachable non-loopback address.
The request reaches Overpush but no XMPP message arrives
Trace the application token, JSON parser, rendered template fields, Redis health, worker processing, target ID, destination JID, XMPP credentials, and outbound network access in that order. The application's Target must exactly equal the enabled target's ID.
The notification has an empty title or message
Compare a sanitized sender payload with the application template. The Grafana application expects body.title, body.message, and body.externalURL. The CrowdSec Security Engine application expects body.alerts.0.message and body.alerts.0.scenario. CrowdSec Console events do not use that same wrapper.
Local delivery works but the Localtonet URL fails
Confirm that the Localtonet client is connected, the HTTP tunnel is running, and the target is 127.0.0.1:8080 for this deployment. Repeat the exact working body against the HTTPS hostname and application-token path. Do not change the template and tunnel at the same time.
CrowdSec does not send a notification
Run the configuration test before restarting, check the systemd service state, and invoke cscli notifications test http_default. Confirm that the notification name in profiles.yaml exactly matches http_default. Inspect CrowdSec and Overpush logs around the same timestamp.
Grafana's contact-point test fails
Confirm that the contact point uses the public HTTPS URL and Grafana can resolve and reach that hostname. Verify the token path, inspect the test error in Grafana, and correlate it with Overpush availability. A successful public curl test helps separate Grafana configuration from the tunnel and application.
Frequently asked questions
Does Overpush require Redis?
Yes. Overpush uses asynq for queued background processing. The project identifies Redis, Valkey, KeyDB, and DragonflyDB as compatible backend choices. This tutorial uses a local Redis service.
What executable does the build create?
This workflow runs go build -o ./overpush ., so the resulting artifact is explicitly ./overpush. Start it from the directory containing overpush.toml with ./overpush.
Why does the guide read the Go version from go.mod?
The tagged module file is authoritative for the pinned revision. The supplied release evidence does not include the literal directive, so the tutorial checks that file instead of printing an unverified version number.
Should Grafana and CrowdSec share an application token?
No. Their payload templates differ, and separate tokens make rotation, revocation, and troubleshooting more precise. Both applications may intentionally use the same XMPP target.
Can the CrowdSec Console use the Security Engine template?
Not generally. The local HTTP notification configuration creates an alerts array. Console webhooks use event-specific payloads with fields such as metadata and details. Configure a separate application from the exact Console schema.
Does the Localtonet tunnel make Redis public?
No, provided the HTTP tunnel points only to the Overpush listener. In this tutorial that target is 127.0.0.1:8080. Redis remains on 127.0.0.1:6379 and should not receive its own tunnel.
Does Overpush provide end-to-end encrypted XMPP messages?
Its native XMPP target can use TLS for the connection, but the project states that OTR and OMEMO are not supported. Do not describe this target as providing those message-layer encryption systems.
Does the public webhook stay available if the Localtonet client stops?
No. The public address is available only while the selected client is connected and the tunnel is running. Overpush, Redis, and the XMPP path must also remain operational for complete delivery.
Can I use a custom domain for the webhook?
HTTP tunnels support Random Sub Domain, Custom Sub Domain, and Custom Domain process types. Check the current dashboard and HTTP tunnel documentation for availability and exact DNS requirements before changing domain records.
Publish your verified Overpush listener with Localtonet
Confirm Redis, Overpush, templates, and XMPP delivery locally first. Then create an HTTP tunnel that forwards only to the tested listener and give each authorized sender its own application URL.
Get Started Free →

