

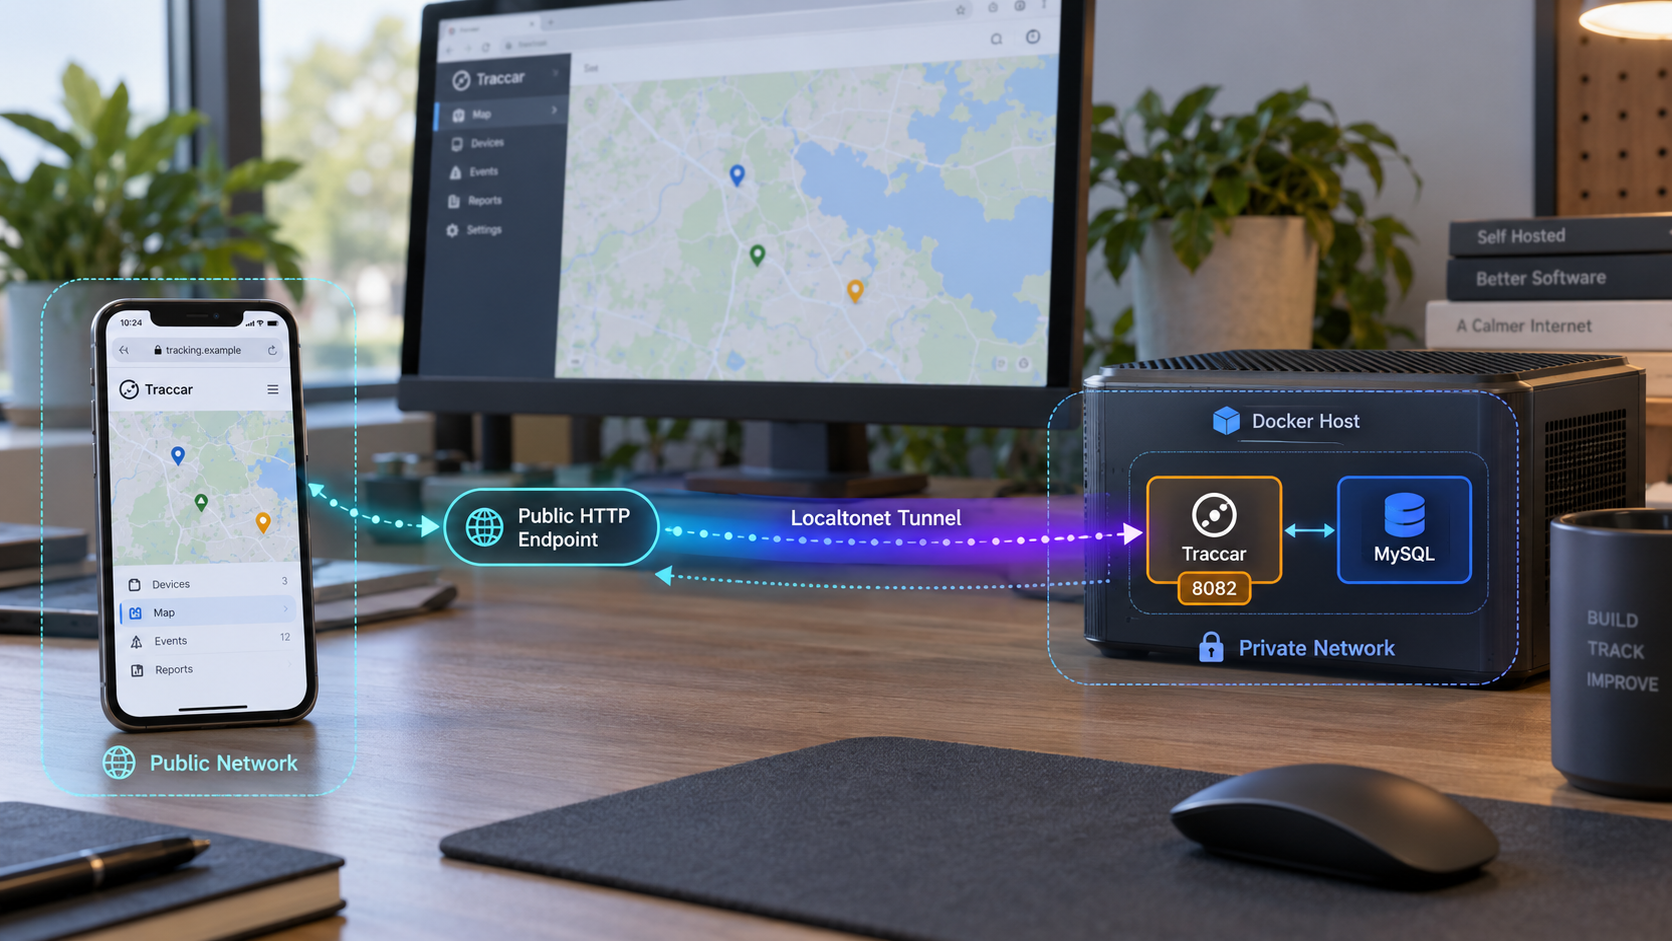
Build a self-hosted GPS tracking server, verify it locally, and publish its dashboard only when you are ready
Traccar is a free, open-source GPS tracking platform for vehicles, assets, people, and other connected devices. In this guide, we install its Docker Compose deployment with MySQL, confirm that the browser dashboard works on port 8082, cover routine container operations, and troubleshoot the most likely startup problems. After the local installation is healthy, we connect that HTTP service to Localtonet so authorized remote users can reach the dashboard without configuring inbound router port forwarding or requiring a public IP address.
📋 What's in this guide
What this Traccar deployment includes
Traccar is a Java-based GPS tracking server with a browser application and a REST API. It supports real-time tracking, account and device management, geofences, reports, alarms, notifications, and driver-behavior monitoring. The project reports support for more than 200 GPS protocols and more than 2,000 tracker models, making it suitable for individual trackers as well as larger fleet deployments.
This tutorial follows Traccar's published quick-start workflow for Docker Compose. The downloaded Compose definition deploys Traccar with MySQL, which the project describes as a production-grade database arrangement. Docker Compose is responsible for creating and starting the containers defined by that file. Once startup succeeds, the Traccar web application is available through HTTP on port 8082.
Localtonet is deliberately added after the installation and local checks. This order separates two concerns. First, Traccar and MySQL must start correctly on the host. Second, the working HTTP endpoint can be made remotely accessible. If the local dashboard does not work, creating a tunnel will not repair the application or database.
Dashboard traffic and tracker traffic are different
Port 8082 is the documented web endpoint for this installation. It is appropriate for the browser dashboard and for API access that Traccar exposes through its web service. It is not a universal device-ingestion port for every GPS tracker.
GPS hardware protocols commonly use protocol-specific TCP or UDP listeners. The exact listener depends on the tracker model, its configured protocol, and Traccar's corresponding server configuration. Although Traccar supports many device protocols, the supplied installation evidence does not establish the individual ports for those protocols. We therefore recommend an HTTP tunnel only for the verified dashboard endpoint in this guide.
The remote-access steps publish Traccar's HTTP service on port 8082. If a physical tracker must initiate a TCP or UDP connection to Traccar, identify its exact Traccar protocol and documented listener port first. That is a separate networking workflow and must not be guessed from the dashboard port.
Prepare the Docker host
Choose a machine that can remain online whenever tracking and remote dashboard access are required. Traccar can run on local hardware or a server, but this particular installation path requires a functioning Docker environment with Docker Compose support. The host also needs enough storage and memory for the tracking workload, database, logs, and retained history. Traccar's quick-start evidence does not specify universal resource minimums, so capacity should be based on the expected number of devices, reporting frequency, history retention, and concurrent users.
Before downloading the Compose file, confirm the following requirements:
- Docker Engine or another compatible Docker installation is running on the host.
- The modern
docker composecommand is available. curlis installed so the published Compose file can be downloaded using the documented command.- The host can make outbound internet connections to download the Compose definition and required container images.
- TCP port 8082 is not already occupied by another local service.
- You have administrative permission to run containers and manage their storage.
- You have selected a dedicated working directory where
compose.yamland related operational notes can be retained.
Check the required commands
These checks do not modify the host. They confirm that the command-line tools used by the installation are available:
docker --version
docker compose version
curl --version
If any command is missing, install it through the official instructions for your operating system and Docker distribution. Package names and installation procedures differ between platforms, so this article does not substitute an unverified universal installation command.
Check whether port 8082 is already in use
Port-checking tools vary across Windows, Linux, and macOS. If another application is already listening on 8082, Docker may fail to publish Traccar's web service. Stop the conflicting service or make a deliberate, documented port adjustment after reviewing the downloaded Compose file. Do not change a database port or a tracker protocol port when the actual conflict concerns the HTTP dashboard.
Complete the local installation, account setup, and authentication checks before creating a public tunnel. A public URL increases the audience that can reach the login surface, so default, temporary, shared, or weak credentials are not suitable for remote access.
Install Traccar with Docker Compose and MySQL
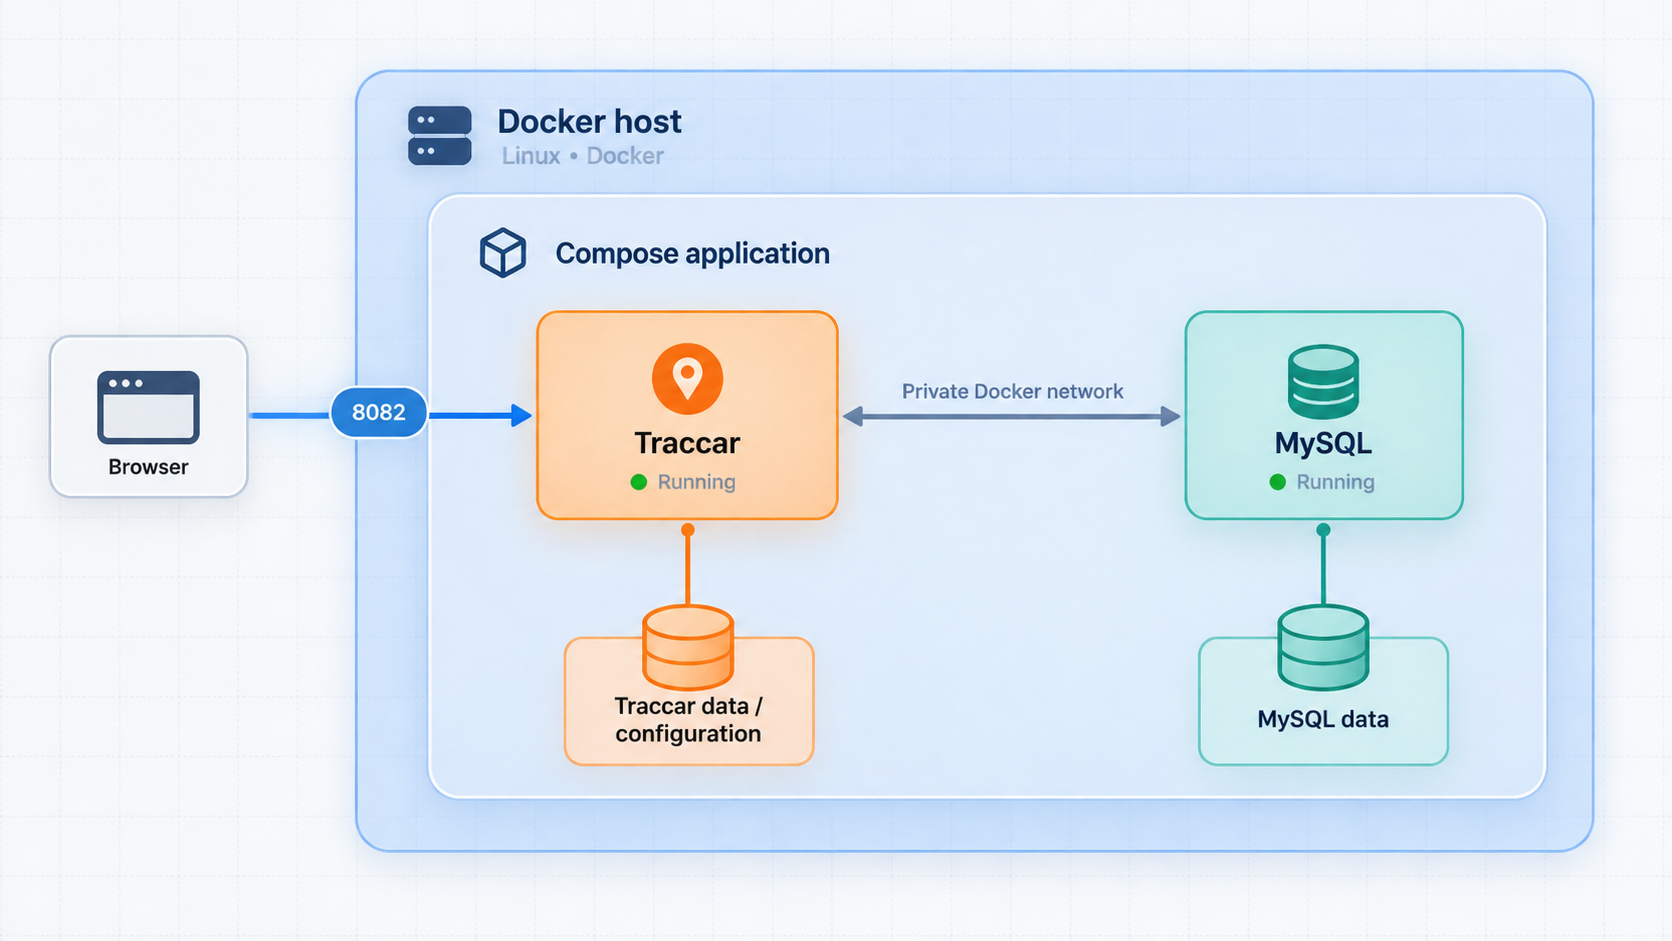
Run the following workflow from the dedicated directory selected for this deployment. Docker Compose normally uses the compose.yaml file in the current directory, so remaining in the same directory is important for later status, log, stop, and restart commands.
Download Traccar's MySQL Compose definition
Use the command published by the Traccar project. It downloads the current traccar-mysql.yaml definition from the project's main branch and saves it locally as compose.yaml.
curl -o compose.yaml https://raw.githubusercontent.com/traccar/traccar/master/docker/compose/traccar-mysql.yamlStart the Compose application
Run Docker Compose in detached mode. Docker reads the downloaded definition, obtains the required images when necessary, creates the services, and starts them in the background.
docker compose up -dThe download URL references Traccar's main branch rather than a fixed release-specific file. This means the contents can change as the project evolves. For a controlled environment, retain the exact reviewed Compose file with your deployment records and review future changes before replacing it.
The first launch can take longer than later launches because Docker may need to download images and MySQL needs to initialize its data storage. A successful return from docker compose up -d means Docker accepted the request to start the services. It does not by itself prove that the database initialization finished or that the dashboard is ready.
Review the deployment before using it
The quick-start Compose file is intended to provide the Traccar and MySQL arrangement without requiring readers to construct a Compose definition manually. Even so, administrators should inspect downloaded configuration before treating it as production configuration.
Review compose.yaml locally and identify:
- The container images and any image tags referenced by the file.
- The services that Docker Compose will create.
- The host port mapping associated with Traccar's port 8082 endpoint.
- The volumes or bind mounts responsible for persistent application and database data.
- Any credentials, environment values, or configuration files expected by the deployment.
- Any additional exposed ports and why they are present.
This guide does not reproduce database credentials or configuration values from the downloaded file because those details may change. It also does not invent replacement values. The file on your host is the configuration Docker actually uses, so review that exact copy and protect any secrets it contains.
Validate the Compose structure
Docker Compose can render and validate the effective configuration. Run this from the directory containing compose.yaml:
docker compose configThis is useful after any intentional edit because it can reveal formatting or interpolation errors before another startup attempt. Be careful when sharing the output for support. Effective Compose configuration can include sensitive values, and credentials should never be pasted into public tickets, chat messages, screenshots, or logs.
Complete application setup through the dashboard
Once the web service loads, follow the account and setup flow presented by the installed Traccar version. The supplied evidence does not establish a universal default username, password, or first-run sequence, so we do not provide guessed credentials. If your deployment displays a login page rather than account creation, use the current Traccar documentation that corresponds to the exact version and installation file you deployed.
Before adding trackers, identify each device model and the protocol it is expected to use. A device must be configured with the correct destination, listener port, and protocol-specific parameters. Support for a large number of models does not mean every tracker sends data to port 8082.
Verify Traccar locally on port 8082
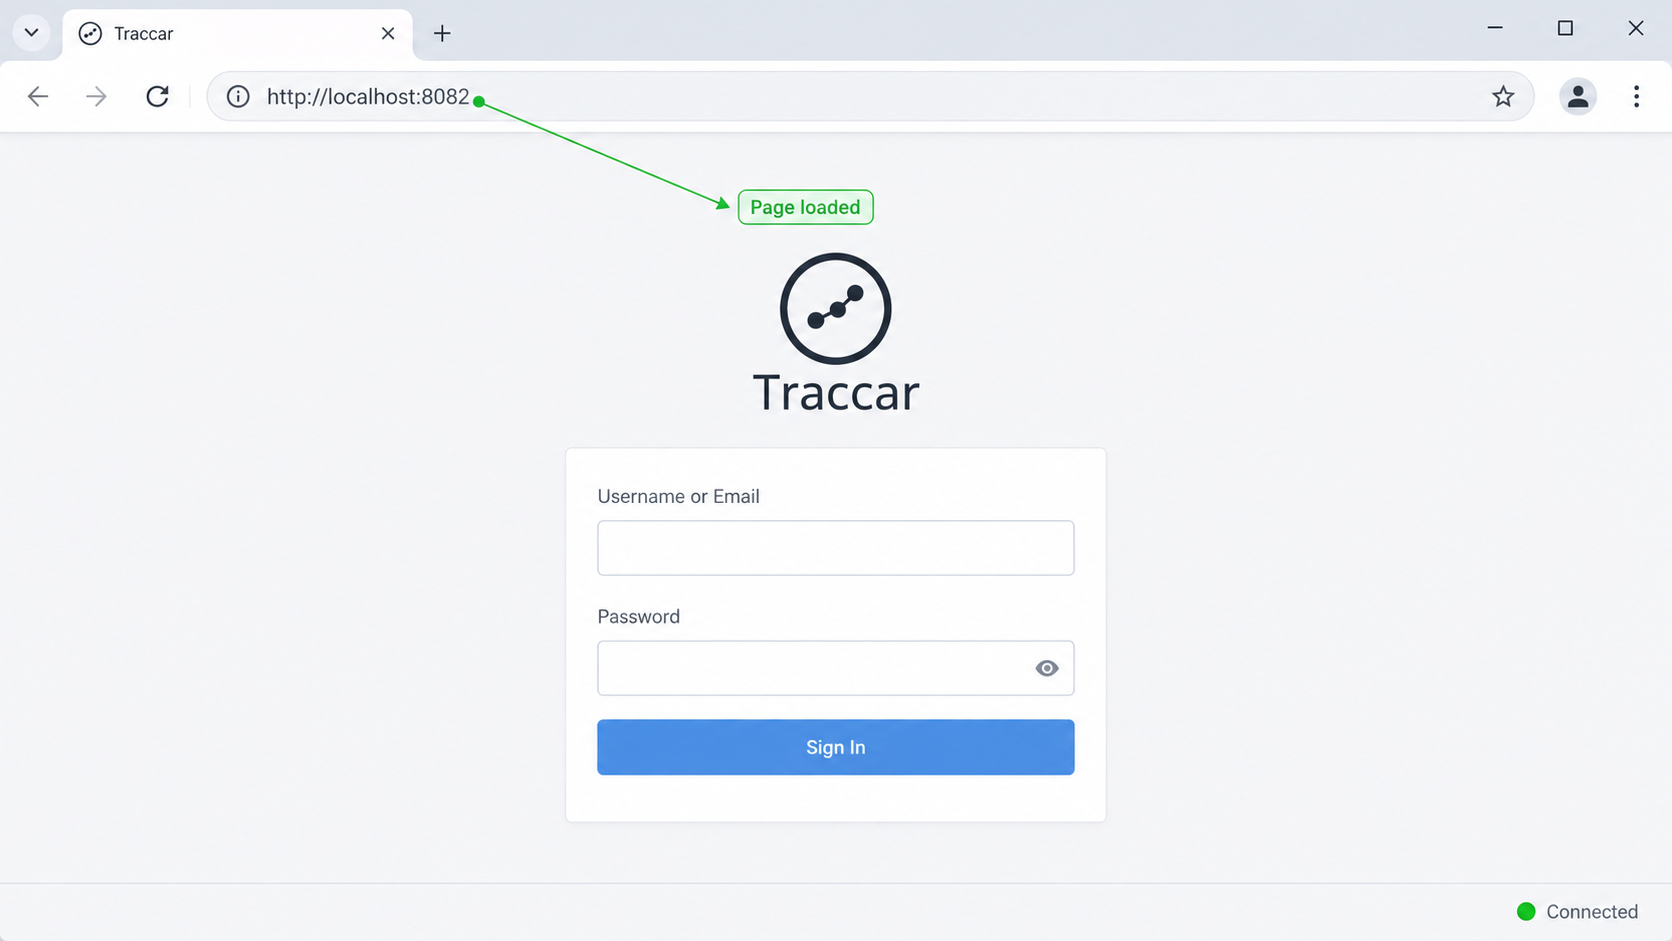
Verification should progress from containers to logs and then to the browser. This makes failures easier to isolate. If the containers are not running, there is no reason to troubleshoot Localtonet. If the containers are running but the dashboard is not responding, inspect Traccar and MySQL before exposing the endpoint.
Check container state
docker compose psReview the reported state for every service. A container that continually restarts, exits immediately, or never becomes ready indicates an application, database, storage, or configuration problem. The exact service names come from the downloaded Compose file, so this article does not assume them.
Inspect recent logs
docker compose logs --tail=100Look for database initialization progress, connection failures, permission errors, invalid configuration, port-binding failures, and repeated restart messages. During the first startup, temporary connection retries can occur while one service waits for another. Persistent errors after initialization deserves investigation.
To watch new messages while reproducing a problem, use:
docker compose logs -fStop following the output with the terminal interrupt shortcut when you have collected enough information. Review logs before sharing them because application logs can contain hostnames, device identifiers, account information, or other operational details.
Open the local dashboard
On the Docker host, open:
http://localhost:8082
If the browser runs on another machine on the same trusted network, use the Docker host's reachable LAN address with port 8082, provided the Compose port mapping and host firewall allow that connection. Do not assume remote LAN access is enabled merely because localhost works.
A useful local acceptance test includes all of the following:
- The page loads without a connection error.
- The expected Traccar login or initial setup interface appears.
- You can authenticate using an account you intentionally configured.
- The interface remains responsive after a browser refresh.
- The containers remain running while the page is used.
- The logs do not show an unresolved database or storage failure.
Localtonet forwards traffic to the local target you configure. If http://localhost:8082 is unavailable from the device running our client, the public address will also fail. Keep troubleshooting focused on Docker, Traccar, MySQL, port mappings, and local reachability until this check passes.
Operate and maintain the Compose deployment
Keep operational commands in the same directory as compose.yaml. Compose associates commands with the project represented by that file. Running commands from an unrelated directory can target a different project or produce a missing-file error.
| Operation | Command | What to expect |
|---|---|---|
| Check service state | docker compose ps |
Lists the containers associated with this Compose project and their current state. |
| Read recent logs | docker compose logs --tail=100 |
Shows recent output without immediately following new messages. |
| Follow logs | docker compose logs -f |
Streams new output until you interrupt the command. |
| Restart services | docker compose restart |
Restarts the existing project containers without redefining the deployment. |
| Stop services | docker compose stop |
Stops the project while retaining its containers for a later start. |
| Start stopped services | docker compose start |
Starts containers that were previously stopped. |
| Remove project containers | docker compose down |
Stops and removes project containers and networks. Review storage implications before using destructive variants. |
Back up the database and persistent files
Tracking history, accounts, devices, reports, and configuration can be operationally important. A copy of compose.yaml alone is not a backup of MySQL data. Identify the persistent volumes or bind mounts in the downloaded definition and establish a database-aware backup process appropriate for MySQL.
A useful backup plan should define what is backed up, where it is stored, how long it is retained, and how restoration is tested. The correct database command depends on the credentials, container arrangement, MySQL version, and storage design in the actual deployment. Because those values are not fixed by the supplied evidence, this guide does not invent a one-line backup command.
Plan updates rather than updating blindly
The Compose file downloaded from the main branch can change over time. Before updating, preserve the deployed file, identify the currently running versions, read the relevant Traccar release notes, back up persistent data, and plan a rollback. Test the new deployment and verify the dashboard locally before restoring public access.
Pulling a newer image without checking database migrations or configuration compatibility can turn a routine update into an outage. For an important fleet deployment, schedule maintenance and verify device ingestion separately from dashboard availability.
Provide remote HTTP access with Localtonet
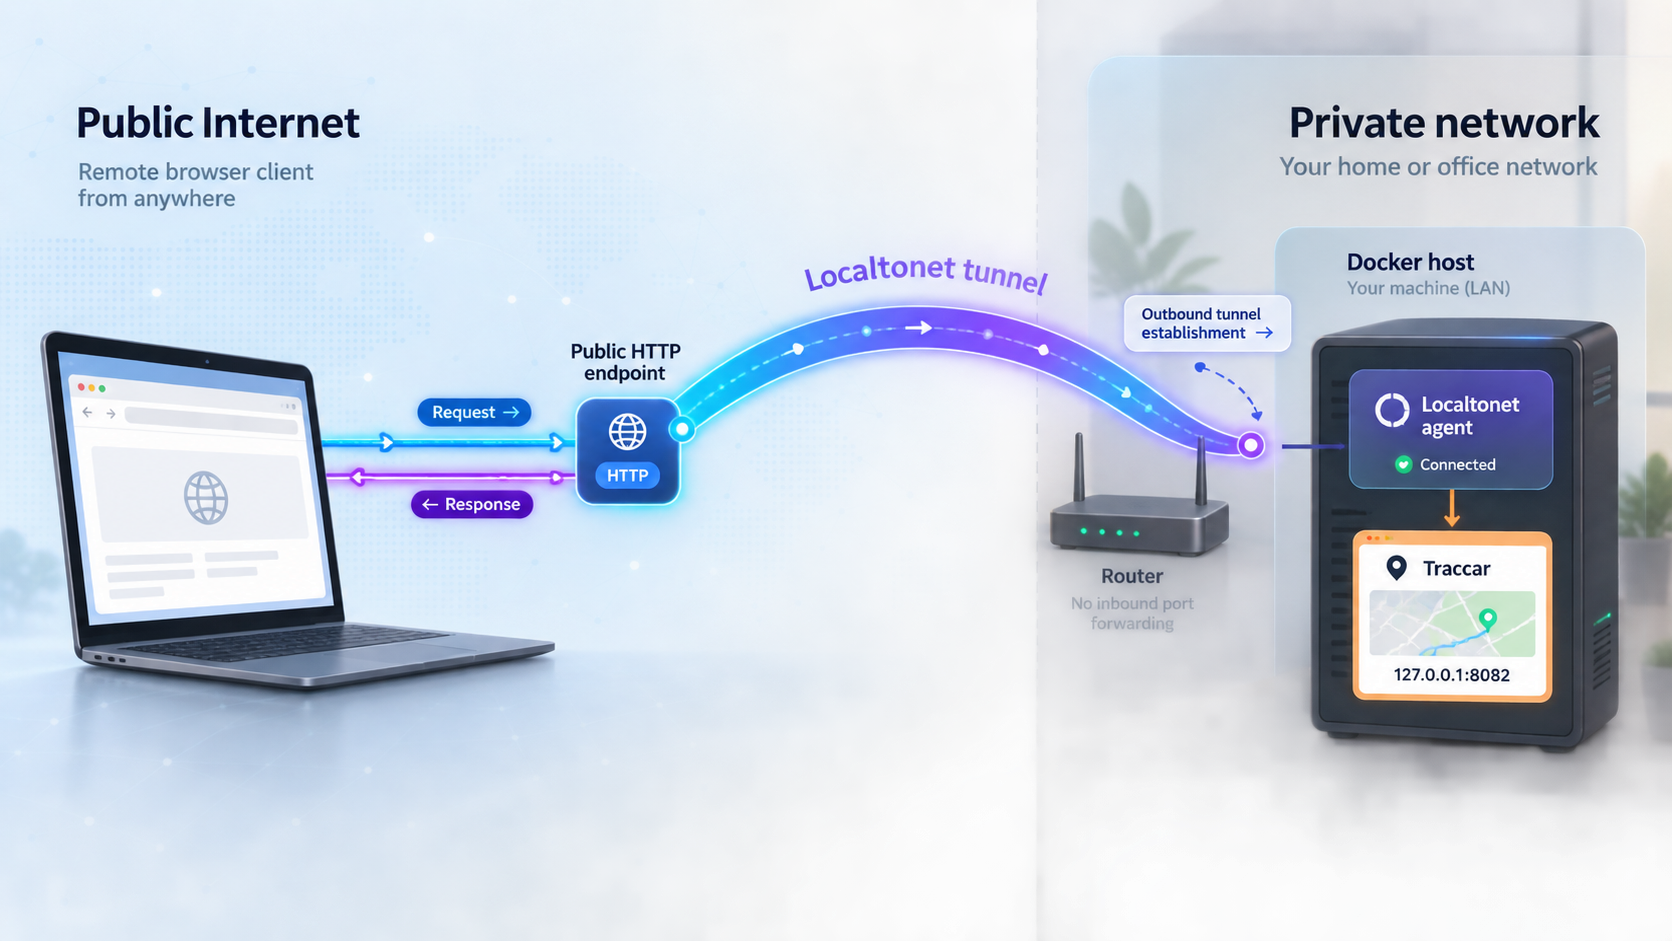
After Traccar works locally, an HTTP tunnel can make the dashboard reachable through a public HTTPS address. The Localtonet client runs on a device that can reach Traccar and establishes an outbound connection to a Localtonet relay server. This avoids requiring inbound router port forwarding, firewall changes, VPN setup, or a public IP address.
The selected client must remain connected and the tunnel must remain running. Creating a tunnel configuration does not automatically mean it is active. You must start it, and you can later stop or delete it when remote access is no longer required.
Install and run the Localtonet client
Install our client on the Docker host or on another trusted device that can reach the Traccar HTTP endpoint. Confirm from that same device that the selected local address and port open the Traccar dashboard.
Authenticate and select the client device
Use the device-specific authentication token associated with the client that will run the tunnel. Treat this token as a secret. Do not place it in the Compose file, publish it in screenshots, or paste it into this article's example commands.
Select an available relay server
Choose from the relay server or region values currently available in the Localtonet dashboard. Availability can vary, so use the current product selection instead of copying a hardcoded server code from an old tutorial.
Create an HTTP tunnel to Traccar
Select an HTTP tunnel and point it to the local IP address that reaches Traccar and local port 8082. If our client runs directly on the Docker host and the published port is reachable through loopback, that local target can use 127.0.0.1. If the client runs elsewhere, use a trusted address reachable from that device. Select the required Process Type: Random Sub Domain, Custom Sub Domain, or Custom Domain. These options serve the same content at a public HTTPS address, but availability and custom-domain requirements should be confirmed in the current dashboard and documentation.
Start the tunnel and test the assigned address
Press Start, then open the assigned public URL in a separate browser session. Confirm that the Traccar login page appears and that an authorized account can sign in. Also confirm that the local dashboard still works, which helps distinguish tunnel behavior from an application outage.
Stop or delete access when it is no longer needed
Stop the tunnel to suspend public availability while retaining its configuration, or delete it when the configuration is no longer required. Remember that the public endpoint works only while the selected client is connected and the tunnel is running.
For the current dashboard sequence and available options, consult our Localtonet HTTP tunnel documentation. Exact relay values, plan availability, domain requirements, and interface details can change, so the live dashboard remains authoritative for selectable options.
Choose the correct local target
| Client location | Likely target pattern | Required validation |
|---|---|---|
| Localtonet client on the Docker host | 127.0.0.1:8082 |
Open http://127.0.0.1:8082 from that host before creating the tunnel. |
| Client on another LAN device | Docker host LAN address with port 8082 |
Confirm the dashboard is reachable from the client device and allowed by the host firewall. |
| Client in a different container | Depends on the Docker network design | Do not assume loopback reaches the Traccar container. Validate the exact address from the client environment. |
127.0.0.1 means the machine or container where the Localtonet client is running. It does not automatically mean the Docker host or the Traccar container. Test the complete target URL from the client environment before using it in the tunnel.
Secure Traccar before and after remote access
A tracking platform can hold sensitive location history, device identifiers, account details, geofence definitions, and operational information. Publishing its login page should be a deliberate administrative decision. Remote availability does not replace Traccar authentication, account controls, database security, host patching, or careful user management.
Do not publish MySQL through the dashboard tunnel
The Localtonet HTTP target should be the Traccar web endpoint on port 8082. MySQL is a separate database service and should not be made publicly reachable merely to support browser access. Traccar communicates with its database within the deployment architecture defined by the Compose file.
Keep Docker and Traccar current
Security maintenance includes the host operating system, Docker, Traccar, MySQL, and any supporting configuration. Review release information before applying updates, preserve backups, and verify both the web dashboard and tracker ingestion after maintenance. A successful login test does not prove that every hardware protocol is still receiving data.
Understand the public endpoint lifecycle
A configured tunnel is available only while the chosen Localtonet client is connected and the tunnel is running. If the host shuts down, the client disconnects, or the tunnel is stopped, the public address cannot deliver traffic to Traccar. This behavior is useful when remote access should be temporary, but it also means service monitoring should distinguish a tunnel outage from a Traccar outage.
Troubleshoot installation and access problems
The Compose command is unavailable
If docker compose version fails, install or enable Docker Compose according to the official instructions for the host platform. The documented Traccar command uses the modern space-separated syntax, docker compose. Do not assume that an older standalone docker-compose installation behaves identically in every environment.
The Compose file did not download correctly
Confirm that curl completed successfully and that compose.yaml is present in the current directory. Inspect the file before running it. A proxy error page, authentication page, or empty response saved under that filename is not a valid Compose definition. Running docker compose config can help identify malformed content.
Docker cannot bind port 8082
A bind error usually means another process already occupies the requested host port or the host policy prevents Docker from publishing it. Identify the conflicting process before changing configuration. If you intentionally choose a different host-side port, record it and use that actual host port for local verification and the Localtonet target. Do not change the container-side application port without understanding the Compose mapping.
The containers start and then exit
Run docker compose ps and inspect recent logs. Look for database startup failures, rejected credentials, inaccessible storage, invalid configuration, or resource-related termination. Do not repeatedly recreate containers without preserving evidence from the logs, because repeated attempts can obscure the first meaningful error.
The dashboard is not immediately available
MySQL may still be initializing during the first startup. Check whether service states stabilize and whether the logs show continuing progress. If errors persist, address the reported database or application problem rather than assuming more waiting will fix it.
The dashboard works on localhost but not from another LAN device
Confirm the host's correct LAN address, the Compose port publication, and host firewall policy. Also verify that the two devices can communicate across the network. A loopback success proves only that the Docker host can reach its own published service.
The Localtonet public URL shows a connection failure
Work through the connection path in order:
- Confirm that the Traccar containers are running.
- Open the target URL from the device running the Localtonet client.
- Confirm that the local target uses the correct IP address and port 8082, or the intentionally changed host port.
- Confirm that the selected client device is connected.
- Confirm that the tunnel has been started, not merely created.
- Review whether a host firewall or container boundary blocks the client from reaching the target.
The public URL loads the wrong application
This usually indicates that the target points to the wrong local port or another service has taken the expected port. Compare the tunnel's local target with the address that successfully loads Traccar from the client device. Do not rely only on what the port was intended to contain.
A GPS tracker does not appear in Traccar
Dashboard availability and device ingestion are separate checks. Verify the exact tracker model, Traccar protocol, device identifier, destination address, and documented protocol port. Some devices use TCP and others use UDP. Port 8082 is the evidenced web endpoint and should not be substituted for an unknown device listener.
If the tracker must reach a server behind a private network, a protocol-appropriate Localtonet TCP, UDP, or combined UDP/TCP tunnel may be relevant. The tunnel type and target port must match verified Traccar and hardware documentation. This guide does not recommend a port because the supplied evidence does not establish one universal value.
Frequently asked questions
What port does the Traccar web dashboard use in this installation?
The documented Docker Compose quick start makes Traccar available on port 8082. Test http://localhost:8082 on the Docker host before configuring remote access. If you deliberately change the host-side mapping, use the resulting host port instead.
Does port 8082 receive data from every GPS tracker?
No. Port 8082 is the web endpoint documented for the dashboard and web service. GPS devices use protocol-specific listeners, which can involve different TCP or UDP ports. Identify the exact device model and Traccar protocol before configuring tracker connectivity.
Why does this guide use MySQL?
The Traccar project's published quick start uses a Docker Compose definition with MySQL and describes it as a production-grade database setup. This guide follows that documented path rather than inventing a different database configuration.
Does Localtonet require router port forwarding for the dashboard?
No. Our client establishes an outbound connection to a Localtonet relay server, so this workflow does not require inbound router port forwarding, firewall changes, VPN setup, or a public IP address. The client device must still be able to reach the local Traccar endpoint.
Is creating a Localtonet tunnel enough to make it active?
No. Creating the configuration does not start it. Select the correct client and relay, create the HTTP target, and then press Start. The public endpoint remains available only while the client is connected and the tunnel is running.
Should the Localtonet client always target 127.0.0.1?
Only when the client runs in an environment where 127.0.0.1:8082 reaches Traccar. If the client runs on another computer or in a separate container, loopback refers to that environment instead. Use an address that you have tested from the Localtonet client device.
Can I access Traccar's REST API through the same HTTP tunnel?
Traccar provides a REST API as part of its web service, so requests routed to the same HTTP endpoint can reach paths exposed by that service. API clients must still use the authentication and request format required by the installed Traccar version. Do not embed credentials in public URLs or expose unauthenticated application functions.
What should I back up before updating Traccar?
Preserve the deployed Compose file, relevant Traccar configuration, and a tested backup of persistent MySQL data. Inspect the actual Compose definition to identify volumes and bind mounts. A copy of compose.yaml by itself does not contain the database records.
Can I use a custom domain for the Traccar dashboard?
HTTP tunnels support Random Sub Domain, Custom Sub Domain, and Custom Domain process types, with each serving the target through a public HTTPS address. Exact availability and custom-domain DNS requirements should be checked in the current Localtonet dashboard and documentation rather than copied from an older setup.
Connect your verified Traccar dashboard with Localtonet
Finish the Docker Compose installation, confirm Traccar on port 8082 from the client device, and then create an HTTP tunnel for controlled remote dashboard access without inbound router port forwarding.
Get Started Free →

