

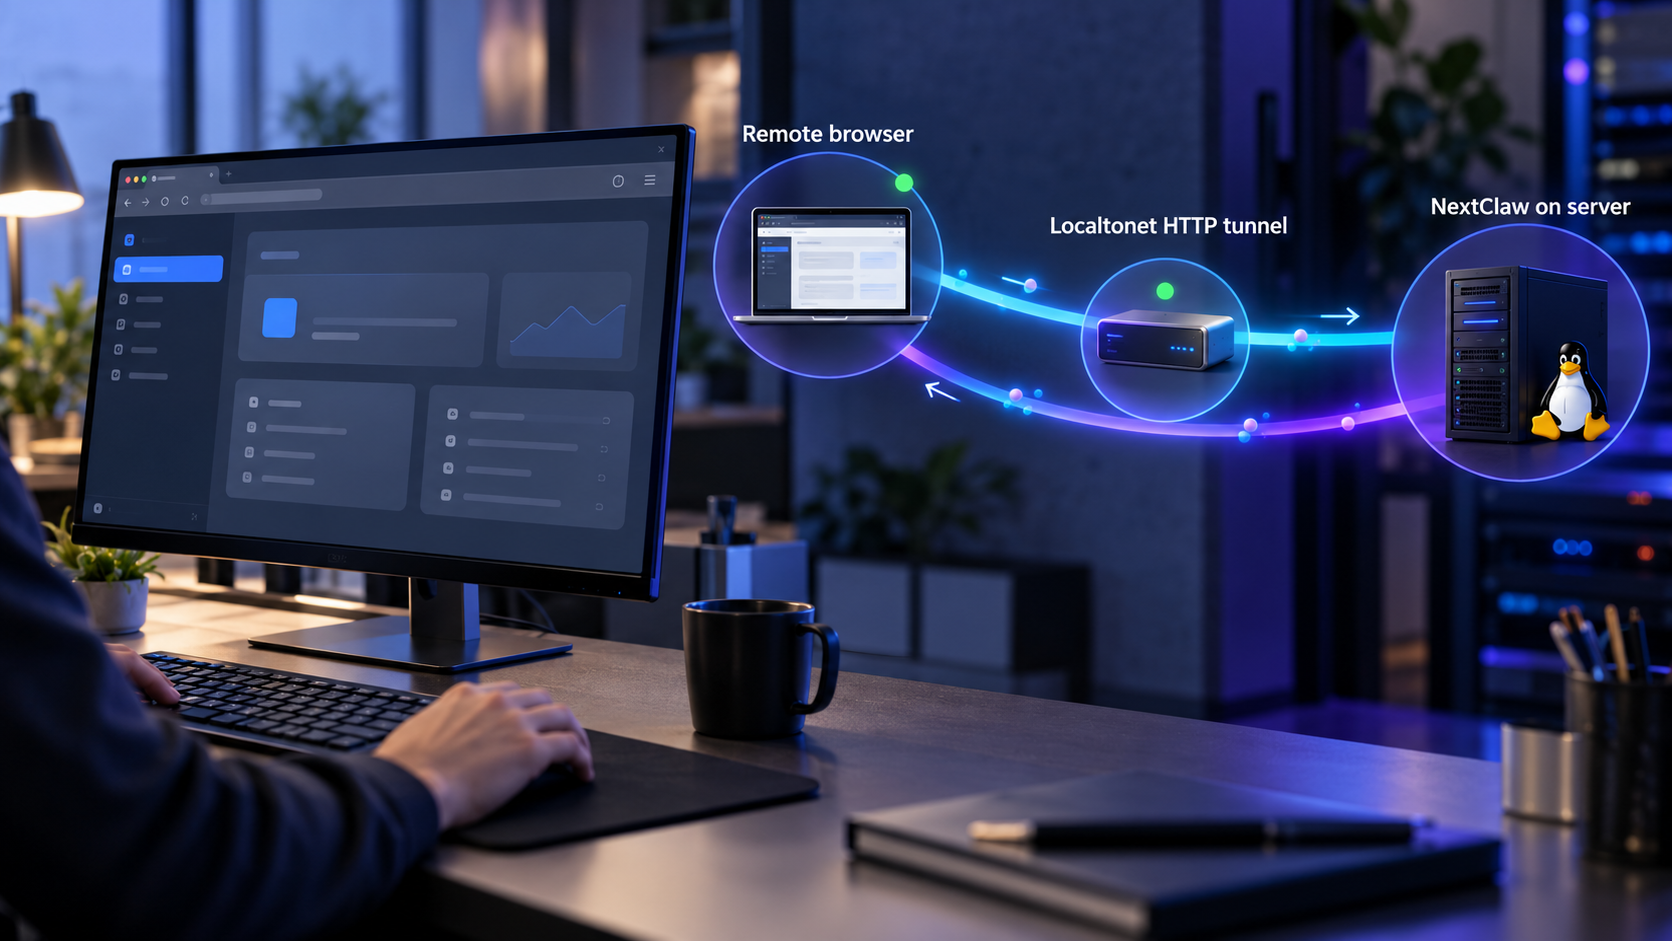
Run a local-first AI workspace on your server, verify it locally, and publish its web interface through an HTTP tunnel
NextClaw is an open-source, local-first AI application that can run on a personal computer, NAS, server, or cloud VM. This guide follows its documented npm installation path: install Node.js LTS, install the NextClaw package globally, start the application, and verify the HTTP interface at http://127.0.0.1:55667. After confirming that NextClaw works locally, we connect that loopback endpoint to a Localtonet HTTP tunnel so you can reach it remotely without configuring inbound router port forwarding, opening an inbound firewall port, setting up a VPN, or requiring a public IP address.
📋 What's in this guide
How the NextClaw and Localtonet architecture works
NextClaw describes itself as a long-term personal AI partner rather than a task-only assistant. Its current capabilities include conversations, local file work, web research, generated documents, scheduled tasks, dedicated agents, skills, model-provider configuration, and different agent runtimes. It is local-first and supports macOS, Windows, Linux, Docker, and cloud VM environments. For this tutorial, we focus on the npm installation path because its required commands and local HTTP endpoint are explicitly documented.
The installation and remote-access stages should remain separate. First, NextClaw must start successfully and answer locally at 127.0.0.1 on TCP port 55667. Only after that local test succeeds should you create a tunnel. This order prevents tunnel configuration from hiding an application installation, startup, or dependency problem.
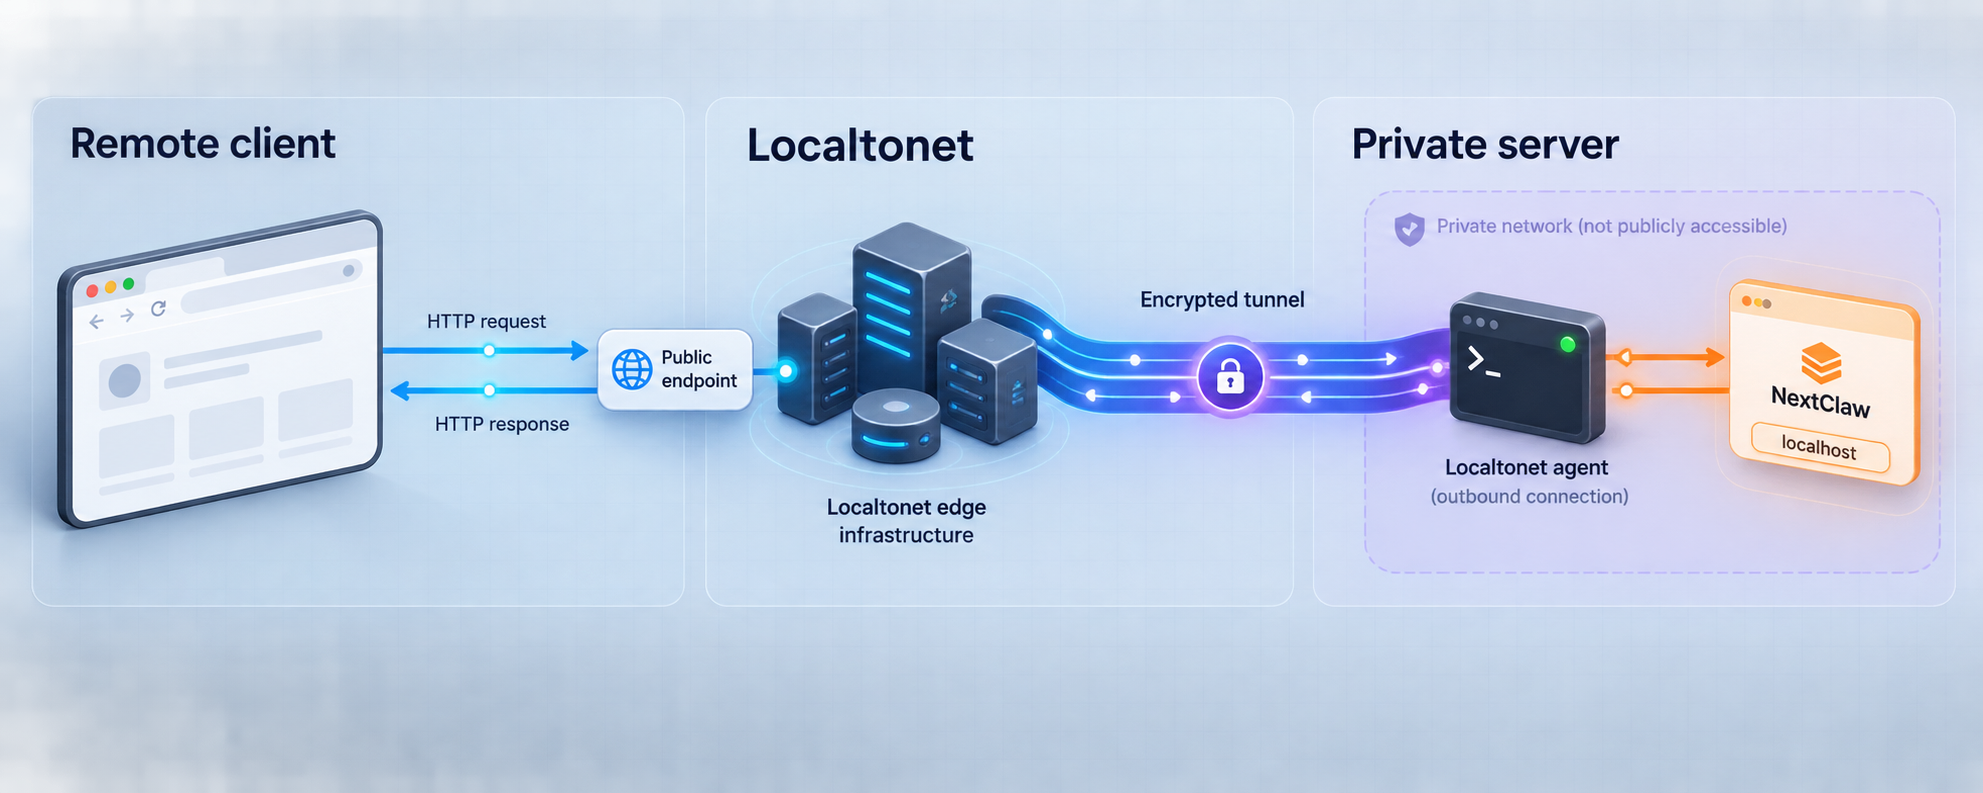
The documented address 127.0.0.1 is the IPv4 loopback address. A service reached through that address is available to software running on the same machine, but it is not ordinarily reachable from a browser on another computer. With Localtonet, our client runs on the server, establishes an outbound connection to a Localtonet relay server, and forwards requests from the tunnel's public address to the local NextClaw endpoint.
nextclaw start.
http://127.0.0.1:55667. Verify this endpoint before introducing remote connectivity.
This is an HTTP tunneling workflow, not a VPN deployment. Localtonet also has a separate VPN Manager feature, but it is not required to expose this specific web interface. The HTTP tunnel publishes one configured local web target rather than joining the remote browser to the server's private network.
Configure 127.0.0.1:55667 only when our client runs on the same host and in a network context that can reach the NextClaw process. If the client runs on another machine, inside an isolated container, or in a separate network namespace, its own 127.0.0.1 does not refer to the NextClaw host. In that situation, determine a reachable local address using your actual deployment topology rather than guessing one.
Prerequisites for installing NextClaw on a server
Before installing anything, decide which server will own the application data, run NextClaw, and run the Localtonet client. A Linux server or cloud VM is a natural fit for an npm-based server installation, although NextClaw also identifies macOS and Windows as supported environments. The commands in this guide are intentionally limited to the documented cross-platform npm workflow. Distribution-specific Node.js repository commands are not included because they vary by operating system, release, package manager, and CPU architecture.
| Requirement | Why it is needed | What to confirm |
|---|---|---|
| Supported host environment | NextClaw is documented for macOS, Windows, Linux, Docker, NAS, and cloud VM use. | Use a maintained operating system and an account authorized to install and run the application. |
| Node.js LTS | The official npm procedure requires Node.js LTS before installing NextClaw. | Confirm that both the Node.js runtime and its npm package manager are available in the shell used for installation. |
| Outbound network access | npm must retrieve the package, and the Localtonet client must connect outbound to a relay. | Check that applicable host and organizational network policies permit the required outbound connections. |
| TCP port 55667 available locally | NextClaw documents its local web interface at 127.0.0.1:55667. |
Make sure another process is not already occupying the port. |
| Localtonet account and client | The client establishes the outbound tunnel from the machine that can reach NextClaw. | Install and run the appropriate client, then use the device-specific token associated with that client. |
| Remote-access policy | An AI workspace can contain conversations, files, generated documents, provider settings, and task results. | Decide who should have access and whether the application's own access controls are sufficient before publishing it. |
Install Node.js LTS without assuming a distribution
Obtain a currently supported Node.js LTS release through a method appropriate for the server. Depending on your environment, that might be the operating system's maintained package channel, an approved Node.js distribution channel, or an established version manager. The exact installation command cannot be universal because Debian-derived systems, RPM-based systems, macOS, and Windows use different package mechanisms.
After installation, confirm that the shell can find Node.js and npm:
node --version
npm --version
Both commands should return version information rather than a command-not-found error. The NextClaw instructions require an LTS release but the supplied project evidence does not establish one fixed Node.js version number for every NextClaw release. Use a current LTS line compatible with the release you are installing, and do not treat a version number copied from an old tutorial as permanent.
Choose the operating account carefully
Install and run NextClaw under the account that should own its runtime and application files. Avoid switching casually between an administrator account and an unprivileged service account, because a global npm installation may be placed somewhere that only one account can use. The exact global npm directory and permission model depend on how Node.js was installed.
If npm install -g reports a permission error, correct the Node.js or npm installation so the intended account can perform supported global package installation. Do not respond by granting broad filesystem permissions or running copied privilege-elevation commands without understanding where the package will be written.
You do not need to open TCP port 55667 to the public internet for this workflow. Leave NextClaw on its documented local address, verify it from the server, and let the Localtonet client connect to it locally. Creating a broad inbound firewall rule would add an unnecessary second public path to the application.
Install and start NextClaw with npm
The official npm path is concise: install Node.js LTS, install the nextclaw package globally, and start it with the NextClaw command. Run these actions in an interactive server shell so you can see installation and startup output. Do not create a background service yet. The first objective is to establish a known-good manual startup.
Install Node.js LTS
Install a supported Node.js LTS release through the method approved for your operating system. Confirm that the same shell and account you will use for NextClaw can run both node and npm.
Install NextClaw globally with npm
Run the documented global package installation command:
npm install -g nextclawAllow npm to finish and review any error output before continuing. A failed or incomplete installation should be fixed at this stage rather than treated as a tunneling issue.
Start NextClaw
Launch the application with the documented command:
nextclaw startKeep the process running while performing the first local test. Read the terminal output for startup or dependency errors. Do not assume that returning to a prompt means the application is healthy without testing the web endpoint.
At this point, do not create a tunnel merely because the command was accepted. A successful command invocation and a working HTTP application are separate conditions. The next step is to request the documented local endpoint from the same server.
What about the desktop, Docker, and source installation paths?
NextClaw also publishes a desktop application and identifies Docker and source development as available installation approaches. The desktop application is described as the easiest starting option on macOS, Windows, or Linux, but a graphical desktop package is not always the best fit for a headless remote server.
Docker can be appropriate when you already operate containerized services. However, the supplied official evidence does not establish the container's host-port mapping or confirm that a container installation exposes the same host address used by the npm path. We therefore do not infer a Docker -p argument, Compose file, volume path, image name, or network configuration. Follow the current NextClaw Docker instructions for those exact values, then identify the verified host endpoint before configuring Localtonet.
A source checkout is most useful for development and contribution work. It introduces repository tooling, workspace dependencies, build steps, and branch-specific behavior that are unnecessary for this server installation. For a straightforward deployment, use the documented npm procedure unless you have a specific reason to build from source.
The supplied NextClaw evidence documents nextclaw start, but it does not establish a systemd unit, Windows service definition, launchd configuration, PM2 command, background flag, log path, or automatic-start option. Begin with the supported foreground command. If you later configure operating-system service management, base it on current NextClaw guidance and your server's service policy rather than an unverified template.
Verify the NextClaw web interface locally
Open the documented address from a browser running on the server, if the server has a desktop environment:
http://127.0.0.1:55667
On a headless server, use an HTTP client already available on that server to request the same URL. For example, if curl is installed:
curl -i http://127.0.0.1:55667The purpose of this request is to confirm that a process is listening and returning an HTTP response. The precise response body and status can vary with the current application release and its initialization state, so this guide does not prescribe an exact page title or status code. A real HTTP response demonstrates a different condition from connection refusal, timeout, or DNS failure.
Interpret common local test results
| Observed result | Likely area to inspect | Recommended next action |
|---|---|---|
| The interface loads or an HTTP response is returned | NextClaw is reachable on the documented local endpoint. | Complete the application's initial setup, then proceed to the Localtonet tunnel. |
| Connection refused | No process is accepting connections at that address and port, or NextClaw stopped during startup. | Return to the terminal running nextclaw start, inspect its output, and confirm that the process remains active. |
| The request times out | The process may be stalled, the test may be running in a different network namespace, or local filtering may be involved. | Confirm where NextClaw is running and perform the request from that same host and network context. |
| A different application responds | Another process may already be using port 55667. |
Identify the process that owns the port and resolve the conflict using documented application options. Do not guess an alternative NextClaw port. |
The shell cannot find nextclaw |
The global npm executable directory may not be in the account's command path, or installation failed. | Review the npm installation result and the Node.js installation method for the same user account. |
Do not proceed until the local endpoint works consistently. Localtonet forwards traffic to the target you configure, but it does not install, start, repair, or configure the target application. If NextClaw is unavailable locally, the public tunnel cannot make it healthy.
Complete the initial NextClaw configuration
Once the web interface loads, complete the setup presented by your installed NextClaw release. The project's current description says that new installations can be ready for a first task without entering an API key because a built-in free trial uses a public gateway. The limits and available models for that gateway may change.
NextClaw's own project information warns that sensitive or confidential data should not be sent through its public trial gateway. Local-first application hosting does not automatically mean every configured model request remains on the machine. Review the model provider selected for each workflow, understand where requests go, and use provider settings appropriate for the data involved.
NextClaw supports adding an OpenAI-compatible endpoint and models, but exact provider forms, environment variables, secret-storage locations, and credential fields are not established by the supplied evidence. Enter credentials only through the controls documented by the version you installed. Never place an API key in a tunnel URL, a shell-history example, a public screenshot, or a support message.
Before enabling remote access, create a harmless test task and confirm that the basic interface behaves as expected. A first test should avoid confidential files and production credentials. The goal is to verify the application layer independently: the interface opens, a task can be submitted using the configured provider or trial, and the result remains available in the workspace.
NextClaw can work with local files, generated documents, scheduled tasks, messaging channels, and dedicated agents. Each additional integration changes the risk profile of the installation. Grant only the filesystem paths, external accounts, provider credentials, and execution capabilities needed for the intended use. An agent that can inspect files or perform actions should not automatically receive broad access to an entire server.
Expose NextClaw with a Localtonet HTTP tunnel
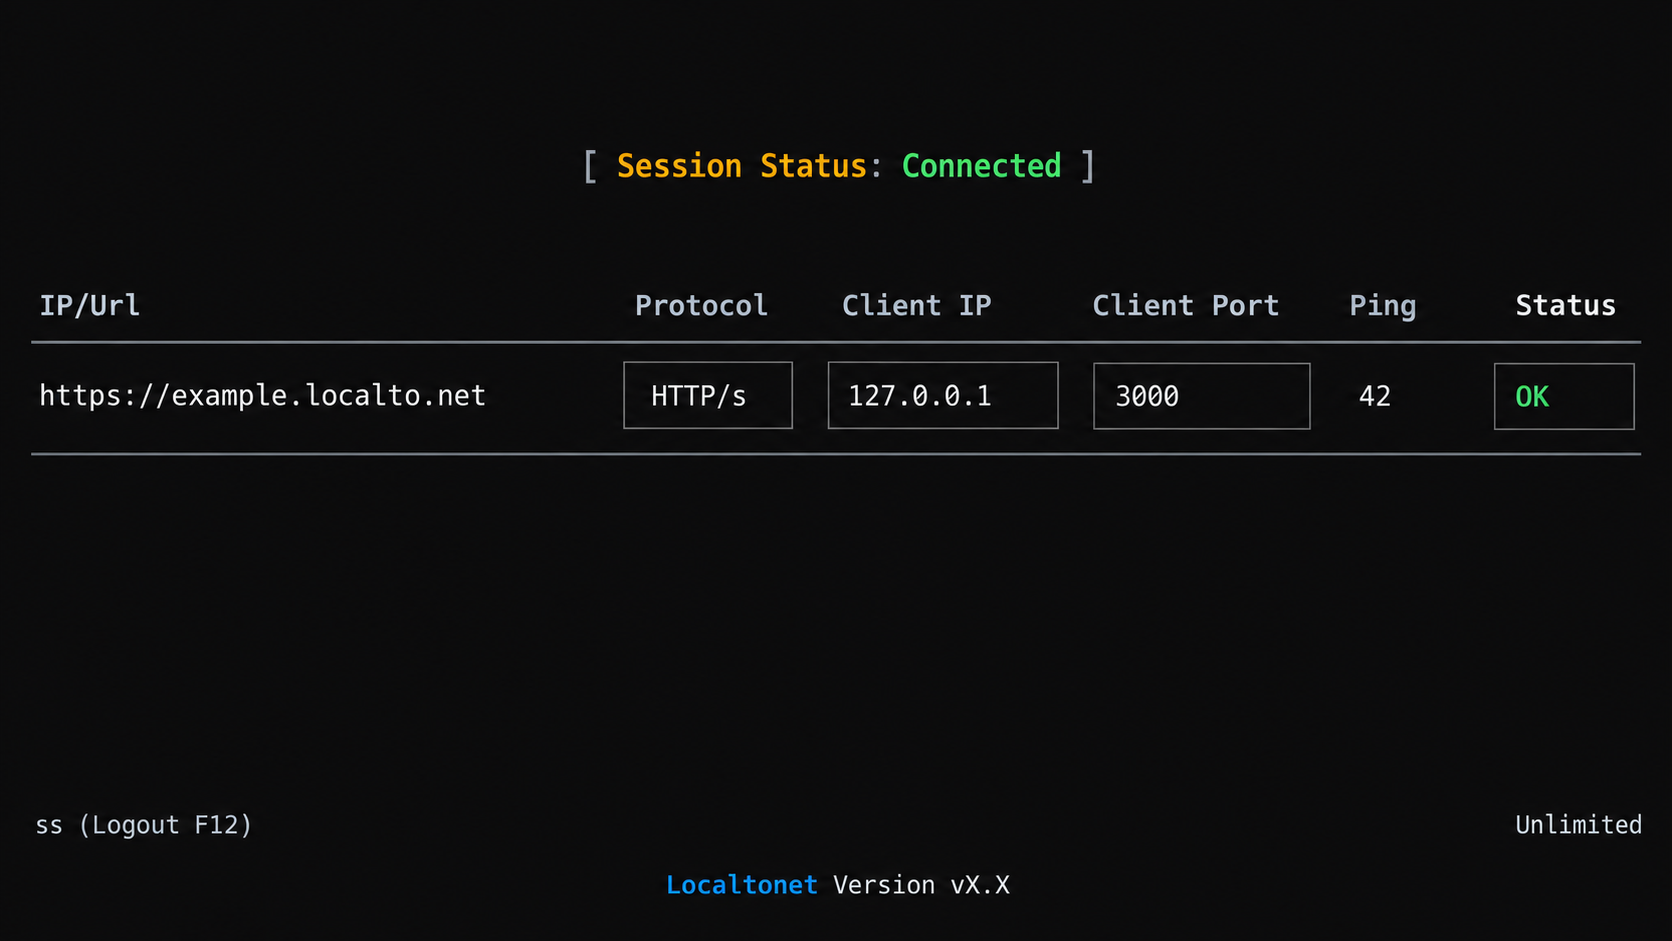
After local verification succeeds, install and run our client on the same server. This placement allows the client to reach 127.0.0.1:55667 directly. The client uses a device-specific authentication token and establishes an outbound connection to a selected relay server. Do not publish or reuse a token as though it were a generic example value.
Use an HTTP tunnel because NextClaw provides a browser-based HTTP application. An HTTP tunnel points to a local IP address and port and provides a public HTTPS address. HTTP tunnel process types can use a random subdomain, a custom subdomain, or a custom domain where supported. All three serve the same local content, but current availability can vary, and custom-domain DNS requirements should be checked against the current dashboard and documentation rather than inferred here.
Install and run the Localtonet client on the NextClaw server
Use the appropriate Localtonet client for the server's operating system. Run it on the device that can successfully request http://127.0.0.1:55667. Installing the client elsewhere changes what the loopback address means.
Authenticate or select the server device
Use the device-specific token associated with this client and select the corresponding device in the dashboard. Treat the token as a secret. Do not paste it into documentation, screenshots, repositories, or public commands.
Select an available relay server or region
Choose from the server or region values currently available in your dashboard. Do not copy a hardcoded server code from an old article because available values may change or differ by account and plan.
Create an HTTP tunnel to the local NextClaw endpoint
Choose an HTTP tunnel and set its local target to IP address 127.0.0.1 and port 55667. Select the available process type appropriate for your address requirements. Do not select a raw TCP tunnel when the goal is ordinary browser access to this HTTP interface.
Start the tunnel
Creating a tunnel does not mean it is running. Use the Start button and confirm that the selected client device is connected. The tunnel remains available only while the client is connected and the tunnel is running.
Open and test the assigned public address
Copy the public HTTPS address shown for the running tunnel and open it in a remote browser. Confirm that it reaches the same NextClaw interface you tested locally. When remote access is no longer required, stop or delete the tunnel.
For the current dashboard workflow, consult our Localtonet HTTP tunnel documentation. Dashboard values such as relay choices and address options should always be taken from the live product rather than hardcoded into automation from this article.
Tunnel creation and tunnel startup are separate lifecycle events. The device must remain connected, NextClaw must remain running, and the tunnel itself must be started. If any one of those conditions stops, the public address cannot deliver the application.
Verify the complete remote path
Test the public address from a device that is not relying on the server's local browser session. A phone or another computer is suitable. Confirm that the browser receives the intended interface and that a harmless application action works. This end-to-end test covers the public address, relay, connected client, local target, and NextClaw process.
If the local URL works but the public URL does not, focus on the tunnel layer: client connectivity, selected device, tunnel state, target IP, target port, and relay selection. If both local and public requests fail, return to NextClaw startup and server prerequisites. This division substantially narrows troubleshooting.
Secure a remotely accessible NextClaw deployment
Publishing an AI workspace deserves more caution than publishing a static demonstration page. NextClaw can hold conversations, source material, generated files, task history, model settings, and integrations. Depending on how you configure it, agents may also interact with local files, external channels, schedules, or execution tools.
Localtonet HTTP process types provide a public HTTPS address, but encrypted browser transport and application authorization solve different problems. The supplied evidence does not establish which authentication controls are enabled by default in every NextClaw release. Until you have verified appropriate access controls, treat the tunnel address as sensitive and do not distribute it broadly.
Follow organizational policy before exposing a service from a managed server. Localtonet removes the need for inbound router port forwarding and public-IP configuration, but it should not be used to bypass authorization, firewall governance, change control, or data-handling requirements. Obtain approval where required and document who owns the application and tunnel.
Keep the server, Node.js LTS line, NextClaw package, and Localtonet client maintained. Before upgrading a production installation, review current NextClaw release information and preserve whatever application data the project identifies as necessary. The supplied evidence does not define NextClaw's data directory, backup command, upgrade command, or rollback procedure, so this article does not invent them.
Routine operation and troubleshooting
Starting a session
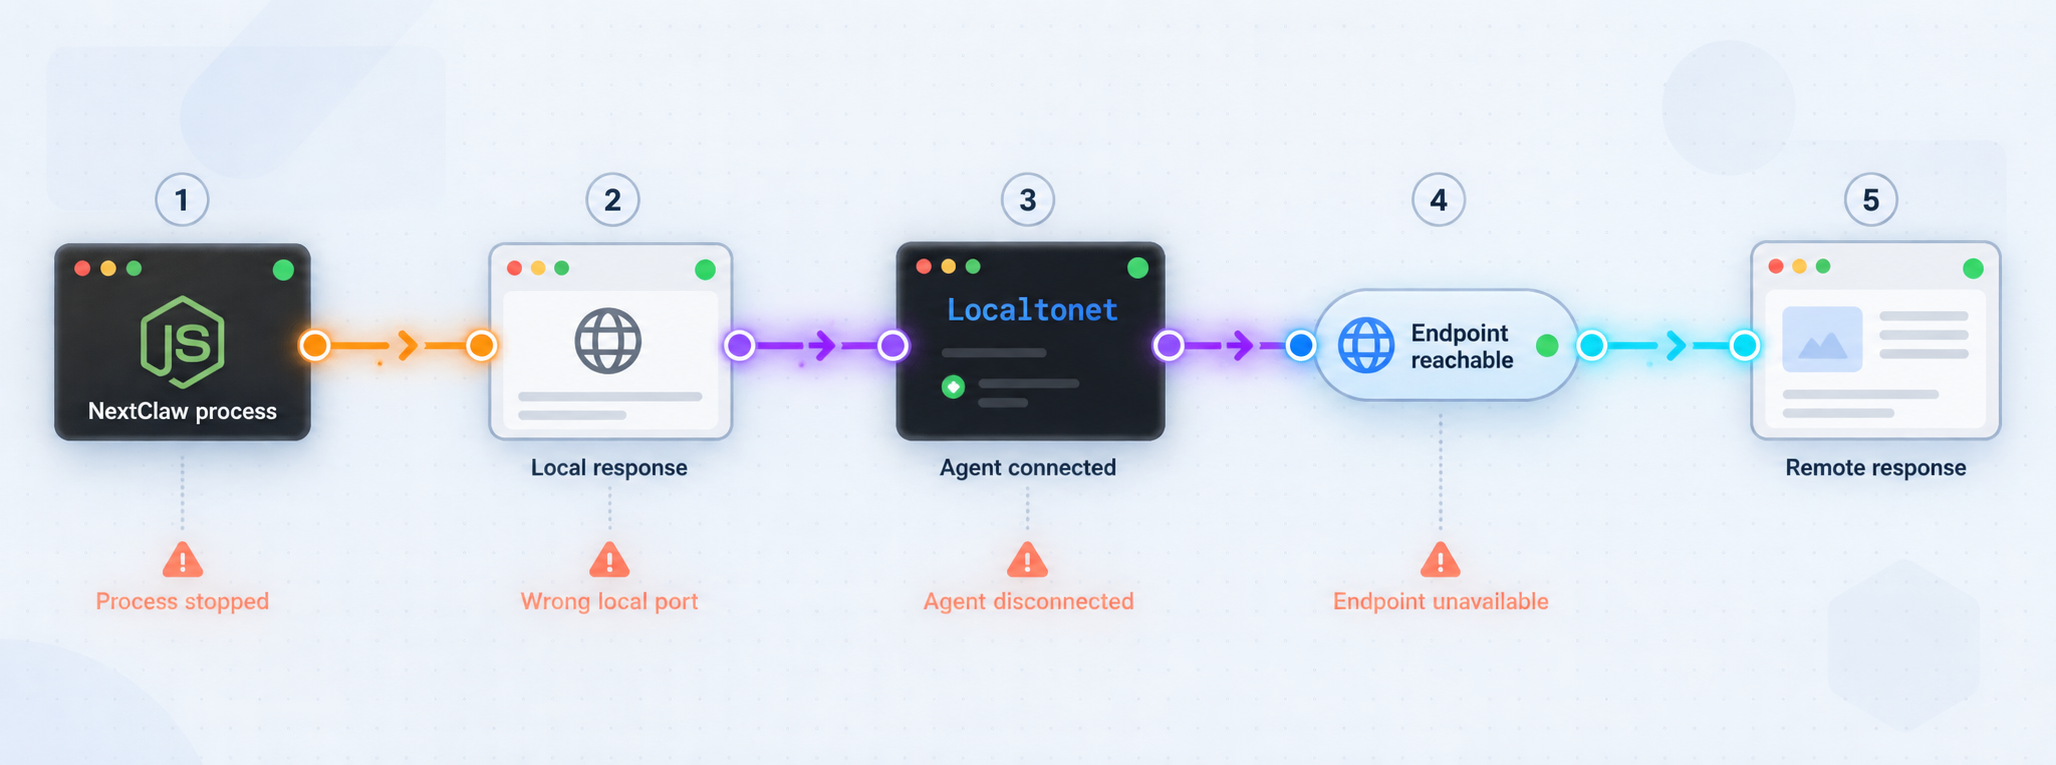
A working remote session depends on three active layers: NextClaw, the Localtonet client device, and the HTTP tunnel. Start NextClaw with its documented command, verify the local endpoint, confirm that our client is connected, and then start the saved tunnel. If you reboot the server, do not assume all three layers returned automatically unless you have separately configured and tested supported startup behavior.
nextclaw start
After startup, request http://127.0.0.1:55667 locally before blaming the public path. This remains the quickest way to separate application availability from tunnel availability.
Stopping access safely
When remote access is temporary, stop the Localtonet tunnel in the dashboard. Stopping the tunnel removes the public route while allowing you to decide separately whether NextClaw should continue running locally. Delete the tunnel if you no longer need its configuration.
If you also stop NextClaw, confirm that no unfinished work depends on it. The supplied project evidence describes scheduled and background work as capabilities, so an application shutdown may affect tasks that are still running or expected to run later.
Troubleshooting checklist
| Problem | Checks | Resolution direction |
|---|---|---|
nextclaw is not found |
Check the npm installation result, current user, and whether the global npm executable location is available to the shell. | Repair the Node.js/npm installation or account path. Do not invent a package location. |
| NextClaw exits immediately | Read the startup output and look for dependency, permission, configuration, or port-conflict messages. | Resolve the reported application issue before creating or changing a tunnel. |
| Local port refuses connections | Confirm that nextclaw start is still running and that the request is made from the same host context. |
Restart only after understanding why the process stopped. Retest locally. |
| Local access works but public access fails | Check client connectivity, device selection, relay selection, tunnel status, target IP, and target port. | Correct the tunnel configuration and ensure it has been explicitly started. |
| Public address reaches the wrong service | Compare the configured target with 127.0.0.1:55667 and verify the local response directly. |
Correct the target or resolve a local port conflict. |
| Tunnel stops after server restart | Determine whether NextClaw and the Localtonet client actually restarted and whether the tunnel is running. | Restore each missing layer. Add automatic startup only through currently supported application and operating-system procedures. |
| Interface loads, but AI tasks fail | Inspect the configured provider, trial availability, credentials, model selection, and application messages. | Treat this as an application or provider problem, not an HTTP reachability problem. |
| Works on the host but not from a containerized client | Remember that a container has its own loopback interface. | Use a deployment-specific address that the client container can reach, based on the documented container networking setup. |
Avoid changing multiple layers at once
Troubleshooting becomes difficult if you simultaneously upgrade Node.js, reinstall NextClaw, move the client into a container, and change the tunnel target. Change one layer, verify it, and then continue. Preserve the basic dependency chain:
- Node.js and npm work for the intended server account.
- The
nextclawcommand is installed and starts successfully. http://127.0.0.1:55667responds locally.- The Localtonet client is connected on the machine that can reach that endpoint.
- The HTTP tunnel targets the verified address and is running.
- The assigned public HTTPS address works from a remote browser.
This sequence is also useful for monitoring. A public failure does not immediately tell you which dependency failed. Checking from the inside outward gives you a consistent way to isolate the fault.
Upgrades and persistent operation
The project is actively released, and behavior can change between versions. Record the version you deploy and review release information before upgrading. The official evidence supplied for this guide does not specify whether a global npm reinstall is the recommended upgrade mechanism for all releases, so do not assume that repeating the installation command is a complete upgrade and migration procedure.
Likewise, do not fabricate a service unit around a command without understanding signal handling, working directories, environment requirements, and data persistence. For a durable server deployment, use current project guidance for unattended operation when available, combine it with your operating system's supported service manager, and test clean startup and shutdown before relying on scheduled work.
Frequently asked questions
What command installs NextClaw on a server?
After installing Node.js LTS, use npm install -g nextclaw. Start the application with nextclaw start. Run both under the server account intended to own and operate the installation.
Which local port does NextClaw use?
The documented npm workflow exposes the local web interface at http://127.0.0.1:55667. Verify that exact endpoint locally before configuring remote access.
Do I need to open port 55667 on my router or cloud firewall?
No. For this Localtonet workflow, NextClaw remains reachable through its local endpoint and our client establishes an outbound connection to a relay. You do not need inbound router port forwarding, an inbound public rule for port 55667, or a public IP address.
Should I use an HTTP or TCP tunnel for NextClaw?
Use an HTTP tunnel for the documented browser interface. It forwards the local HTTP service and provides a public HTTPS address. A raw TCP tunnel is not necessary for this normal web-interface workflow.
Must the Localtonet client run on the same server as NextClaw?
It should run on the same server when you configure the documented target 127.0.0.1:55667. A client on another machine or in an isolated container has a different loopback interface. A separate client host can work only if it has a valid network path to an address where NextClaw is actually listening, and that topology must be configured deliberately.
Does creating a Localtonet tunnel start it automatically?
No. Creating a tunnel and starting it are separate lifecycle actions. Use the Start button after configuration. The selected client must also remain connected, and NextClaw must remain available at the local target.
Does the public HTTPS address automatically protect the NextClaw interface with a login?
Do not assume so. HTTPS protects browser transport, while login and authorization are application-access controls. The supplied evidence does not establish the default authentication behavior of every NextClaw release. Verify the controls in your installed version before sharing the public address.
Can I use NextClaw without adding an AI provider key?
The project states that new installations can use a built-in free trial through a public gateway without first entering an API key. Its limits and models may change, and sensitive or confidential data should not be sent through that gateway. Review provider behavior before using real data.
Can I follow this same port configuration for Docker?
Not without verifying the current Docker documentation. The evidence for this guide does not establish the container's port publication, host mapping, image name, volume paths, or whether it exposes the same host endpoint as the npm installation. Use the project's current Docker instructions and tunnel the host endpoint you have actually tested.
Why does the tunnel fail even though the configuration looks correct?
Test http://127.0.0.1:55667 from the Localtonet client host first. If it fails there, troubleshoot NextClaw. If it works locally, confirm that the correct device is connected, the target is 127.0.0.1 and port 55667, an available relay is selected, and the tunnel has been started.
Connect your verified NextClaw server with Localtonet
Once NextClaw responds locally at http://127.0.0.1:55667, create an HTTP tunnel on the same server and use the assigned public HTTPS address for controlled remote browser access.


