

Run the Petdex development stack locally, verify the gallery, and share the working preview through a public HTTPS address
Petdex is an open-source gallery, CLI, and desktop ecosystem for animated coding-agent companions. This tutorial covers the repository's documented local full-stack path: clone the project, install its Bun dependencies, start the Docker or Podman development environment, and verify the Next.js interface at http://localhost:3000. Only after that local verification gate do we connect the HTTP service to Localtonet for temporary remote access. This remains a development workflow, not a production deployment architecture.
📋 What's in this guide
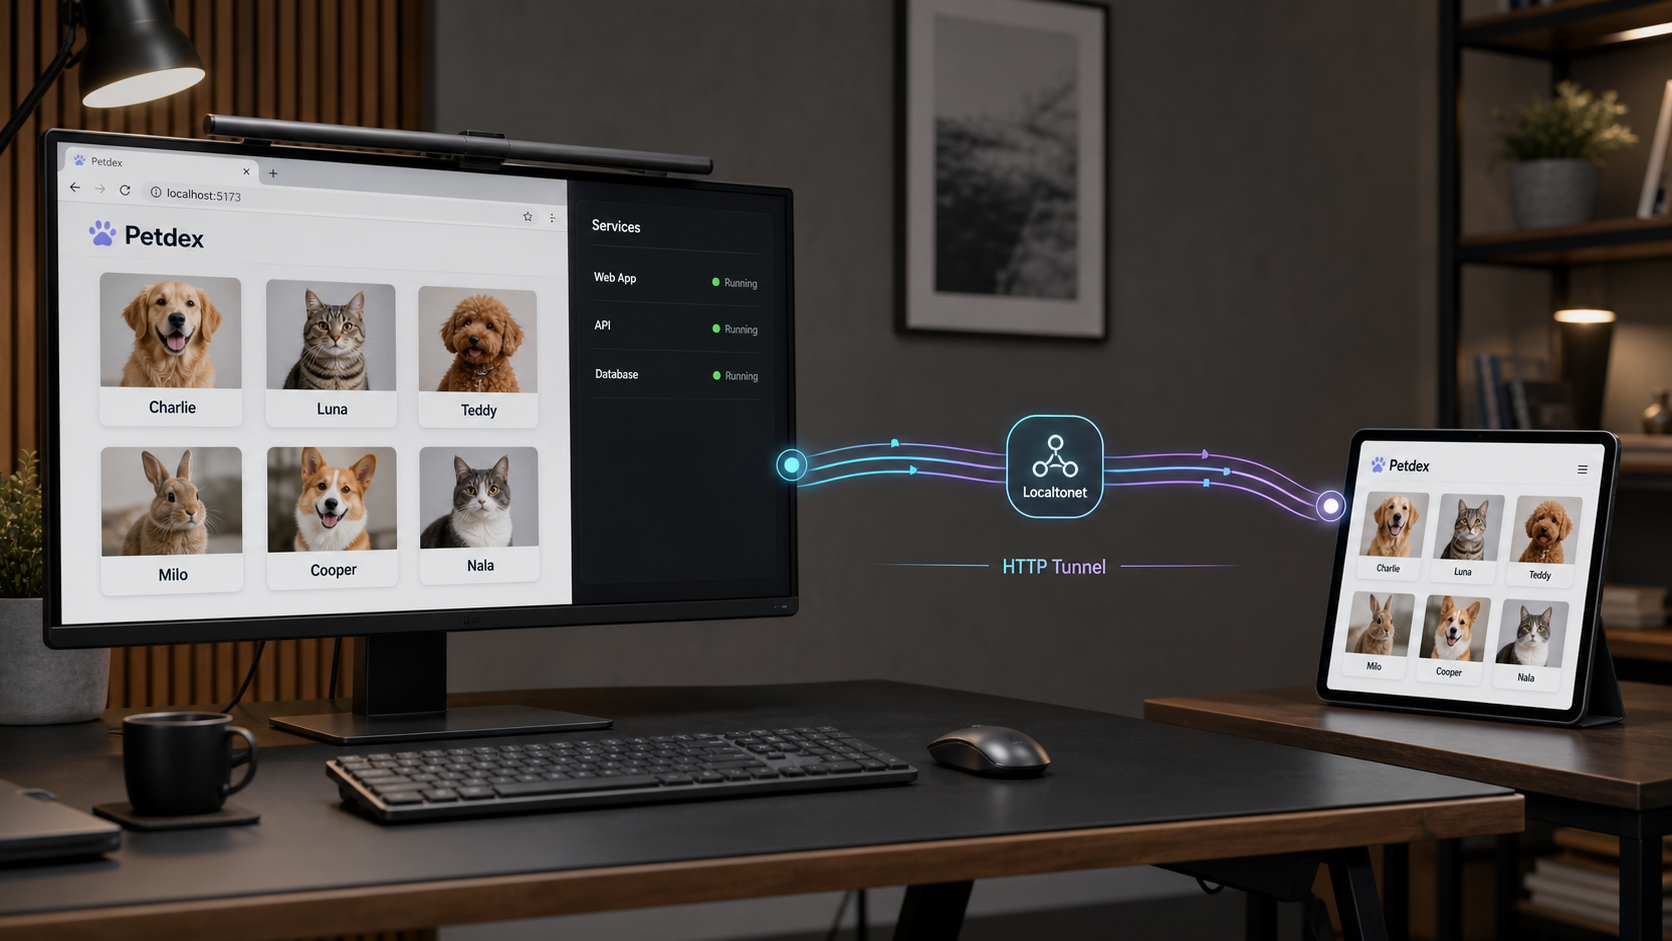
Understand the Petdex full-stack workflow
Petdex describes three related experiences. Its public web gallery lets the community browse, submit, review, and showcase animated pets. Its command-line tool installs and submits pet packages. Its desktop application displays a floating companion that reacts to supported coding-agent activity.
This article is not a tutorial for installing an individual pet with npx petdex install, and it is not a Petdex Desktop installation guide. It covers the repository workflow for contributors, developers, reviewers, and integrators who need to run the Petdex website and its supporting development services on their own machine.
The current repository identifies the web stack as Next.js 16, React 19, Tailwind, Drizzle, PostgreSQL, Redis, Clerk, and R2. Its source tree contains the public gallery, individual pet pages, collections, community and submission interfaces, CLI-facing endpoints, a public manifest endpoint, administrative review surfaces, database definitions, and SQL migrations managed through Drizzle.
Petdex documents two development paths. The normal local full-stack path uses bun run dev:docker with Docker or Podman and notes an approximate 30-second warm-up. The second path uses bun run dev with a populated .env.local and is identified as a maintainer-only workflow against real services. This guide uses the containerized path.
http://localhost:3000 after starting the full stack.
bun install followed by bun run dev:docker.
Petdex explicitly directs contributors to its current CONTRIBUTING.md guide. Repository scripts, environment files, migration behavior, and container lifecycle details can change independently of this article. Review that file at the same commit you intend to run before executing cleanup, reset, migration, or real-service commands.
Prepare Git, Bun, and a container runtime
The documented full-stack sequence requires Git, Bun, Docker or Podman, and a browser. Install these before cloning the repository. If you plan to share the result, you will also need a Localtonet client on the Petdex machine or on another device that can reach the Petdex HTTP service.
Tool constraints must be determined from the exact Petdex revision you check out. The repository contains package.json, bun.lock, and docker-compose.dev.yml, but the supplied repository extract does not expose the complete current contents of those files. Consequently, this article does not claim that Petdex has no Bun, Docker, Podman, Compose, or operating-system version requirement. Check the current files before choosing versions.
Install Git
Use the installation method supported by your operating system or Git distribution. After installation, open a new terminal and confirm that Git is discoverable:
git --versionA version response confirms that your shell can find Git. It does not by itself confirm that your network can reach GitHub, so the later clone remains a separate readiness check.
Install Bun from its official installation guidance
Follow the platform-specific instructions in the official Bun installation documentation. Bun offers different installation paths for Windows, macOS, and Linux, so use the documented path for your operating system rather than copying a platform-specific command from an unrelated tutorial.
Open a new terminal after installation and verify that Bun is on your executable path:
bun --version
Before relying on that version, inspect Petdex's
current package.json
for an engines field, a package-manager declaration, or other project-specific constraint. Also review the lockfile and contributor guide at the checked-out commit. Do not infer the website repository's required Bun version from the separate Petdex CLI requirement for Node.js 20 or later.
Choose Docker or Podman
Petdex says the local full-stack path supports Docker or Podman. Install one runtime, not both unless you already understand how your shell and Compose tooling select between them.
- For Docker, follow Docker's official installation path for your operating system.
- For Podman, follow the official Podman installation guidance for your operating system.
Confirm that the selected runtime is installed and that its service or virtual machine is operational:
docker version
docker info
If you selected Podman, use its corresponding readiness checks:
podman version
podman info
Run only the checks for the runtime you selected. A client version can print even when the runtime backend is stopped, so the information command is important. Resolve daemon, virtual-machine, socket, or account-permission errors before starting Petdex.
Verify the required orchestration support
The repository includes docker-compose.dev.yml, which means the project depends on container orchestration rather than a single isolated container. Before startup, inspect the current
development Compose definition
and the dev:docker script in package.json. Those files determine the actual runtime invocation, service names, ports, health checks, volumes, initialization behavior, and shutdown semantics for that revision.
Do not assume that an arbitrary Compose replacement is compatible. The README confirms Docker or Podman support, but the supplied evidence does not establish a separate command that contributors should run manually in place of bun run dev:docker.
| Requirement | Readiness check | What success establishes |
|---|---|---|
| Git | git --version |
The Git executable is available to the current shell. |
| Bun | bun --version |
The Bun executable is available. Compare it with the checked-out project constraints. |
| Docker | docker version and docker info |
The Docker client and runtime backend are reachable. |
| Podman | podman version and podman info |
The Podman client and runtime backend are reachable. |
| Port 3000 | Confirm no unrelated service appears at http://localhost:3000. |
The documented Petdex web port is not already serving another application. |
| Browser | Open the local URL after startup. | The application can be tested independently of Localtonet. |
First load Petdex directly through http://localhost:3000. Enabling remote access before local verification makes failures harder to isolate and can expose application routes, development data, or diagnostic output that you have not reviewed.
Review Petdex configuration before startup
The short README sequence is useful, but the repository itself says the complete development guidance lives in CONTRIBUTING.md. Read the contributor guide and inspect the project files at the exact Git commit you cloned. This is especially important before making statements about environment preparation, database initialization, migrations, or cleanup.
Files that define the supported path
| File | Why it matters | What to inspect |
|---|---|---|
CONTRIBUTING.md |
The repository identifies it as the full contributor guide. | Preparation, startup expectations, database steps, testing, shutdown, reset, update, and troubleshooting instructions. |
package.json |
Defines scripts and may declare package-manager or engine constraints. | The exact dev:docker implementation, related scripts, and any tool-version declarations. |
docker-compose.dev.yml |
Defines the development services and their relationships. | Service names, ports, volumes, health checks, commands, dependencies, and environment-file references. |
.env.dev |
May contain development defaults used by the supported stack. | Which values are examples, which are safe local defaults, and whether local changes are expected. |
.env.example |
Documents broader environment keys. | Which keys apply only to real services or maintainers. |
.env.mock |
May define mocked-service behavior. | Whether the containerized workflow consumes it and whether contributors should modify it. |
drizzle/ |
Contains the PostgreSQL migration history. | Migration files should be applied through the project-defined workflow, not manually reordered. |
The supplied evidence confirms that these files exist, but it does not include their complete current contents. We therefore cannot responsibly reproduce undocumented migration, reset, teardown, or log commands here. If CONTRIBUTING.md requires an explicit preparation or initialization action at your checked-out revision, perform it in the documented order before continuing.
Likewise, do not manually execute SQL migrations merely because the repository contains a drizzle directory. The dev:docker script or a container entry point may own initialization for the supported path. Running an extra migration command without checking the project definition can duplicate work or change the development database unexpectedly.
The confirmed public README sequence is clone, enter the repository, run bun install, run bun run dev:docker, and open localhost:3000. Exact container service names, migration commands, teardown flags, volume cleanup, and log commands must come from the contributor guide and project files at the selected commit.
Install and start the Petdex full stack
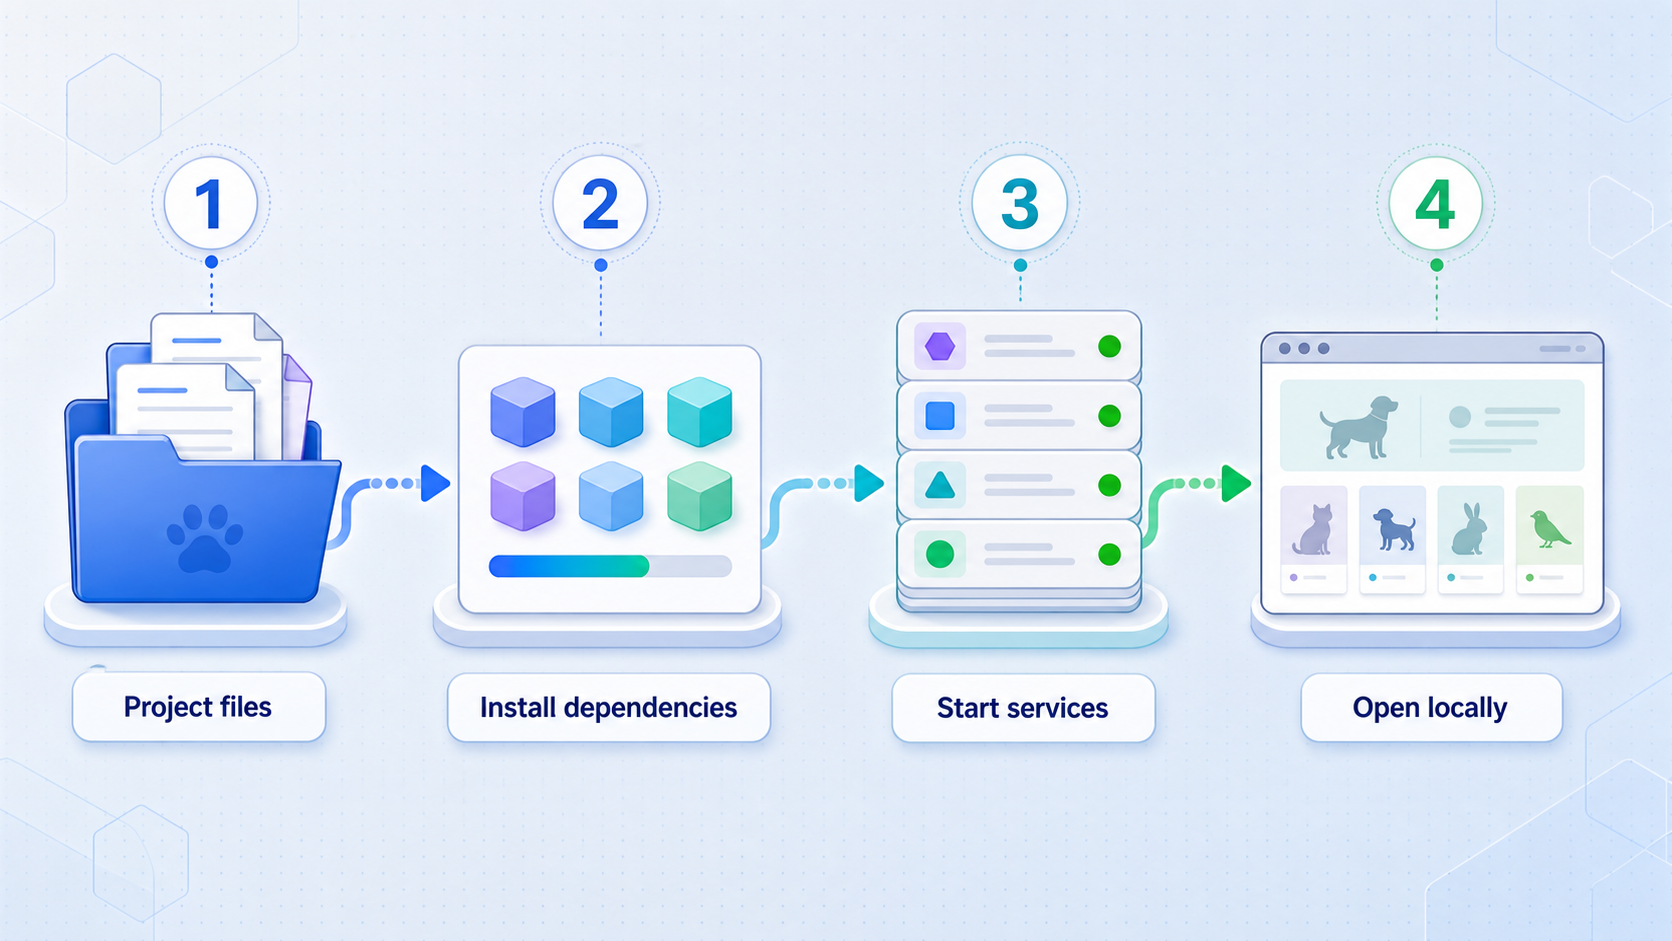
The following five actions preserve the public repository's documented sequence. Complete any additional revision-specific preparation required by the current contributor guide before running the startup script.
Clone the official Petdex repository
Download the current project history from its public repository:
git clone https://github.com/crafter-station/petdex.gitIf cloning fails, resolve Git authentication, DNS, proxy, or network access before continuing.
Enter the repository directory
cd petdexRead CONTRIBUTING.md and inspect package.json, docker-compose.dev.yml, and referenced environment files at this checked-out revision.
Install the locked dependency set with Bun
bun installAllow installation to finish successfully. Preserve the first meaningful error if it fails instead of proceeding with a partially installed dependency tree.
Start the supported containerized environment
bun run dev:dockerKeep the foreground process and its output available while testing. Petdex notes an approximate 30-second warm-up, but initial downloads and local machine conditions can make the first startup take longer.
Open the local Petdex web interface
http://localhost:3000Do not create a public tunnel until this address responds and the routes relevant to your work behave correctly.
Why the script says Docker when Podman is supported
The repository names the script dev:docker while describing Docker or Podman as supported choices. Use the project script exactly as documented. Do not rename it or substitute a hand-written Compose command merely because you selected Podman.
Do not switch silently to real services
The alternative bun run dev route requires a populated .env.local and is identified as being for maintainers. The evidence supplied for this revision does not provide safe general-purpose values for Clerk, PostgreSQL, Redis, R2, or other real-service integrations.
Do not guess credentials or copy production values into a development checkout. Obtain maintainer-approved configuration if your task genuinely requires the real-services path. Keep environment files out of commits, screenshots, support messages, and public tunnel demonstrations.
Verify Petdex locally before sharing it
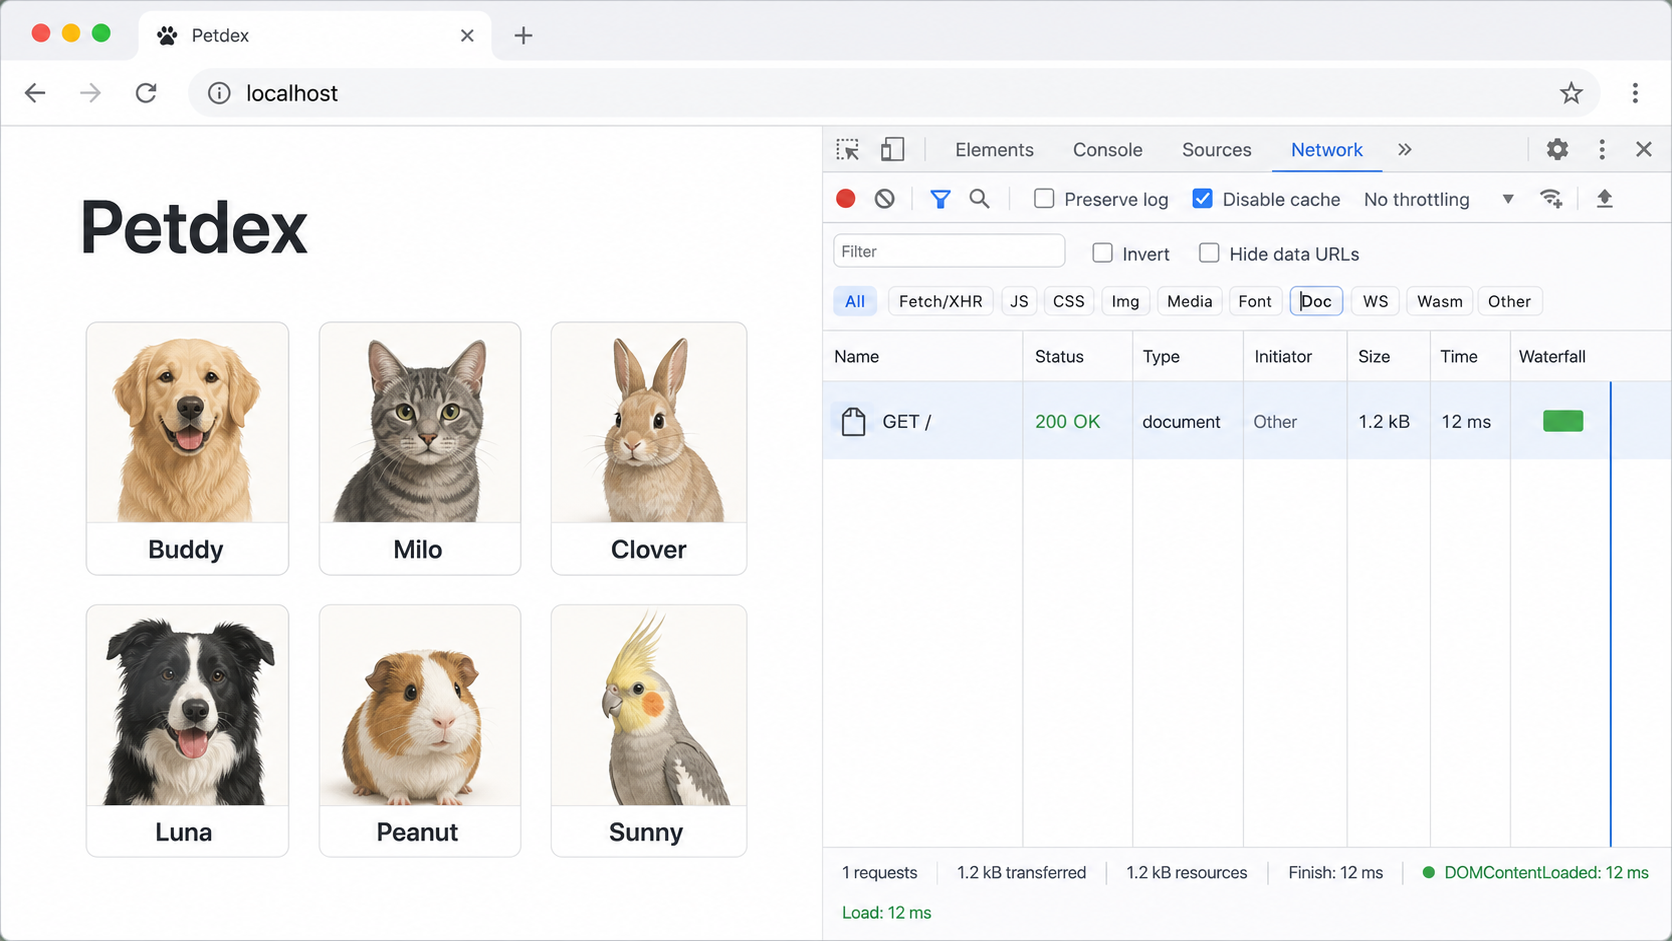
A startup command that remains running is not enough to prove that Petdex is ready. Verify the browser response, static assets, navigation, and the specific data-backed behavior you intend to demonstrate.
Confirm the root page
Open http://localhost:3000 on the development machine. You should reach the Petdex interface rather than a connection refusal, a blank response, or an unrelated service. If another application appears, port 3000 may have been occupied before Petdex started.
Check browser rendering and assets
Confirm that the page has its expected styling, images, and client-side behavior. A Next.js application can return an initial HTML document even when scripts, stylesheets, image requests, or server-rendered operations fail afterward.
Open the browser developer tools only if needed, then look for failed network requests and console errors. Treat what you observe as diagnostic evidence. Do not assume every browser warning is a Petdex defect, and do not claim that an integration is broken until the corresponding request or project log supports that conclusion.
Test the routes you plan to share
Petdex includes gallery pages, individual pet routes, collections, community and submission experiences, CLI endpoints, a public manifest, and administrative surfaces. A small change does not require testing every part of the repository, but every page you plan to show through the public URL should work locally first.
Watch the project output
Keep the terminal that launched bun run dev:docker visible. If a page fails, correlate the browser request with the output produced at the same time. The browser may reveal a failed URL while the application or container output identifies whether the failure came from compilation, a database operation, an unavailable supporting service, authentication, or an external dependency.
Account for initial readiness
Supporting services may not become ready at the same moment as the web server. During the initial warm-up, wait for the documented startup process to settle and retry once. If the same failure continues, investigate it rather than refreshing indefinitely.
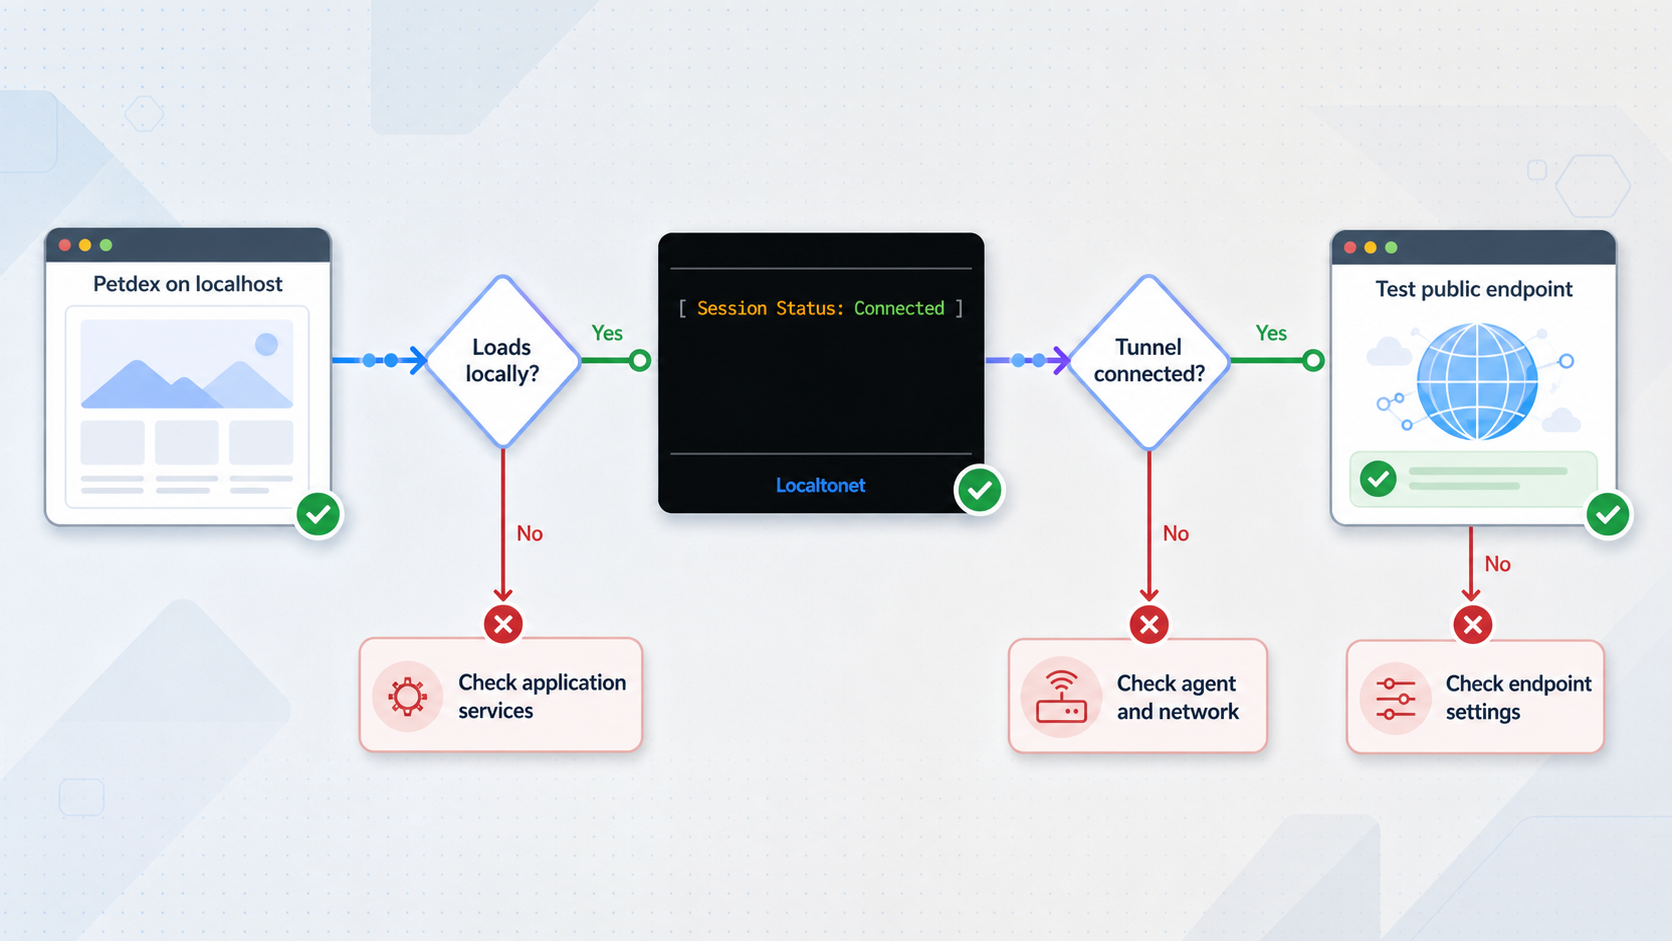
If http://localhost:3000 fails, troubleshoot Petdex and its container runtime. If localhost works but the public URL fails, investigate the Localtonet client, selected device, relay selection, tunnel target, and tunnel state.
Start, stop, update, and inspect the development stack
Petdex and Localtonet have independent lifecycles. The development process must remain active, the Localtonet client must remain connected, and the tunnel must be running for a remote browser to reach Petdex.
Start a later development session
Return to the existing checkout and run the documented full-stack script:
cd petdex
bun run dev:docker
Run bun install again when the dependency definition or lockfile has changed, or when the current contributor guide instructs you to do so. Reinstalling dependencies repeatedly is not a substitute for reading a specific startup error.
Stop the foreground process
Interrupt the foreground development command in the terminal when testing is complete. Then verify whether the project's containers stopped or remained active. The supplied evidence does not expose a canonical Petdex teardown command or its exact persistence behavior, so this article does not invent one.
Before issuing a generic Compose shutdown or deleting volumes, check the current contributor guide and dev:docker script. A normal shutdown, a container removal, and a volume-destructive reset are different operations. Never use a cleanup command that removes volumes unless you understand which development data it will delete.
Inspect logs through the project-defined workflow
Begin with the output of bun run dev:docker. If the contributor guide documents a service-specific log command, use that exact command and service name. Do not guess service identifiers from technology names such as PostgreSQL or Redis because Compose service names are project-defined.
Record the first relevant error, the route being requested, and whether the failure occurs during startup or only after a browser action. Redact environment values, authorization headers, cookies, tokens, database connection strings, and presigned storage URLs before sharing output.
Update carefully
Preserve or commit your local work before updating. After obtaining a newer revision, inspect changes to CONTRIBUTING.md, package.json, bun.lock, docker-compose.dev.yml, environment templates, and drizzle/. Run any update or migration actions documented by that revision in the specified order.
Do not assume that containers, volumes, or a database initialized by an older commit are compatible with every future revision. If the project documents a reset path, understand its data-loss implications before using it.
Stop the tunnel separately
Stopping Petdex does not stop a Localtonet tunnel, and stopping the tunnel does not shut down Petdex. When the review ends, stop the tunnel first so the public endpoint is no longer carrying requests, then stop the local development environment according to the project guidance.
Connect the verified Petdex service to Localtonet
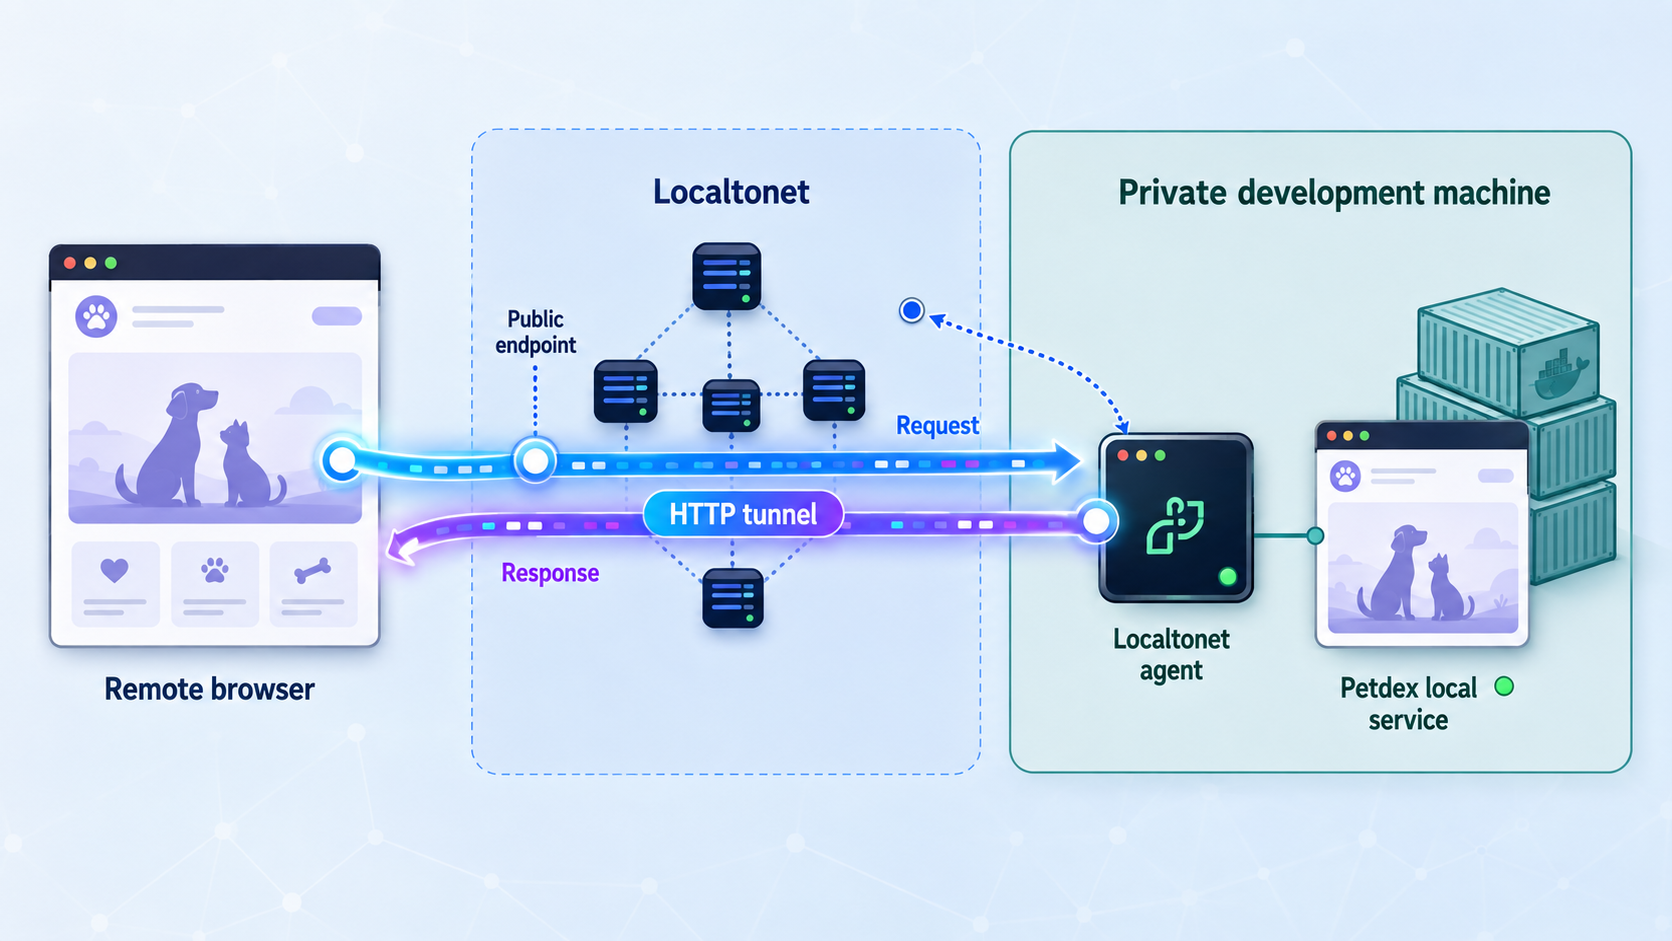
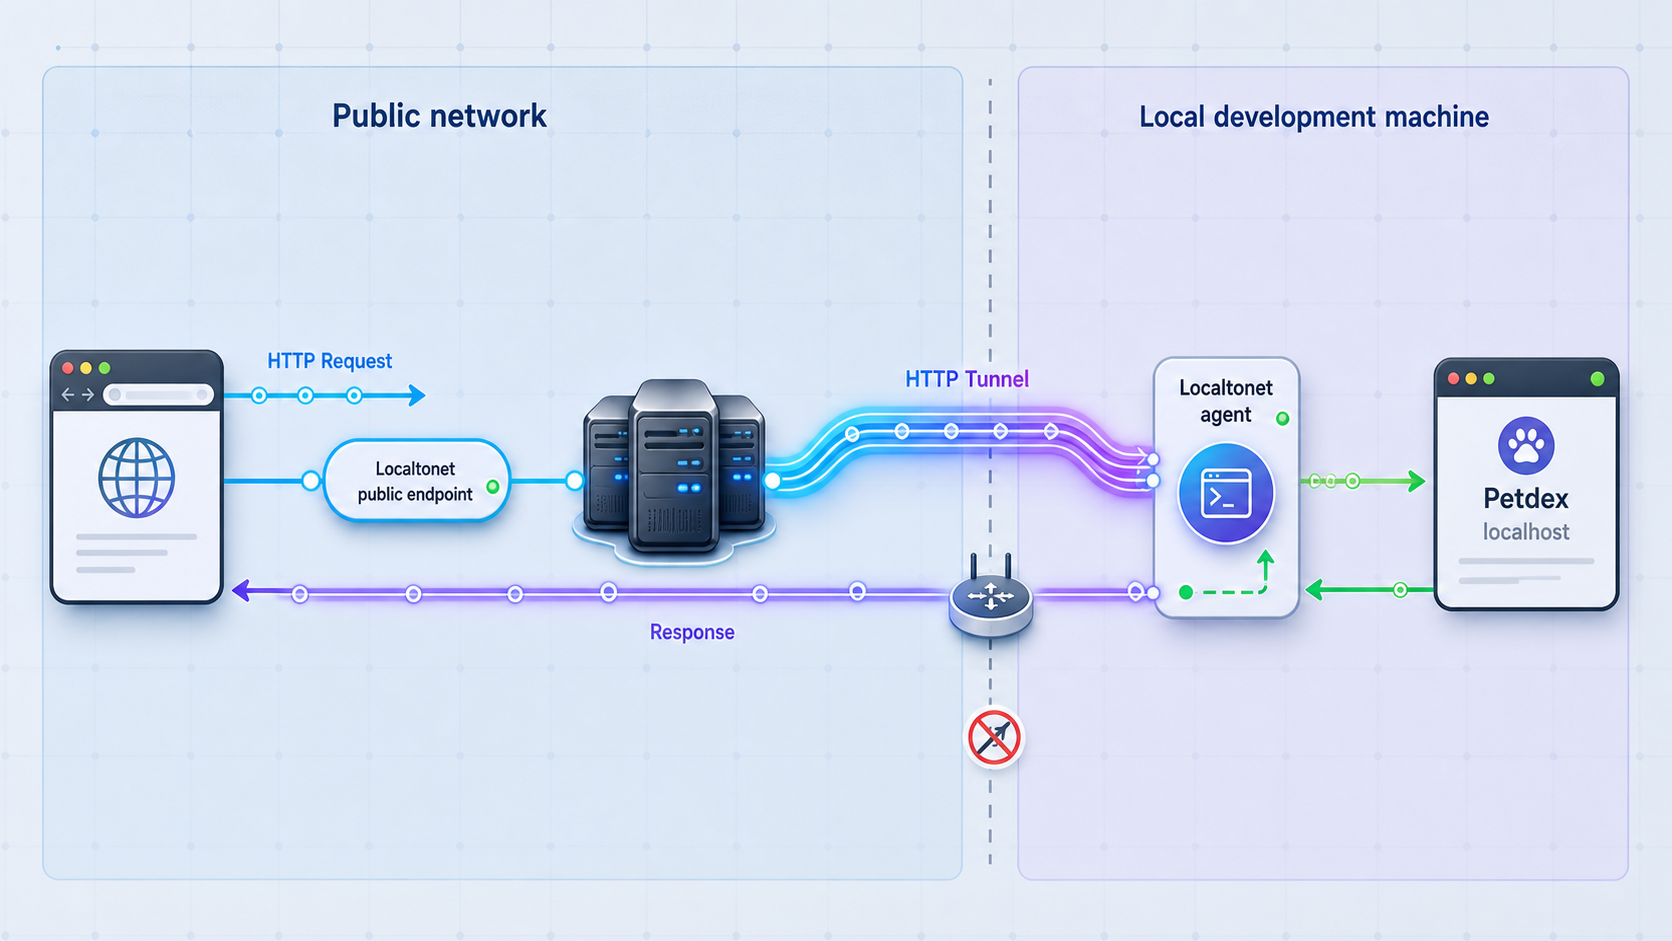
With Localtonet, our client application establishes an outbound connection from your device to a Localtonet relay server. The resulting HTTP tunnel provides a public HTTPS address without inbound router port forwarding, firewall changes, VPN setup, or a public IP address.
Install our client by following the current platform-specific installation path presented in the Localtonet dashboard and documentation. Installation details vary by operating system and client version, so this article does not invent a package command or download URL. Run the client on the Petdex machine whenever possible. That arrangement lets the tunnel target the loopback service directly and avoids uncertainty about whether the Petdex development server accepts connections from other LAN devices.
The HTTP tunnel configuration requires a Process Type, the device's AuthToken selection, an available Localtonet server, and the local IP address and port. For this tutorial, the local service port is 3000. Available relay values must come from the current dashboard and must not be hardcoded from another user's configuration.
Install and run the Localtonet client
Use the current installation path for your operating system. Run the client on the Petdex machine or on a device that can already reach the Petdex service.
Open the HTTP tunnel configuration
Create an HTTP tunnel for the browser-based Petdex service. Do not choose a raw TCP, UDP, File Server, proxy, or VPN configuration for this web preview.
Select the Process Type
Choose Random Sub Domain, Custom Sub Domain, or Custom Domain according to the options currently available to you. All three process types serve HTTP tunnel content through a public HTTPS address. Check current DNS instructions before using a custom domain.
Select the device AuthToken
Choose the device-specific token for the client that will run this tunnel. Never place the token in source code, screenshots, terminal examples, issue reports, or public messages.
Select an available Localtonet server
Choose a relay server currently listed in the dashboard. Region and server availability can vary, so this guide does not recommend or hardcode a server code.
Enter the local IP address and port
Point the HTTP tunnel to the address that reaches Petdex from the Localtonet client device and enter port 3000. When both processes run on the same machine, use the loopback target accepted by the current dashboard.
Start the tunnel
Creating or saving a tunnel does not make it run. Use the separate Start action and confirm that the selected device remains connected and the tunnel is running.
Open the assigned HTTPS address
Test the public URL from an external browser context. Stop or delete the tunnel after the preview according to whether you intend to reuse its configuration.
See the Localtonet HTTP tunnel documentation alongside the current dashboard. If a field name or installation path changes after publication, the current product interface and documentation take precedence.
A saved HTTP tunnel is only a configuration. Petdex becomes reachable through its assigned endpoint only while the selected Localtonet client is connected and the tunnel has been started.
Verify the public Petdex preview from outside
Do not send the URL to a reviewer until you have tested it from a browser context that does not share your normal local session. A private window can reveal session dependencies, but a second device on another network gives a stronger connectivity test.
External-browser checklist
- Open the assigned
https://URL rather than manually substituting the localhost address. - Confirm that the response is the intended Petdex instance, not another service on port 3000.
- Verify that styling, scripts, images, and other browser assets load through the public hostname.
- Navigate to every route you plan to demonstrate.
- Repeat any safe read-only interaction required for the review.
- Check the browser network panel for failed requests if the public rendering differs from localhost.
- Watch the Petdex terminal output while making the external request.
- Confirm that no development-only administrative or submission surface is unintentionally exposed.
- Test without relying on a privileged browser session or cached authentication state.
- Stop the tunnel after the review and confirm that the public endpoint no longer reaches Petdex.
If a public request fails, compare it with the same path at http://localhost:3000. A local and public failure points toward Petdex. A local success with a public failure points toward the tunnel state, selected device, target address, or behavior that depends on the public hostname.
Share a development instance safely
A Localtonet HTTP tunnel gives the configured Petdex service a public address. Anyone able to reach that address may be able to request routes exposed by the development application unless Petdex itself requires authentication or another access control. An unfamiliar or hard-to-guess URL is not authorization.
Localtonet provides connectivity to the configured local HTTP service. It does not replace application authentication, authorization, input validation, safe test data, secrets management, or production deployment controls. Expose only a reviewed instance and stop the tunnel when collaboration is complete.
Use non-sensitive test data
Do not load a public preview with real user records, confidential assets, production database copies, or private submissions. Development errors may expose route names, stack traces, identifiers, or configuration clues that would not be appropriate for a public audience.
Protect both Localtonet and Petdex secrets
A Localtonet AuthToken identifies a client device and must remain private. Petdex-related authentication, database, Redis, storage, and environment values also require protection. Never include them in screenshots, issue descriptions, browser URLs, code blocks, commits, or copied logs.
Expose only the web service
The remote reviewer generally needs only the Petdex browser interface on port 3000. Do not expose PostgreSQL, Redis, container sockets, debugging listeners, or the Petdex Desktop hook server. Those are separate services with different security boundaries.
Keep the preview temporary
Start the tunnel shortly before collaboration begins and stop it when the session ends. Closing the browser does not stop a tunnel. Stopping Petdex also does not automatically stop or delete its Localtonet configuration.
Troubleshoot Petdex and Localtonet by layer
The repository will not clone
Confirm that git --version succeeds and that your machine can reach GitHub. Preserve the actual Git error. DNS failures, proxy restrictions, repository access problems, certificate issues, and insufficient disk space require different remedies.
bun install fails
Confirm that bun --version succeeds, then compare it with constraints in the current package.json and contributor guide. Read the first meaningful installation error. Do not switch to npm, pnpm, or Yarn unless Petdex explicitly documents that package manager for the website workflow.
The presence of bun.lock and the published command sequence establish Bun as the documented dependency path. A package download error, version incompatibility, patch failure, network restriction, or disk problem should be solved directly rather than hidden by another installer.
bun run dev:docker cannot reach the runtime
Run docker info or podman info for the runtime you selected. A daemon, socket, virtual-machine, or permission error belongs to the container layer. Resolve it before modifying Petdex source code or environment values.
The startup script reports a Compose error
Inspect the exact dev:docker script and docker-compose.dev.yml from your checkout. Confirm that your runtime supports the orchestration path invoked by the project. Do not guess an alternative command, change service names, or remove health checks merely to make startup continue.
Database initialization or migration fails
Use the migration and initialization path documented in the current contributor guide. Preserve the failing migration identifier and the relevant service output. Do not manually mark migrations complete, reorder SQL files, or delete the database volume unless the project specifically documents that recovery action.
The available evidence confirms that Petdex uses Drizzle and includes PostgreSQL migration history, but it does not establish the current initialization command or whether dev:docker runs it automatically. Observe the checked-out scripts and logs rather than assuming.
The browser cannot open localhost:3000
Confirm that the foreground process is still running. Review its output for compilation errors, failed supporting services, migration problems, and port conflicts. Verify that you are using HTTP and port 3000 exactly as documented.
If a different application loads, stop and identify the existing process before restarting Petdex. Do not configure Localtonet to an unverified port merely to work around the conflict.
The root page loads but a feature fails
Reproduce the exact action while observing both browser developer tools and project output. Determine whether the failure is a static asset request, Next.js route, API request, database operation, authentication flow, or real-service integration.
Some behavior may require maintainer-only real-service configuration. If logs identify a missing credential or external service, do not invent a value. Confirm whether the containerized workflow is expected to support that feature at the current revision.
The Localtonet client cannot reach Petdex
Running our client on the Petdex machine is the simplest supported arrangement because Petdex is documented at localhost:3000. If the client runs on another device, that device must be able to reach the Petdex host through the private network before a tunnel can work.
The supplied Petdex evidence does not establish a project-supported command-line option for binding the development server to every network interface. Do not invent a host flag. Move the Localtonet client to the Petdex machine unless the current Petdex contributor guide documents a LAN-accessible configuration.
The public URL does not respond
Check the layers in order:
- Confirm
http://localhost:3000still works. - Confirm the Localtonet client is running and connected.
- Confirm the correct device-specific AuthToken was selected.
- Confirm the local target address reaches Petdex and the port is
3000. - Confirm an available relay server was selected.
- Confirm the HTTP tunnel was explicitly started.
- Retry the assigned HTTPS URL from an external browser.
The public page loads differently from localhost
Compare browser network requests, redirects, cookies, authentication callbacks, and console output between the two origins. Watch the Petdex output while loading the public URL. The available evidence does not document every Petdex behavior behind an alternate hostname, so use the observed logs before changing application configuration.
The URL worked and then stopped
Verify that Petdex is still running, the Localtonet client remains connected, and the tunnel remains started. Sleeping the development machine, interrupting the project process, stopping the client, or stopping the tunnel can end availability.
Frequently asked questions
What command starts the Petdex local full stack?
Install dependencies with bun install, then run bun run dev:docker from the repository. Complete any additional preparation required by the current CONTRIBUTING.md first.
Can I use Podman instead of Docker?
Yes. Petdex describes Docker or Podman as supported for the local full-stack path, even though the script is named dev:docker. Use the script exactly as defined by the repository.
Does Petdex require a particular Bun or container-runtime version?
The supplied extract does not expose the complete current constraints. Inspect package.json, docker-compose.dev.yml, and CONTRIBUTING.md at the commit you are running. Do not infer the website requirement from the separate Petdex CLI's Node.js requirement.
Should I run database migrations manually?
Only if the contributor guide for your checked-out revision explicitly instructs you to do so. Petdex includes Drizzle migrations, but the supplied evidence does not establish whether the current container startup applies them automatically.
Should I use bun run dev instead?
Not for the normal local full-stack path. Petdex describes bun run dev as a maintainer-only workflow that requires a populated .env.local and real services.
Is this a production Petdex deployment?
No. The documented path is local development. It does not establish production procedures for durable storage, backups, scaling, monitoring, high availability, or production access control. A tunnel does not change that status.
Which port should the Localtonet HTTP tunnel target?
Use port 3000, which is the documented Petdex web endpoint. The target IP address must be reachable from the device running our client.
Does creating a Localtonet tunnel immediately make Petdex public?
No. Creating or saving a tunnel does not mean it is running. You must use the Start action, and the selected client device must remain connected.
Does the public HTTPS endpoint protect every Petdex route?
No. The HTTP tunnel provides a public HTTPS address, but it does not replace Petdex authentication or authorization. Review the available routes, avoid sensitive data, and limit the exposure period.
Do I need router port forwarding or a public IP address?
No. Our client creates an outbound connection to a Localtonet relay, so this workflow does not require inbound router port forwarding, firewall changes, VPN setup, or a public IP address.
Share your verified Petdex development preview
Start the supported Petdex stack, confirm that http://localhost:3000 works, review the routes and data you will expose, then connect that HTTP service to a temporary public HTTPS address with Localtonet. Stop the tunnel as soon as collaboration is complete.


