

Compile a reproducible Domoticz installation, secure and verify it locally, then provide controlled remote access
This tutorial builds Domoticz from source on Debian Bookworm or newer using the dependency, Boost, CMake, startup, and update procedures documented by the Domoticz project. It explains how to choose between the moving development branch and a pinned stable release such as 2026.3, handle optional deprecated OpenZWave support, complete the first-run administrator setup, verify the local web listener, configure startup after reboot, and protect your backups before updating. Once the local installation is healthy, we show how to expose its HTTP or HTTPS web listener with Localtonet without inbound router port forwarding, firewall changes for unsolicited internet traffic, VPN setup, or a public IP address.
📋 What's in this guide
What this Debian source-build workflow delivers
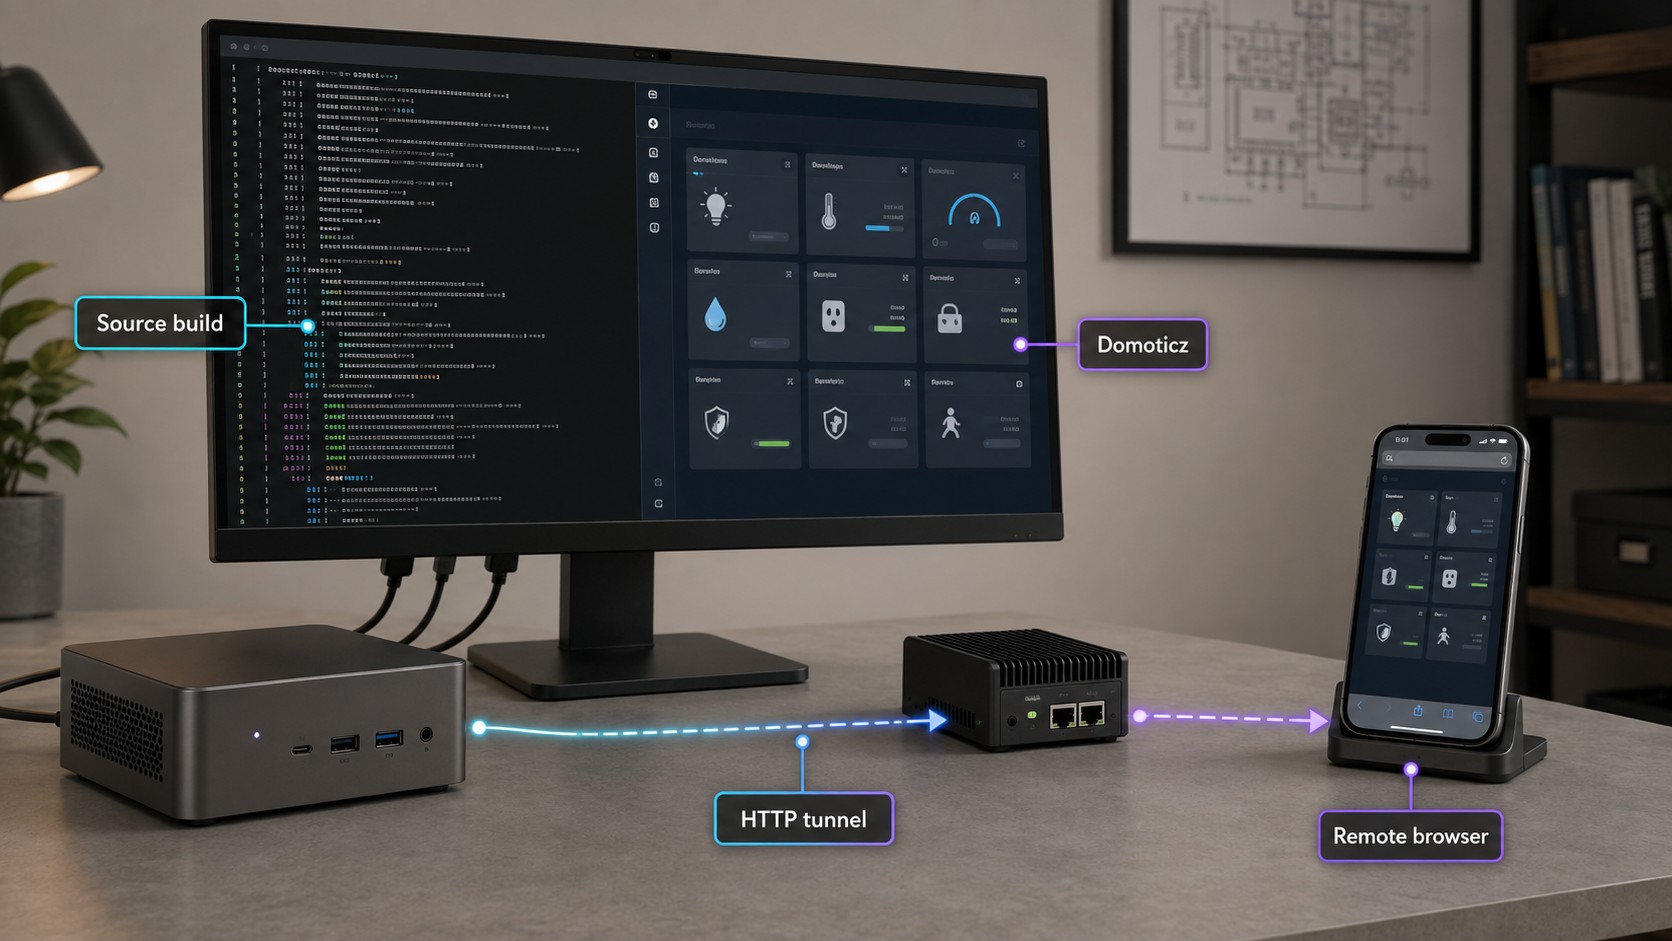
Domoticz is a free, open-source home automation system with a responsive HTML5 interface for desktop and mobile browsers. It can monitor and control lights, switches, environmental sensors, energy meters, water and gas meters, and other connected equipment. The project documents more than 150 supported hardware types, including Zigbee, Z-Wave, MQTT, RFXCOM, P1 smart meters, 1-Wire, Philips Hue, and related integrations. Automation options include dzVents, Lua, Python plugins, and Blockly.
Although Domoticz supports several operating systems, the verified command sequence in this guide is specifically for Debian Bookworm or newer. The official build wiki states that it also works for most Debian-based Linux systems, but package names, toolchain versions, service integration, and hardware permissions can still differ. Do not copy these apt commands to Fedora, Arch Linux, or another distribution and assume that the result is supported.
Building from source is useful when you need an auditable revision, a specific release, a development fix, or a locally modified build. It also makes you responsible for dependency management, revision selection, compilation records, startup integration, backups, and future updates. If you only want a standard installation, Domoticz also publishes a precompiled installer route. Running that installer is not the same as compiling from source.
Initial compilation creates the executable. First startup initializes and tests Domoticz. The startup script makes it persistent across reboots. An update changes the source and rebuilds it. A backup protects the existing environment. Localtonet then provides network reachability to an already working listener. Success at one stage does not prove that the others are healthy.
Prepare Debian Bookworm and install the build dependencies
Use a Debian Bookworm or newer system with the correct date and time. Update your deployment notes with the Debian release, CPU architecture, available storage, available memory, intended Linux runtime account, attached hardware, and selected Domoticz revision. Domoticz requires CMake 3.16 or newer when building on an older environment, which is one reason this tutorial stays within the project’s documented Debian Bookworm or newer scope.
Install the packages listed by the official Domoticz source-build guide:
sudo apt-get install -y make gcc g++ libssl-dev git libcurl4-gnutls-dev libusb-dev libsqlite3-dev python3-dev zlib1g-dev liblua5.3-dev uthash-dev wget cmake libmosquitto-devThis installs the compiler and build tools along with development libraries used by the project. Read any package-manager errors before proceeding. A partially completed package operation is not a valid prerequisite checkpoint.
Confirm that Git, CMake, GCC, and G++ can run:
git --version
cmake --version
gcc --version
g++ --version
The exact version strings depend on the current Debian packages. The important checks are that each command exists and that CMake satisfies the project requirement.
Plan for memory-constrained systems
The Domoticz wiki warns that systems with less than 4 GB of memory might need a swap file during compilation. This can matter on small single-board computers. Swap is a build-host resource decision, not a Domoticz runtime feature. Monitor memory during compilation and follow an operating-system-appropriate swap procedure if the compiler is terminated because the system runs out of memory. The project notes that temporary compilation swap does not need to be enabled at boot.
Account for connected home automation hardware
A USB Zigbee coordinator, Z-Wave adapter, RFXCOM transceiver, or other controller must be accessible to the Linux account that eventually runs Domoticz. Record the device path and permissions before and after a reboot. Avoid running Domoticz permanently as root merely to work around a serial-device permission problem. Grant the selected account only the access it needs, using the groups or device rules appropriate to your Debian installation and hardware.
| Checkpoint | What to record | Why it matters |
|---|---|---|
| Operating system | Debian release and CPU architecture | The verified package sequence targets Debian Bookworm or newer. |
| Build capacity | Free storage, memory, and any temporary swap arrangement | Compilation can fail when a constrained system exhausts resources. |
| Runtime identity | Linux user and required file or device access | The boot script must run Domoticz under the intended account. |
| Source revision | Tag, branch, and resolved commit | This distinguishes a reproducible release from a moving branch. |
| Web listener | HTTP or HTTPS, bind address, and configured port | The browser test and Localtonet target must match the real listener. |
| Recovery | Backup location, restore procedure, and retained working revision | A source update should not remove your only recovery path. |
Remove conflicting Boost packages and build Boost 1.90.0
Domoticz uses parts of Boost. The official build instructions recommend using current Boost libraries and warn that an older installed Boost development set can cause linking errors. The documented procedure first removes the listed Debian Boost development packages:
sudo apt remove --purge --auto-remove libboost-dev libboost-thread-dev libboost-system-dev libboost-atomic-dev libboost-regex-dev libboost-chrono-devPackage removal can affect other locally compiled software that depends on Debian’s Boost development packages. Read the package manager’s proposed changes and make sure you understand the effect on the rest of the host. This command removes development packages, not merely files inside the Domoticz source directory.
The current Domoticz wiki procedure uses Boost 1.90.0. Run the following commands from a working directory where you have permission to create and remove files:
wget https://archives.boost.io/release/1.90.0/source/boost_1_90_0.tar.gz
tar xvfz boost_1_90_0.tar.gz
rm boost_1_90_0.tar.gz
cd boost_1_90_0
./bootstrap.sh
./b2 stage threading=multi link=static --with-thread --with-system
sudo ./b2 install threading=multi link=static --with-thread --with-system
cd ..
sudo rm -Rf boost_1_90_0/
The extraction step can take time on slower storage, and the Boost build can take time on smaller systems. Stop if bootstrap.sh, the staging build, or the privileged installation reports an error. Do not remove the source directory until installation has completed successfully and you have retained the terminal output needed for diagnosis.
Boost versions change independently of Domoticz releases. For a later deployment, compare the version in the current Domoticz build instructions with the version shown here instead of modifying the URL by guesswork. For a reproducible build, record that Boost 1.90.0 was used along with the selected Domoticz tag and Debian release.
Choose OpenZWave support and select the Domoticz revision
Prefer ZWaveJS2MQTT for new Z-Wave deployments
The Domoticz project marks OpenZWave support as deprecated and encourages users who need Z-Wave to use ZWaveJS2MQTT instead. Do not add OpenZWave merely because it appears in an older installation guide. Use the optional compilation path only when you have an existing compatibility requirement that still depends on it.
If OpenZWave is required, the official procedure expects the OpenZWave and Domoticz source directories to be siblings named open-zwave-read-only and dev-domoticz. From their common parent directory, clone and build OpenZWave before compiling Domoticz:
git clone https://github.com/domoticz/open-zwave open-zwave-read-only
cd open-zwave-read-only
make
cd ..
Confirm that make finishes successfully. If you do not need deprecated OpenZWave support, skip these commands and continue with the Domoticz checkout.
Understand the development-branch workflow
The project wiki gives this initial checkout command:
git clone https://github.com/domoticz/domoticz.git dev-domoticz
The repository currently uses development as its visible branch. Running git pull in a branch checkout updates it to newer commits available on that branch. That workflow is suitable when you intentionally want current development code, but it is not a reproducible production deployment because the same branch name can resolve to different code later.
Pin the evidenced stable 2026.3 release
Stable Release 2026.3 is identified by tag 2026.3 and commit f734fde. To build that specific release instead of silently compiling a moving branch, clone the official repository, fetch its tags, and check out the stable tag:
git clone https://github.com/domoticz/domoticz.git dev-domoticz
cd dev-domoticz
git fetch --tags
git checkout 2026.3
git rev-parse HEAD
The final command should resolve to the commit associated with the selected tag. For the evidenced 2026.3 release, that is f734fde. Record the complete commit value printed by Git in your deployment notes.
Checking out a release tag commonly places Git in a detached HEAD state. That is appropriate for compiling an unchanged release. If you need local patches, create a clearly named local branch from the tag and document every modification. Do not run an unexplained git pull against a pinned production checkout.
Release 2026.3 is used here because it is the stable release supported by the supplied evidence. A newer stable release may be available when you perform the installation. If you select a newer release, replace the tag only after reviewing that release’s requirements and recording its resolved commit.
Configure and compile Domoticz
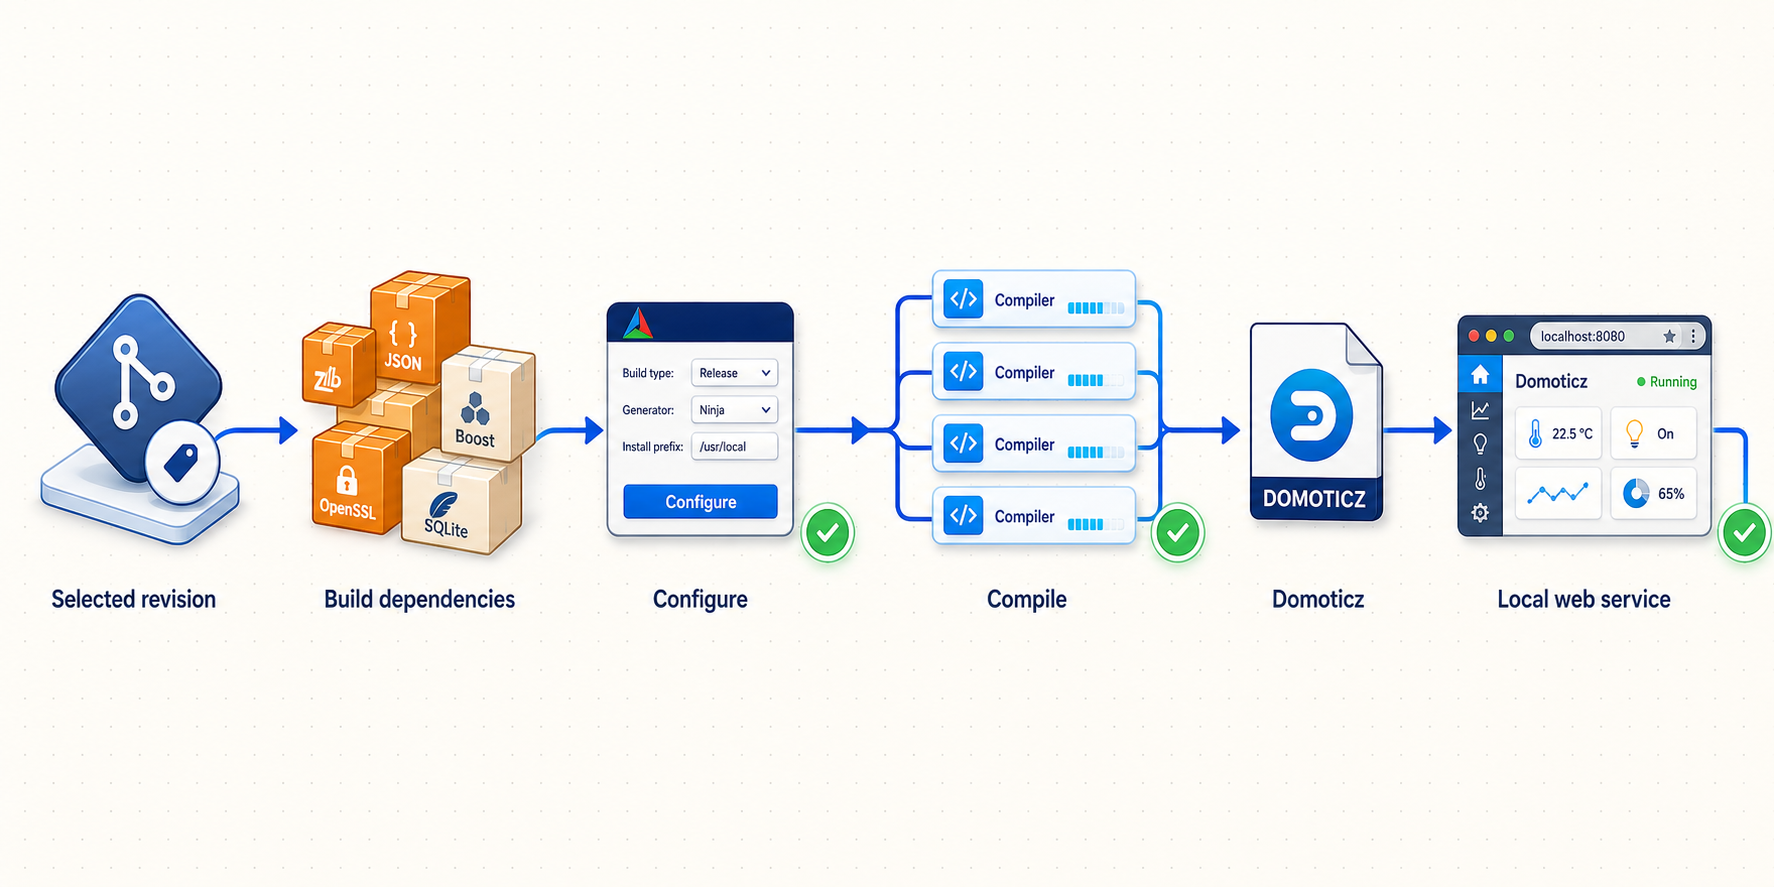
With the shell in the dev-domoticz directory, configure a release build and compile it using the official sequence:
cmake -DCMAKE_BUILD_TYPE=Release CMakeLists.txt
make
Read the complete CMake summary before compiling. Missing libraries, disabled integrations, incompatible versions, or configuration errors should be investigated even if CMake creates build files. During make, preserve the first meaningful compiler or linker error. A long list of later failures can be a consequence of that first problem.
The Domoticz wiki reports example initial compilation times of about 28 minutes on a Raspberry Pi 4 and 10 minutes on a Raspberry Pi 5. These are project-provided examples, not guarantees. CPU model, cooling, storage, memory pressure, background activity, compiler versions, and selected source revision can change the result.
Locate the generated executable
A successful make should produce the Domoticz executable. The project notes that it can be built inside the bin directory, so check both the source directory and that output location:
ls -l ./domoticz ./bin/domoticz 2>/dev/null
One nonexistent path is not necessarily an error because the output location can differ. At least one candidate should exist after a successful build. Record the absolute path because the startup script’s DAEMON parameter must point to the executable that you actually built.
Do not move only the executable into an arbitrary system directory. A source-built application can depend on web assets and other runtime files in its deployment tree. Keep the source/build directory intact unless the documentation for your selected revision gives a separate installation procedure.
Compilation proves only that an executable was generated. It does not prove that the application starts, finds its web assets, loads its database, reaches attached controllers, or works with your configuration. Preserve any existing working installation and backup until the new build passes local and reboot tests.
Start Domoticz for the first time and configure boot persistence
Perform the first foreground startup
Stay in the dev-domoticz directory so that Domoticz can resolve the runtime files shipped with the source tree. Run the executable at the location found after compilation:
./domoticz
If the executable was created in bin, use:
./bin/domoticzDo not run both copies simultaneously. Watch the startup output and record the listener information, database messages, hardware warnings, and paths used by the process. Keep this terminal available while performing the first browser test.
On first run, Domoticz presents a setup wizard that creates the administrator account. Open the locally reported web endpoint from a trusted device, create a unique administrator username and password, and store the credentials in a password manager. The project documents DOMOTICZ_ADMIN_PASSWORD and optional DOMOTICZ_ADMIN_USERNAME for Docker deployments, but those Docker provisioning variables are not the native source-build setup method used here.
Install the supplied startup script
The official source-build procedure uses the repository’s domoticz.sh script for startup at boot. The project also notes that this boot configuration is needed for Web Update. From the dev-domoticz directory, copy and register it:
sudo cp domoticz.sh /etc/init.d
sudo chmod +x /etc/init.d/domoticz.sh
sudo update-rc.d domoticz.sh defaults
Edit /etc/init.d/domoticz.sh and set these required parameters to match your deployment:
USERNAME: the Linux account that should run Domoticz. This account needs access to the Domoticz files, data, and required hardware devices.DAEMON: the absolute path to the executable found after compilation, whether it is in the source root or thebindirectory.DAEMON_ARGS: the startup arguments appropriate to your listener and runtime layout. Preserve documented defaults unless you intentionally need different settings, and make sure the resulting HTTP or HTTPS listener matches what you later verify.
These values are installation-specific. Do not leave a sample username or guessed executable path in the script. Do not add undocumented flags merely to make the process start.
Test the operational startup path
Stop the foreground process cleanly before starting the init-script-managed instance. Then start Domoticz through the installed script:
sudo /etc/init.d/domoticz.sh startConfirm that only one Domoticz process is running and that the same administrator account and configuration are available. A foreground process accidentally left running can hide problems in the startup script or create a port conflict.
Perform a controlled reboot after the local web checks in the next section. Following the reboot, verify the process, listener, administrator login, attached hardware, and recent data. Boot registration is not considered complete until the service returns without a manual shell command.
Discover and verify the local Domoticz web listener
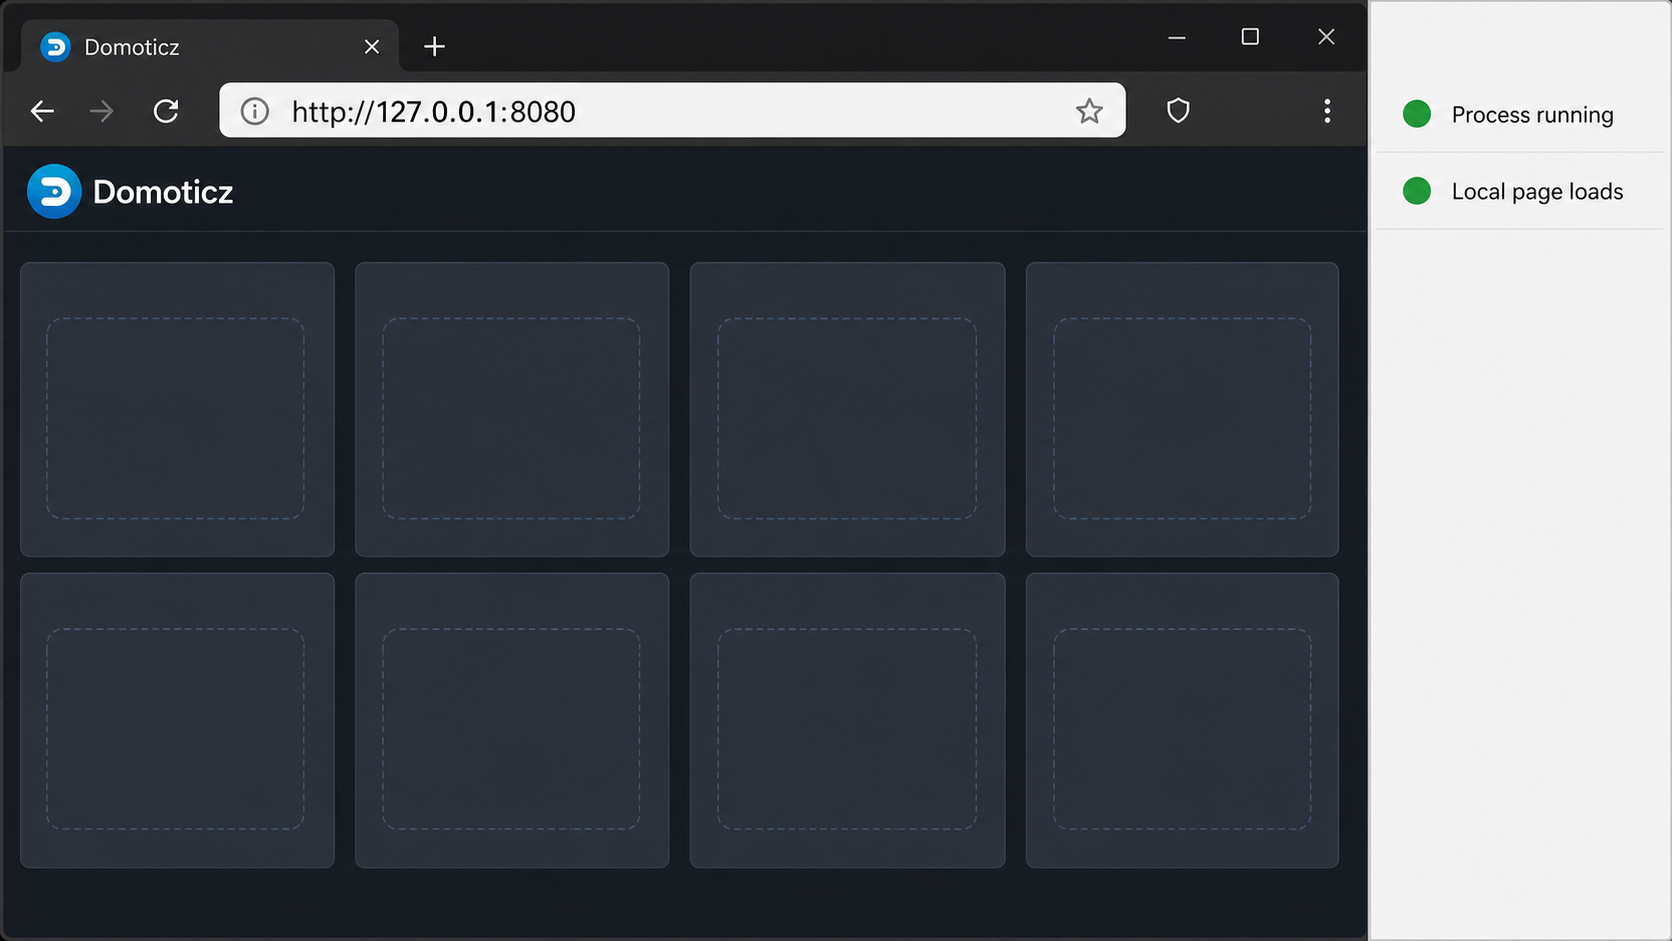
Use the first-start output and the configured DAEMON_ARGS to identify the web scheme, bind address, and port. Do not rely on a port copied from an older tutorial. You need to know whether the listener uses HTTP or HTTPS and whether it is bound to loopback, a particular LAN address, or a wider interface.
On Debian, list listening TCP sockets with:
ss -lntpProcess details can depend on the account and privileges used to run the command. Match the result to the Domoticz process and its startup output instead of selecting an unexplained open port.
Test an HTTP listener after replacing the placeholder with the actual port:
curl -I "http://127.0.0.1:YOUR_CONFIGURED_PORT/"For a locally configured HTTPS listener, use its actual scheme:
curl -I "https://127.0.0.1:YOUR_CONFIGURED_PORT/"Certificate validation can fail when an HTTPS certificate does not match the loopback address or is not trusted by the client. Do not automatically disable certificate verification and treat that as a final success. Inspect the certificate and use a hostname for which it is configured, or correct the local HTTPS setup.
A header response is only a connectivity check. Open the same endpoint in a browser and confirm all of the following:
- The Domoticz interface and static assets load completely.
- The first-run administrator account can sign in.
- Navigation between pages works.
- Current device or sensor data appears where configured.
- A safe test device or low-risk operation behaves as expected.
- The same checks still pass after restarting Domoticz through the startup script.
- The listener and attached hardware return after a controlled Debian reboot.
If the Localtonet client will run on another LAN device, repeat the browser or curl test from that device using the Debian host’s private address. A service bound only to 127.0.0.1 is reachable from a Localtonet client on the same host, but not from a client running on another computer.
If the selected Localtonet client cannot reach the Domoticz listener directly, a public URL will not make it healthy. Resolve process, protocol, bind-address, port, certificate, hardware-permission, web-asset, and local firewall problems first.
Provide remote Domoticz access with Localtonet
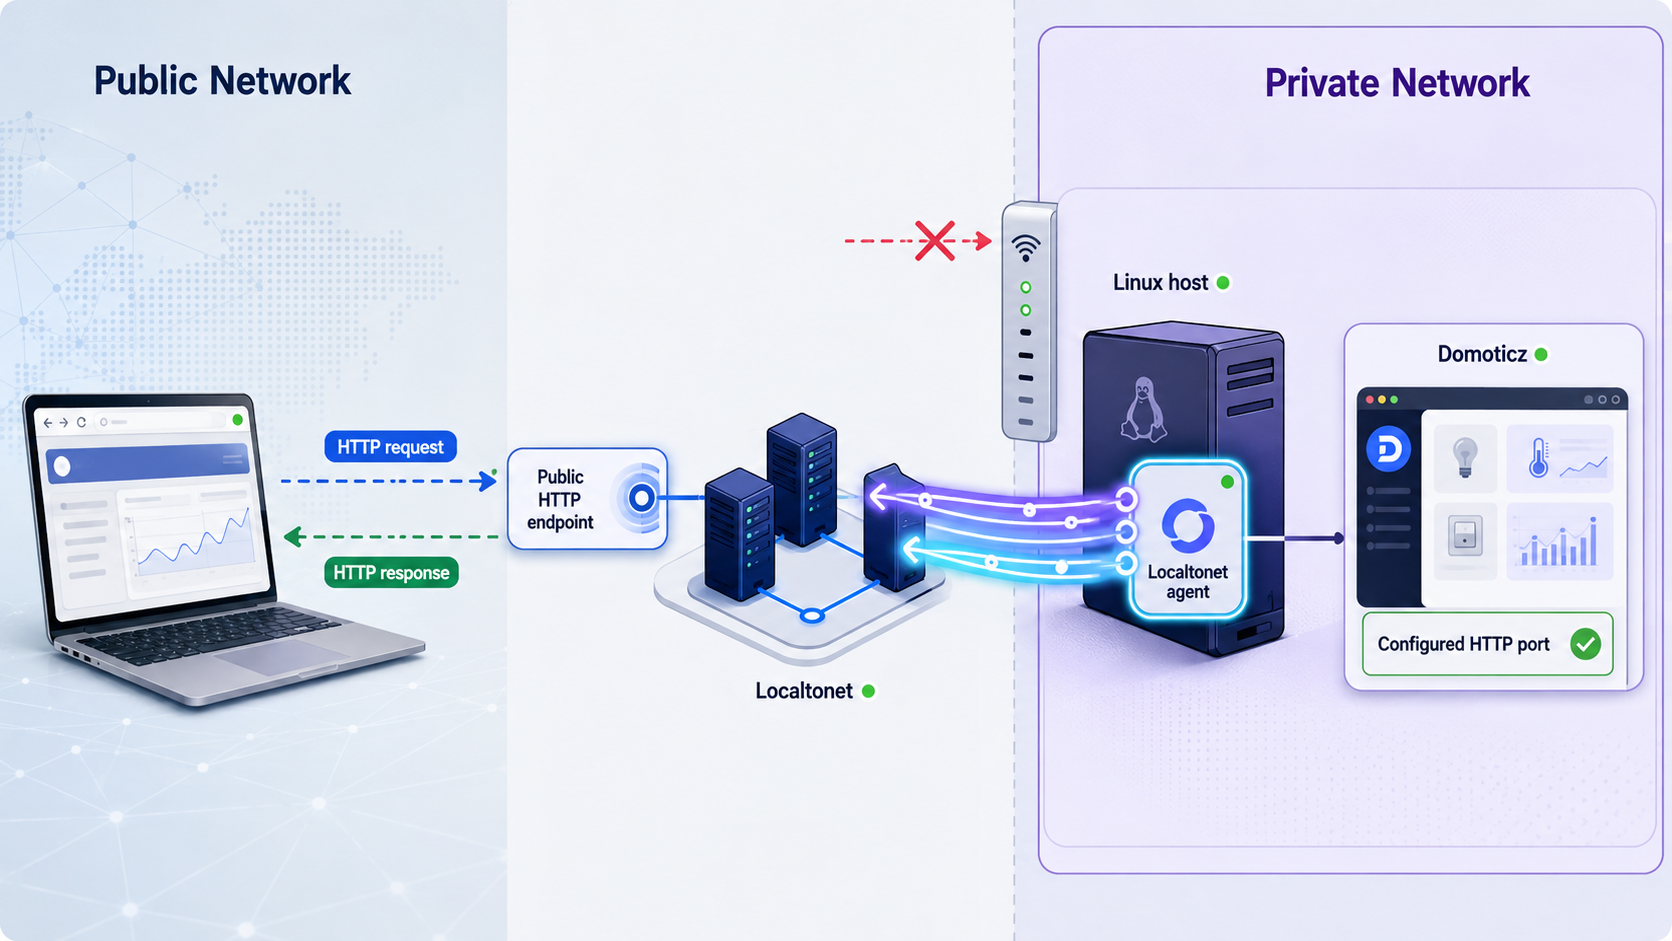
Once Domoticz works locally and survives a reboot, an HTTP tunnel with Localtonet can provide remote access. Our client establishes an outbound connection to a Localtonet relay server. The resulting tunnel provides a public HTTPS address without inbound router port forwarding, a public IP address, firewall changes for unsolicited inbound traffic, or a separate VPN setup.
The Localtonet client can run on the Domoticz host or another device that can reach it. When both run on the Debian host, the local target can use the verified loopback listener. When the client runs elsewhere, use the private address reachable from that client. In that second arrangement, localhost means the Localtonet client device, not the Domoticz computer.
HTTP and File Server tunnels use a Process Type of Random Sub Domain, Custom Sub Domain, or Custom Domain, with availability depending on the current dashboard and plan. All three serve content from a public HTTPS address. Custom-domain DNS details should be taken from the current dashboard and documentation rather than inferred from this tutorial.
Install and run the Localtonet client
Install the client on the Debian Domoticz host or on another device that has already passed a direct local test against the Domoticz listener. The client must remain connected whenever the tunnel is expected to work.
Authenticate and select the device
Authenticate the client using its device-specific token and select that connected device in the dashboard. Keep the token out of commands shown to other people, screenshots, source repositories, tickets, and public logs.
Select an available relay server
Choose a relay server or region currently offered by the dashboard. Available values can vary by plan, client version, region, or deployment, so no server code is hardcoded here.
Create the HTTP tunnel configuration
Select the desired Process Type and enter the exact local IP address and port verified for Domoticz. Configure the local target for the actual listener protocol shown by your installation. An HTTP listener must be targeted as HTTP, while an HTTPS listener requires the corresponding HTTPS-capable local target behavior available in the current HTTP/s tunnel configuration. Do not treat the two local protocols as interchangeable.
Start and test the tunnel
Creating the tunnel does not start it. Press Start, then open the assigned public HTTPS address from a device outside the local network. Confirm the Domoticz login page, authentication, interface assets, and a low-risk read operation before attempting remote control.
Stop or delete remote access when appropriate
Stop the tunnel to end public availability while retaining its configuration, or delete it when it is no longer needed. The endpoint is available only while the selected client is connected and the tunnel is running.
Review our current Localtonet HTTP tunnel documentation while configuring the tunnel. The dashboard and current documentation are authoritative for the available local protocol controls, relay servers, Process Types, custom-domain requirements, and plan-specific options.
| Deployment pattern | Local target | Required check |
|---|---|---|
| Both processes on Debian | Verified loopback address and Domoticz port | Confirm the Localtonet client process can reach the local listener. |
| Client on another LAN device | Reachable private address of the Debian host and Domoticz port | Test that address from the client device before creating the tunnel. |
| Local Domoticz listener uses HTTP | Matching HTTP local target | Do not select HTTPS for a service that is speaking plain HTTP locally. |
| Local Domoticz listener uses HTTPS | Matching HTTPS-capable local target | Validate local certificate behavior and use the current documented HTTP/s configuration. |
Secure Domoticz before leaving the tunnel running
A public URL changes the exposure of the application even though no router port is opened. Localtonet provides network reachability to the selected listener. Domoticz remains responsible for application users, passwords, authorization, trusted-network behavior, and its web security configuration.
Follow the official Domoticz security setup guidance
Complete the first-run administrator wizard before starting the tunnel. Use a unique password and review the project’s Domoticz security setup documentation for the security controls supported by the current release. In particular, confirm how authentication, users, network trust settings, and secure web access are configured for your deployment.
Do not define public clients as trusted merely to avoid login prompts. Any trusted-network or local-network exception should be limited to networks you genuinely control and should not turn the public tunnel path into an authentication bypass. Test the public address in a fresh browser session to confirm that an unauthenticated remote visitor receives the expected login requirement.
If you enable HTTPS directly in Domoticz, configure and maintain its certificate according to the project’s current security instructions. The public Localtonet address is HTTPS, but that does not justify pretending that a local HTTPS listener is HTTP or ignoring local certificate failures. Select a tunnel target compatible with the protocol Domoticz actually serves.
Use least privilege and expose only Domoticz
Run Domoticz under the Linux account configured in USERNAME, with only the directory and hardware access it needs. Point the tunnel only to the verified web listener. Do not bundle SSH, database ports, development listeners, or unrelated administration services into this workflow.
Protect the Localtonet token
A Localtonet authentication token identifies a client device. Never paste it into a public tutorial, issue report, shared terminal transcript, or source repository. If you believe a token has been disclosed, use the current account controls to revoke or replace it rather than continuing to use a compromised secret.
Understand the three runtime states
- Domoticz state: the application must be running and listening at the configured local address.
- Localtonet client state: the selected device must be connected to our relay platform.
- Tunnel state: the created tunnel must also be started.
These states are independent. Domoticz can work locally while the client is disconnected. The client can be connected while Domoticz is stopped. Both can be healthy while the tunnel is intentionally stopped.
Back up, update, verify, and roll back safely
Back up before every update
This is an explicit warning in the Domoticz source-build documentation. Protect the database, configuration, scripts, plugins, certificates, web customizations, and other installation-specific files required to restore your environment. Keep the backup outside the source tree being modified and verify that it is readable before proceeding.
A source checkout is not a backup of operational data. Git can restore tracked source files, but it does not recreate your administrator account, devices, automation logic, runtime database, local plugins, or secrets. Use the backup facilities and recovery guidance appropriate to your Domoticz release, and retain a copy that will not be overwritten by the update.
The project notes that its beta update script creates an automatic complete-environment archive under a path such as domoticz/backups/domoticz_backup_yyyymmdd_hhmmss.tar.gz. Do not assume that every manual source update creates that archive. Make an explicit backup before a manual git pull, tag change, or rebuild.
Update an intentional development checkout
The official wiki gives the following source-update workflow for a checkout that is intentionally following its branch:
cd dev-domoticz
git pull
make
This retrieves newer source on the checked-out branch and recompiles it. Use it only when following that moving branch is your deliberate policy. Before running it, record the old commit with git rev-parse HEAD, create and verify the backup, and inspect incoming changes.
Update a pinned stable deployment
For a production installation pinned to a stable tag, do not convert the deployment into a moving development build by running an unexplained pull. Fetch the published tags, review the intended newer stable release, and check out that exact tag:
cd dev-domoticz
git fetch --tags
git checkout NEW_VERIFIED_STABLE_TAG
git rev-parse HEAD
cmake -DCMAKE_BUILD_TYPE=Release CMakeLists.txt
make
NEW_VERIFIED_STABLE_TAG is deliberately a placeholder. Replace it only with a tag that exists in the official repository and whose release requirements you have reviewed. Record the new commit and build output.
Validate the updated build before reopening access
Stop the tunnel during maintenance if remote access is not required. Start the updated Domoticz build locally, inspect its logs, verify administrator authentication, load the interface, check device data, test a low-risk automation, and restart it through the boot script. Reboot the host when the update affects startup behavior, libraries, or hardware access.
Keep a practical rollback path
Retain the previous source revision, its working executable and runtime tree, and the pre-update Domoticz environment backup. If validation fails, stop the updated process, restore the previous code and environment using your tested recovery procedure, then verify it locally before restarting the tunnel.
Do not blindly combine an older executable with a database already changed by a newer release. Restore a mutually compatible application and environment set. A Git checkout alone is not a complete rollback when runtime data has changed.
Troubleshoot the build, startup, web interface, and tunnel
The dependency installation fails
Confirm that the host is Debian Bookworm or newer, its package metadata is current, and package management is not left in an interrupted state. Verify the first missing package name against the official Domoticz build guide. Do not download random headers into system directories or substitute similarly named runtime packages for required development packages.
Boost fails to compile or Domoticz reports linker errors
Confirm that the listed Debian Boost development packages were removed and that all three Boost stages completed: bootstrap.sh, the staging build, and the privileged install. Review the first linker error and verify that the Domoticz build is not mixing incompatible Boost installations.
The compiler is terminated on a small system
Check the kernel and terminal output for an out-of-memory condition. Systems with less than 4 GB of memory might need temporary swap during compilation. Also check free storage and system temperature. Do not interpret a terminated compiler as a valid completed build merely because an older executable still exists.
The executable is not in the source root
Check dev-domoticz/bin. The project notes that the executable can be built there. Make sure DAEMON in the startup script points to the absolute path of the executable you tested, not a path copied from another installation.
Domoticz works in the foreground but not through the startup script
Recheck USERNAME, DAEMON, and DAEMON_ARGS. Compare the runtime user’s permissions with those of the interactive account. Look for missing access to the Domoticz directory, database, scripts, plugins, certificates, or attached USB devices. Confirm the foreground process was stopped before testing the managed instance.
Domoticz does not return after reboot
Verify that update-rc.d completed, the init script is executable, and its parameters still point to valid locations. Separate a startup-script failure from a hardware-permission failure. A changed USB device path can allow the web server to start while leaving an integration unavailable.
The browser cannot connect locally
Compare the URL with the scheme, address, and port reported by Domoticz and shown by ss -lntp. A loopback listener is reachable only from the same host. If testing from another device, ensure Domoticz is intentionally listening on a reachable private address and that local firewall policy permits that connection.
The page opens but interface assets or live data fail
Start Domoticz from the intended runtime directory and retain the source tree’s required assets. Watch the Domoticz log while reloading the page. If the local page is also incomplete, fix the application deployment before investigating Localtonet.
The public Localtonet address is unavailable
Check the three lifecycle conditions separately: Domoticz must be listening, the selected Localtonet client must be connected, and the tunnel must be started. Confirm that the configured local IP, port, and protocol match the endpoint successfully tested from the client device.
The public page loads but login fails
Verify the same credentials locally and make sure the first-run administrator setup was completed on the intended Domoticz instance. Do not disable authentication as a workaround. Review the official Domoticz security configuration, correct the account or trust settings locally, and test again in a fresh remote browser session.
Remote access fails only after an update
Stop the tunnel and test Domoticz locally. An update can change application behavior without affecting the Localtonet client. Compare the current listener with the tunnel target, inspect startup output, and use the retained revision and pre-update backup if a rollback is required.
Frequently asked questions
Which Linux distributions does this exact build procedure cover?
The commands target Debian Bookworm or newer. The Domoticz project says the guide also works for most Debian-based systems, but package availability and system integration can differ. This tutorial does not claim that the same commands apply to Fedora, Arch Linux, or other distribution families.
Should I build the development branch or Stable Release 2026.3?
Use the development branch only when you intentionally want changing development code. For a reproducible deployment, check out a stable tag or exact commit. The evidenced Stable Release 2026.3 uses tag 2026.3 and commit f734fde. Review whether a newer stable release exists before starting a new installation.
Do I need to compile OpenZWave?
Only if you have a specific compatibility requirement for deprecated OpenZWave support. The Domoticz project encourages Z-Wave users to use ZWaveJS2MQTT because OpenZWave support is deprecated. If OpenZWave is required, build it before Domoticz and preserve the documented sibling-directory layout.
Where is the compiled Domoticz executable?
It may appear in the dev-domoticz source root or inside its bin directory. Check both locations after make, test the actual executable, and place its absolute path in the startup script’s DAEMON parameter.
What port should I use for Domoticz?
Use the port configured by your installation and confirmed in the startup output or listening-socket check. This tutorial does not assume one universal port or protocol. The Localtonet target must use the same verified IP address, port, and local HTTP or HTTPS behavior.
Is the one-line Domoticz installer a source build?
No. The project’s installer route is separate from compiling Domoticz yourself. A source build installs development dependencies, prepares Boost, checks out an intentional source revision, runs CMake and make, and configures the resulting executable.
Must the Localtonet client run on the Domoticz host?
No. It can run on the Debian host or another device that can reach Domoticz. If it runs elsewhere, use the Debian host’s reachable private address rather than localhost, and verify that address directly from the client device first.
Does creating a Localtonet tunnel start it?
No. Creating and starting are separate actions. Press Start after creating the configuration. The public endpoint remains available only while the selected client is connected and the tunnel is running.
Does Localtonet replace Domoticz authentication or backups?
No. Localtonet provides network reachability to the configured local listener. Domoticz remains responsible for accounts, permissions, and application security, while you remain responsible for backups, restore testing, updates, and rollback.
Connect your verified Domoticz installation with Localtonet
After the pinned Domoticz build starts reliably, survives a reboot, requires the expected administrator login, and works at its local HTTP or HTTPS endpoint, create a Localtonet tunnel to that exact listener. Protect the device token and stop the tunnel whenever remote access is no longer required.
Get Started Free →

