

Build and validate the game server locally before making OTClient access available remotely
The Forgotten Server is a free and open-source MMORPG server emulator written in C++ and designed to accept compatible client connections, including OTClient. This guide explains how to choose an official release, what the available project evidence does and does not establish, how to compile the server on Arch Linux, and how to verify the installation before exposing anything. Once the local service is working, we show how to prepare a Localtonet tunnel without guessing the listener port or transport protocol. The result is a controlled installation-first workflow that keeps application problems separate from remote connectivity problems.
📋 What's in this guide
Understand the TFS, OTClient, and Localtonet workflow
The Forgotten Server, commonly abbreviated as TFS, is the server process in this workflow. It loads the selected game data and configuration, initializes its required supporting services, and listens for compatible game-client connections. OTClient is the client application used by a player to connect to the running server. Localtonet becomes relevant only after TFS is installed, starts successfully, and accepts a connection on the local network path you intend to expose.
This order matters because a tunnel cannot repair an application that is not listening, a missing database, an incompatible client protocol, or an invalid TFS configuration. Localtonet forwards traffic to a local target that is already reachable from the device running our client. If that target refuses the same connection locally, a public endpoint will usually produce the same failure with an extra network layer to investigate.
The project release evidence identifies The Forgotten Server 1.6 as a stable protocol 13.10 release. That is important compatibility information, but it is not enough by itself to prove that an arbitrary OTClient build can connect. OTClient distributions can differ, and a client must speak the protocol expected by the server. Treat the server release, datapack, and client build as one compatibility set rather than selecting each independently.
The supplied official project evidence does not establish the game listener's current address, port, or transport protocol. This guide therefore does not invent a port or tell you to select a specific Localtonet tunnel family prematurely. Identify the effective listener from your installed TFS configuration and confirm it with a local connection or an operating-system socket inspection before creating the tunnel.
Prepare the installation prerequisites
Begin by deciding whether you will use an artifact attached to an official tagged release or compile the source. The project README explicitly supports both approaches: compile the project using its compilation documentation, or download an available release. The better path depends on the artifacts actually attached to the release, your operating system, and whether you need to modify the C++ source.
| Installation path | Best fit | What must be confirmed |
|---|---|---|
| Official release artifact | Readers who want a tagged version without compiling, when a suitable artifact is provided | The release contains an artifact for the intended operating system and architecture |
| Tagged source release | Readers who want a reproducible version but need to build it themselves | The selected compilation instructions apply to that version and operating system |
| Current source branch | Developers testing current project changes | The branch may differ from the latest stable tagged release and can require updated dependencies or configuration |
Choose the server and client versions together
Record the exact TFS tag you plan to install. If you choose version 1.6, record that the release describes itself as stable protocol 13.10. Then identify an OTClient distribution that explicitly supports the same expected protocol. Do not infer compatibility from the name OTClient alone. A successful launch of both applications does not prove that their protocol versions match.
Keep a clean copy of the selected release or source tree. Make configuration and game-data changes in a controlled working copy, and document each change. This makes it easier to distinguish an upstream installation issue from a problem introduced by a customized datapack, script, map, or client module.
Plan for supporting services
The repository contains files including config.lua.dist and schema.sql. Their presence indicates that configuration and database preparation are part of the broader deployment, but the extracted evidence supplied for this article does not document the complete database installation procedure, database engine requirements, credential variables, or the exact process for turning the distributed configuration into an active configuration for every release.
Before attempting startup, inspect the files shipped with the exact release you downloaded. Follow that release's configuration comments and current running guide for its required database service, schema import, data paths, and credentials. Do not copy credentials from an unrelated tutorial or assume that instructions for an older TFS release remain correct.
Prepare the host
The host must be able to run TFS continuously and reach every supporting service named in its effective configuration. For later remote access, install our Localtonet client on this same machine or on another device that can reach the TFS listener over the local network. Running both on the same host normally simplifies target selection because the tunnel can point to the locally reachable listener rather than crossing another LAN segment.
Apply operating-system updates, use a dedicated non-administrative account where practical, and protect configuration files containing database credentials. Back up customized server data and database contents before upgrades. Public reachability should be the final deployment step, not the first.
The repository contains a Dockerfile and displays Docker-related project automation, but the supplied README evidence does not document Docker as the supported installation path for this tutorial. We therefore do not invent a container command, image name, volume layout, or environment-variable set. The extracted legacy Windows page also states that its Visual Studio 2017 and TFS SDK workflow applies only through TFS 1.2 and directs newer users to the separate vcpkg workflow. Do not use that legacy procedure for TFS 1.6.
Install The Forgotten Server from an official release
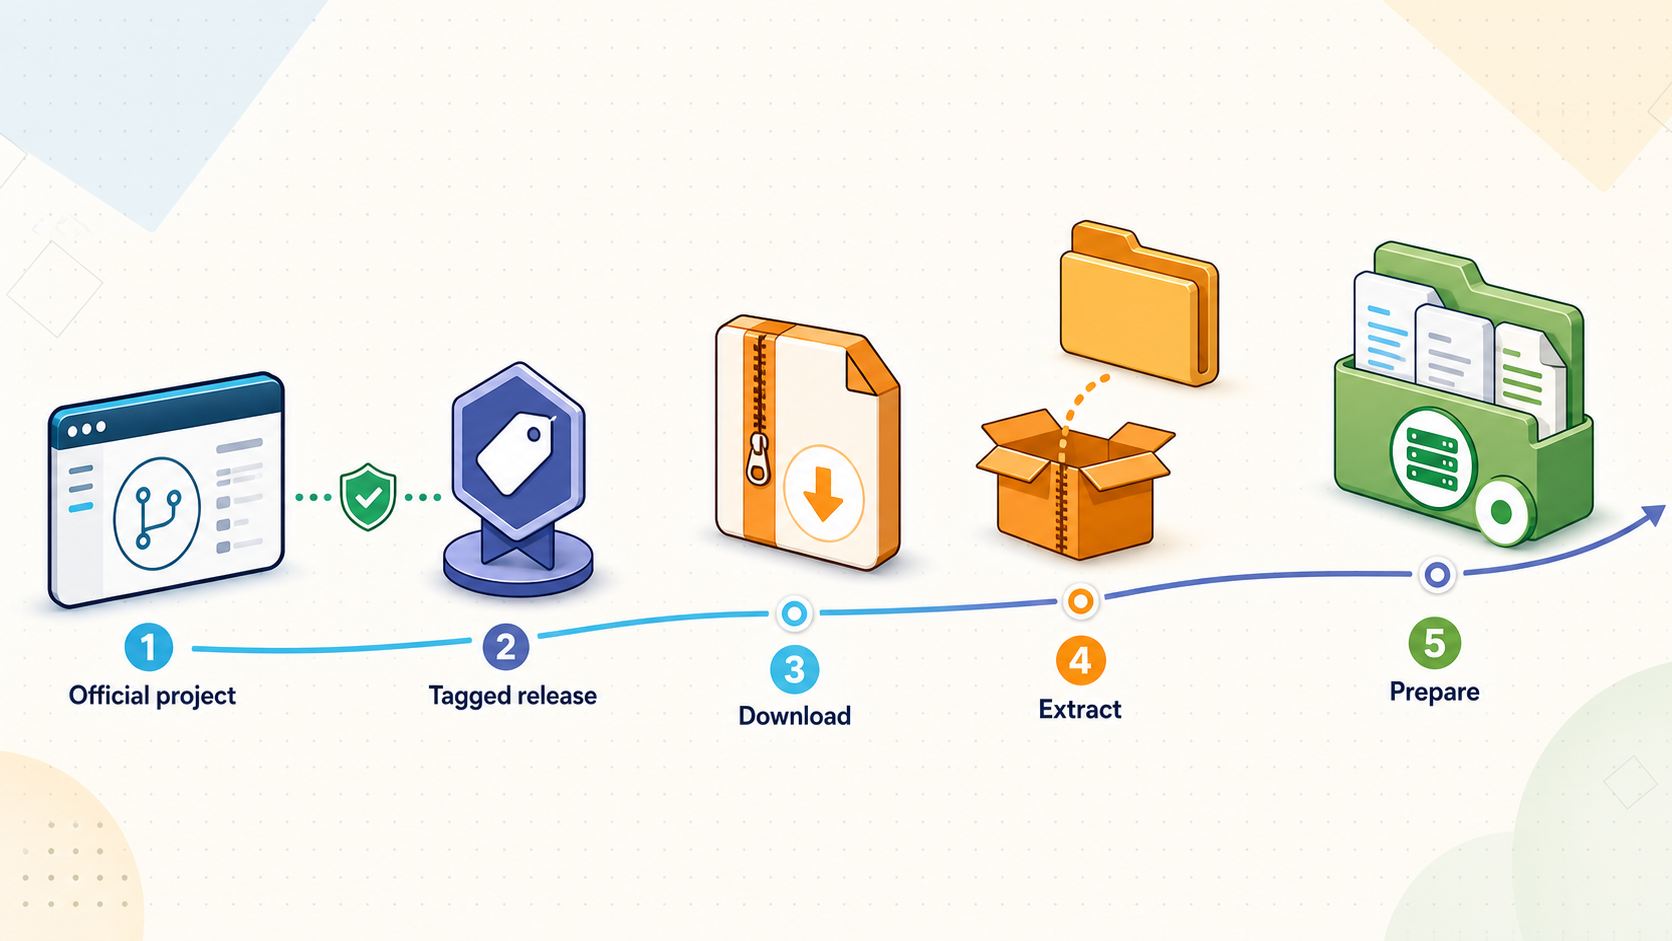
For an installation tied to a stable version, start from the project's official release list rather than a repackaged binary from a forum post, file host, or unofficial server distribution. The release list currently includes tagged versions such as 1.6, 1.4.2, 1.4.1, 1.4, 1.2, 1.1, and 1.0. The available tags do not guarantee that every release contains a ready-to-run binary for every operating system.
Open the official The Forgotten Server releases page, select the intended tag, and read its release description. For version 1.6, the project identifies it as the latest stable protocol 13.10 release in the supplied evidence. Check the assets attached to the release at the time you install. Asset names, supported operating systems, architectures, and packaging can change, so this article does not fabricate a filename.
Use an attached artifact only when it matches the host
If the selected release provides an artifact for your exact operating system and architecture, download that artifact from the official release entry. Retain the release tag and original filename in your deployment notes. If your normal operating-system tooling can calculate a cryptographic digest, record it for your internal deployment history. The supplied release evidence does not publish an artifact checksum that we can reproduce here, so do not compare against an invented value.
Extract the package into a dedicated directory owned by the account that will operate the server. Avoid mixing files from multiple TFS versions in the same directory. In particular, do not overwrite a new release with an old executable or copy an entire old configuration and data tree on top of it before understanding migration requirements.
Inspect the package before configuring it
Confirm that the package includes the executable and runtime files expected by its release instructions. Compare the extracted structure with the official release description and repository layout. Relevant repository files include the distributed configuration template, database schema, data directory, and key material, but an attached binary package may not have exactly the same layout as a source checkout.
If no suitable binary artifact is attached, the safe conclusion is not that an asset must exist elsewhere. Use the official source for that tag and compile it with a current documented method instead. This protects version traceability and avoids downloading an executable whose origin or modifications cannot be established.
Installing or extracting a release does not automatically configure its database, accounts, game data, listener, firewall policy, or OTClient compatibility. Complete those tasks for the exact selected version and prove local operation before adding Localtonet.
Compile The Forgotten Server on Arch Linux
The current evidence provides a complete, concrete compilation path for Arch Linux. It installs the documented dependencies from the system package manager, clones the official repository, generates build files with CMake, and builds the project. These commands follow the documented sequence exactly.
Install the required software and libraries
Update the Arch Linux system, then install the base development tools, Git, CMake, LuaJIT, Boost, MariaDB client library, pugixml, Crypto++, and fmt packages documented by the project.
Download the official source code
Clone the official repository. If your goal is a specific stable release rather than the current branch, make sure the resulting checkout is placed on the intended official tag before treating the build as that release.
Generate the build files
Enter the repository directory and use CMake to generate a build directory, following the documented command.
Build the executable
Run the documented make command against the build directory. The official Arch Linux guide states that the resulting executable is located at ./build/tfs.
sudo pacman -Syu
sudo pacman -S base-devel git cmake luajit boost boost-libs libmariadbclient pugixml crypto++ fmt

git clone https://github.com/otland/forgottenserver.git
cd forgottenserver
cmake . -B build
make -C build
The clone command above retrieves the repository's current default branch. A default-branch build is not automatically the same as release 1.6. If the objective is specifically TFS 1.6, select the official v1.6 tag using your established Git release workflow before generating the build files. The extracted official evidence does not provide a tag-selection command, so we do not add one here.
Successful compilation proves that the source and dependencies produced the TFS executable. It does not prove that the database is initialized, configuration is valid, the datapack loads, the intended listener is active, or OTClient can authenticate. Continue with configuration and local verification.
Windows compilation limitation
The supplied Windows compilation page documents an older Visual Studio 2017, TFS SDK, and Boost workflow, but it explicitly limits that workflow to versions up to and including TFS 1.2 and an older portion of the master branch. It directs current users to the Windows vcpkg guide. Because the actual current vcpkg commands were not included in the evidence available for this draft, reproducing commands would require guessing.
For TFS 1.6 on Windows, use the project's current Windows with vcpkg instructions and preserve their exact tool versions, architecture selection, and build sequence. Do not follow the legacy vc14 solution procedure merely because it appears in search results.
Configure TFS without relying on unsafe assumptions
Configuration is where a generic installation becomes your server. Work from the files supplied with the exact release or source tag, not from an unrelated downloadable distribution. The repository includes a config.lua.dist template and schema.sql, but the evidence available here does not establish every active filename, setting, default value, or database command required by TFS 1.6.
Prepare the database
Determine the database system and version required by your selected TFS release from its current running instructions. Create a dedicated database and a dedicated database account with only the permissions the server needs. Import the release's own schema according to those instructions. Store the database credential in the effective TFS configuration and prevent other local users from reading it.
Do not expose the database listener through the same public path as the game service. OTClient should connect to the game-server listener, not directly to the database. The database should remain local or on a protected private network unless you have a separately designed and secured administration requirement.
Create the active configuration carefully
Preserve the distributed template so you can compare it with future releases. Create or edit the active configuration using the process documented for the selected version. Review every network-related value, database reference, file path, and game-data setting. Avoid blindly retaining values copied from another server.
Of particular importance for Localtonet is the effective game listener. Record its bind address, port, and transport protocol from the current configuration or runtime documentation. A bind address limited to loopback can be appropriate when the Localtonet client runs on the same machine. If the Localtonet client runs on another LAN device, the service must be reachable from that device through an appropriate private address and host firewall rule.
Database passwords, device tokens, private keys, and administrative credentials should never appear in a public tutorial, support post, source repository, or screenshot. Localtonet device tokens are device-specific. Obtain the token through your own account and never paste it into shared troubleshooting material.
Keep client compatibility in scope
Confirm that OTClient has the assets, modules, and protocol support expected by your TFS deployment. For TFS 1.6, the release evidence identifies protocol 13.10. That statement describes the server release, not every OTClient fork or build. If the client cannot complete a local connection, investigate protocol and data compatibility before changing the tunnel.
Customized servers may also require a customized OTClient configuration. Such client-specific setup is outside what the supplied official TFS evidence establishes, so this guide does not invent OTClient files, command-line arguments, module settings, or server-list variables.
Start and verify the server locally
Start the executable using the documented procedure for your selected release and operating system. For an Arch source build, the compilation guide establishes that the executable is placed at ./build/tfs, but it does not provide the complete startup command, working-directory requirements, or service-manager configuration in the supplied evidence. Run it from the context required by the current TFS running guide so that relative configuration and data paths resolve correctly.
Watch the initial console output. A process that exits immediately is not ready for Localtonet. Resolve reported configuration, database, permission, or data-loading errors first. A process that stays open is a better sign, but it still does not prove that the expected listener is active.
Confirm the listener
Use your operating system's socket inspection tools to identify the address, port, and transport associated with the running TFS process. Tool names and output formats vary by operating system, so this article does not prescribe a command unsupported by the project evidence. The result should agree with the effective TFS configuration.
Record four facts for the Localtonet step:
- The local IP address or hostname reachable from the Localtonet client device.
- The exact game-server port shown by configuration and runtime inspection.
- The transport protocol used by that listener.
- Whether the listener is reachable only on the server itself or from another device on the LAN.
Test with OTClient on the same machine or LAN
Configure a compatible OTClient build to connect directly to the local TFS endpoint. Begin on the same machine where practical. If that works, repeat from another LAN device if your intended Localtonet client will run elsewhere. This sequence tests the application separately from internet routing.
A meaningful verification goes beyond reaching a login screen. Confirm that the client completes the expected connection flow and can enter the server according to your configuration. If authentication or character loading fails locally, collect the TFS console message and OTClient error before changing network settings.
| Observation | What it establishes | Next action |
|---|---|---|
| TFS exits during startup | The server is not operational | Fix the reported configuration, database, permission, or data error |
| TFS runs but no expected socket is listening | The intended network service is not ready | Review the effective listener configuration and startup log |
| OTClient fails on the same machine | The problem is not caused by Localtonet | Check protocol compatibility, client configuration, credentials, and TFS logs |
| Same-host access works but LAN access fails | The service may be bound only to loopback or blocked locally | Review the bind address and host firewall without opening unnecessary public access |
| Local and LAN access both work | The application target is ready for tunnel configuration | Record the verified local address, port, and protocol |
Connect OTClient remotely with Localtonet
Once local OTClient access works, Localtonet can expose the verified listener without requiring inbound router port forwarding, firewall changes at the internet edge, VPN setup, or a public IP address. Our client makes an outbound connection to a Localtonet relay server. The resulting raw-port tunnel provides a public host and port that the remote client can use while the selected device is connected and the tunnel is running.
This is not an HTTP website workflow unless the actual application endpoint is documented and verified as HTTP. A game protocol should not be placed behind an HTTP tunnel merely because HTTP tunnels provide convenient URLs. Select the raw tunnel family that matches the transport you established during local verification.
Install and run the Localtonet client
Install our client on the TFS host or on a device that can reach the verified TFS listener. Keep the client running for as long as remote access is required.
Authenticate or select the device
Use the device-specific token from your Localtonet account to identify the client device. Do not guess, publish, or reuse another device's token.
Select an available relay server
Choose an available server or region from the current Localtonet dashboard. Available server codes vary and should not be hardcoded from an article.
Create the matching raw-port configuration
Select the tunnel family that matches the verified TFS transport. Enter the local IP address and port that worked during local testing. Do not use a guessed default.
Start the tunnel and record its public endpoint
Creating the configuration does not make it active. Press Start, then use the assigned public host and port. The tunnel is available only while the selected Localtonet client is connected and the tunnel is running.
Test remotely, then stop or delete when finished
Configure the compatible remote OTClient with the assigned public host and port, then test from outside the local network. Stop the tunnel when temporary access is no longer needed, or delete it if the configuration will not be reused.
Select the tunnel only after identifying the transport
| Verified local service | Localtonet direction | What not to assume |
|---|---|---|
| A TCP listener used by OTClient | Use the corresponding raw TCP tunnel configuration | Do not place it behind an HTTP tunnel |
| A UDP listener used by the selected server and client | Use the corresponding UDP tunnel configuration | Do not substitute TCP without application evidence |
| Both transports are explicitly required | Evaluate the documented combined UDP/TCP tunnel option | Do not enable both merely as a troubleshooting shortcut |
| Transport remains unknown | Return to configuration and socket inspection | Do not create a tunnel until the local target is known |
The remote OTClient must use the public host and port assigned to the running tunnel, not the server's private LAN address. The TFS host should continue listening on the verified local endpoint. Localtonet handles public reachability by forwarding traffic through the outbound client connection.
Expose only the listener required by compatible game clients. Do not tunnel the database, file shares, development consoles, or unrelated administration interfaces. Keep TFS and its dependencies updated, use strong account credentials, review application logs, and stop the tunnel when access is not required.
Verify from a genuinely remote network
A test from another device on the same Wi-Fi network may still exercise local routing rather than the public tunnel. Test the assigned Localtonet host and port from a connection outside the server's LAN. Keep the local success case available for comparison.
During the remote test, observe the TFS console or logs. If the remote connection reaches TFS but fails later, the tunnel is carrying traffic and the remaining issue is likely at the application or compatibility layer. If no connection reaches TFS, compare the Localtonet target with the address and port already proven locally.
Troubleshoot installation and remote connection problems
The build fails on Arch Linux
Confirm that both documented package-manager commands completed successfully and that all listed dependencies were installed. Make sure CMake generation succeeded before running the build command. The first compiler or linker error is usually more useful than the final summary. If you checked out a different branch or tag, verify that the compilation instructions apply to that source version.
The release package has no runnable binary for the host
A release tag can exist without providing a compatible binary for every platform. Do not rename or execute an artifact built for another operating system or architecture. Compile the official source using the current documented path for your host, or select a release that explicitly provides an appropriate artifact.
TFS starts and immediately closes
Start it in a context where you can read its output and capture the first actionable error. Check that its working directory allows it to find the intended configuration and data. Verify the database is running, the schema and credentials correspond to the selected release, and the operating-system account can read required files. Avoid repeatedly changing unrelated settings.
OTClient cannot connect locally
Confirm the TFS process is listening on the address and port entered into OTClient. Then verify protocol compatibility. For TFS 1.6, the supplied release evidence describes protocol 13.10, but the OTClient build must independently support the required protocol and server setup. Check both client and server diagnostics for a protocol, authentication, or data mismatch.
Local OTClient works but the Localtonet endpoint does not
Confirm the Localtonet client device is connected and the tunnel is running. Creating a tunnel alone is not enough. Compare the tunnel's local target with the exact address and port that succeeded locally. If our client is on a different LAN device, do not use that device's loopback address to target TFS on another computer. Use the TFS host's reachable private address and verify the same path directly from the Localtonet client device.
Also confirm that the selected Localtonet tunnel family matches the transport actually used by TFS. Changing randomly among HTTP, TCP, and UDP obscures the root cause. Return to the effective application configuration and socket inspection when the protocol is uncertain.
The connection works briefly and then becomes unavailable
Check whether TFS is still running, whether the Localtonet client remains connected, and whether the tunnel remains started. Localtonet availability depends on both the selected client device and the tunnel lifecycle. Host sleep, process termination, lost internet connectivity, or stopping the tunnel will remove remote reachability.
Remote users reach TFS but cannot enter the game
Reaching the server does not guarantee successful authentication or client compatibility. Compare the remote failure with a fresh local test using the same OTClient build and account flow. If both fail in the same way, investigate TFS configuration, database state, game data, and protocol compatibility. If only the remote attempt fails after TFS logs a connection, inspect application behavior that may advertise or validate addresses, but change only settings documented for the exact release.
An upgrade breaks the server
Restore the last known working deployment and database backup rather than mixing old and new files. Review the selected release notes and migration instructions. Keep the executable, configuration, schema state, datapack, scripts, and OTClient expectations aligned. A binary-only rollback may not be enough if the database or data files were changed.
Frequently asked questions
What is The Forgotten Server?
The Forgotten Server is a free and open-source MMORPG server emulator written in C++. It is a fork of the OpenTibia Server project. Its official repository directs users to compile the source or download an available release, and it identifies OTClient as a client that can connect to the server.
Should I install an official release or compile TFS?
Use an official release artifact when the selected tag provides a suitable package for your operating system and architecture. Compile the official source when no suitable artifact exists, when you need source modifications, or when your platform requires a local build. Keep the exact release tag documented in either case.
Is TFS 1.6 compatible with every OTClient build?
No universal compatibility is established. The TFS 1.6 release describes itself as a stable protocol 13.10 release. Your OTClient build must support the protocol and any assets or configuration required by your server deployment. Confirm compatibility locally before configuring remote access.
Which TFS port should I enter in Localtonet?
Enter the port established by the effective configuration of your installed TFS version and confirmed by local testing or runtime socket inspection. The official evidence supplied for this guide does not establish a listener port, so using a guessed default would be unsafe and unreliable.
Should I create an HTTP, TCP, or UDP tunnel?
Select the tunnel family that matches the transport used by the verified TFS listener. Do not select HTTP merely because it provides a URL, and do not assume TCP or UDP without checking the application configuration and active socket. If the transport remains unknown, identify it before creating the tunnel.
Does Localtonet require router port forwarding?
No. Our client establishes an outbound connection to a Localtonet relay server, so this workflow does not require inbound router port forwarding, a public IP address, VPN setup, or firewall changes at the internet edge. The local TFS service must still be reachable from the device running our client.
Does creating a Localtonet tunnel start it automatically?
No. Tunnel creation and tunnel startup are separate lifecycle actions. Start the tunnel after creating it. Remote access remains available only while the selected Localtonet client is connected and the tunnel is running.
Can the Localtonet client run on another computer?
Yes, provided that computer can reach the TFS listener over the local network. In that arrangement, target the TFS host's reachable private address rather than the Localtonet device's loopback address. Verify the path directly from the Localtonet client device before starting the tunnel.
Should I expose the TFS database through Localtonet?
Not for OTClient access. OTClient connects to the game-server service, not directly to the database. Keep the database local or on a protected private network and expose only the verified listener required by the game client.
Is the old Visual Studio 2017 compilation guide suitable for TFS 1.6?
No. The extracted official Windows page explicitly limits that workflow to versions up to TFS 1.2 and an older portion of the master branch. It directs newer users to the Windows vcpkg method. Use the current vcpkg instructions for a modern Windows build rather than the legacy TFS SDK procedure.
Make your verified TFS listener reachable with Localtonet
After TFS starts successfully and a compatible OTClient connects locally, create a Localtonet tunnel for the exact verified address, port, and transport. You can then test the assigned public host and port remotely without configuring inbound router port forwarding.
Get Started Free →

