

Install a packaged Omnigent release, verify the local agent workspace, and publish it only after authorization is confirmed
Omnigent provides a common orchestration layer for supported coding harnesses and custom agents. This guide covers the documented uv and Homebrew installation paths, prerequisite validation, package upgrades and removal, local startup, and troubleshooting. It also distinguishes packaged releases from installations that track the repository and explains how to connect the verified local HTTP service to Localtonet. Because Omnigent can expose sessions, files, terminals, provider access, and host-affecting controls, remote access remains conditional on effective application-level authorization.
📋 What's in this guide
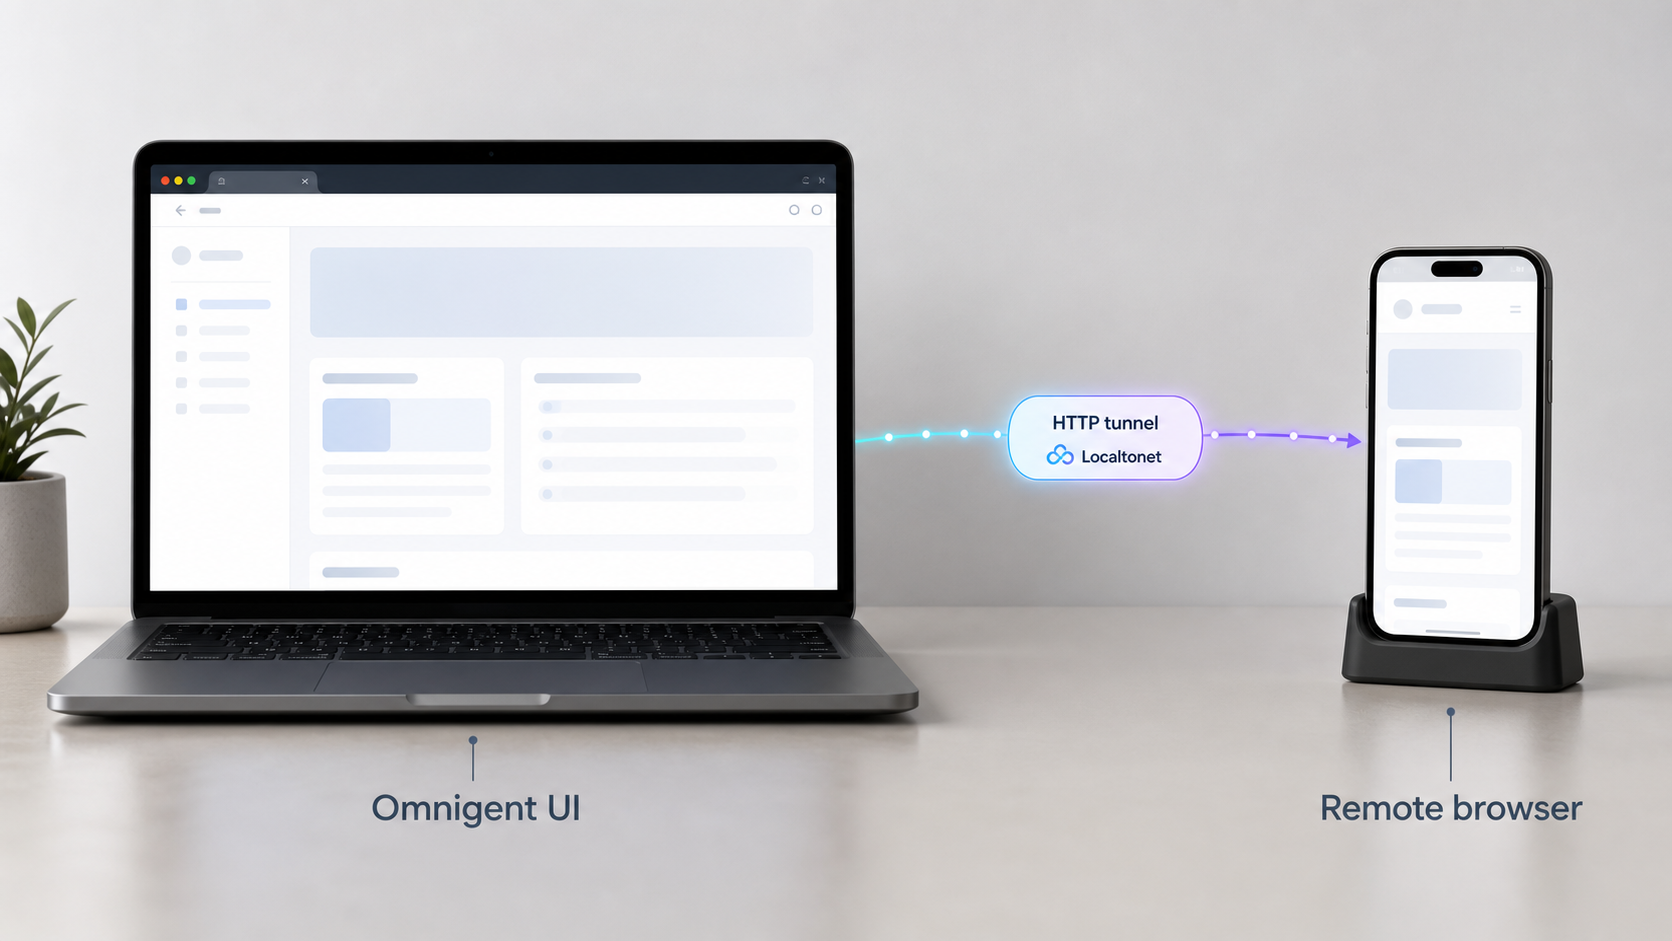
What Omnigent is and what this installation covers
Omnigent is an open-source AI agent framework and meta-harness. Its upstream project describes a common orchestration layer over Claude Code, Codex, Cursor, OpenCode, Hermes, Pi, and user-defined agents. The layer is intended to let operators combine harnesses, enforce policies and sandboxing, and collaborate on sessions from terminals, browsers, phones, and supported native applications.
Installing Omnigent does not install or authorize every harness that it can coordinate. The core package, a selected coding harness, a model provider, an optional sandbox provider, and a Localtonet tunnel are separate components. Each component can succeed or fail independently. A working Omnigent web page therefore proves that the local server started, but it does not prove that a provider account is authorized, a native wrapper is correctly sandboxed, or the interface is safe to publish.
The commands and compatibility boundaries in this revision were checked against the current upstream Omnigent repository and README, the project website, and the v0.11.0 release page available during the 2026 editorial review. Omnigent identifies itself as alpha software, and its main branch has continued changing after that release. Recheck the README, release notes, and upstream changelog before applying these instructions to a later release.
omnigent and direct the user to the local interface at http://localhost:6767.
The reviewed public Omnigent material describes session sharing by URL, but the evidence available for this revision does not establish a universal authentication configuration that can be applied to every installation. Do not start a public tunnel unless your installed Omnigent version presents effective authorization before any session, file, terminal, provider, or host-affecting control becomes available.
Install and validate the applicable prerequisites
The shortest prerequisite list depends on the installation method and the workflow you intend to run. A packaged installation is not the same as a source-development environment. Do not install every tool in the project repository merely to launch the packaged application.
| Component | When it is needed | Validation |
|---|---|---|
| uv | Required for the uv installation path and used by the upstream installer | uv --version |
| Homebrew | Required only for the Homebrew installation path on a supported macOS or Linux system | brew --version |
| Python 3.12+ | Required by manual Omnigent package installation; uv can manage the selected interpreter | python3 --version or uv python list |
| Git | Required by the project toolchain and direct repository installations | git --version |
| Node.js 22 LTS+ and npm | Needed for coding-harness CLIs installed through Omnigent workflows | node --version and npm --version |
| pnpm | Needed for the web UI toolchain, especially development workflows | pnpm --version |
| tmux | Required by documented native terminal wrappers such as Claude, Codex, Cursor, Hermes, Kiro, and Pi | tmux -V |
| bubblewrap | Required on Linux for affected native wrappers and the Pi harness sandbox path | bwrap --version |
Install uv on macOS or Linux
Use the installer published by Astral, the uv maintainer:
curl -LsSf https://astral.sh/uv/install.sh | shOpen a new terminal if the installer updates your shell environment, then validate the result:
uv --versionIf your organization does not permit scripts to be piped directly into a shell, download and review the installer first or use another installation method listed in the official uv installation documentation.
Install uv on Windows
In PowerShell, the official uv documentation provides this installation path:
powershell -ExecutionPolicy ByPass -c "irm https://astral.sh/uv/install.ps1 | iex"Close and reopen PowerShell, then run:
uv --versionOmnigent's POSIX bootstrap script is not the native Windows installation method. Native Windows users should use uv directly, as shown later in this guide.
Install Homebrew on macOS or Linux
If Homebrew is not already present, use the installer published by the Homebrew project:
/bin/bash -c "$(curl -fsSL https://raw.githubusercontent.com/Homebrew/install/HEAD/install.sh)"Follow the environment instructions printed by the installer. Those instructions are platform and shell specific, so do not ignore them. Open a new terminal and validate Homebrew:
brew --version
brew doctor
Consult the
official Homebrew installation page
if your environment blocks the standard installer or if brew doctor reports a system-specific problem.
Install or select Python 3.12 with uv
Omnigent's upstream README requires Python 3.12 or newer for manual installation. uv can install a managed Python 3.12 interpreter:
uv python install 3.12
uv python list
You do not need to replace the operating system's default Python. The Omnigent installation command can explicitly select Python 3.12, keeping the tool isolated from unrelated system packages.
Install Git only when your workflow needs it
Git is required for a direct repository installation and for development work. On macOS or Linux with Homebrew:
brew install git
git --version
On Debian or Ubuntu:
sudo apt update
sudo apt install git
git --version
Windows users can select a supported installer from the
official Git downloads page,
then validate it in a new terminal with git --version.
Install Node.js, npm, and pnpm only for applicable harness or development work
The upstream prerequisites specify Node.js 22 LTS or newer with npm for coding-harness command-line tools installed by Omnigent workflows. The web UI toolchain uses pnpm. A user who only wants to test the installed server should not assume that all repository development dependencies are mandatory, but a selected harness can still require them.
Install a current supported Node.js release from the official Node.js download page or through your approved system package manager. Then validate both Node.js and npm:
node --version
npm --version
Confirm that the reported Node.js major version is at least 22. To make pnpm available, use one of the paths identified by the Omnigent README:
corepack enable
pnpm --version
If Corepack is not available in your approved Node distribution, the documented alternative is:
npm install -g pnpm
pnpm --version
Use one pnpm setup path. Installing it repeatedly through different managers can create the same executable-resolution problem as duplicate Omnigent installations.
Install native-wrapper dependencies
The reviewed Omnigent README lists tmux as required by the native omnigent <harness> terminal wrappers for Claude, Codex, Cursor, Hermes, Kiro, and Pi. On macOS:
brew install tmux
tmux -V
On Debian or Ubuntu:
sudo apt update
sudo apt install tmux bubblewrap
tmux -V
bwrap --version
On Linux, affected native wrappers and the Pi harness place agent terminals in a bubblewrap operating-system sandbox. The upstream documentation says this isolation is mandatory and that those terminals fail to start when bwrap is missing. macOS uses its built-in seatbelt sandbox instead of bubblewrap.
Understand the native Windows boundary
The upstream README describes native Windows operation as degraded mode. It identifies the Omnigent server, web UI, and SDK-based harnesses run through omnigent run <agent.yaml> as available, with agents running under a Windows Job Object for process-tree containment. The available evidence does not support claiming parity with the native terminal-wrapper experience on Linux or macOS.
If your intended harness relies on a native terminal wrapper, use Linux, macOS, or a currently supported WSL workflow after checking the latest upstream compatibility notes. Do not infer support merely because the core web UI starts on Windows.
Python and the selected package manager are central to a packaged install. Git is necessary for repository installation. Node.js, pnpm, tmux, bubblewrap, provider CLIs, and optional extras depend on the harness or development workflow. Install and validate the smallest set required for the workflow you have actually selected.
Install Omnigent with uv or Homebrew
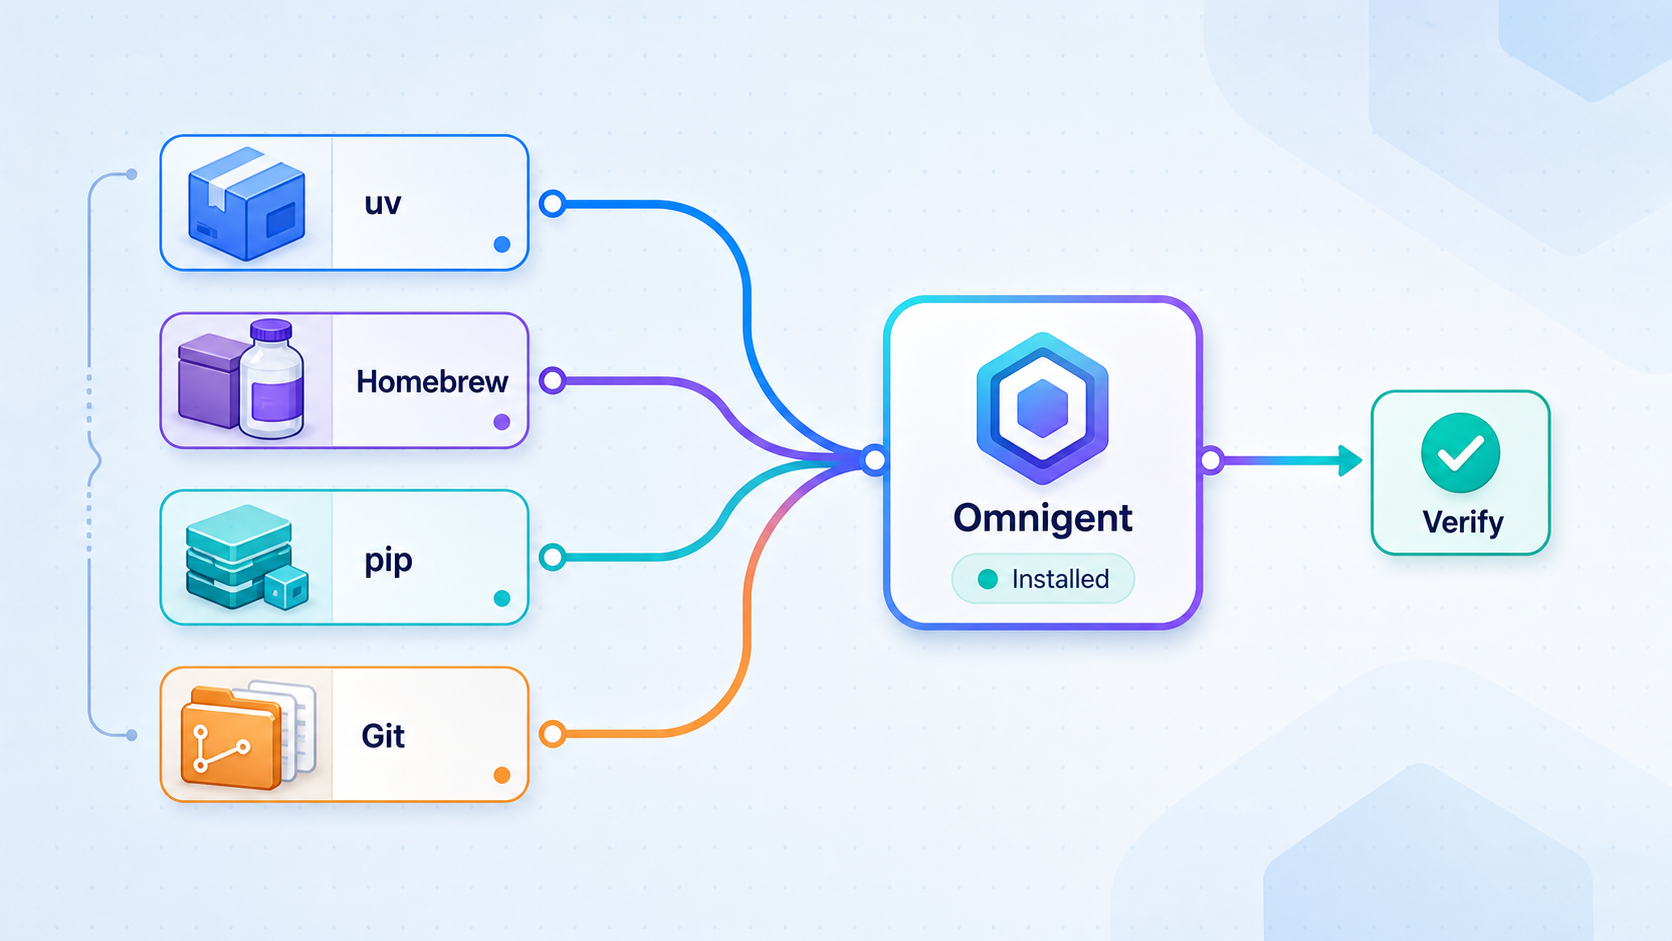
Before installing, check whether an omnigent executable already exists. On macOS or Linux:
command -v omnigent
type -a omnigent
A missing result is expected on a new system. If several paths appear, identify which package manager owns each copy before proceeding. In PowerShell, use:
Get-Command omnigent -AllOption 1: Install a packaged release with uv
The upstream manual installation command is:
uv tool install omnigentTo require Python 3.12 explicitly, including on native Windows, use:
uv tool install --python 3.12 omnigentuv installs the application into an isolated tool environment and exposes the command through uv's executable directory. Inspect the managed tools and resolved executable:
uv tool list
command -v omnigent
On Windows:
uv tool list
Get-Command omnigent -All
If uv reports a successful installation but the command is unavailable, follow uv's shell-path guidance and open a new terminal. Do not install a second copy with pip or Homebrew to hide a path problem.
Option 2: Install a packaged release with Homebrew
The current Omnigent README documents this tap and formula:
brew install omnigent-ai/tap/omnigentConfirm that Homebrew owns the package and that your shell resolves the expected executable:
brew list --versions omnigent
brew info omnigent
command -v omnigent
type -a omnigent
If brew list --versions omnigent shows an installation but command -v omnigent returns nothing, repair Homebrew's environment initialization using the instructions printed by Homebrew. Installing another copy is not the correct first response.
Optional pip installation
Upstream also documents:
pip install "omnigent"This guide recommends uv or Homebrew for the primary paths because they provide clearer tool-level lifecycle management. If you intentionally use pip, install into a controlled Python 3.12 or newer environment and use that same environment for upgrades and removal. Do not mix a pip copy with a uv or Homebrew copy in the same command path.
Optional integrations and extras
Omnigent publishes optional extras for selected model providers, sandbox providers, SDK harnesses, storage, and memory integrations. The reviewed README lists examples including Databricks, Bedrock, Vertex, Modal, Daytona, Blaxel, Boxlite, microsandbox, CoreWeave sandbox support, E2B, OpenShell, Kubernetes, Antigravity, Copilot, Cursor, Agents SDK, S3, and Hindsight.
With uv, extras use Python package-extra syntax. The upstream example for Databricks and Modal is:
uv tool install "omnigent[databricks,modal]"Install only extras required by the selected workflow. An extra can add dependencies, but it does not automatically configure provider credentials, grant access to an account, or prove that a sandbox is operating correctly.
Do not run the uv, Homebrew, pip, and bootstrap installers in succession. Multiple installations can leave different versions on the same command path. Use type -a omnigent or Get-Command omnigent -All, remove obsolete copies with their original package managers, and then recheck the resolved path.
Packaged releases, repository installs, and reproducibility
A normal uv tool install omnigent or Homebrew formula installation consumes package-manager metadata. A direct Git installation consumes code from the repository. Those are not interchangeable release models.
| Installation model | Best use | Reproducibility consideration |
|---|---|---|
| uv packaged release | Isolated command-line installation with uv lifecycle management | A version can be pinned using standard Python requirement syntax when that version is available from the configured package source. |
| Homebrew formula | Homebrew-managed installation on supported macOS or Linux systems | The installed formula follows the version currently available from the tap. Historical rollback depends on what the tap retains. |
| Unpinned Git main branch | Short-lived testing of the latest repository state | The same command can install different code later because the branch moves. |
| Git tag or commit | Testing a specific repository revision | A fixed tag or full commit identifier is more reproducible than an unpinned branch. |
Install from the moving repository branch only for deliberate testing
The upstream README documents:
uv tool install -q --python 3.12 git+https://github.com/omnigent-ai/omnigent.gitThis URL does not identify a fixed release or commit. Running it at different times can produce different software. It is appropriate only when you intentionally want to test the repository's current default branch and are prepared to diagnose unreleased changes.
Pin a packaged uv installation when a specific published version is required
uv accepts standard package requirement syntax. For example, the reviewed release was v0.11.0, so a package source that still provides that version can be requested as:
uv tool install --python 3.12 "omnigent==0.11.0"Confirm package availability in your configured source before relying on this example. A GitHub release page does not by itself prove that every package index or Homebrew tap retains the same historical version.
Pin a repository test to a tag
To test the repository state associated with the reviewed tag rather than a moving branch, uv can install the Git URL with that tag:
uv tool install --python 3.12 "git+https://github.com/omnigent-ai/omnigent.git@v0.11.0"For long-term reproducibility, record the full commit identifier, the Python version, selected extras, operating system, harness version, and provider dependencies. A tag is clearer than main, while a full commit identifier is the strongest reference to a specific repository state.
Review the Omnigent releases and changelog before moving between versions. The v0.11.0 release included significant native-harness controls, automation guardrails, interface changes, reconnection fixes, and a Windows terminal startup fix, which illustrates why upgrade testing matters.
Start Omnigent and verify it locally
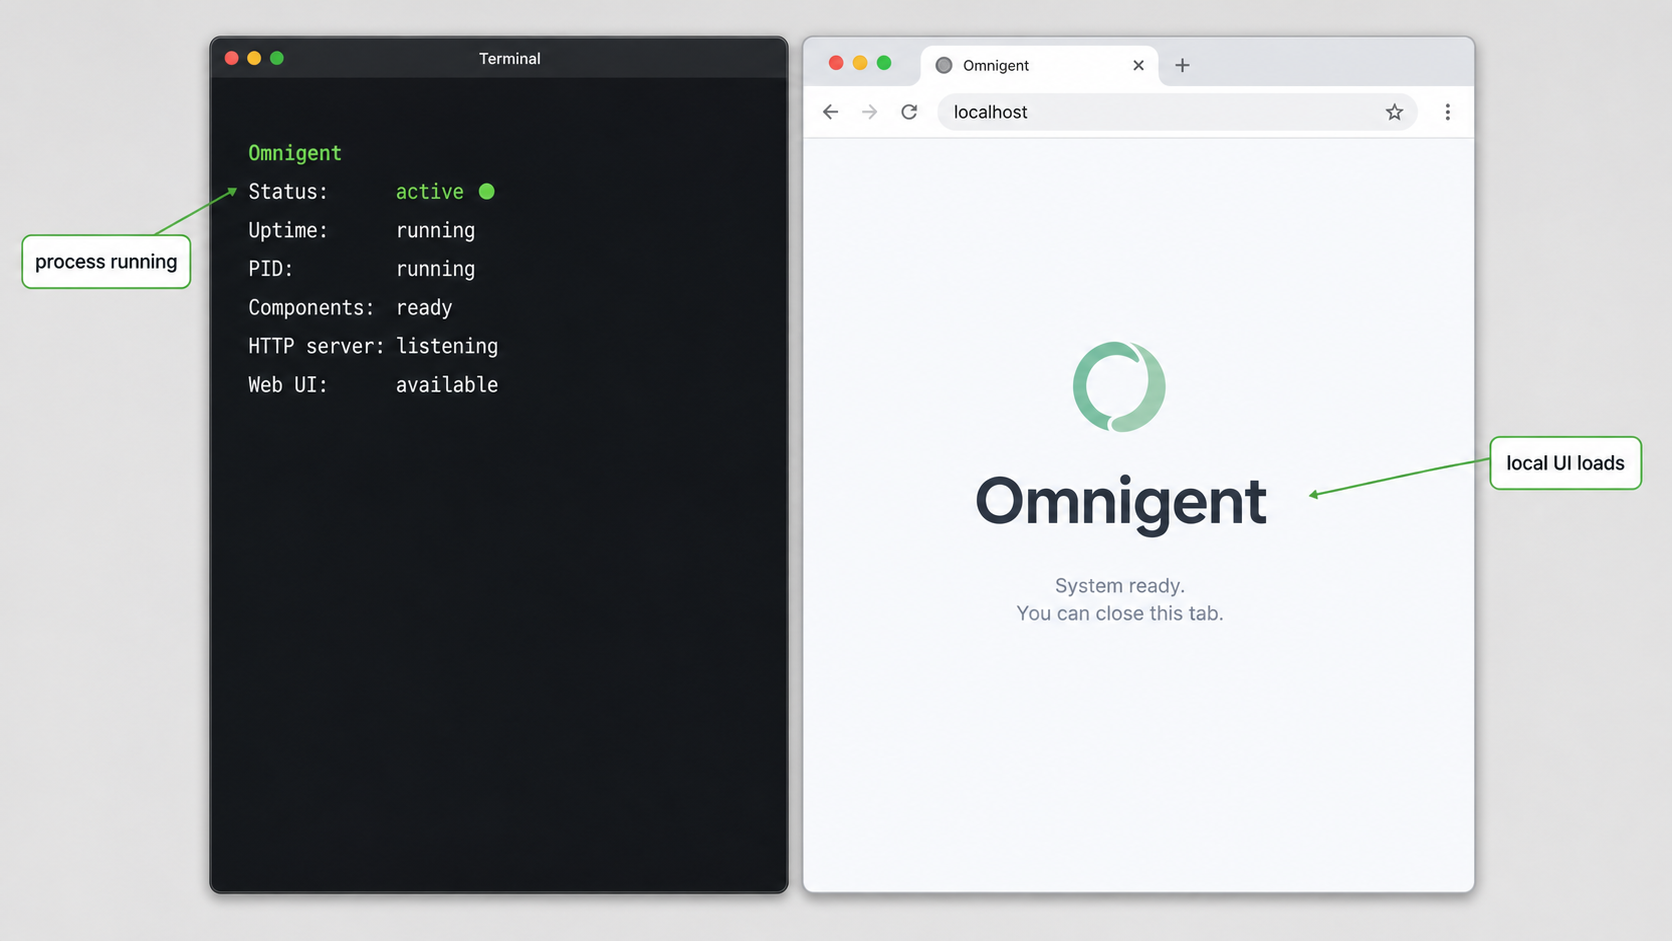
Start the reviewed Omnigent release with:
omnigentKeep the terminal visible during the first launch. Open the local address documented by the reviewed upstream material:
http://localhost:6767A working page confirms that the shell found an executable, the process remained active, and the browser reached the local HTTP service. It does not establish the installed package version unless the package manager reports it, and it does not validate every harness.
Perform the local acceptance test
- Confirm that
uv tool listorbrew list --versions omnigentidentifies the installation you expect. - Confirm that
command -v omnigent,type -a omnigent, orGet-Command omnigent -Allresolves the intended copy. - Run
omnigentand confirm that it does not immediately exit with an exception. - Load
http://localhost:6767from a browser on the same host. - Select one low-risk harness or custom agent and validate its own dependencies and authorization.
- Confirm that expected approvals, policies, and sandbox behavior remain visible during the test.
- Stop and restart Omnigent once so that the operational procedure is understood.
Prepare one agent workflow at a time
There is no universal provider credential or agent configuration that applies to Claude Code, Codex, Cursor, Pi, every SDK harness, and every custom YAML agent. Choose one workflow and follow that integration's current authorization instructions. Never place API keys or provider tokens in a tunnel URL, screenshot, source repository, or command copied into a public issue.
Review the selected agent's filesystem scope, network access, tool permissions, spending controls, and approval behavior. Omnigent documents policy and sandboxing concepts, but their exact enforcement path depends on the release, platform, and harness. A browser interface loading successfully is not evidence that a terminal wrapper has entered the expected sandbox.
First test the installed application's access behavior locally. Then test from a private browser session or a separate local browser profile. If that session can reach sensitive content without an authorization challenge, do not create or start a public tunnel.
Upgrade, remove, and recover package-manager installations
Use the package manager that created the active executable. Before any upgrade, record the current package-manager version, executable path, selected extras, and one known-good local workflow. Review upstream release notes and stop public access while validating the new version.
Manage a uv installation
List the current uv-managed tool:
uv tool list
command -v omnigent
type -a omnigent
Upgrade the packaged tool:
uv tool upgrade omnigentAfter the upgrade, repeat the package listing and local startup test:
uv tool list
omnigent
Then load http://localhost:6767 and test one representative agent workflow before restoring remote access.
Remove the uv-managed tool with:
uv tool uninstall omnigentIf rollback is required and the earlier packaged version remains available from your configured package source, uninstall the current tool and reinstall the known version:
uv tool uninstall omnigent
uv tool install --python 3.12 "omnigent==0.11.0"
Replace 0.11.0 with the specific version you previously tested. A package rollback does not automatically roll back configuration or stored application data. The available evidence does not define one universal Omnigent data directory or migration rollback procedure, so preserve and restore data only according to the documentation for the installed release.
Manage a Homebrew installation
Inspect the formula and resolved executable:
brew list --versions omnigent
brew info omnigent
command -v omnigent
type -a omnigent
Refresh Homebrew metadata and upgrade Omnigent:
brew update
brew upgrade omnigent
If Homebrew reports that the formula is already current, do not assume a different copy is also current. Recheck type -a omnigent and remove obsolete uv or pip copies if they are taking precedence.
Uninstall the Homebrew formula with:
brew uninstall omnigentHomebrew does not provide a universal promise that every old tap version remains available. Do not invent a rollback command or download an unreviewed historical formula. Before upgrading a critical installation, confirm whether the Omnigent tap retains the version you would need, preserve approved configuration and data, and test the upgrade on a non-critical host.
Check for duplicate installations after changes
On macOS or Linux:
type -a omnigent
uv tool list
brew list --versions omnigent
On Windows:
Get-Command omnigent -All
uv tool list
Remove each obsolete copy with the manager that installed it. Deleting an executable manually can leave package metadata and isolated environments behind.
Separate application and tunnel lifecycles
Omnigent is available only while its process is running. A Localtonet tunnel is available only while the selected client device is connected and the tunnel has been started. Starting one does not start the other.
No verified systemd, launchd, or Windows service definition was supplied for this revision, so this guide does not invent one. If you create operating-system startup automation, preserve the tested user identity, executable path, working environment, credentials, and filesystem permissions. Test a complete reboot before relying on it.
Configure a Localtonet HTTP tunnel only after authorization passes
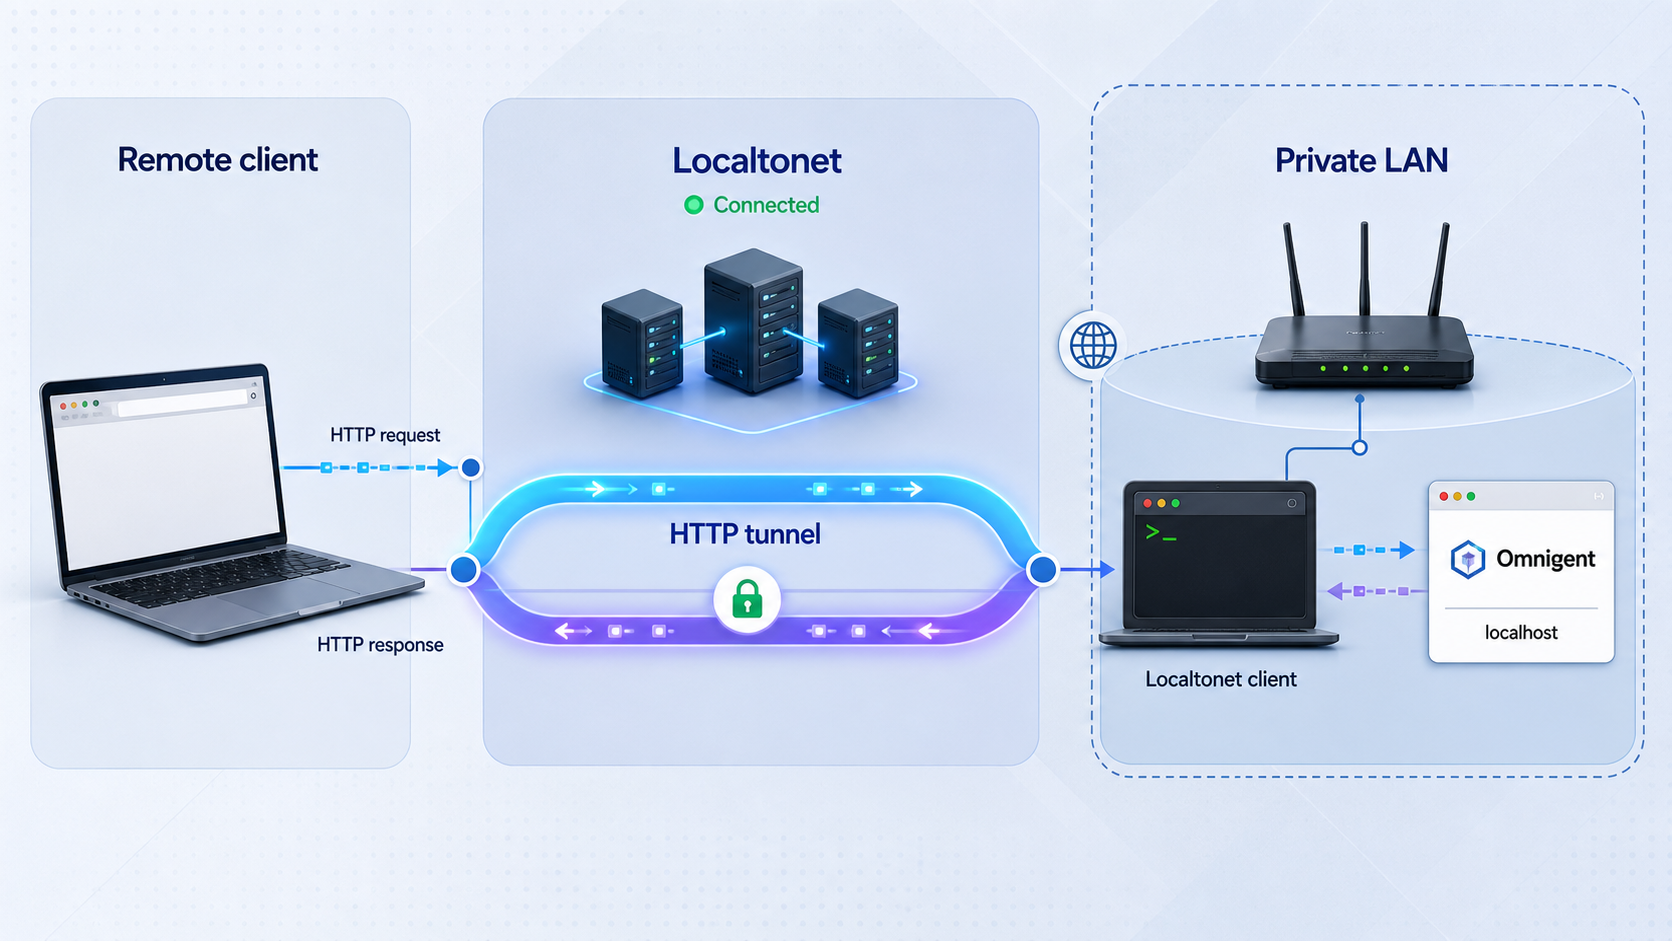
Localtonet exposes a service running on your machine through an outbound connection to one of our relay servers. The standard workflow does not require inbound router port forwarding, firewall changes, VPN setup, or a public IP address.
Omnigent's reviewed local interface is HTTP on port 6767, so use a Localtonet HTTP tunnel. HTTP tunnels support the Process Type choices shown in the current dashboard, including Random Sub Domain, Custom Sub Domain, and Custom Domain where available. These process types serve the same target content at a public HTTPS address. Availability can vary by current plan or product configuration.
The current evidence confirms that Omnigent supports sharing sessions by URL, but it does not provide a universal, verified authentication switch or configuration that we can safely reproduce here. Do not continue if an unauthorized private-browser session can see sessions, files, terminal output, provider information, or controls. Keep Omnigent local until the documentation for your exact release establishes and you have tested effective authorization.
Once that security gate passes, follow the documented HTTP tunnel sequence below. Field names are kept aligned with the current Localtonet workflow rather than replaced with inferred networking terminology.
Install and run the Localtonet app
Install our client for the operating system on the Omnigent host, or on another device that can reach the Omnigent service. Keep the client connected and confirm that http://localhost:6767 still works on the Omnigent host.
Open the HTTP Tunnel page
In the Localtonet dashboard, go to the HTTP Tunnel page. Use an HTTP tunnel for this browser interface rather than configuring a raw TCP, UDP, File Server, proxy, or VPN target.
Select Process Type
Choose a Process Type currently shown in your dashboard: Random Sub Domain, Custom Sub Domain, or Custom Domain where supported. Check the current documentation before configuring custom-domain DNS because exact DNS requirements can change.
Select AuthToken and server
Select the device-specific AuthToken for the client that can reach Omnigent, then select an available server. Never publish or guess an AuthToken, and use only server values currently presented by the product.
Enter the local IP address and port
Enter the IP address that reaches Omnigent from the selected client device and set the local port to 6767. If both applications run on the same machine, use the loopback or local address accepted by the current dashboard. If the client runs elsewhere, use a reachable LAN address and verify it from that client device first.
Press Start
Creating the tunnel does not start it. Press Start and confirm that the selected client is connected and the tunnel is running. The assigned public address is available only while both conditions remain true.
See the current Localtonet HTTP tunnel documentation alongside these instructions when checking dashboard fields, available server values, and domain options.
Test the public address without weakening access control
Open the assigned HTTPS address from a separate device or network and use a private browser session. Verify that the authorization boundary appears before sensitive content. Attempt no destructive action during the first test. Confirm that an unauthorized visitor cannot open existing sessions, create an agent, interact with a terminal, inspect files, or invoke provider-backed tools.
If the page fails remotely, do not remove authentication or broaden agent permissions to make testing easier. Stop the tunnel, return to local verification, and diagnose the application, client, and tunnel layers separately.
| Layer | Required state | Typical failure |
|---|---|---|
| Omnigent package | The intended uv or Homebrew installation resolves in the shell | The command is missing or an obsolete copy runs. |
| Omnigent process | omnigent remains running and serves the local page |
http://localhost:6767 does not load. |
| Application authorization | Unauthorized browsers are denied before sensitive content | The interface loads publicly without an effective authorization boundary. |
| Localtonet client | The selected AuthToken identifies a connected device that can reach Omnigent | The device appears disconnected or cannot reach the target address. |
| HTTP tunnel | The target IP and port are correct and the tunnel has been started | The public address is unavailable or reaches the wrong local service. |
Security checklist for an agent workspace
Remote access changes the trust boundary. HTTPS protects traffic to the Localtonet tunnel edge, but it does not decide who is allowed to control an agent, view files, read session history, spend provider funds, or execute host-affecting tools. Those decisions must be enforced by Omnigent, the selected harness, and your operating environment.
Review the project's current security policy before deploying a release that will handle private repositories, customer information, provider credentials, or unrestricted terminals. The security policy is also the appropriate place to verify the project's current vulnerability-reporting process.
Anyone who receives, discovers, or obtains a public URL can attempt to open it. Do not rely on URL secrecy. If adequate application-level authorization cannot be confirmed for the installed Omnigent version, the safe configuration is to leave the Localtonet tunnel stopped.
Troubleshoot installation, startup, and remote access
The shell says omnigent is not found
Confirm that the original package manager reports the tool as installed:
uv tool list
brew list --versions omnigent
Then inspect executable resolution with type -a omnigent. On Windows, use Get-Command omnigent -All. Open a new terminal after applying uv or Homebrew environment instructions. Do not add a second installation until the path issue is understood.
The wrong Omnigent copy starts
Several results from type -a omnigent or Get-Command omnigent -All indicate duplicate installations. Compare those paths with uv tool list and brew info omnigent. Uninstall the obsolete copy with uv, Homebrew, or the exact Python environment that installed it, then open a new shell and check again.
The installer reports an unsupported Python version
Install Python 3.12 through uv and request it explicitly:
uv python install 3.12
uv tool install --python 3.12 omnigent
Installing a newer system Python does not guarantee that an unrelated pip executable will use it. That ambiguity is one reason the explicit uv path is useful.
The local page does not load
Return to the terminal running omnigent. Confirm that the process remains active and inspect the visible exception output. Do not troubleshoot Localtonet until http://localhost:6767 works on the host.
The reviewed upstream material establishes port 6767 as the local endpoint for this workflow but does not provide evidence here for an alternative-port flag. This article therefore does not invent one. If a later release changes startup or binding behavior, follow that release's README and changelog.
The UI works, but a native harness fails
The server and a selected harness have separate requirements. Validate Node.js 22 LTS or newer where required, npm, pnpm for the web toolchain, and tmux for native wrappers. On Linux, validate bubblewrap for affected wrappers and Pi. On native Windows, confirm that you selected a currently supported SDK-based path rather than assuming native-wrapper compatibility.
A provider rejects the agent request
Provider authorization is separate from Omnigent installation. Follow the selected provider or harness's current sign-in procedure, and confirm that any required Omnigent extra was installed. Do not print complete tokens while debugging, and redact secrets before sharing logs.
An upgrade breaks a previously working workflow
Stop remote access, record the new package-manager state, and compare the change with the upstream release notes and changelog. Test the core local page separately from the affected harness. uv users can reinstall a previously tested packaged version if it remains available. Homebrew rollback depends on the tap retaining an appropriate formula, so there is no universal rollback command.
The local UI works, but the public address does not
Check each layer in order. Confirm Omnigent locally, confirm that our client is connected under the selected AuthToken, confirm that the target IP is reachable from that client, confirm port 6767, and confirm that the HTTP tunnel was started. Creation alone does not make a tunnel active.
The public address reaches the wrong page
Stop the tunnel immediately. Recheck the local IP address and port. A different service may be using the selected target, or the Localtonet client may be running on a different device from the Omnigent host. Verify the exact target from the client device before restarting the tunnel.
The tunnel stopped after a restart
Omnigent, the Localtonet client, and the tunnel have separate lifecycles. Confirm that the Omnigent process started, that the client reconnected, and that the tunnel is running. Do not assume that creating a dashboard configuration permanently starts every local dependency.
Frequently asked questions
Should I install Omnigent with uv or Homebrew?
Use uv when you want an isolated Python tool installation, need to select Python 3.12 explicitly, or are installing on native Windows. Use Homebrew when it is already your approved package manager on macOS or Linux. Keep one primary installation method so upgrades and removal target the executable your shell actually runs.
What Python version does Omnigent require?
The reviewed upstream README requires Python 3.12 or newer for manual installation. With uv, you can install and explicitly select Python 3.12 without replacing the operating system's default Python.
Does a packaged installation require every development tool?
No. Git is required for repository installation and project development. Node.js, pnpm, tmux, bubblewrap, provider CLIs, and extras depend on the harness or development workflow. Install the requirements for the workflow you plan to use rather than treating the whole repository toolchain as a universal runtime requirement.
How do I check which Omnigent installation is running?
Use type -a omnigent on macOS or Linux, or Get-Command omnigent -All in PowerShell. Compare the returned paths with uv tool list and brew info omnigent. Remove obsolete installations with their original package managers.
How do I upgrade or uninstall a uv installation?
Run uv tool upgrade omnigent to upgrade and uv tool uninstall omnigent to remove it. After an upgrade, inspect uv tool list, start Omnigent, load the local page, and test one representative agent workflow before restoring remote access.
Is installing from the repository the same as installing a release?
No. The unpinned Git URL follows the repository's moving default branch, so the installed code can change between runs. Use a packaged release for normal operation, or pin a repository test to a known tag or full commit identifier when reproducibility matters.
Can Omnigent run natively on Windows?
Yes, but the reviewed upstream documentation calls native Windows a degraded mode. It identifies the server, web UI, and supported SDK-based harnesses as available. Do not assume that every native terminal wrapper has the same support as Linux or macOS.
Can Localtonet expose Omnigent without port forwarding?
Yes. Our client establishes an outbound connection to a Localtonet relay, and an HTTP tunnel can forward the assigned public HTTPS address to the Omnigent service on port 6767. This does not require inbound router port forwarding, firewall changes, VPN setup, or a public IP address.
Is the Localtonet HTTPS address enough to secure Omnigent?
No. HTTPS protects the connection, but it is not application authorization. The available evidence does not establish one universal Omnigent authentication configuration. Leave the tunnel stopped unless your exact release denies unauthorized access before exposing sessions, files, terminals, provider access, or agent controls.
Connect a verified Omnigent workspace with Localtonet
Install one managed Omnigent copy, validate its local interface and agent controls, confirm effective authorization from an unauthenticated browser session, and then create a Localtonet HTTP tunnel for controlled access outside your LAN.
Get Started Free →

