

Build the current OpenCodex source, configure a provider, verify routed requests, and publish controlled remote access
OpenCodex is a local proxy that translates requests between Codex, Claude Code, and supported LLM provider formats. This guide installs the official lidge-jun/opencodex project from source with Bun, explains how to choose between a moving branch and a pinned revision, initializes a client, and tests an actual routed request. It then connects the verified HTTP service to a Localtonet HTTP tunnel without inbound router port forwarding. Operational commands, updates, rollback, troubleshooting, and public-dashboard security are included so the deployment does not stop at merely loading a web page.
📋 What's in this guide
What you are installing
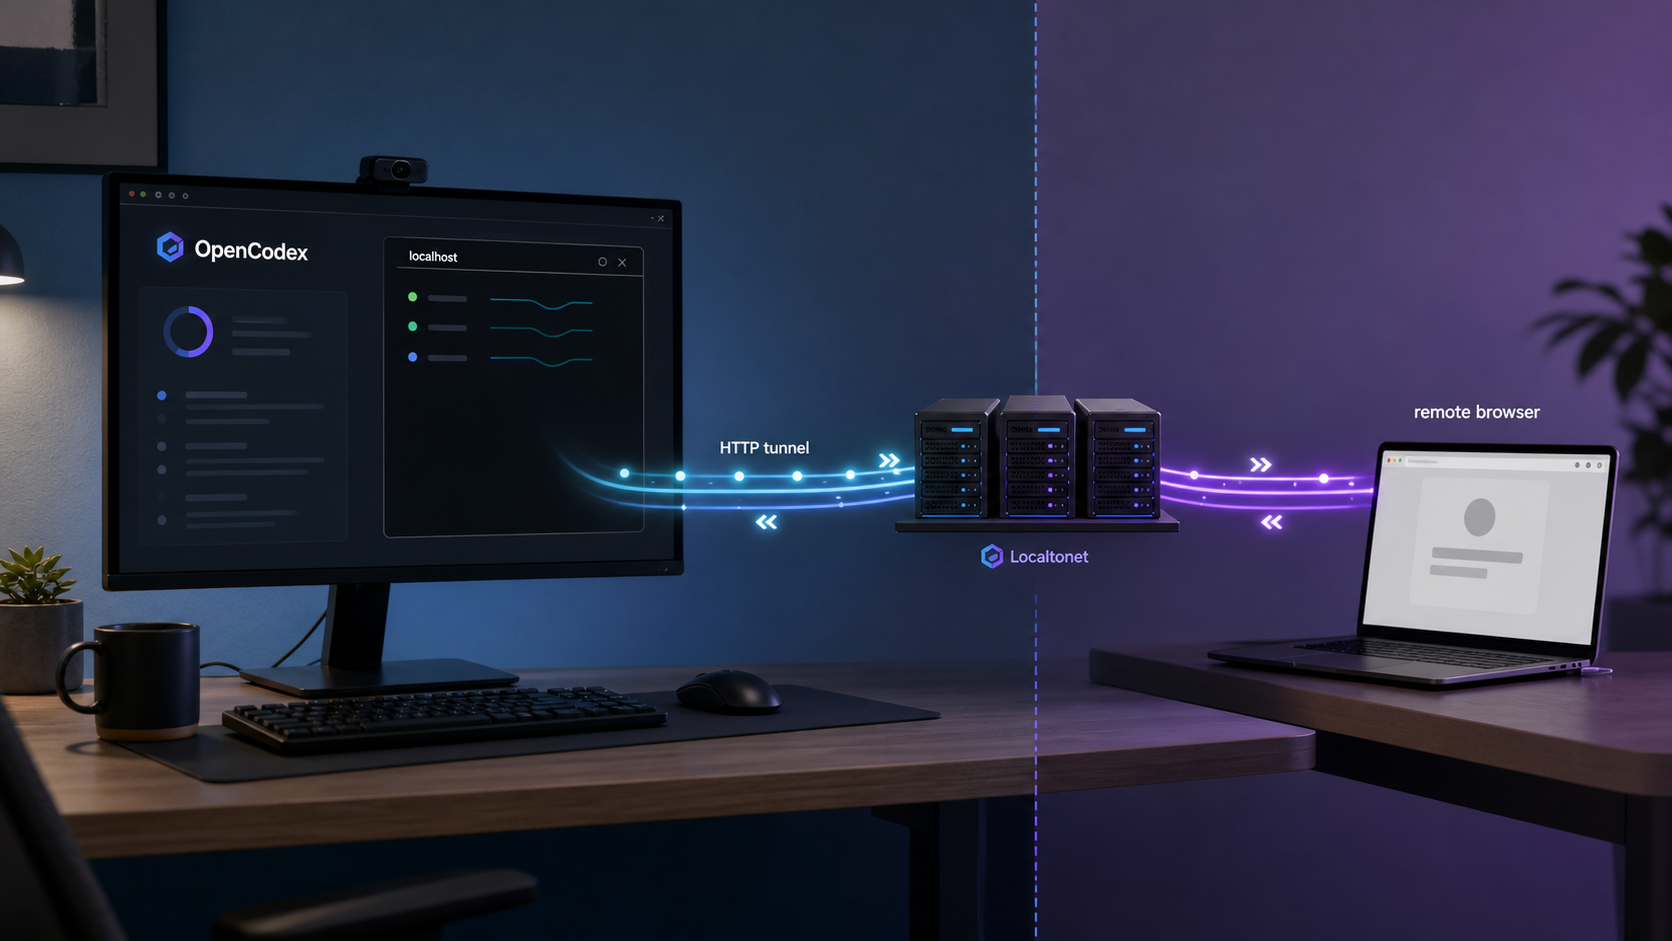
OpenCodex is a lightweight local proxy that translates Codex Responses API traffic into formats understood by configured providers. The current project describes support for streaming, tool calls, reasoning tokens, images, Codex, Claude Code, Claude Desktop, and Grok Build. Its proxy and browser-based management dashboard are served from one local HTTP service. This tutorial covers the project in the
official lidge-jun/opencodex repository,
not the separate ymichael/open-codex fork or another similarly named package.
The project offers two materially different installation models. The published npm workflow installs @bitkyc08/opencodex and exposes the ocx command. It requires Node.js 18 or newer, and its npm package bundles the Bun runtime. The source workflow in this article clones the repository, installs dependencies with Bun, and invokes the TypeScript CLI entry point directly. A separate Bun installation is therefore required for the source workflow.
@bitkyc08/opencodex globally and provides the shorter ocx command. Node.js 18 or newer is required.
src/cli/index.ts from the repository.
http://localhost:10100. Verify the actual startup result before configuring any client or tunnel.
Cloning a branch gives you whatever commit that branch points to at that moment. Record the commit with git rev-parse HEAD, or deliberately check out a reviewed tag or commit before installing dependencies. This distinction matters when diagnosing regressions, recreating a deployment, or rolling back.
Prerequisites and deployment decisions
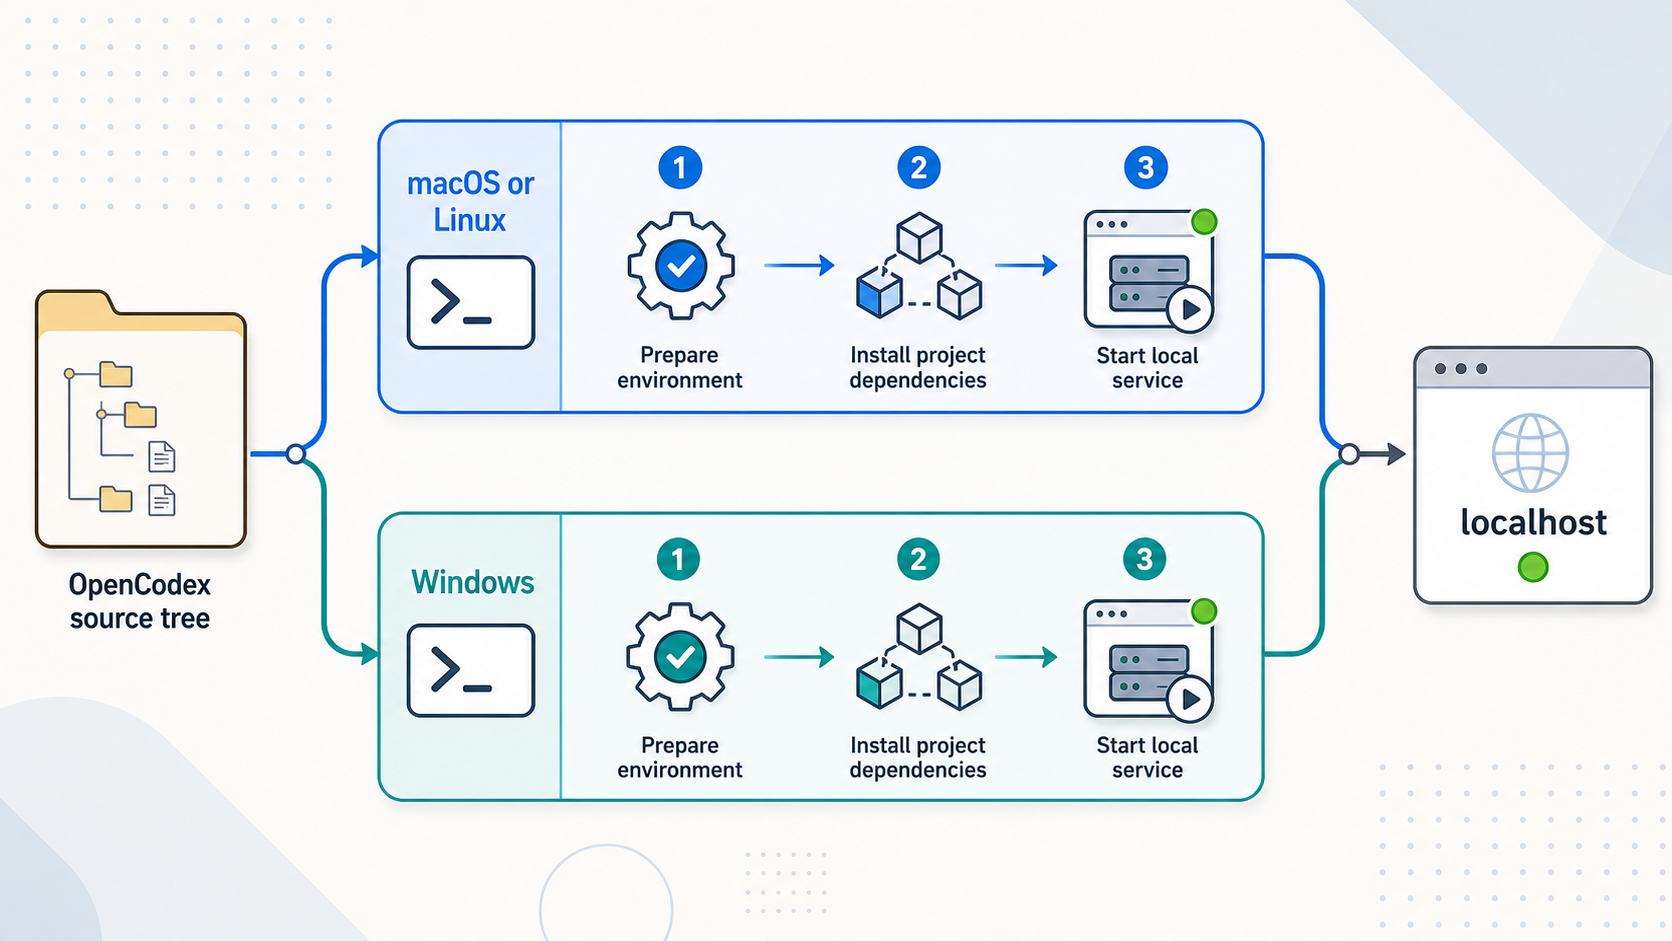
The documented source installation supports macOS, Linux, and Windows PowerShell. Install Git first and make sure your user can create files in the chosen checkout directory. Windows does not require WSL for this procedure. Review the official Bun installation documentation before running a downloaded installer, particularly on managed systems where software installation must follow an organizational approval process.
You also need an LLM provider account or an endpoint that OpenCodex supports, plus a compatible client for the functional routed-request test. OpenCodex documents more than 40 built-in providers and support for OpenAI-compatible endpoints. Provider authentication may involve an API key, an OAuth flow, a forwarded Codex login, or an environment-variable reference such as ${ENV_VAR}. The exact choice depends on the provider.
Keep provider secrets outside the repository. Do not paste secrets into Git-tracked configuration, screenshots, this tutorial, a Localtonet device token field, or a public URL. If you use an environment-variable reference, define that variable through an appropriate secret-management or service environment mechanism on the host.
Choose a branch, tag, or exact commit
| Revision choice | Behavior | Operational consequence |
|---|---|---|
| Current branch | The checkout can advance when you fetch and pull later commits. | Useful for following development, but future installations may not reproduce the same code. |
| Release tag | The checkout targets a named project release. | Easier to communicate and reproduce than an unnamed branch snapshot. |
| Exact commit | The checkout targets one immutable Git object identifier. | Provides the most precise record for testing, rollback, and incident analysis. |
The project describes its source installation as the latest development workflow, so do not silently treat a moving checkout as a stable package release. At the time of the supplied project evidence, v2.33.0 identifies an immutable release associated with commit ec51e42. That example will eventually become old, so inspect the repository’s current tags and release notes before selecting a production revision.
git tag --sort=-version:refname
git rev-parse HEAD
Run git status before switching revisions. Commit, export, or otherwise preserve intentional local changes first. A clean upstream checkout is much easier to update and roll back than a deployment containing undocumented edits.
Install OpenCodex from source
macOS and Linux
Run the following sequence from a normal user account. The documented commands install Bun under the user’s home directory, clone the official repository, install its declared dependencies, and start the TypeScript CLI.
Install Bun
Use Bun’s documented installer after reviewing the script and your local software-installation policy.
curl -fsSL https://bun.sh/install | bashClone the official repository
Clone the project, enter the checkout, and confirm that Git reports the expected upstream repository.
git clone https://github.com/lidge-jun/opencodex.git
cd opencodex
git remote -vOptionally pin the checkout
Skip this action only when you deliberately want the current moving branch. The example below uses the audited release tag. Review the current releases before adopting it.
git checkout v2.33.0
git rev-parse HEADInstall project dependencies
Invoke the Bun binary at the path used by the project’s documented macOS and Linux source procedure.
~/.bun/bin/bun installStart OpenCodex interactively
Keep this terminal open during initial configuration and testing so startup messages and failures remain visible.
~/.bun/bin/bun run src/cli/index.ts startWindows PowerShell
Run the Windows workflow in PowerShell from a directory your user can modify. If the newly installed bun command is not immediately available, open a new PowerShell session and verify the installation before continuing.
Install Bun
Run the Bun PowerShell installer documented by the project after reviewing your execution policy and organizational controls.
irm bun.sh/install.ps1 | iexClone the official repository
Retrieve the OpenCodex source and enter the checkout.
git clone https://github.com/lidge-jun/opencodex.git
cd opencodex
git remote -vOptionally pin the revision
Use a reviewed current tag or exact commit when you need a repeatable deployment. This example reflects the audited release evidence.
git checkout v2.33.0
git rev-parse HEADInstall dependencies
Resolve the dependencies declared by the selected checkout.
bun installStart OpenCodex interactively
Keep the PowerShell window open while completing initial verification.
bun run src/cli/index.ts start
Published-package documentation commonly shows commands such as ocx start. In a source checkout, this tutorial invokes the same CLI through bun run src/cli/index.ts. Run source actions from the repository directory and use the platform-appropriate Bun path shown above.
Configure a provider and initialize the client
Starting the process proves only that the application launched. It does not make provider routing operational. Open http://localhost:10100 on the same computer and use the dashboard to add a provider, authenticate it using a method supported by that provider, select or configure models, and inspect provider status. The
official OpenCodex documentation site
links to provider, routing, Codex integration, Claude Code, dashboard, CLI, configuration, and health documentation.
OpenCodex currently documents built-in provider integrations as well as OpenAI-compatible endpoints. Authentication can include API keys, provider-specific OAuth for supported services, a forwarded Codex login, or environment-variable references. Do not infer that every provider supports every authentication method. Follow the provider-specific screen and documentation presented by the installed revision.
Confirm the local dashboard
Open http://localhost:10100. If it does not respond, resolve the local process problem before adding providers or configuring Localtonet.
Add and authenticate a provider
Select a provider or an OpenAI-compatible endpoint in the dashboard. Complete its supported API-key, OAuth, account, or environment-variable workflow without placing credentials in the repository.
Select a routable model
Choose a model exposed by the configured provider and verify that the dashboard reports the provider and authentication state expected for that model.
Run OpenCodex initialization
The interactive init action writes ~/.opencodex/config.json and wires Codex to OpenCodex. It does not start the proxy, so keep the existing process running or start it separately.
~/.bun/bin/bun run src/cli/index.ts initbun run src/cli/index.ts init
The order of start and init can be reversed, but they perform different jobs. The proxy must be running before a functional routed test. The project also warns that headless management commands, including provider-add and combo-setting operations, communicate with the live proxy and exit nonzero when it is unreachable.
OpenCodex states that some providers may restrict accounts that send traffic through third-party proxies. Account pooling does not protect an account from rate limits, enforcement, suspension, or other provider actions. Review each provider’s current terms and account policies before connecting it, and do not use routing or additional accounts to circumvent provider limits.
Verify the dashboard, health, and a routed request
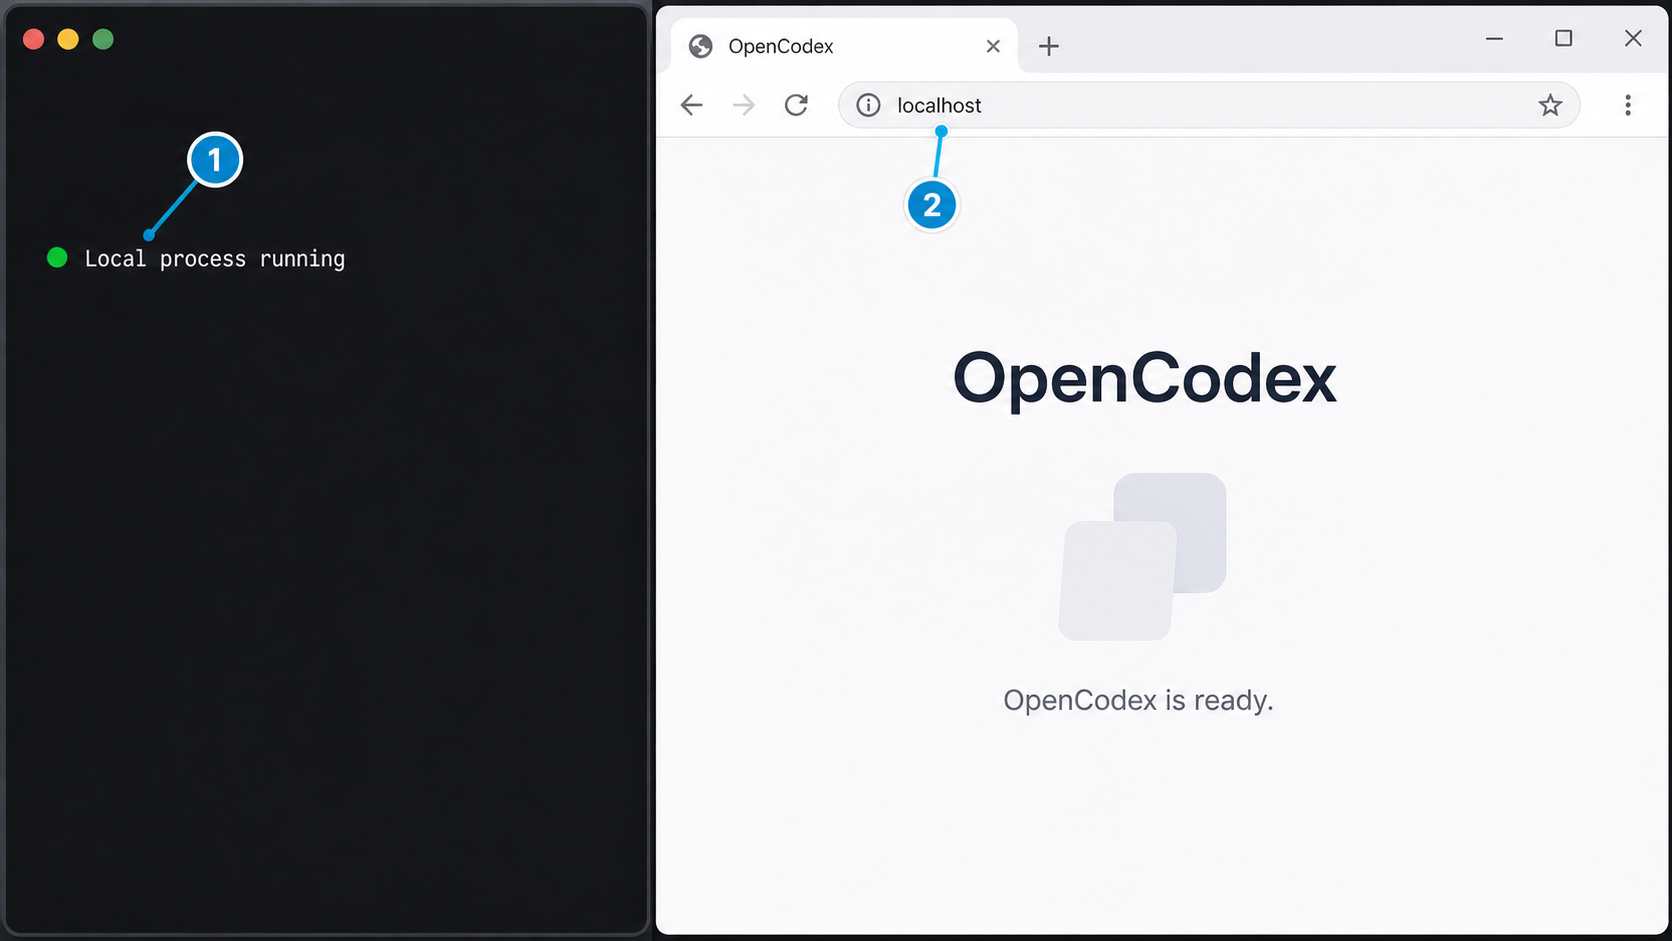
The documented default address is http://localhost:10100. The supplied primary project evidence does not establish that OpenCodex automatically selects another free port when 10100 is occupied, so this guide does not rely on that behavior. If startup fails or the page does not load, read the process output and check whether another application already owns the port. Do not point a tunnel at a guessed replacement port.
Run the supported status and health checks
OpenCodex documents status, doctor, and health actions for reporting the running state. Execute them from a second terminal while the interactive proxy remains active.
~/.bun/bin/bun run src/cli/index.ts status
~/.bun/bin/bun run src/cli/index.ts doctor
~/.bun/bin/bun run src/cli/index.ts health
bun run src/cli/index.ts status
bun run src/cli/index.ts doctor
bun run src/cli/index.ts healthThese checks help distinguish a running proxy from a broken provider or client route. Record unexpected output before restarting so you retain useful diagnostic evidence.
Send a functional routed request
A loaded dashboard is not an end-to-end test. After completing init, use an installed Codex client to submit a harmless prompt through the configured route. The official quickstart demonstrates the following request:
codex "Write a hello world in Rust"Confirm that the response is streamed back successfully and inspect the OpenCodex dashboard’s live request information. The dashboard can show providers, OAuth status, model selection, request activity, and cache token counts. A successful test demonstrates that the client configuration, local proxy, model route, provider authentication, and upstream response path are working together.
Provider requests may leave the local machine and be processed according to the selected provider’s policies. Do not include credentials, proprietary source code, personal information, or production data in an initial connectivity test.
Background operation, shutdown, updates, pinning, and rollback
Run OpenCodex in its supported background mode
The project documents service as the supported background action. Supported service managers are launchd on macOS, a systemd user unit on Linux, and Task Scheduler on Windows, with an opt-in native Windows service also documented by the project. Use this supported action instead of constructing an undocumented startup loop.
~/.bun/bin/bun run src/cli/index.ts servicebun run src/cli/index.ts service
After enabling background operation, run status, doctor, and health again. Also reload the local dashboard and send another routed request. A service-manager entry is not sufficient evidence that the application is healthy.
Stop cleanly
Use the project’s stop action rather than abruptly terminating files or deleting configuration. OpenCodex states that a clean stop restores Codex to its original configuration.
~/.bun/bin/bun run src/cli/index.ts stopbun run src/cli/index.ts stopConfirm shutdown with the status command and by checking that the local dashboard no longer responds. Stop the Localtonet tunnel separately if it was running, because OpenCodex and Localtonet have independent lifecycles.
Update a moving source checkout
Before updating, save the current commit identifier and verify that the working tree is clean. Stop OpenCodex, fetch upstream changes, review the branch and release notes, move the branch forward, reinstall dependencies, and repeat all health and routed-request tests.
git status
git rev-parse HEAD
git fetch --tags origin
git pull --ff-only
~/.bun/bin/bun install
~/.bun/bin/bun run src/cli/index.ts start
On Windows, use bun install and bun run src/cli/index.ts start for the final two commands. Do not use git pull while detached at a tag or commit. Select a newer reviewed tag or commit explicitly instead.
Pin and roll back
For a pinned deployment, fetch tags and check out the exact reviewed reference. Record both the human-readable tag and the resulting commit identifier. Reinstall dependencies after changing revisions because dependency declarations and the lockfile may differ.
git fetch --tags origin
git checkout v2.33.0
git rev-parse HEAD
~/.bun/bin/bun install
To roll back, stop OpenCodex, confirm that no uncommitted work will be lost, check out the previously recorded tag or commit, reinstall dependencies, and restart. Then run status, doctor, health, dashboard, and routed-request checks again.
git status
git checkout ec51e42
~/.bun/bin/bun install
~/.bun/bin/bun run src/cli/index.ts start
The identifiers above reflect the supplied audited release evidence and are examples, not a recommendation to remain on that version indefinitely. Keep your own deployment record containing the selected revision, update date, provider configuration changes, and test result.
Create the Localtonet HTTP tunnel
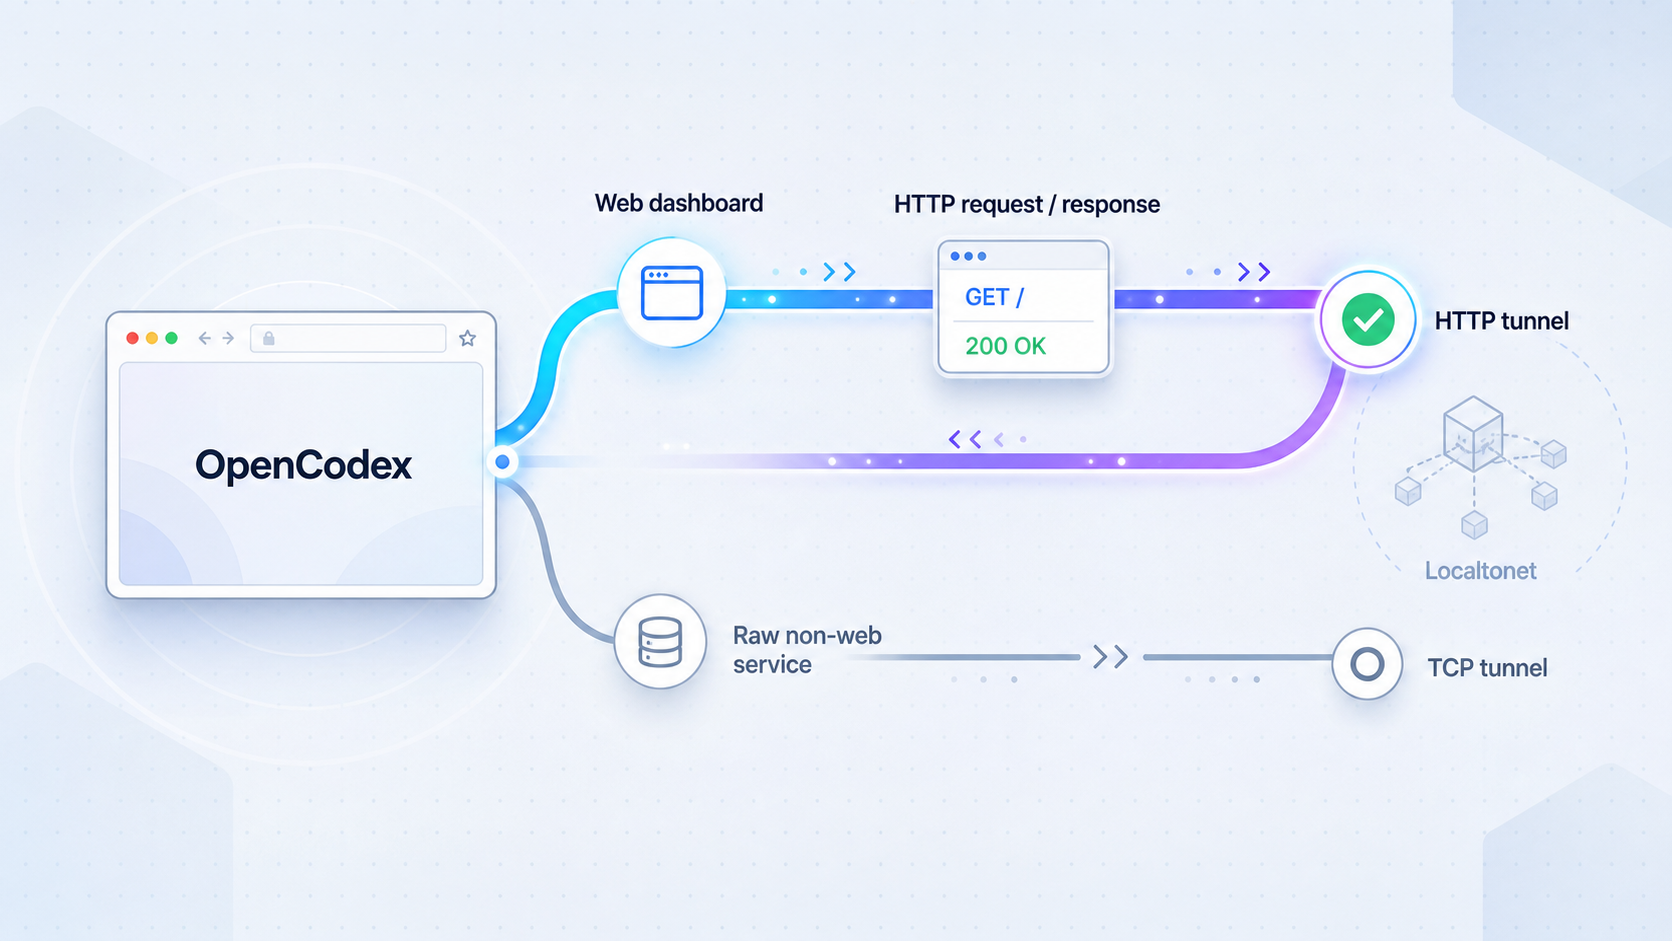
Start this section only after the local dashboard, health commands, and routed request all work. Our client establishes an outbound connection from the selected device to a Localtonet relay server. The resulting HTTP tunnel provides a public HTTPS address without inbound router port forwarding, firewall changes, VPN setup, or a public IP address.
Follow the Localtonet HTTP tunnel documentation while using the current dashboard. Available relay servers, regions, process types, and plan-dependent options can change, so choose from values actually offered to your account rather than copying a server code from an old tutorial.
Install and run the Localtonet client
Install our client on the OpenCodex computer or another device that can reach the OpenCodex HTTP listener. Keep the client running because it creates the outbound relay connection.
Open the HTTP tunnel configuration
In the Localtonet dashboard, go to the HTTP tunnel page and begin creating the HTTP configuration for the verified OpenCodex service.
Select the process type
Choose the required HTTP process type from Random Sub Domain, Custom Sub Domain, or Custom Domain as currently available. All three serve the target content from a public HTTPS address. Check current DNS instructions before using a custom domain.
Select the device token
Select the device-specific authentication token belonging to the connected client that will run this tunnel. The token identifies the device and must not be exposed in source code, screenshots, logs, or shared documentation.
Select an available relay server
Choose a server or region offered in the current dashboard. Do not hardcode an old relay server code because availability can vary by product state, deployment, region, or plan.
Enter the local IP address and port
Enter the OpenCodex address reachable from the Localtonet client and the verified port. When both applications run on the same computer, use the appropriate loopback target corresponding to the working localhost:10100 test. If the client is on another device, loopback will not reach the OpenCodex host.
Start the tunnel
Creating the tunnel does not make it run. Press Start and confirm that the selected client and tunnel report a connected state.
Verify the public address
Open the assigned public HTTPS address from a separate browser session or network. Confirm that it reaches the expected OpenCodex interface without exposing credentials in the URL or test request.
The tunnel is available only while the selected Localtonet client is connected and the tunnel is running. Press Stop when temporary access is complete. Delete the tunnel when the public endpoint is no longer required. Stopping OpenCodex without stopping the tunnel leaves a public address whose local target is unavailable, while stopping Localtonet does not stop the OpenCodex process.
Secure the administrative dashboard before public access
The OpenCodex dashboard is an administrative interface, not a static public website. It can expose provider configuration, model selection, account information, OAuth state, quota information, and live request details. A public tunnel expands the interface’s network boundary from the local machine to anyone capable of reaching the assigned address.
The reviewed OpenCodex material describes provider authentication, but it does not establish a built-in login or authorization boundary protecting the web dashboard itself. Do not confuse provider API keys or OAuth sessions with authentication for people opening the administrative interface. Unless your installed revision’s current documentation explicitly confirms and explains dashboard access control, treat the dashboard as unprotected and do not expose it broadly.
Before starting a public tunnel, verify the actual access-control capabilities of the specific OpenCodex revision and the Localtonet configuration available to your account. Where supported, apply authentication, least privilege, IP restrictions, or another reviewed access layer. An unguessable subdomain is not authentication. Do not assume that TLS alone authorizes users either: HTTPS protects transport to the tunnel edge, while authorization determines who should be allowed to use the interface.
Limit the exposure window. Start the tunnel only when remote administration is required, avoid sharing the URL through public channels, and stop or delete the tunnel afterward. Review the dashboard and request log for sensitive prompts, model details, account identifiers, or operational metadata before granting another person access.
Provider policy is a separate security and compliance concern. OpenCodex explicitly warns that some providers may restrict third-party proxy use. Review the current terms for every connected service, use only accounts you are authorized to operate, and do not pool accounts or reroute traffic to evade quotas, rate limits, enforcement, or account restrictions.
Troubleshooting the complete request path
The OpenCodex process exits during startup
Read the first error in the interactive terminal rather than repeatedly restarting. Confirm that Bun is available, the command is being run from the repository directory, dependencies were installed for the selected revision, and the working tree contains the expected files. Run bun install again after switching a tag or commit. Use git status and git rev-parse HEAD to confirm the deployment state.
Port 10100 is already occupied
The project documents 10100 as the default. The supplied primary evidence does not verify automatic free-port selection, so do not assume OpenCodex moved elsewhere. Identify and stop the conflicting process if appropriate, or consult the documentation for your installed OpenCodex revision for a supported port configuration. Start OpenCodex again and verify the exact listener locally before changing Localtonet.
The dashboard loads but the health checks fail
Run status, doctor, and health from the same checkout and user context as the running process. A browser can display cached or partial interface content even when a provider or internal component is unhealthy. Preserve the command output, inspect the interactive process log, and resolve the reported local issue before creating a tunnel.
The dashboard works but the routed Codex request fails
Confirm that init completed, that ~/.opencodex/config.json was written for the intended user, and that the Codex client is using that user’s configuration. Check the selected model, provider authentication, OAuth state, endpoint address, account status, and upstream availability. A working dashboard does not prove that a model request can complete.
The provider returns 401, 403, or 429 responses
These responses generally concern upstream authentication, authorization, policy, or rate limits rather than Localtonet reachability. Refresh or reauthorize the account through a supported provider workflow, verify that the model is permitted, and review current provider terms. Do not add accounts or alter routing to circumvent enforcement or limits.
The local page works but the public address does not
Confirm that the Localtonet client is connected, the HTTP tunnel was started, and the target IP address and port exactly match the locally verified service. If Localtonet runs on another device, 127.0.0.1 or localhost refers to that other device, not the OpenCodex host. The OpenCodex listener must be reachable from the client device using a binding and network configuration supported by the project.
The public address stopped responding
Check both lifecycles. OpenCodex must be running and healthy, while the selected Localtonet client must remain connected and the tunnel must remain started. A sleeping computer, stopped service, network interruption, disconnected client, or manually stopped tunnel can make the address unavailable.
The public page reaches the wrong application
Recheck the tunnel’s local IP address and port. Another service may own the configured port, particularly after a failed OpenCodex restart. Stop the tunnel while correcting the target, verify OpenCodex locally, and start the tunnel again only after the correct dashboard is confirmed.
An update introduced a regression
Stop both public access and OpenCodex, record the failing revision, and return to the previously tested tag or commit. Run Bun installation again so dependencies match the restored checkout, then repeat status, doctor, health, dashboard, and routed-request tests. Avoid mixing files from different revisions or rolling back only selected source files.
Frequently asked questions
Does an OpenCodex source installation require Node.js?
The documented source workflow uses a separately installed Bun runtime to install dependencies and execute the TypeScript CLI. Node.js 18 or newer is explicitly required for the published npm package workflow.
Is OpenCodex guaranteed to choose another port when 10100 is occupied?
That behavior is not established by the supplied primary project evidence. Treat 10100 as the documented default, inspect startup errors, resolve any conflict, and use only a port configuration supported by the documentation for your installed revision.
Does loading the dashboard prove OpenCodex is fully configured?
No. It proves that an HTTP response is available locally. Complete provider authentication, select a model, run init, check status, doctor, and health, and submit a routed client request before considering the setup operational.
What is the difference between a source branch and a pinned revision?
A branch reference can move as commits are added. A selected release tag or exact commit identifies a specific source state. Record the commit identifier whenever repeatable installation and rollback matter.
Does Localtonet require router port forwarding?
No. Our client creates an outbound connection to a Localtonet relay server, so this workflow does not require inbound router port forwarding, firewall changes, VPN setup, or a public IP address.
Does creating a Localtonet tunnel start it automatically?
No. After completing the HTTP tunnel configuration, press Start. The public address remains available only while the selected client is connected and the tunnel is running. Stop or delete it when access is no longer needed.
Can the Localtonet client run on another device?
Yes, if that device can reach the OpenCodex IP address and port. A listener bound only to loopback is ordinarily reachable only from the OpenCodex host. Change binding behavior only through documented OpenCodex options and review the resulting network exposure.
Should the OpenCodex dashboard be published without authentication?
No. The reviewed evidence does not establish built-in dashboard authentication. Treat it as an administrative interface, verify the access controls available in the exact deployed revision and tunnel configuration, and do not rely on an unguessable URL as authorization.
Can provider accounts always be used through OpenCodex?
Not necessarily. OpenCodex warns that some providers may restrict third-party proxy use. Review each provider’s current terms, authentication rules, and account policies before routing traffic.
Connect your verified OpenCodex deployment
After OpenCodex passes local health and routed-request tests, use Localtonet to create an HTTP tunnel to the confirmed listener. Keep the device token private, verify dashboard access controls before publication, and stop or delete the tunnel when remote administration is complete.
Get Started Free →

