

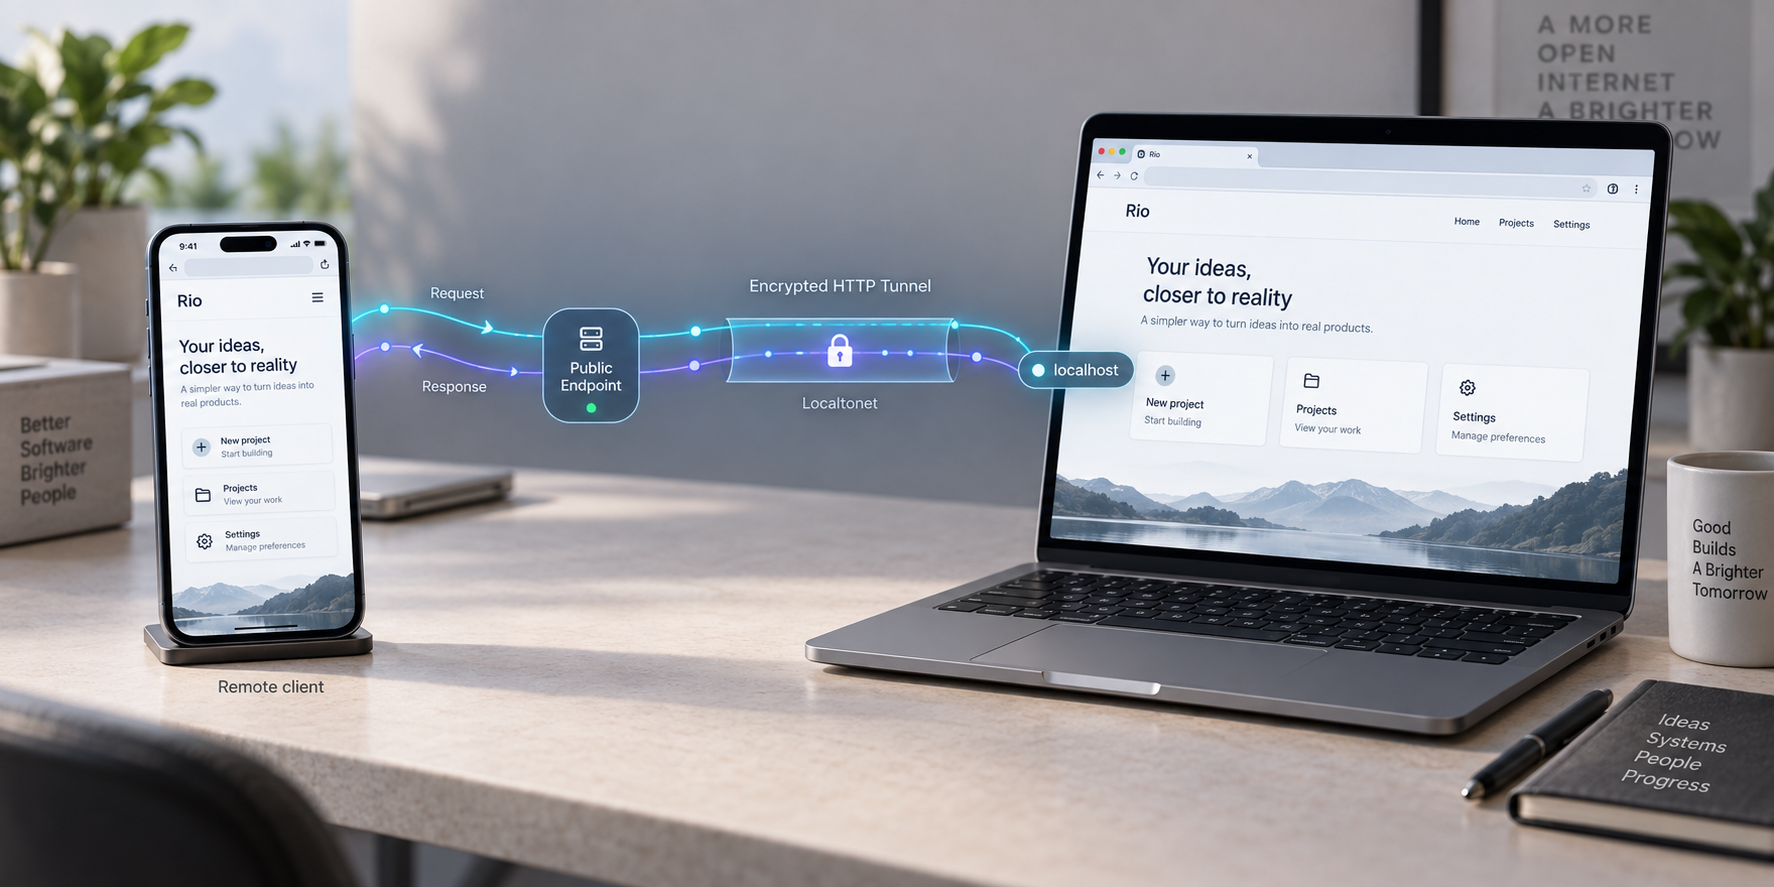
Build a browser-based Python app locally, verify it, and make it reachable from another device
Rio lets developers create websites and interactive applications using Python components instead of writing the interface in HTML, CSS, and JavaScript. In this guide, we install Rio from PyPI, create a starter project, run it locally, and verify the application before introducing any remote connectivity. We then configure a Localtonet HTTP tunnel that points to the exact local address reported by Rio at runtime. The result is a practical development or demonstration workflow that does not require inbound router port forwarding, firewall changes, a VPN, or a public IP address.
📋 What's in this guide
How Rio and Localtonet fit together
Rio is an open-source framework for creating websites and applications in Python. Its component model is declarative and React-inspired, but the application author can define the user interface and behavior in Python. Rio includes more than 50 built-in components for common interface elements and supplies development tools and a command-line utility for creating and running projects.
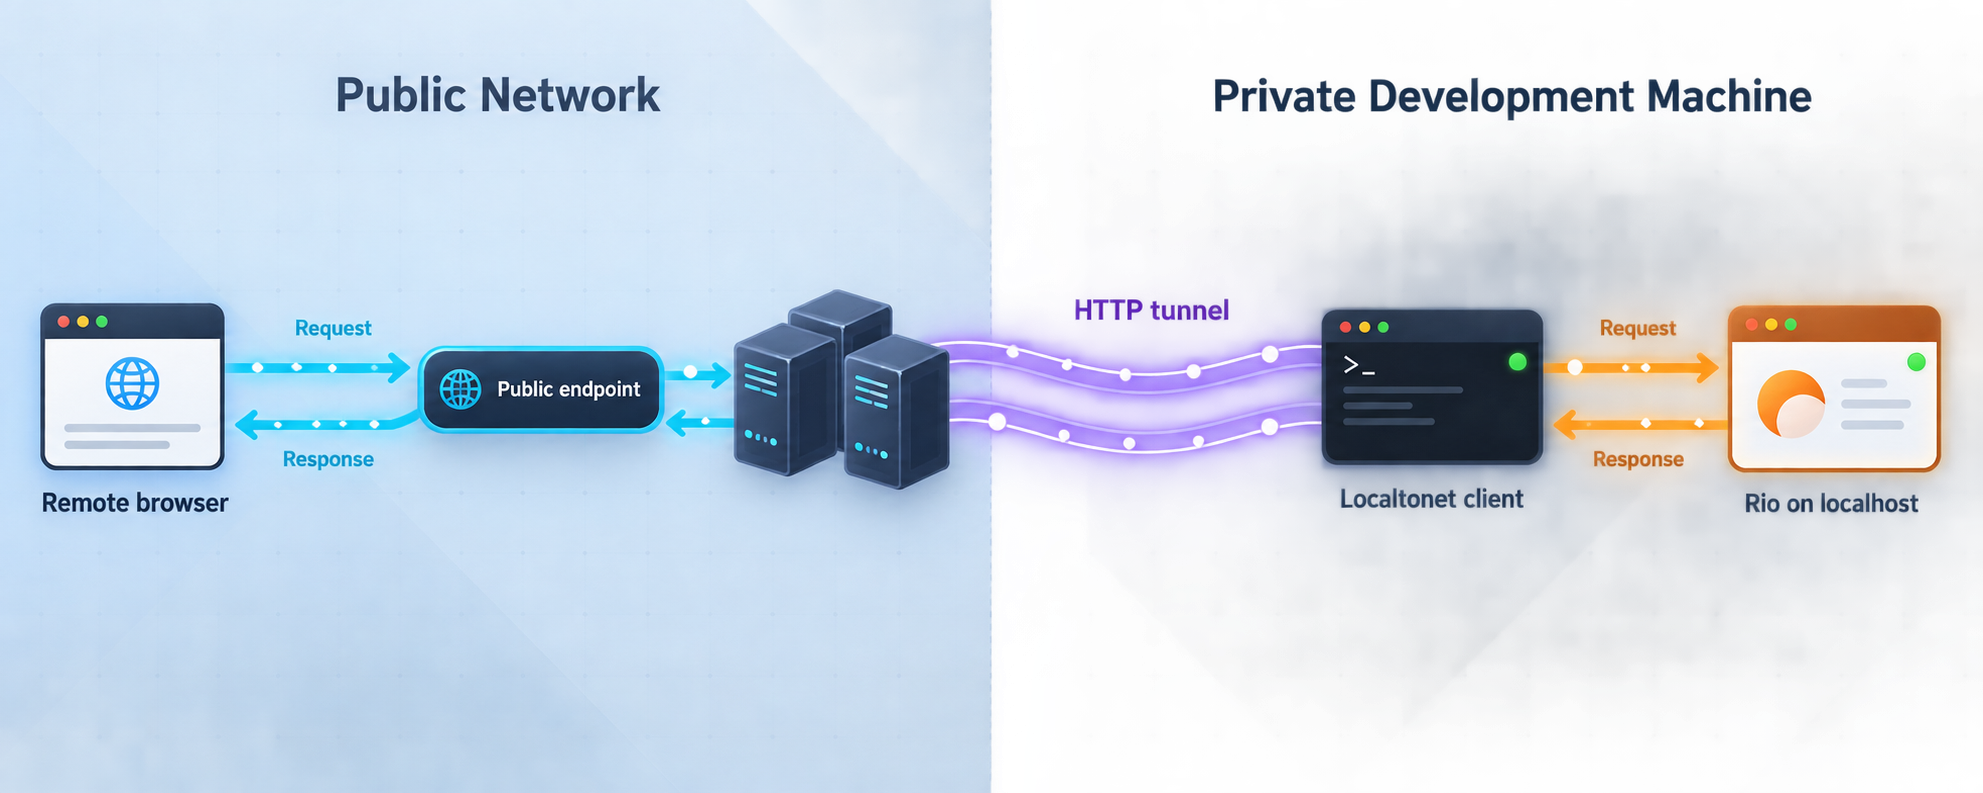
A Rio application and a Localtonet tunnel solve separate parts of the workflow. Rio creates and runs the application. When Rio starts a browser-based project, it provides a local web endpoint. That endpoint must work on the host machine before remote access can work. Localtonet then publishes the already-running local HTTP service through an outbound connection from the Localtonet client to one of our relay servers.
This separation is important when diagnosing problems. If the Rio application does not load locally, a tunnel cannot repair the application, choose a different application port, or make the Rio process start. Conversely, if Rio works locally but the public address does not, the next checks belong to the Localtonet client, tunnel state, selected device, relay selection, and local target.
This tutorial is aimed at development, testing, controlled demonstrations, and remote access to a Rio application that you operate. The available Rio evidence documents local and web-capable applications, installation from PyPI, project scaffolding, and startup. It does not establish a production deployment procedure, a fixed production server topology, or a fixed default network address. We therefore do not present the development command as a production deployment recommendation.
Rio's documented overview does not establish one hostname, port, URL, or network binding that is valid for every installation. Do not copy an assumed port from another tutorial. Start your own application and use the exact local address reported by that running process.
Prerequisites and decisions to make first
You need a working Python installation with access to pip, a terminal or command prompt, and a browser for local verification. You also need permission to install Python packages and create project files on the machine. For the remote-access portion, install and run the Localtonet client on the same machine as Rio or on another device that can reach Rio's local address.
The supplied Rio evidence does not state a supported Python version range. Because that information can change between Rio releases, this guide does not invent a minimum version. Before choosing a Python interpreter for a long-lived project, check the current package metadata or Rio documentation for the release you intend to install. If pip rejects the package because of a Python compatibility requirement, use a supported interpreter rather than forcing an incompatible installation.
Choose whether to use a virtual environment
A Python virtual environment is not a special Rio requirement, but it is a useful way to keep the project's packages separate from globally installed software. Create it before installing rio-ui. The command used to invoke Python can vary between systems, so substitute the Python launcher that belongs to the interpreter you intend to use.
python -m venv .venvOn POSIX-style shells, the conventional activation command is:
source .venv/bin/activateIn Windows Command Prompt, the conventional activation command is:
.venv\Scripts\activate.batIn Windows PowerShell, the conventional activation command is:
.venv\Scripts\Activate.ps1
Activation changes which Python and package executables the current shell uses. If you open a new terminal later, activate the environment again before running the Rio command. Keep the same environment active for installation, project creation, and startup so that the rio executable and installed package remain aligned.
Plan where the Localtonet client will run
The simplest arrangement is to run Rio and the Localtonet client on the same device. In that arrangement, a loopback address reported by Rio can normally be reached by the client on that same machine. If the Localtonet client runs on another device, that device must be able to reach the Rio service over the local network. Whether Rio listens on a LAN-reachable interface is controlled by Rio's runtime configuration, and the supplied project evidence does not document the relevant binding option.
If Rio and the Localtonet client run on different devices, consult the current Rio documentation for its supported host or interface configuration. Do not invent a command-line flag or assume that a loopback-only service is available across the LAN. Running both processes on the same machine avoids that additional requirement.
Collect the information needed for the tunnel
You do not need a public IP address, router administration access, or inbound port forwarding. You will need the local hostname or IP address and port shown by the Rio process, a Localtonet device authentication token, and a currently available relay server selection from our dashboard. Authentication tokens are device-specific and should be handled as secrets. Relay server codes and regional availability must be read from the current dashboard instead of copied from an article.
Install Rio and create a starter project
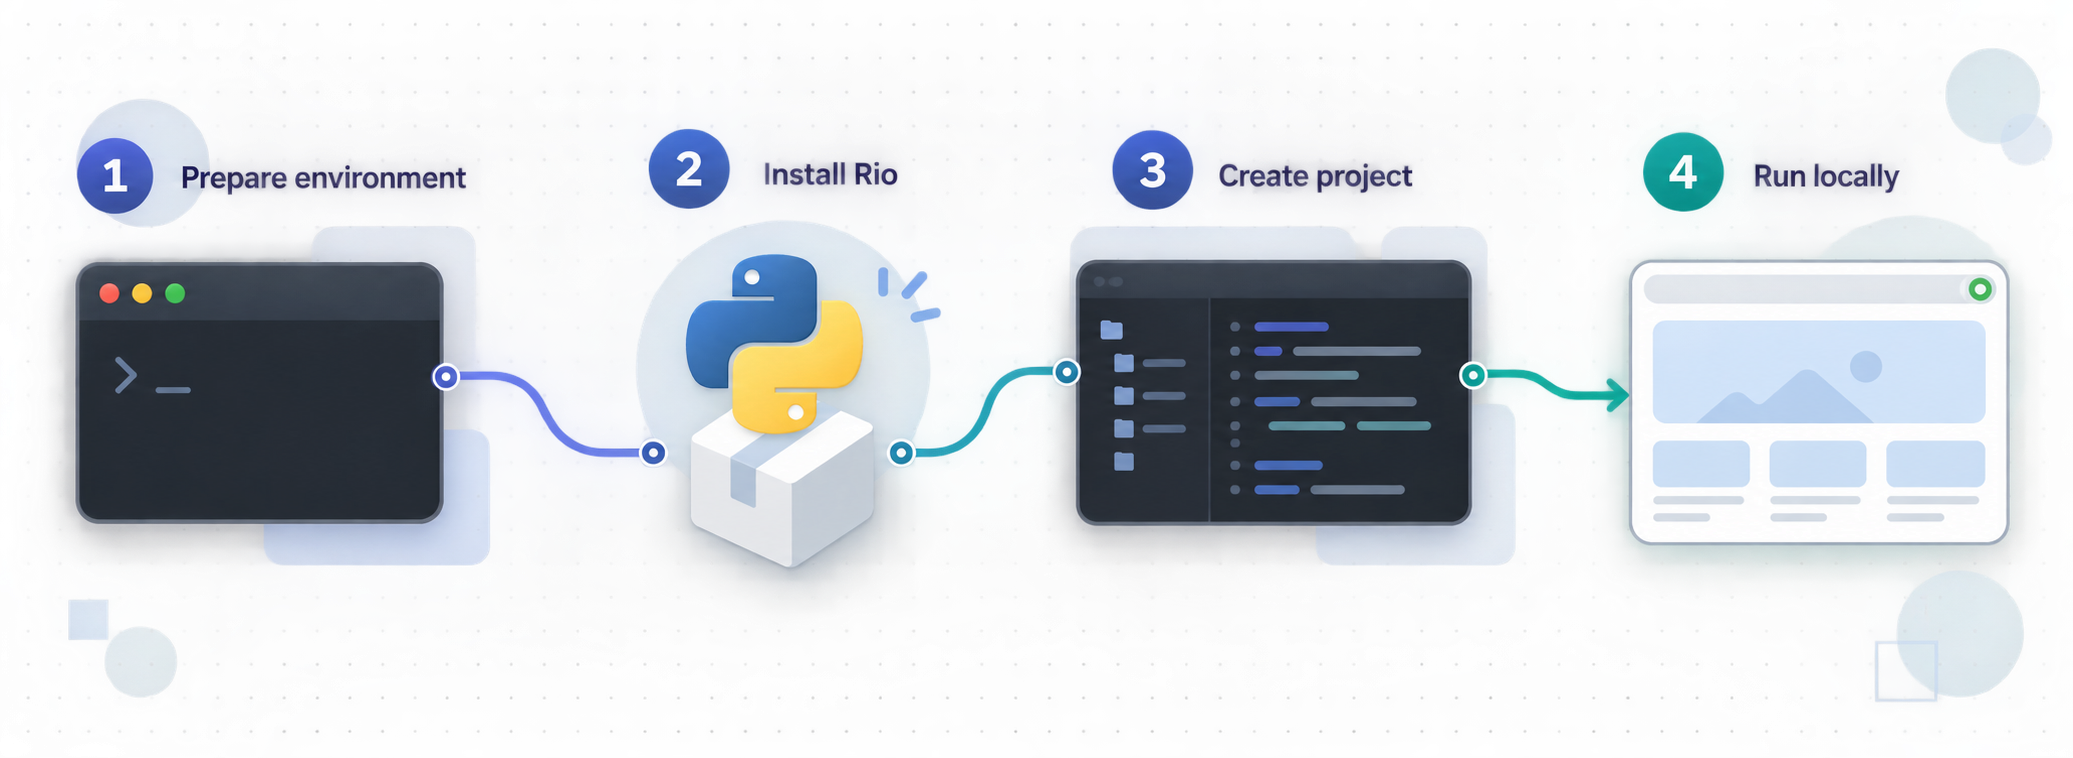
Rio is distributed through PyPI under the package name rio-ui. Its command-line utility uses the rio command. The official getting-started sequence installs the package, creates a project, enters the new project directory, and runs it.
Install the Rio package
Open a terminal in the environment you want to use and install the published rio-ui package from PyPI.
Create a project with the Rio command-line utility
Run rio new for the interactive project creator, or use the documented Tic-Tac-Toe website template command shown below to create a concrete starter project.
Enter the generated project directory
Change into the directory created by Rio. Commands that operate on the project should be run from the appropriate generated project directory.
Start the Rio application
Run rio run and keep the terminal open. Read the startup output and record the exact local URL, including its hostname and port.
Install from PyPI
pip install rio-uiIf you are updating an existing installation and intentionally want the latest available package, Rio's release instructions also document:
pip install --upgrade rio-uiUpgrading can change project behavior, dependencies, or APIs. For an existing application, review the relevant Rio release information and test the application locally before making it remotely accessible again.
Create a project interactively
Rio includes an interactive project creation command:
rio newFollow the prompts presented by the installed Rio version. The choices can evolve with the framework, so this guide does not claim that every release presents the same list of templates or prompts.
Create the documented Tic-Tac-Toe website example
If you prefer a repeatable command rather than the interactive creator, Rio documents a website project based on its Tic-Tac-Toe template:
rio new my-project --type website --template "Tic-Tac-Toe"
cd my-project
rio run
Keep rio run active while testing. Stopping that process removes the local application target, even if the Localtonet client and tunnel remain connected.
Install the PyPI package as rio-ui, then invoke the project utility as rio. If the shell reports that rio is unavailable after installation, first confirm that you are using the same environment in which the package was installed.
Build and understand the Rio application
The generated template is already a working Rio application, so creating it and running it satisfies the basic build objective. It also gives you a project structure selected by the current Rio release rather than relying on file paths copied from an older tutorial. Explore the generated files before editing them, and keep changes small enough that you can run the project after each meaningful update.
Rio's programming model centers on components. A custom component subclasses rio.Component and implements a build method that returns the component tree to display. State can be represented as component attributes, and event handlers update that state. Rio then updates the interface based on the component's current state.
The following standalone example demonstrates that model using the documented button, text, column, application, and browser startup APIs. Save it as a Python file in a separate experiment if you want to understand the component pattern without first exploring a generated template.
import rio

class ButtonClicker(rio.Component):
    clicks: int = 0

    def _on_press(self) -> None:
        self.clicks += 1

    def build(self) -> rio.Component:
        return rio.Column(
            rio.Button(
                "Click me",
                on_press=self._on_press,
            ),
            rio.Text(
                f"You clicked the button {self.clicks} time(s)"
            ),
        )

app = rio.App(build=ButtonClicker)
app.run_in_browser()
Run a standalone Python file with the Python interpreter from the same environment where rio-ui is installed:
python app.py
The call to run_in_browser() is Rio's documented browser-oriented startup method. Rio also documents run_in_window() for a local application window, but that is not the path to use for this HTTP tunnel workflow. A Localtonet HTTP tunnel needs an HTTP service with a reachable local host and port, so the browser-based form is the relevant target.
| Rio workflow | Best use in this guide | How it starts | Remote-access relevance |
|---|---|---|---|
| Generated website project | Starting a structured project from a built-in template | rio run from the project directory |
Use the local web address printed by the process |
| Interactive project creator | Selecting from the choices offered by the installed Rio release | rio new, then rio run |
Suitable once the generated website works locally |
| Standalone component example | Learning Rio's component, state, and event model | Run the Python file containing app.run_in_browser() |
Suitable when its runtime exposes a local browser endpoint |
| Local window mode | Running an app in a local application window | app.run_in_window() |
Not the documented HTTP-target path used in this tutorial |
Do not mix startup styles accidentally. If you use a generated project, follow that project's generated entry structure and start it with rio run. If you use a standalone script containing run_in_browser(), run that script with Python. In either case, remote access begins only after a browser-accessible local endpoint is running and verified.
Verify the Rio app locally before tunneling it
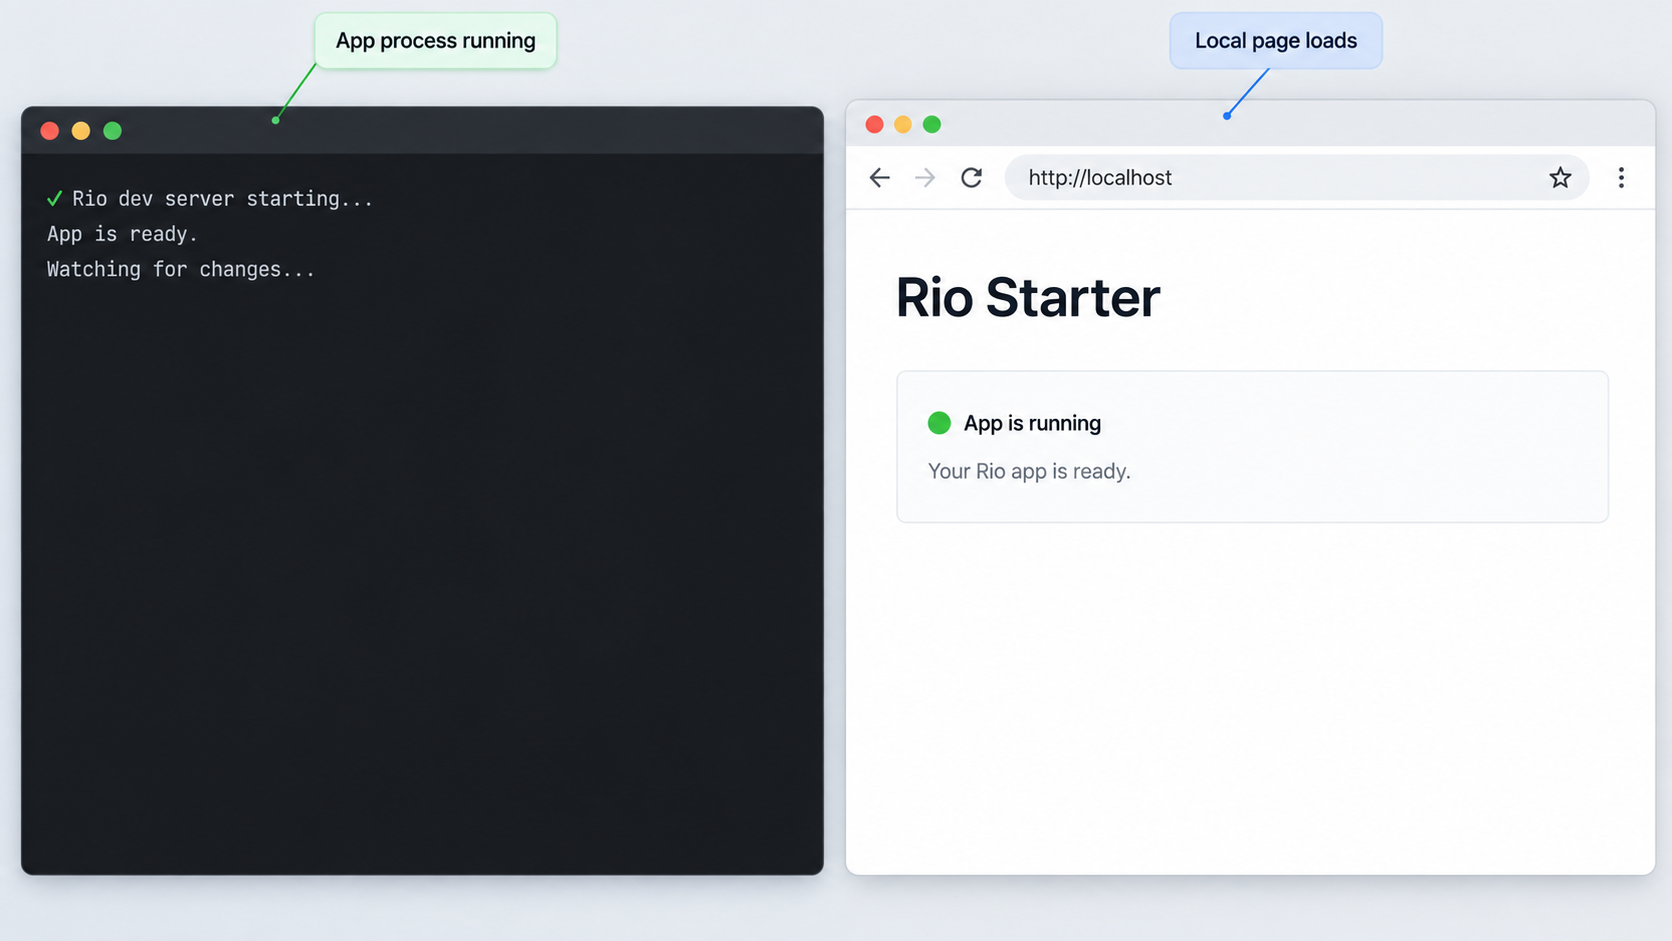
Local verification establishes that Rio is installed, the selected environment is active, the project can be loaded, and the application is listening. It also reveals the target address that the HTTP tunnel needs.
Start the intended application
From the generated project directory, run rio run. For a standalone example, run the Python file containing app.run_in_browser().
Read the runtime output
Record the exact hostname or IP address and port reported by your installed Rio version. Do not substitute a commonly used development port.
Open the local address
Use a browser on the Rio host to open that exact address. Confirm that the initial page renders without relying on a public tunnel.
Exercise an interactive action
For the Tic-Tac-Toe template, interact with the game. For the standalone counter, press the button and confirm that the displayed count changes.
Keep the process running
Leave the successful Rio process active while configuring and testing Localtonet. If the process exits, resolve that failure locally before continuing.
Verification should cover behavior, not just the presence of a page. A static error page, incomplete asset load, or application that fails on its first interaction is not a successful result. Watch the Rio terminal while testing because server-side exceptions may appear there even when the browser shows only a generic failure.
Also check that the address belongs to the process you just started. A different program can already occupy a port, an old Rio process can remain active, or a bookmarked URL can point to a previous run. The runtime output and terminal process should agree with the browser session you are testing.
A tunnel forwards traffic to a local target. It does not install Rio, start the app, resolve Python import errors, select a valid project directory, or repair application code. Get the local page and its interactive behavior working first.
Add remote access with a Localtonet HTTP tunnel
Once the Rio application works locally, an HTTP tunnel is the appropriate Localtonet family for its browser endpoint. Our client establishes an outbound connection to a Localtonet relay, so the workflow does not require an inbound router rule, a public IP address, firewall changes, or VPN setup. The tunnel points to the local IP address and port reported by Rio.
HTTP tunnels can use a Random Sub Domain, Custom Sub Domain, or Custom Domain process type. Each serves the target content at a public HTTPS address. Availability can depend on the current product configuration or subscription, so use the options shown in your dashboard. A random subdomain avoids adding unverified DNS instructions to the initial test and is a practical choice when it is available.
Install and run the Localtonet client
Run our client on the Rio machine or on another device that can reach Rio's local service. Keep the client connected for as long as remote access is required.
Authenticate or select the client device
Use the device-specific authentication token associated with the client that will carry the tunnel. Do not paste the token into application code, screenshots, logs, or a public repository.
Select an available relay server
Choose from the server or region values currently available in the dashboard. Server codes and availability can change, so this article does not hardcode one.
Create an HTTP tunnel for the Rio target
Select the desired HTTP process type and enter the local IP address and port from Rio's runtime output. The target must be reachable from the selected Localtonet client device.
Start the tunnel
Creating the configuration does not make it active. Press the Start button and confirm that the selected device remains connected and the tunnel is running.
Test the assigned public URL
Open the public HTTPS address from a separate browser or device. Repeat the same interactive action used during local verification and watch the Rio terminal for requests or errors.
For the current dashboard workflow, consult our Localtonet HTTP tunnel documentation. The documentation is especially important if you select a custom domain, because exact DNS requirements must be checked against the current product behavior rather than inferred from a generic tunneling guide.
| HTTP process type | Public address approach | Typical decision | Important limitation |
|---|---|---|---|
| Random Sub Domain | Uses a generated public HTTPS address | Useful for an initial remote test or temporary demonstration | Use the exact address assigned to the running tunnel |
| Custom Sub Domain | Uses a selected subdomain where supported | Useful when a recognizable subdomain is available | Availability must be confirmed in the current dashboard |
| Custom Domain | Uses a domain controlled by the operator | Useful when access needs a domain you manage | Follow current Localtonet DNS instructions instead of guessing records |
After creating the HTTP tunnel, start it explicitly. Public access depends on three active elements: the Rio application, the selected Localtonet client device, and the tunnel itself. The public endpoint is available only while the client is connected and the tunnel is running.
Secure the remotely accessible Rio endpoint
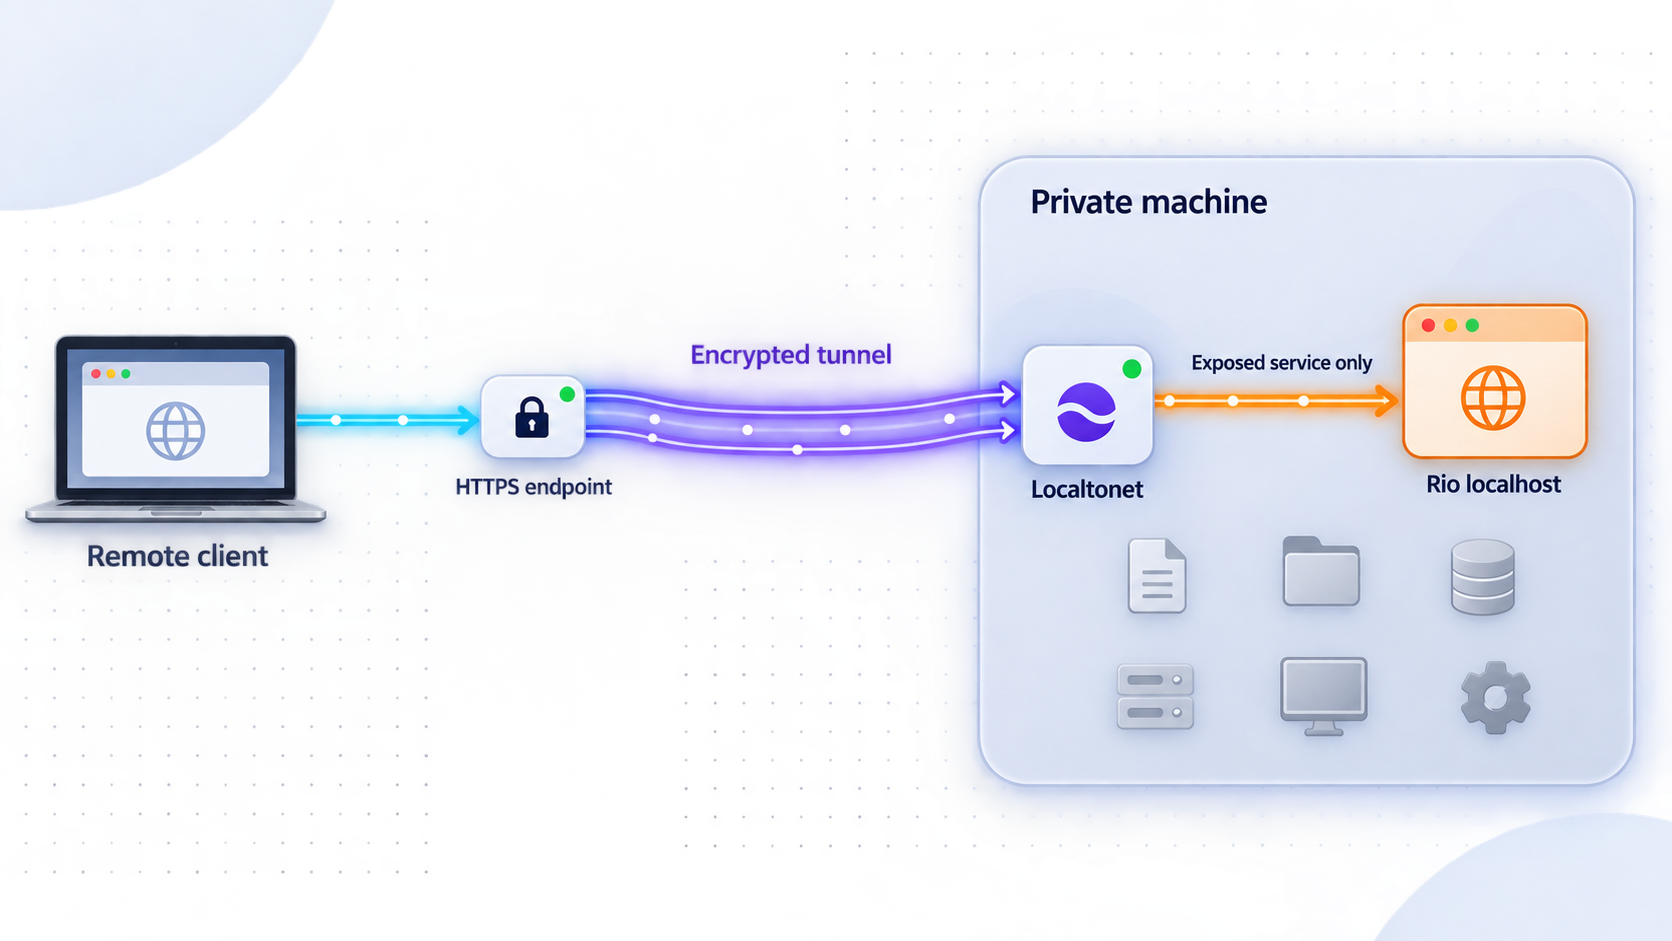
A working public URL changes the audience that can send requests to the application. A service that was previously reachable only on the local machine can now receive internet traffic through the tunnel. Treat that as an intentional publication decision, even if the URL is being used only for a short demonstration.
A public HTTPS address protects the browser-facing transport represented by that address, but HTTPS alone does not decide who is allowed to use the Rio application. Application authentication, authorization, session handling, input validation, and access policy remain separate responsibilities. Do not assume that a hard-to-guess URL is an access-control system.
The available Rio evidence does not define a production deployment procedure or establish that rio run is appropriate for an internet-facing production workload. This guide uses it for installation, development verification, and controlled remote access. Evaluate Rio's current production guidance, application security, persistence, process supervision, capacity, and recovery requirements before treating the workflow as a production service.
Review everything the app can do through the public route. An interface that writes files, runs jobs, displays internal records, invokes local tools, or changes system state needs stricter controls than a read-only demonstration. Use dedicated test data where possible, and avoid exposing unrelated administrative functions.
The Localtonet client needs network reachability to the Rio target, but that does not mean Rio should be opened to every interface without a reason. If both processes run on one machine, a locally reachable target keeps the architecture simpler. If they run on separate devices, restrict local network exposure according to your environment's policy and use only Rio configuration documented for your installed release.
Operate and update the workflow safely
A remote Rio session involves multiple processes with different lifecycles. Rio serves the application. The Localtonet client maintains its outbound relay connection. The HTTP tunnel maps its public address to the configured local target. Keep these roles distinct during startup, shutdown, maintenance, and diagnosis.
Recommended startup order
Start Rio first and verify the local URL. Next, start or confirm the Localtonet client. Then start the configured tunnel and test its public address. This order prevents a tunnel test from hiding a basic application startup failure.
Recommended shutdown order
When the remote session ends, stop the tunnel so the public route is no longer available. You can then stop Rio and, if the client is not needed for another tunnel, close the client. Delete the tunnel rather than merely stopping it when you do not intend to reuse the configuration.
Changing the Rio address or port
If Rio reports a different port after a restart, update the tunnel's local target before testing again. Never assume that an address from an earlier run remains valid. A public URL can remain assigned while its local target is unavailable, so check both sides independently.
Updating Rio
Activate the project's environment and use Rio's documented upgrade command when you intentionally want a newer package:
pip install --upgrade rio-uiAfter an update, start the application locally and repeat the complete local verification. Check component behavior, project startup, and the runtime URL before restarting public access. Rio 0.12, for example, changed component rebuild behavior and introduced experimental reactive collection types, showing why an update should be tested rather than treated as a transparent networking change.
Reproducing the project on another machine
Install an appropriate Python version, create or activate the intended environment, install the Rio dependencies required by the project, and run the project locally before configuring Localtonet. Do not copy a device authentication token from one host and assume it represents the new host. Tokens are device-specific, and the tunnel must use the client device that can actually reach the recreated Rio service.
Observing failures
Keep the Rio terminal visible during remote testing. When a public request reaches the local service but triggers an application exception, the Rio process is the likely place to obtain diagnostic information. If the Rio terminal shows no corresponding activity, investigate the tunnel state, selected client, and target address first.
Troubleshooting Rio installation and remote access
Troubleshoot from the inside outward. First confirm the Python environment and Rio installation. Then confirm project startup and local browser behavior. Only after those checks succeed should you investigate the Localtonet client and public tunnel.
| Symptom | Likely area | What to check |
|---|---|---|
pip cannot install rio-ui |
Python or package environment | Confirm that pip belongs to the intended Python installation and that the interpreter satisfies Rio's current package requirements. |
The rio command is unavailable |
Environment activation or executable path | Activate the environment where rio-ui was installed and reopen the terminal if its executable search path has not refreshed. |
rio run does not find the project |
Working directory | Change into the directory generated by rio new before running the project command. |
| The browser cannot open the Rio address locally | Application startup | Read the Rio terminal, verify that the process remains running, and use the exact address it reports rather than an assumed port. |
| The page loads but interaction fails | Rio application code | Watch the Rio terminal while reproducing the action and resolve the component or event-handler failure before tunneling. |
| The Localtonet tunnel exists but has no public access | Tunnel lifecycle | Confirm that the selected client is connected and that the tunnel was explicitly started after creation. |
| The public URL returns an error while local access works | Local target configuration | Compare the tunnel's IP address and port with the current Rio runtime output. Check whether the selected client device can reach that target. |
| Rio works on its host but not from a separate client device | Network binding or LAN reachability | Rio may be reachable only through the host's loopback interface. Use the current Rio documentation to configure a supported reachable binding, or run the Localtonet client on the Rio host. |
| The tunnel worked before Rio restarted | Changed local endpoint | Read the new runtime output and verify that the local port still matches the configured tunnel target. |
| A custom domain does not resolve correctly | DNS configuration | Compare the domain setup with current Localtonet documentation. Do not substitute generic DNS records from another tunneling service. |
| Remote access stops unexpectedly | One of the three required runtime elements | Confirm that Rio is running, the Localtonet client is connected, and the tunnel remains started. |
Isolate the failing layer
If the Rio URL fails on the same machine, stop and debug Rio. If it succeeds on the Rio machine but fails from a separate Localtonet client device, investigate binding and local network reachability. If the selected client can reach Rio but the public URL fails, investigate the tunnel configuration and state.
Avoid changing several variables at once
Do not simultaneously upgrade Rio, change the project, move the Localtonet client, select another relay, and alter the tunnel target. Make one controlled change, retest locally, and then retest publicly. This preserves a useful distinction between application failures and connectivity failures.
Recreate only when the configuration is understood
Deleting and recreating a tunnel can help when you intentionally want a new configuration, but it should not replace diagnosis. Record the working Rio target, selected device, process type, and tunnel state first. Never record or publish the device token itself.
Frequently asked questions
What command installs Rio?
Rio is available from PyPI under the package name rio-ui. Install it with pip install rio-ui. To intentionally update an existing installation, use the documented pip install --upgrade rio-ui command and test the project locally afterward.
How do I create and run a Rio project?
Run rio new to use the interactive creator. Rio also documents rio new my-project --type website --template "Tic-Tac-Toe" as a complete template example. Enter the generated directory with cd my-project, then start it with rio run.
Which Rio port should I enter in Localtonet?
Use the port reported by your own running Rio process. The evidence available for this tutorial does not establish one fixed hostname or port for every Rio release and configuration, so copying an assumed default can point the tunnel at the wrong service.
Does the Localtonet client need to run on the same machine as Rio?
Not necessarily. It can run on another device that can reach the Rio service. Running both on the same machine is simpler when Rio listens only on a loopback address. For a separate device, configure Rio using its current documented network-binding options and confirm local network reachability before creating the tunnel.
Does creating an HTTP tunnel start it automatically?
No. Creating a tunnel saves its configuration, but the tunnel must be started with the Start button. It remains available only while the selected Localtonet client is connected and the tunnel is running.
Do I need router port forwarding or a public IP address?
No. Our client establishes an outbound connection to a Localtonet relay server. This workflow does not require inbound router port forwarding, firewall changes, VPN setup, or a public IP address.
Is the public Rio application automatically private?
No. A public URL should be treated as internet-accessible. HTTPS does not replace application authentication or authorization. Add appropriate access controls for private data and privileged actions, and stop or delete the tunnel when remote access is no longer required.
Is this a documented production deployment for Rio?
No. This guide documents installation, project creation, local verification, and controlled remote access to a running browser-based Rio application. The supplied evidence does not establish Rio's production deployment requirements, so production operators should evaluate the framework's current deployment guidance, security model, process supervision, persistence, scaling, and recovery needs separately.
Make your verified Rio app remotely accessible
Start with a Rio application that works locally, run our client on a device that can reach it, and create an HTTP tunnel using the exact target reported by Rio.
Get Started Free →

