

Reproduce the official jforgame demo locally, verify its TCP listener, and publish that listener for remote testing
This walkthrough uses the official jforgame v4.1.0 release at commit f9a8313, rather than the moving default branch. It follows the project’s documented sequence: import the root Maven project, prepare game_data_001 and game_user_001, set the jforgame-demo working directory, start ServerStartup, and then run ClientStartup. It also provides deterministic repository checks for details that the published README and release evidence do not expose, including the effective Java compiler setting, SQL resource paths, database configuration, server port, bind scope, and client destination. After the supplied client works locally, you can expose the verified raw TCP listener with Localtonet.
📋 What's in this guide
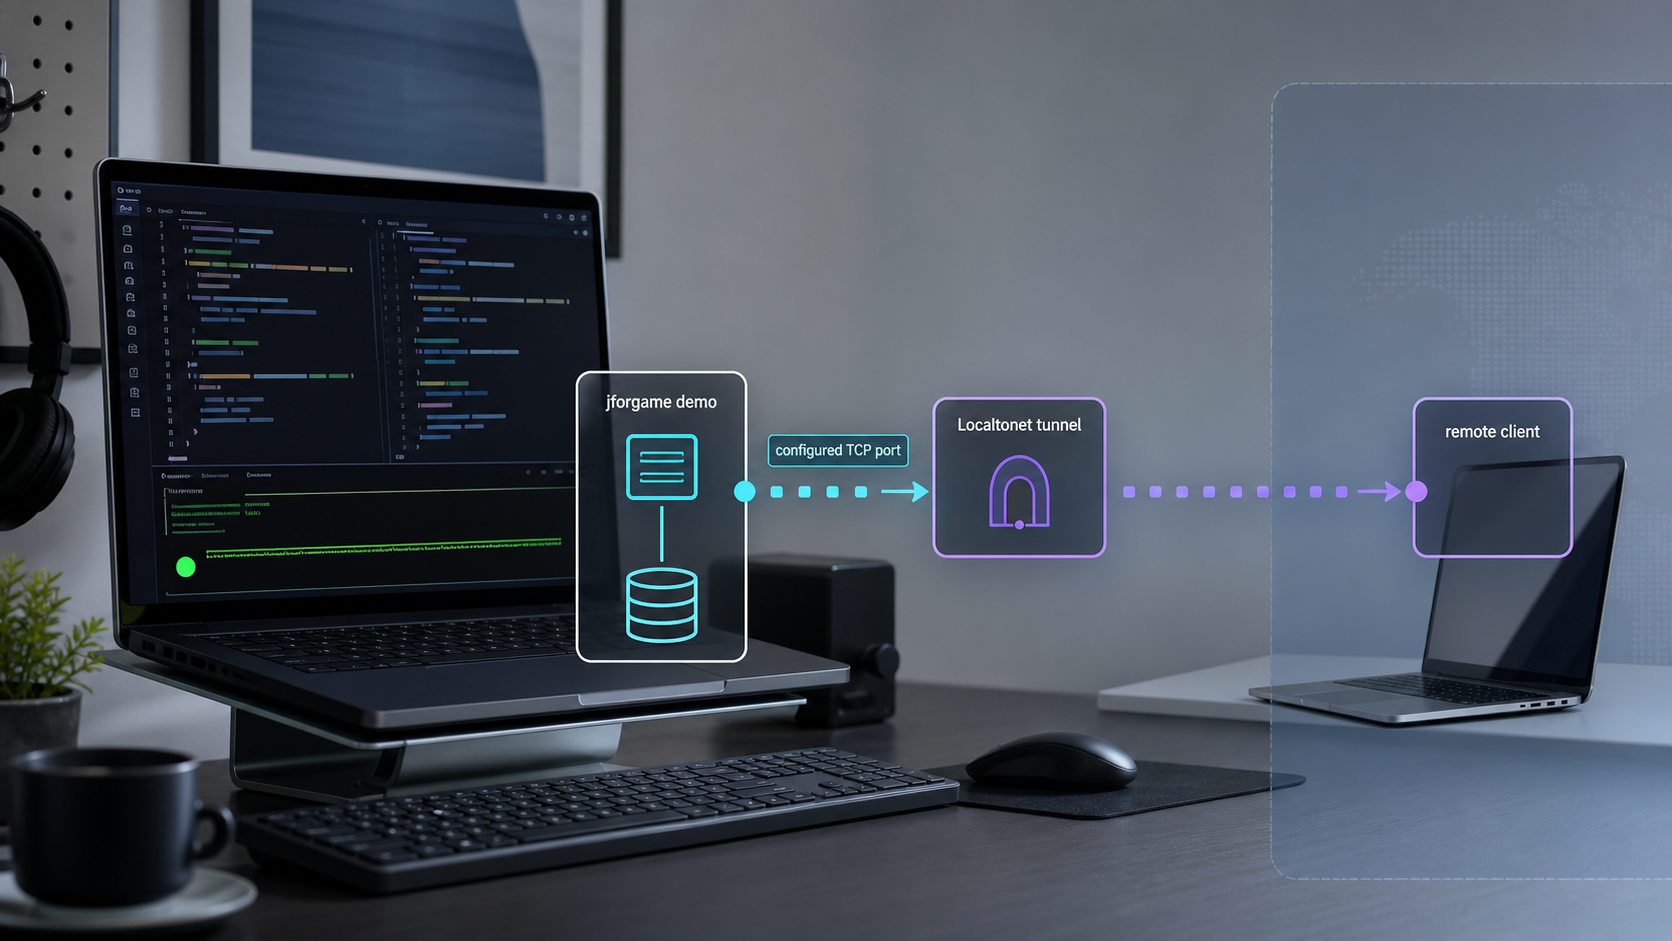
Scope, source, and pinned jforgame revision
jforgame is a component-based Java framework for mobile game servers and other socket applications. Its modules cover socket servers and clients, message codecs, routing, session management, threading, persistence, configuration data, runtime monitoring, and hot replacement. The jforgame-demo module combines framework components with sample game behavior, making it the appropriate starting point for the repository’s documented quick-start procedure.
This article pins the walkthrough to the official kingston-csj/jforgame repository, release v4.1.0, commit f9a8313. The release was published on August 31 and is identified by GitHub as the latest release in the supplied evidence. Pinning the source matters because the default master branch can change after this article is published.
git clone https://github.com/kingston-csj/jforgame
cd jforgame
git checkout --detach f9a8313
git rev-parse HEAD
git describe --tags --exact-match
The first verification command must print a commit identifier beginning with f9a8313. The tag command should identify v4.1.0. Detached HEAD mode is intentional for this walkthrough because it prevents an accidental branch pull from silently replacing the tested revision. Create a separate branch if you intend to modify the demo:
git switch -c local-demo-v4.1.0
The supplied repository pages establish the release commit, root Maven import, two database names, SQL files under test/resources, working directory, and startup classes. They do not expose the contents of the pinned revision’s Maven files, SQL tree, active database configuration files, ServerConfig, or ClientStartup. Consequently, this article does not invent a JDK number, database engine, SQL pathname, database credential file, port, bind address, or client configuration filename. The inspection commands below resolve those values directly from the pinned checkout and turn them into explicit setup inputs before you run or expose the demo.
This distinction is important. A tutorial that labels an unverified port or Java version as a default can send traffic to the wrong service or leave readers debugging a build that was never supported by the selected source. Record the output of the inspection stage with your local setup notes. Once recorded, those values are the concrete configuration for your copy of v4.1.0.
Prerequisites and required setup information
Prepare Git, a JDK, an IDE with Maven support, and a database environment. You also need administrative access sufficient to create the two demo databases and import their SQL resources. The database account used by the running application should be separate from an unrestricted administrative account whenever the selected engine supports that arrangement.
| Requirement | Purpose | How to establish it safely |
|---|---|---|
| Git | Clone and pin the official source | Check out commit f9a8313 and verify the resulting commit identifier. |
| JDK | Compile and run the Maven modules | Read the root and module Maven compiler properties before selecting the IDE project SDK. |
| Maven-capable IDE | Import the multi-module build and launch the documented classes | Import the repository root pom.xml, not only the demo folder. |
| Database service | Host the two required demo databases | Identify the JDBC driver and active connection configuration in the pinned checkout before installing or choosing an engine. |
| SQL resources | Create the expected schema and initial records | List the exact tracked paths containing game_data_001.sql and game_user_001.sql. |
| Localtonet client | Publish the verified TCP listener later | Run it on the server host or another device that can reach the local target. |
Do not choose the JDK from the release number
The release notes mention a fix related to hot replacement on JDK 17, but that statement is not equivalent to a declaration that every module in the complete demo has a Java 17 compiler target. The build metadata remains authoritative. Inspect it before Maven import so your IDE and Maven process use a compatible JDK.
Confirm which Java executable the terminal and Maven currently use:
java -version
mvn -version
The Maven output includes the Java runtime Maven is using. It can differ from the JDK configured for an IDE run configuration. After resolving the project’s compiler settings, align the IDE project SDK, Maven importer JDK, and run configuration JRE with those settings.
Do not infer the database engine from database names
The official quick start names game_data_001 and game_user_001, but a database name does not identify an engine. Determine the engine from the JDBC driver, JDBC URL, Maven dependencies, SQL syntax, and active application configuration in the pinned source. Do not install MySQL, MariaDB, PostgreSQL, or another engine merely because an older fork or unrelated tutorial mentions it.
Resolve the pinned revision’s Java, database, server, and client settings
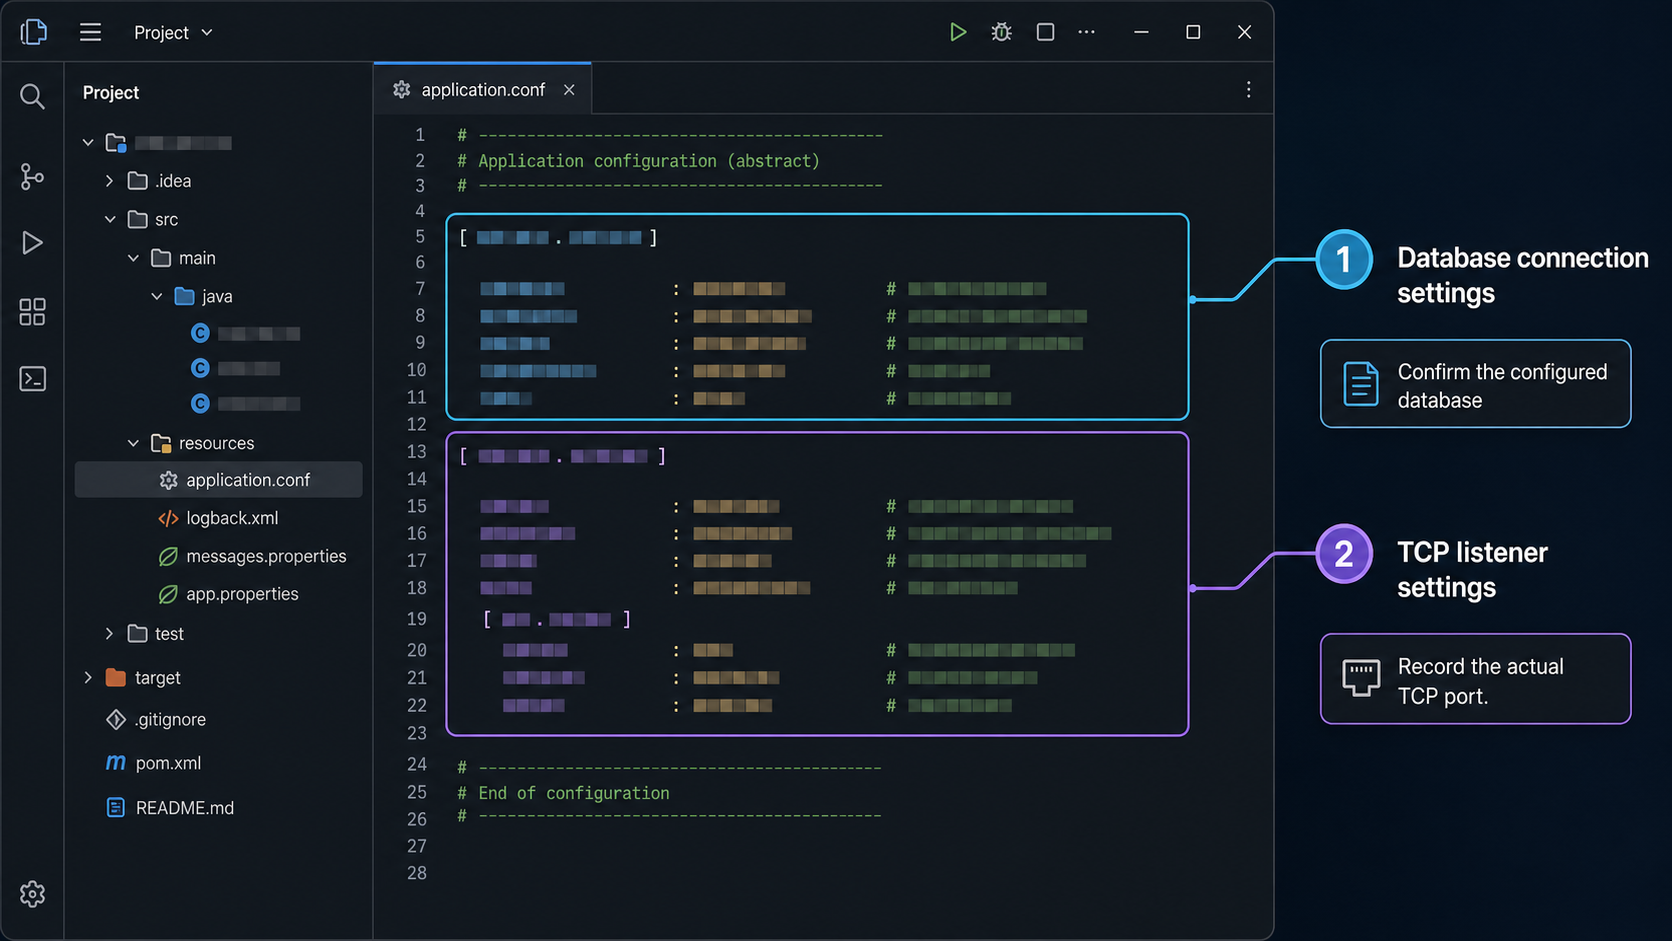
Run this inspection from the repository root after checking out f9a8313. The purpose is not to browse randomly. Each command answers one setup question and produces a path or value that you should record.
Identify the compiler target or release
git grep -n -E 'maven\.compiler\.(release|source|target)|<maven.compiler.release>|<maven.compiler.source>|<maven.compiler.target>|<release>|<source>|<target>' -- '*.xml'
Prioritize settings in the root pom.xml, inherited properties, and the Maven Compiler Plugin configuration applicable to jforgame-demo. A module-specific override takes precedence over a root default for that module. If this command finds no compiler declaration, the supplied evidence does not establish a supported JDK for the pinned revision. In that case, Maven’s actual build result and project maintainers’ guidance are necessary before claiming a supported version.
List the exact SQL resource paths
git ls-files | grep -E '(^|/)test/resources/.*/?game_(data|user)_001\.sql$|(^|/)test/resources/game_(data|user)_001\.sql$'On Windows PowerShell, use:
git ls-files | Select-String '(^|/)test/resources/.*/?game_(data|user)_001\.sql$|(^|/)test/resources/game_(data|user)_001\.sql$'
The command must identify one tracked SQL resource for each required database. Preserve the complete paths printed by Git. Import the game_data_001.sql resource into game_data_001 and game_user_001.sql into game_user_001. If either file is absent at commit f9a8313, stop and consult the official jforgame quick start or repository issues. Do not substitute SQL from another release.
Identify the database engine and active connection locations
git grep -n -E 'jdbc:|DataSource|datasource|driverClassName|driver-class-name|game_data_001|game_user_001' -- 'jforgame-demo/**' '*.xml' '*.properties' '*.yml' '*.yaml' '*.java'Read the results in this order:
- Find the connection definitions that reference
game_data_001andgame_user_001. - Record the exact configuration file paths.
- Identify the JDBC URL prefix and driver class, which establish the engine expected by that configuration.
- Check the startup code to confirm those files are loaded when the working directory is
jforgame-demo. - Replace only the environment-specific host, port, username, and password values needed for your database service.
A search result is not automatically active configuration. Follow the references from ServerStartup or its initialization path to determine which configuration is loaded. If several profiles exist, record which profile your run configuration activates. Keep credentials outside commits and screenshots.
Resolve the server port and binding behavior
The README’s server example proves that the port is supplied through ServerConfig.getInstance().getServerPort():
TcpSocketServerBuilder.newBuilder()
    .bindingPort(HostAndPort.valueOf(
        ServerConfig.getInstance().getServerPort()
    ))
    .setMessageFactory(GameMessageFactory.getInstance())
    .setMessageCodec(new StructMessageCodec())
    .setSocketIoDispatcher(
        new MessageIoDispatcher(ServerScanPaths.MESSAGE_PATH)
    )
    .build()
    .start();
Resolve the backing value and inspect the builder’s interpretation of it:
git grep -n -E 'class ServerConfig|getServerPort|setServerPort|serverPort|server\.port|bindingPort|HostAndPort' -- 'jforgame-demo/**' 'jforgame-socket-parent/**'
Record the configured value exactly as loaded at runtime. If it includes only a number, inspect HostAndPort.valueOf and the builder implementation to determine whether the server binds loopback, all interfaces, or another default. If it contains a host and port, record both. Runtime listener verification remains the final authority because configuration can be overridden or fail to load.
Resolve the supplied client’s destination setting
git grep -n -E 'class ClientStartup|ClientStartup|HostAndPort|connect\(|remoteAddress|serverHost|serverPort|getServerPort' -- 'jforgame-demo/**' 'jforgame-socket-parent/**'
Begin at the ClientStartup result and follow the client builder or connection call. Record the exact file, field, or configuration key that supplies the destination host and port. The local values must point to the address and port on which the server is listening. Later, remote testing changes those same two effective values to the Localtonet public host and public port.
Record the full commit identifier, compiler release or target, database engine, both SQL paths, active database configuration paths, effective server host and port, bind scope, client destination location, and working directory. This converts values extracted from the source into a reproducible installation record for your environment.
Install and run the official jforgame demo
The following five steps preserve the order in the official quick start. The repository documents an IDE-based startup procedure, so this tutorial does not invent Maven execution goals, packaged JAR names, or command-line classpaths.
Clone and pin the repository
Clone the official repository, enter it, and check out commit f9a8313. Verify the commit before making local changes. This keeps the Maven files, Java sources, and SQL resources on the same release.
Import the root Maven project
Open the pom.xml at the repository root in an IDE with Maven support. Allow the complete multi-module model and dependencies to load. Set the project SDK and Maven importer JDK according to the compiler configuration resolved from the pinned source.
Create and populate both databases
Install or select the database engine identified by the pinned JDBC configuration. Create game_data_001 and game_user_001. Import the exact tracked game_data_001.sql resource into the first database and the exact game_user_001.sql resource into the second. Review the database tool’s output for failed statements.
Configure and launch ServerStartup
Create an IDE application run configuration for ServerStartup. Set its working directory to the absolute path of the checked-out jforgame-demo directory. Use the resolved JDK and active database configuration, then start the server and keep its console visible.
Configure and launch ClientStartup
Create a run configuration for ClientStartup with the same absolute jforgame-demo working directory. Confirm that its effective destination is the locally verified server host and port. Start it only after the server remains active and the listener has been confirmed.
Why the working directory is required
Java resolves relative paths from the process working directory. The official quick start specifically directs developers importing all modules to use jforgame-demo as the working directory for both startup classes. Running from the repository root, an IDE output folder, or another module can cause existing configuration or resource files to appear missing.
In IntelliJ IDEA, open Run, Edit Configurations, select the application configuration, and set Working directory to the absolute jforgame-demo path. Other Maven-capable IDEs expose an equivalent process-directory field. Replace the README’s illustrative wildcard path with the real directory on your machine.
Observable local success criteria
The supplied repository pages do not publish one guaranteed success message, demo account, response payload, or exit code for v4.1.0. Use the following observable criteria instead:
- Maven imports the root project without unresolved internal modules.
ServerStartupremains running after initialization.- The server console does not report a fatal database connection, authentication, schema, resource-loading, or socket-bind error.
- The Java server process owns a listening TCP socket at the resolved port.
ClientStartupreaches that listener instead of reporting connection refusal or timeout.- The server observes the client connection and proceeds into its expected message-handling path without an immediate codec or routing failure.
These criteria distinguish build success, process startup, transport availability, and application-level behavior. A long-running Java process alone does not prove that database initialization or socket binding succeeded.
Verify the TCP listener on Windows, Linux, and macOS
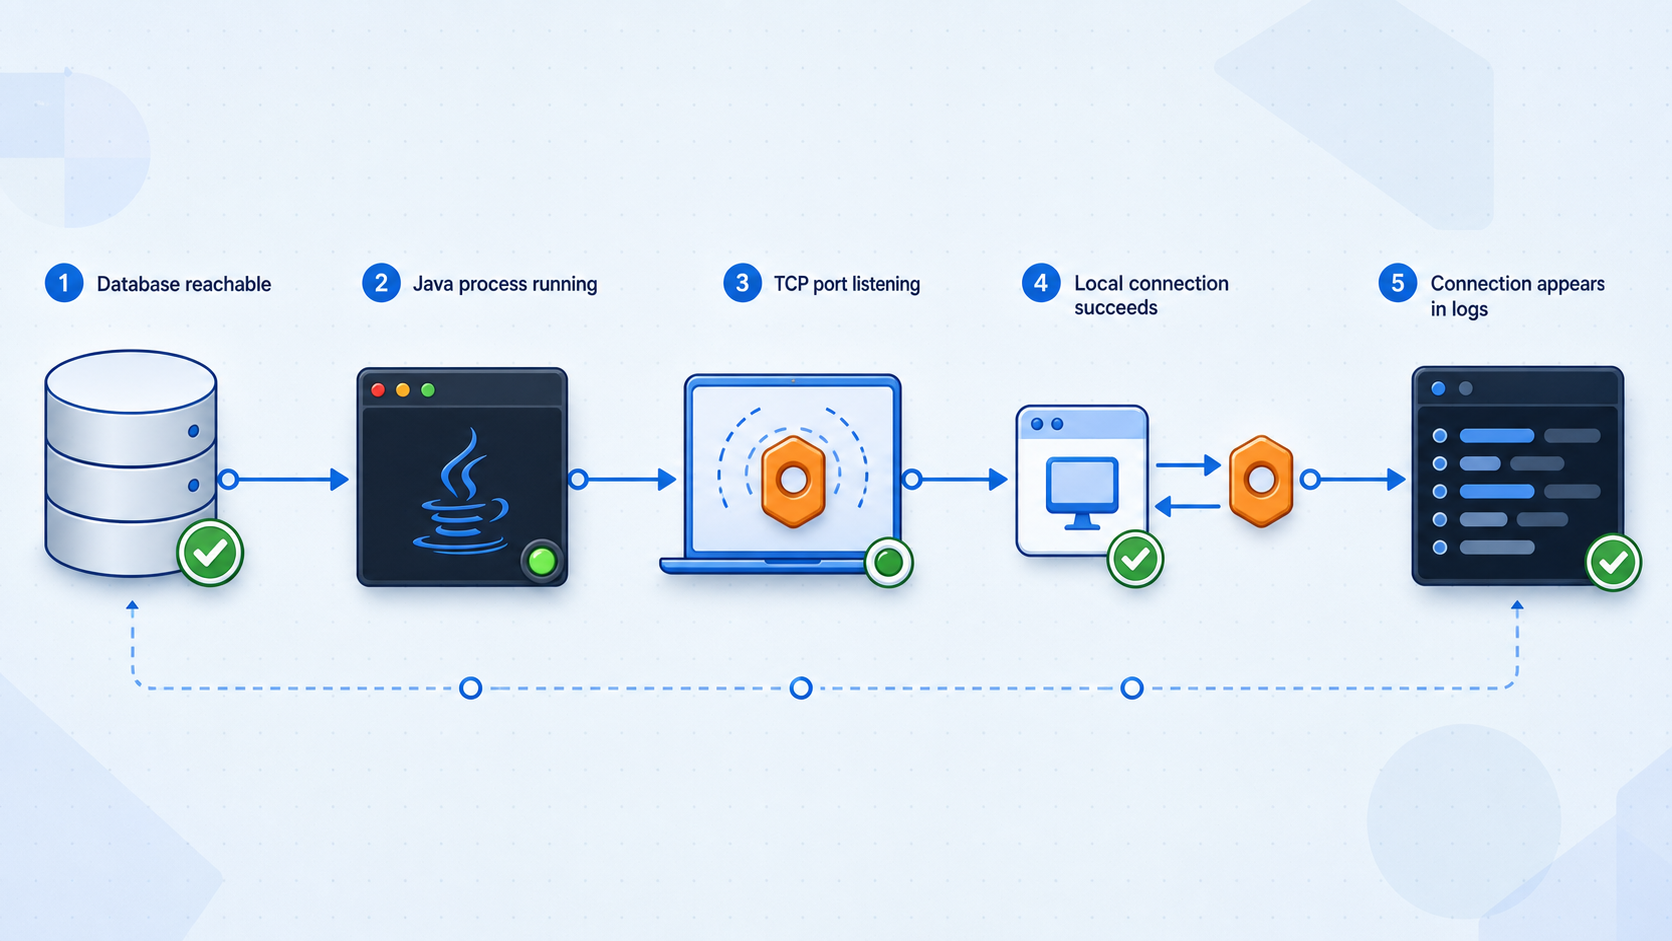
Replace PORT in the examples with the numeric port resolved from ServerConfig. These commands only inspect listeners. They do not send arbitrary game messages or expose credentials.
Windows PowerShell
$port = PORT
$listeners = Get-NetTCPConnection -State Listen -LocalPort $port
$listeners | Format-Table LocalAddress, LocalPort, OwningProcess
$listeners | ForEach-Object { Get-Process -Id $_.OwningProcess }
Confirm that a listening row exists, the local port matches, and the owning process is the Java process started by the IDE. 127.0.0.1 or ::1 indicates loopback-only availability. 0.0.0.0 or :: normally represents a wildcard listener, subject to operating-system and firewall behavior.
Linux
PORT=PORT
ss -ltnp | grep -E ":${PORT}[[:space:]]"
Run with appropriate local privileges if process details are hidden. Verify the local address, port, and Java process. A loopback listener can be used by a Localtonet client on the same machine, but it is not reachable from a different LAN device.
macOS
PORT=PORT
lsof -nP -iTCP:${PORT} -sTCP:LISTEN
Confirm that the command reports Java as the listener owner. The address column shows whether the service is limited to loopback, bound to a particular interface, or accepting on a wildcard address.
Exercise the actual protocol
A listener is necessary but not sufficient. Start ClientStartup against the local destination discovered in the pinned source and inspect both consoles. The supplied client is more meaningful than a generic port probe because it uses the project’s expected framing, codec, and message definitions.
A raw TCP socket is not an HTTP website. Entering the address in a browser does not validate the demo unless you have separately configured and verified a compatible WebSocket or HTTP endpoint. The documented builder example starts a TCP socket server, so use the supplied compatible client for this workflow.
Expose the verified jforgame listener with Localtonet
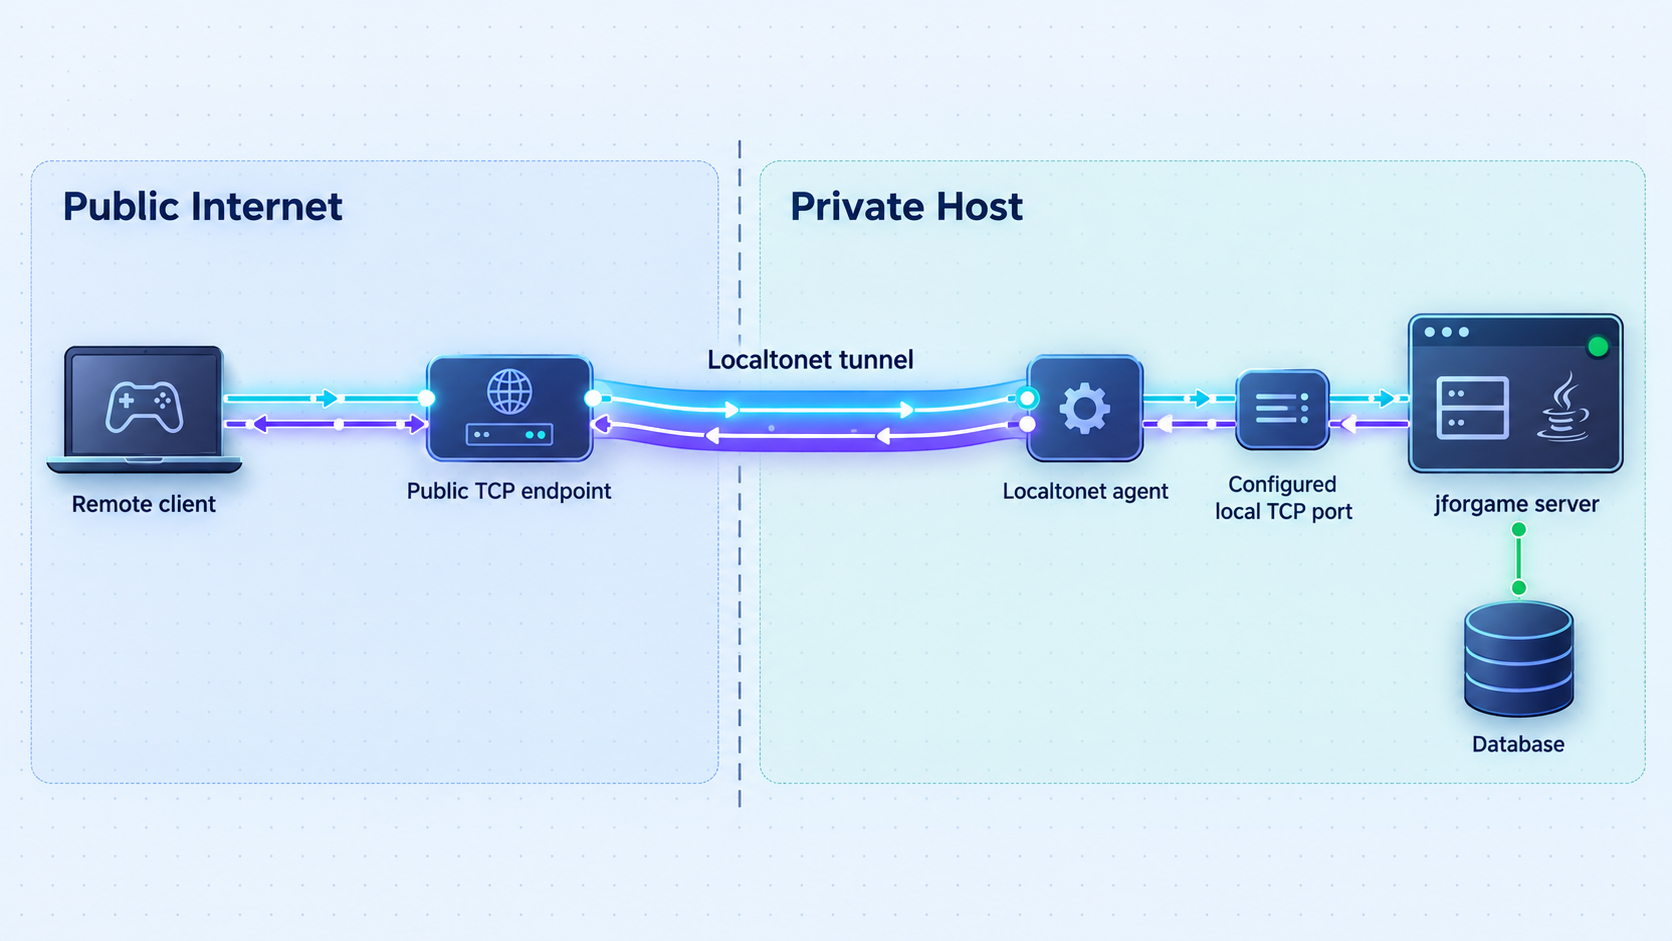
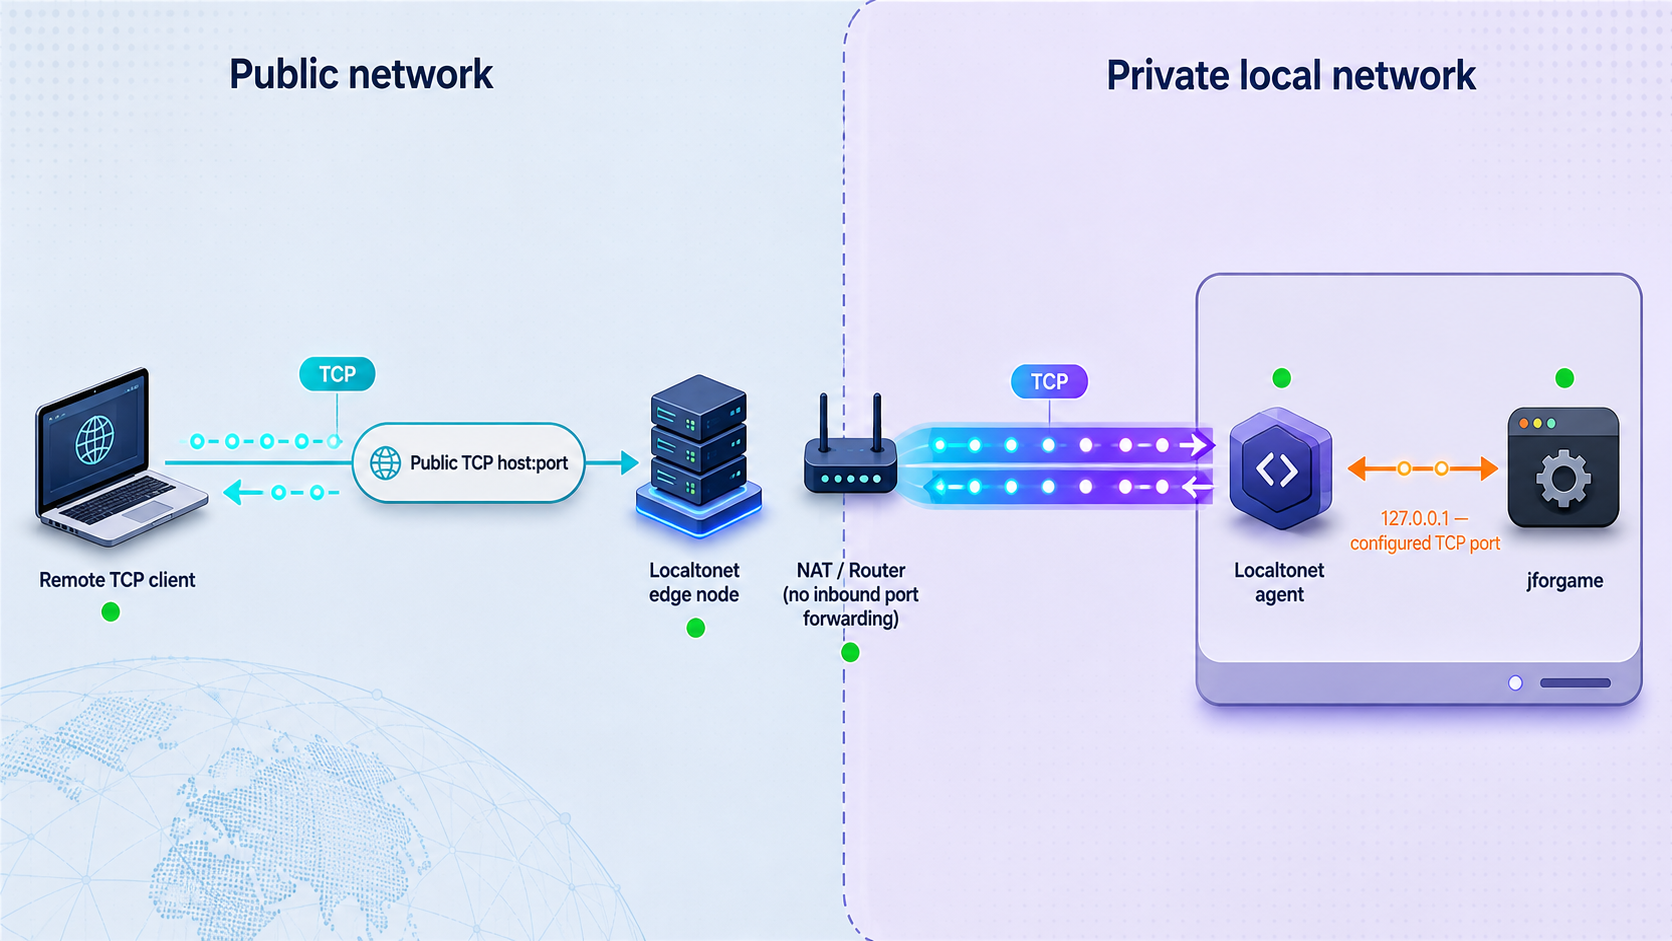
Localtonet exposes a service running on your machine without inbound router port forwarding, firewall changes, VPN setup, or a public IP address. Our client establishes an outbound connection to a Localtonet relay. For this demo, create a TCP tunnel because the verified server path uses TcpSocketServerBuilder.
Review the current Localtonet TCP tunnel documentation alongside the workflow below. Available relay servers, regions, and plan-specific options can change, so select current values from the dashboard rather than copying a server code from an old article.
Install and run the Localtonet client
Install our client on the jforgame host or another device that can reach the verified local address and port. Running both processes on the same machine is simplest for initial testing.
Authenticate or select the tunnel device
Select the device-specific authentication token belonging to the client that will run the tunnel. Keep the token secret and remove it from screenshots, logs, source files, issue reports, and client configuration.
Select an available relay server
Choose a currently available server or region in the Localtonet dashboard. Do not hardcode an example relay code because availability can vary.
Create a TCP tunnel to the verified local target
Select TCP and enter the IP address and port confirmed during listener verification. For a same-machine client, use an address on which jforgame is listening. For a separate Localtonet device, use the jforgame host’s reachable LAN address and confirm that the bind scope permits that path.
Start the tunnel and record the public endpoint
Creating the tunnel does not start it. Press Start, wait for it to run, and record the assigned public host and public port. The endpoint is available only while the selected Localtonet device is connected and the tunnel is running.
Point ClientStartup at the public host and port
Open the exact client destination source identified from ClientStartup during inspection. Replace the effective local host value with the Localtonet public host and replace the effective local port value with the assigned public port. Do not place the device token in the game client. Start the client from an external network and inspect both consoles.
Remote client reconfiguration checklist
The location of the client destination is revision-specific, but the effective change is always limited to the destination used by the connection call:
| Client value | Local verification | Remote verification |
|---|---|---|
| Destination host | The locally reachable server address used in the successful baseline | The public host assigned by the running Localtonet TCP tunnel |
| Destination port | The jforgame listening port resolved from ServerConfig |
The public port assigned by Localtonet, which can differ from the local port |
| Protocol and codec | The supplied jforgame client behavior | Unchanged, because Localtonet forwards TCP and does not translate the game protocol |
| Localtonet token | Not used by the game client | Still not used by the game client; it belongs only to the Localtonet device |
If the client code combines host and port into one string, replace both parts with the assigned public endpoint. If it stores them in separate fields, change both fields. If configuration is loaded from a resource, edit the active resource identified from the ClientStartup path, not an unused example file. Preserve the original local values so you can switch back for diagnosis.
A Localtonet TCP tunnel forwards connections to the configured target. It does not create jforgame accounts, authorize game actions, validate messages, or restrict what an authenticated player may do. Review the demo’s login, session, input-validation, and authorization behavior before sharing the endpoint with untrusted users. Expose only the game listener, never database or IDE debugging ports.
Operate the demo predictably and safely
Start each dependency only after the preceding layer is healthy. Bring up the database service, start jforgame, verify the local listener, run the supplied client locally, start the Localtonet client, and then start the TCP tunnel. Stop in reverse order so the public entry point disappears before the application or database becomes unavailable.
| Operation | Recommended sequence | Reason |
|---|---|---|
| Start remote testing | Database, server, listener check, local client, Localtonet client, tunnel, remote client | Each new layer depends on a verified lower layer. |
| Restart jforgame | Stop tunnel, restart server, verify locally, restart tunnel | New public connections are not sent to a partially initialized server. |
| Change the local port | Update server, verify listener, update local client, update tunnel target | Every component must agree on the effective destination. |
| Finish testing | Stop or delete tunnel, stop Localtonet client if appropriate, stop jforgame | The public endpoint is removed before the local process exits. |
Stop the tunnel whenever public access is unnecessary. Stopping retains its saved configuration, while deleting removes the tunnel configuration. In either case, remote availability also ends if the selected Localtonet device disconnects.
The original article included illustrative Maven dependencies with a literal latest version. They have been removed because that value does not create a reproducible application build. This tutorial runs the complete pinned source tree instead. If you later extract individual modules into another application, select concrete artifact versions verified against that application and commit those versions to source control.
Troubleshoot installation and remote connection failures
The Maven project does not import
Confirm that the IDE imported the repository root pom.xml. Opening only jforgame-demo as an unrelated project can leave sibling modules unresolved. Compare the Java runtime shown by mvn -version with the compiler configuration extracted from the pinned Maven files, then refresh the Maven model.
ServerStartup cannot find resources
Verify that the run configuration’s working directory is the absolute jforgame-demo directory in the pinned checkout. Apply the same directory to ClientStartup. Do not use the repository root, an IDE output directory, or the README’s wildcard notation literally.
The database connection fails
Separate connection refusal, authentication failure, and missing schema objects. Connection refusal points to the engine, host, port, or service state. Authentication failure points to credentials or account policy. Missing-table errors indicate that the application reached the database but the matching SQL resource was not imported successfully into the correct database.
The configured port is already in use
Use the platform-specific listener command to identify the owning process. Stop an obsolete process if appropriate. If you deliberately change the jforgame port, update the local client destination and Localtonet target only after confirming the new runtime listener.
ClientStartup cannot connect locally
Keep ServerStartup running and confirm the actual listener first. Then verify that the client destination found through ClientStartup matches the listener’s address and port. A connection that opens and immediately closes can indicate a framing, codec, message-definition, login, or routing problem rather than a network failure.
The tunnel is saved but unavailable
A created tunnel is not automatically running. Press Start and confirm that the selected Localtonet device remains connected. Verify that the tunnel type is TCP and that its local target exactly matches the successful listener baseline.
The Localtonet device cannot reach the target
If Localtonet and jforgame run on different machines, test the local network path from the Localtonet device. A service listening only on 127.0.0.1 or ::1 cannot accept a connection from another LAN host. Either run Localtonet on the jforgame machine or configure an appropriate non-loopback bind address after reviewing the security consequences.
The remote client still uses localhost
Reopen the exact destination location traced from ClientStartup. Confirm that the effective host is the Localtonet public host and the effective port is the Localtonet public port. Changing only the host while retaining the local port is a common error because the public and local ports do not have to be identical.
TCP connects but the game operation fails
Transport success moves diagnosis to the application. Confirm that the remote client was built from compatible source and still uses the same codec and message definitions. Inspect server logs for decoding, routing, login, session, authorization, or database failures. Localtonet carries the TCP stream but does not translate incompatible application messages.
A WebSocket client fails through this tunnel
The jforgame Netty implementation supports WebSocket, but that does not prove that the demo’s raw TCP startup and a WebSocket endpoint share a port, path, frame type, or startup procedure. Verify a WebSocket endpoint separately from the pinned source before exposing it. This tutorial covers the raw TCP listener established by the documented builder example.
Check source revision, Maven import, JDK selection, database engine, schema import, working directory, server process, listener, local client protocol, Localtonet device, tunnel lifecycle, target reachability, public transport, and remote application behavior in that order. Avoid changing several layers at once.
Frequently asked questions
Which jforgame revision does this tutorial use?
It uses official release v4.1.0 at commit f9a8313. Verify the complete commit identifier with git rev-parse HEAD before importing the project.
What JDK does jforgame v4.1.0 require?
The supplied repository page evidence does not expose the pinned Maven compiler settings, so this article does not invent a version. Resolve the compiler release, source, or target from the root and applicable module Maven configuration. If none is declared, obtain project guidance before claiming a supported JDK.
Which database engine should I install?
Identify it from the JDBC driver, JDBC URL, Maven dependency, and active database configuration in commit f9a8313. The official quick start establishes the database names but the supplied evidence does not identify the engine. Do not choose an engine from an old fork or unrelated tutorial.
Why are two databases required?
The official quick start explicitly requires game_data_001 and game_user_001, each populated from its same-named SQL resource. Preserve that separation unless you also change and validate the application configuration.
Which port does the demo use?
The documented server builder gets its value from ServerConfig.getInstance().getServerPort(). Resolve that value in the pinned checkout and confirm it with an operating-system listener check. Do not copy an unverified port from another branch.
How do I point the supplied client at Localtonet?
Trace the connection destination from ClientStartup, then replace its effective local host and port with the public host and public port assigned by the running Localtonet TCP tunnel. Keep the client protocol and codec unchanged, and never place the Localtonet device token in the game client.
Should I use an HTTP or TCP tunnel?
Use a TCP tunnel for the raw listener started through TcpSocketServerBuilder. WebSocket support is a separate endpoint workflow and must be configured and verified independently.
Does Localtonet require router port forwarding or a public IP?
No. Our client establishes an outbound connection to a Localtonet relay, so this workflow does not require inbound router port forwarding, firewall changes, VPN setup, or a public IP address. The selected device must remain connected and the tunnel must be running.
Does the TCP tunnel secure the game’s login and permissions?
No. Authentication, authorization, session rules, message validation, and game permissions remain application responsibilities. Review and harden those controls before allowing untrusted clients to connect.
Publish your verified jforgame TCP listener
Pin the source, resolve the revision-specific settings, prove the supplied client and server flow locally, and then point a Localtonet TCP tunnel at the exact listener you verified.
Get Started Free →

