

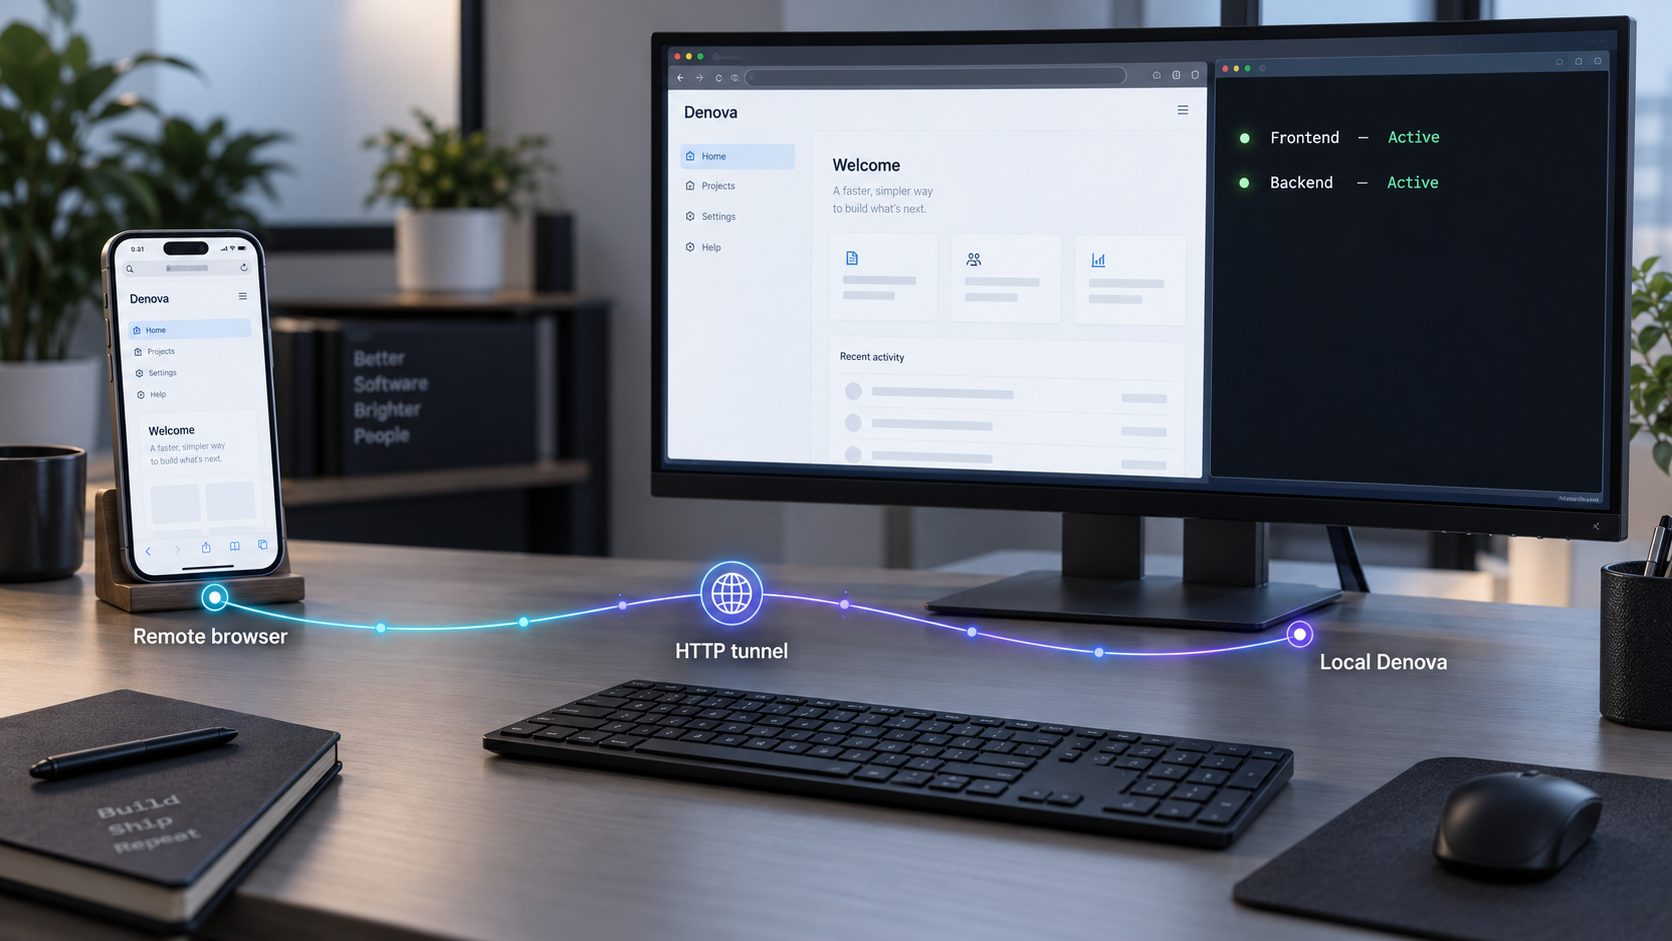
Build the Denova frontend and backend locally, verify the production interface, then make it reachable through a public HTTPS address.
Denova is a browser-based creative platform for novel writing, interactive role-playing, AI-assisted workflows, image generation, and project version management. This guide explains how to run Denova from source with its documented Go and Node.js toolchain, verify both development endpoints, build the web interface served by the backend, and prepare Denova's own access controls. Once the complete local interface works on port 8080, we will expose that HTTP service with Localtonet without configuring inbound router port forwarding, a public IP address, or a VPN.
📋 What's in this guide
Understand the Denova source architecture
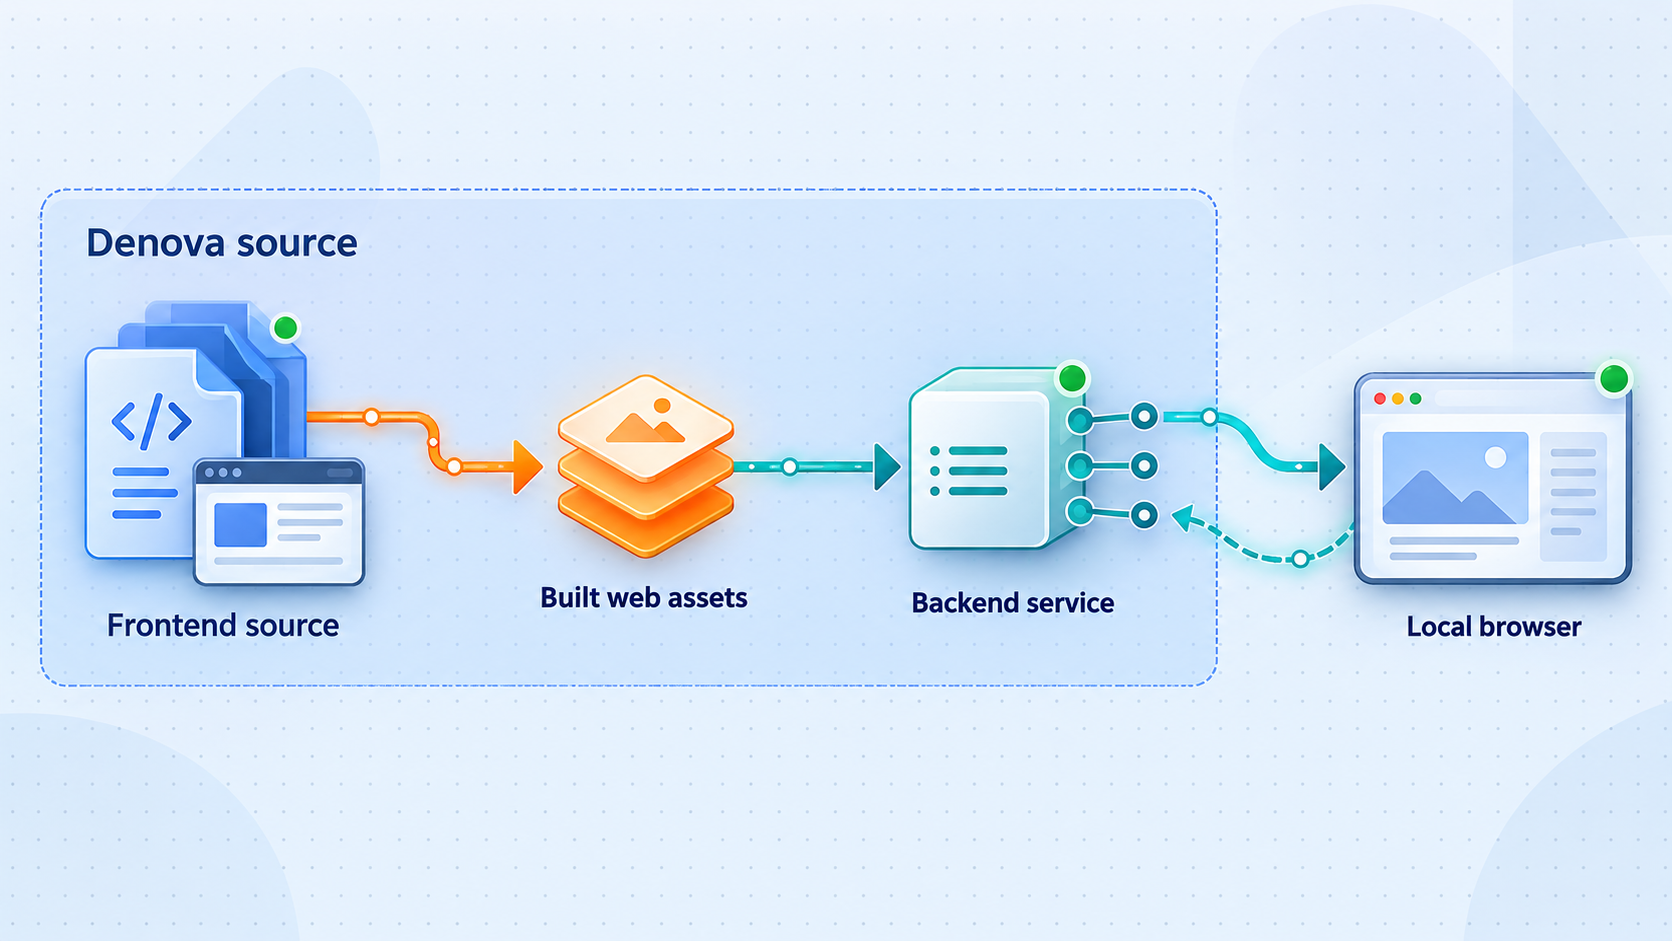
Denova combines a frontend development server with a backend service. When the project is run from source, the documented default addresses are http://localhost:5173 for the frontend and http://localhost:8080 for the backend. These two endpoints serve different purposes, so choosing the correct one is important before adding remote access.
Port 5173 is the local Vite development entry point. It is useful while changing frontend code because it provides the development workflow and hot updates. Port 8080 is the backend endpoint. After the frontend has been compiled into the web/dist directory, the backend can serve those built assets as a complete web interface. Denova's source documentation specifically states that generated QR codes and connection links use the backend port and depend on the built web/dist assets.
For that reason, this guide uses port 8080 as the Localtonet target. Exposing port 5173 would publish a development server rather than the intended backend-served application. A development frontend may also depend on the backend and may not represent the same workflow that Denova uses for its LAN, mobile, and remote connection links.
http://localhost:5173. Use it for local frontend development and hot updates, not as the preferred public application endpoint.
http://localhost:8080. It is the appropriate target when the backend is serving the compiled web interface.
pnpm --dir web build creates the frontend build used by the backend. Rebuild after frontend updates and restart the backend.
| Endpoint or component | Documented role | Recommended use in this guide |
|---|---|---|
localhost:5173 |
Vite frontend development entry point | Local development and frontend verification |
localhost:8080 |
Denova backend and built web interface | Local production-style verification and Localtonet target |
web/dist |
Compiled frontend assets used through the backend port | Build before relying on backend-based remote access |
| Localtonet public URL | Public address forwarded to the selected local target | Remote browser access after Denova is secured and verified |
Denova recommends a release build for stable use, while the master branch can contain changes that have not yet been released. This article deliberately covers the source workflow. The packaged release does not have a fixed local port established by the supplied project documentation, so do not assume that a release installation uses port 8080. The release application displays its LAN address after LAN access is enabled.
Prepare the source-build prerequisites
A Denova source installation requires more than downloading a single executable. Install and confirm the documented development toolchain before cloning the repository. Denova currently requires Go 1.26.6 or newer, Node.js 22.13 or newer, pnpm, ripgrep, and Bash.
The repository uses corepack enable as part of its setup sequence. Corepack is used to make the required package manager available through the Node.js toolchain. You should still confirm that your Node.js installation includes a working Corepack command before beginning the bootstrap process.
| Requirement | Required version or role | Why Denova needs it |
|---|---|---|
| Go | 1.26.6 or newer | Builds and runs the Go-based application components |
| Node.js | 22.13 or newer | Provides the JavaScript runtime and frontend build environment |
| pnpm | Required, exact version not stated in the supplied documentation | Installs and builds the web application dependencies |
| ripgrep | Required command-line tool | Supports repository and application workflows that depend on fast searching |
| Bash | Required shell | Runs the repository bootstrap and build scripts |
| Git | Needed for the documented clone command | Downloads the source repository and supports source-based maintenance |
On Windows, run the documented shell commands in Git Bash or Windows Subsystem for Linux. Running the Bash scripts directly in Command Prompt or a shell without compatible Bash behavior is not the documented workflow. On macOS and Linux, use a Bash-capable terminal.
You should also have permission to download dependencies, create files inside the cloned repository, and listen on the local development ports. If another application already occupies port 5173 or 8080, Denova may not be able to start at its documented default address. The supplied project evidence does not establish an official command-line option for changing those ports, so this guide does not invent one. Resolve the conflict or consult the current project configuration before attempting to substitute a different port.
An older Go or Node.js release can cause dependency, syntax, or build failures that resemble a Denova problem. Confirm that Go is at least 1.26.6 and Node.js is at least 22.13 before running the bootstrap script. Do not work around version checks by editing project files unless you are intentionally developing and testing an unsupported toolchain.
Clone and run Denova from source
The documented source bootstrap is intentionally short. It clones the project, enters the repository, enables Corepack, and runs Denova's bootstrap script. Run these commands from a directory where you want the denova repository folder to be created.
Clone the Denova repository
Download the current source repository with Git. For a stable day-to-day deployment, consider whether the latest release is more appropriate because the master branch can contain unreleased changes.
git clone https://github.com/alfredxw/denova.gitEnter the repository directory
Change into the cloned project before enabling the package manager and running any repository scripts.
cd denovaEnable Corepack
Enable Corepack through the installed Node.js toolchain so the repository can use its expected package-manager workflow.
corepack enableRun the bootstrap script
Start the documented bootstrap process from Bash. Allow dependency downloads and compilation to finish, and keep the relevant process running while testing Denova.
./scripts/bootstrap.sh
After a successful startup, the documented default frontend address is http://localhost:5173 and the documented backend address is http://localhost:8080. Open both from a browser on the Denova host. Testing both endpoints now makes later diagnosis much easier because it separates a Denova startup problem from a Localtonet tunnel problem.
Denova also documents component-specific bootstrap commands for development:
./scripts/bootstrap.sh fe
./scripts/bootstrap.sh be
Use the frontend form when you specifically need the frontend development workflow and the backend form when you need the backend workflow. The general ./scripts/bootstrap.sh command remains the documented starting point for initially running from source. The project also documents ./scripts/build.sh as a common development build command, but the explicit command required for generating the frontend assets used through the backend port is pnpm --dir web build.
A successful build does not by itself make Denova continuously available. The backend process must remain running for local or remote browsers to reach port 8080. The Localtonet client must also remain connected and the tunnel must be running. Use a process-management method appropriate for your operating system if you need unattended operation, but select and configure that method separately because Denova's supplied documentation does not prescribe one.
Complete Denova's first-run configuration
On first use, Denova guides you through adding a language-model API key and model name. Treat provider credentials as secrets. Enter them only through the intended application settings, never place them in a public URL, tunnel name, screenshot, shell history example, or article comment.
Denova recommends completing model setup from its settings page. Add a provider connection first, choose or enter the model, and test the connection. One connection can be reused for multiple models. Language models may use built-in providers or custom compatible endpoints. Image generation is configured separately and can be added when your workflow actually needs it.
After model setup, create a new book, import an existing novel, or open an existing project directory. Writing and interactive games are separate top-level workflows, while resources such as the knowledge base, creative configurations, Skills, and version management can support both. Starting with a small test project is a practical way to verify application behavior before exposing a workspace that contains important writing or credentials.
Enable Denova's access controls
Before providing access beyond the host itself, open Settings → Access in Denova. Enable LAN access, set a username and a strong, unique password, and restart Denova as instructed by the application. Other devices can then use the address displayed by Denova and authenticate with those credentials.
Denova can also generate a one-time login QR code and link that remains valid for five minutes. That feature is intended for convenient login, including mobile access on the same LAN. A browser login can remain valid for 30 days, and users can sign out through settings. Do not confuse this temporary Denova login link with the Localtonet public URL. Localtonet supplies the network route, while Denova controls authentication to its application.
Denova can contain manuscripts, project files, provider credentials, generated assets, automation settings, and Agent-accessible content. Set and test Denova's username and password before starting a public tunnel. Use a unique password that is not shared with your model provider, email account, or Localtonet account.
Build the web interface for backend access
A source checkout can present two different browser experiences. The Vite service on port 5173 serves the development frontend, while remote links generated from a source build use the backend port and expect compiled assets in web/dist. Building those assets is therefore a required preparation step for the port 8080 workflow used in this article.
Open a terminal in the repository root
Run the frontend build from the cloned denova directory. The command uses the repository's web package rather than requiring you to change into that directory.
Compile the frontend assets
Build the web project into the distribution expected by the backend.
pnpm --dir web buildRestart the Denova backend
Restart the backend after the build so it serves the current frontend output. If you are using the documented component-specific development workflow, the backend bootstrap command is ./scripts/bootstrap.sh be.
./scripts/bootstrap.sh beRepeat the frontend build and backend restart after changing or updating frontend code. The local Vite endpoint may continue to be useful during development, but it does not replace the built assets required by backend-based connection links.
Do not assume that an old web/dist directory reflects the current source tree. If the frontend works on port 5173 but port 8080 displays an outdated page, a blank interface, or missing resources, rebuild the frontend and restart the backend before changing tunnel settings.
Verify Denova completely on the local machine
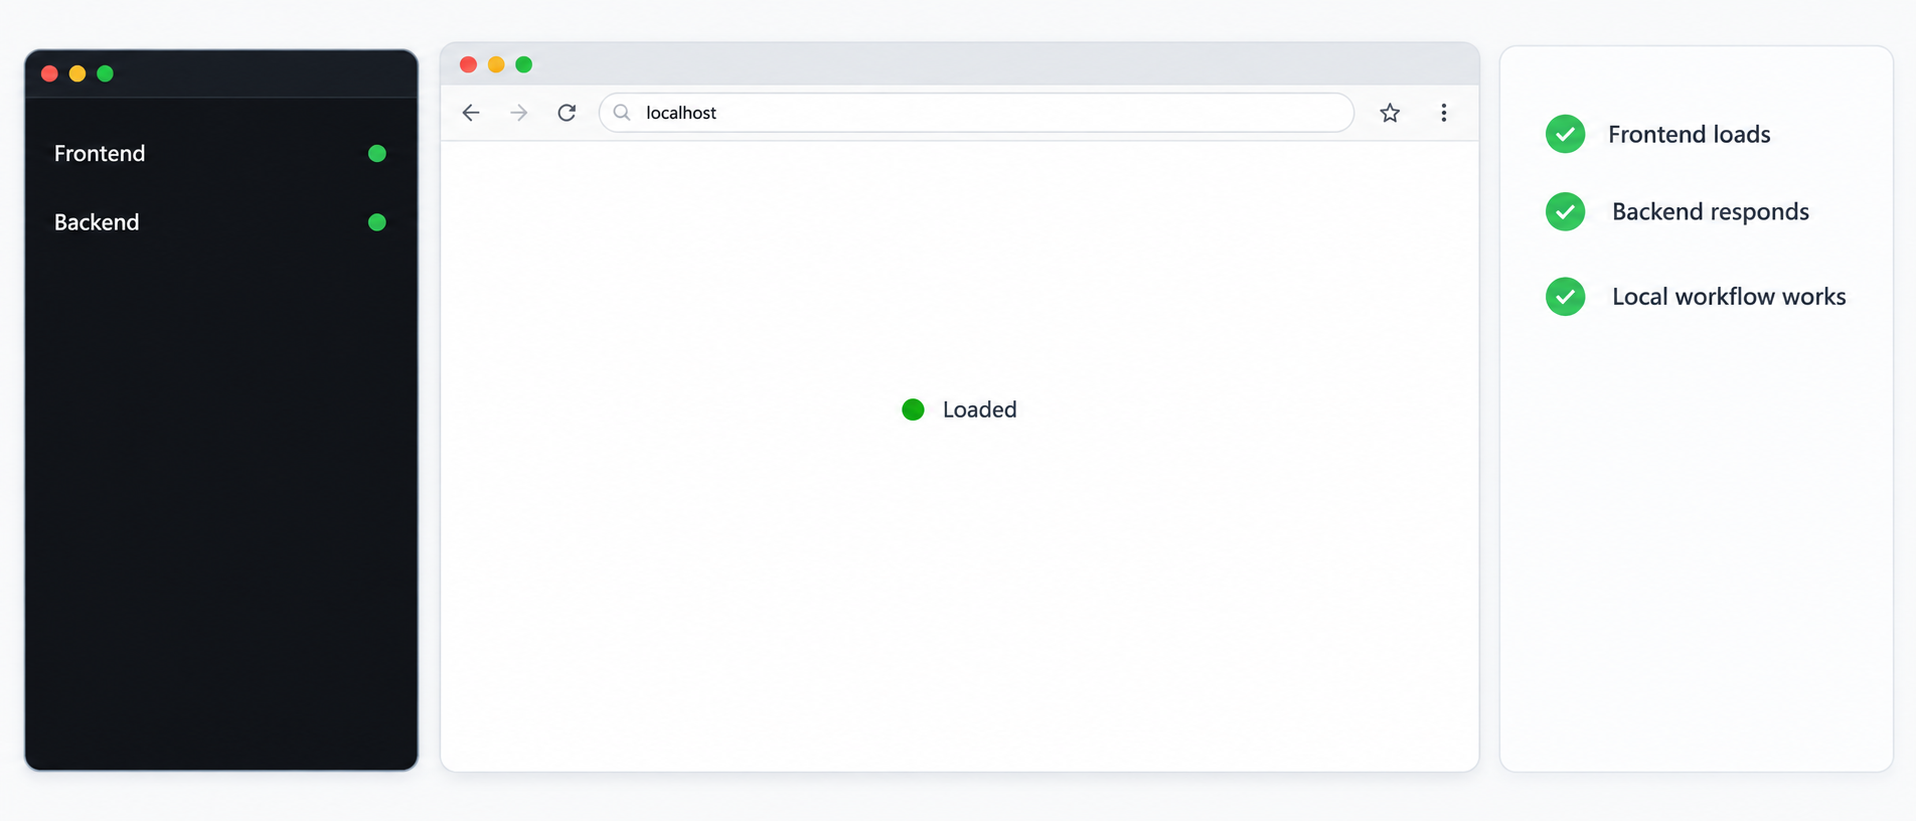
Local verification should happen before Localtonet is introduced. If Denova does not work directly on the host, a tunnel cannot repair the application, build, model connection, or authentication configuration. Use the following checks in order.
Check the development frontend
Open http://localhost:5173 on the Denova machine. Confirm that the development frontend loads when its process is running. This verifies the local frontend workflow but does not yet prove that the backend can serve the compiled interface.
Check the backend-served interface
Open http://localhost:8080. Confirm that the complete Denova interface loads from the backend after the frontend build. This is the endpoint that will be mapped through Localtonet.
Test authentication
Verify that Denova requests the configured credentials where expected. Use a private browser session if necessary so an existing 30-day browser login does not hide an authentication problem.
Test a basic application workflow
Open a test project, navigate between relevant views, and confirm that the application can reach its configured model connection if that feature is needed. A page shell that loads without functioning backend operations is not a complete verification.
If you plan to use Denova from a phone or another browser, also test the displayed LAN address before public exposure when your network permits it. This can confirm that Denova's LAN access option and login behavior are working. A LAN test is useful, but it is not a prerequisite for Localtonet when our client runs on the same device and can reach the local backend target.
A working page at port 5173 does not prove that port 8080 has the compiled web interface. The public tunnel in this workflow should not be started until http://localhost:8080 works correctly on the Denova host.
Expose Denova with a Localtonet HTTP tunnel
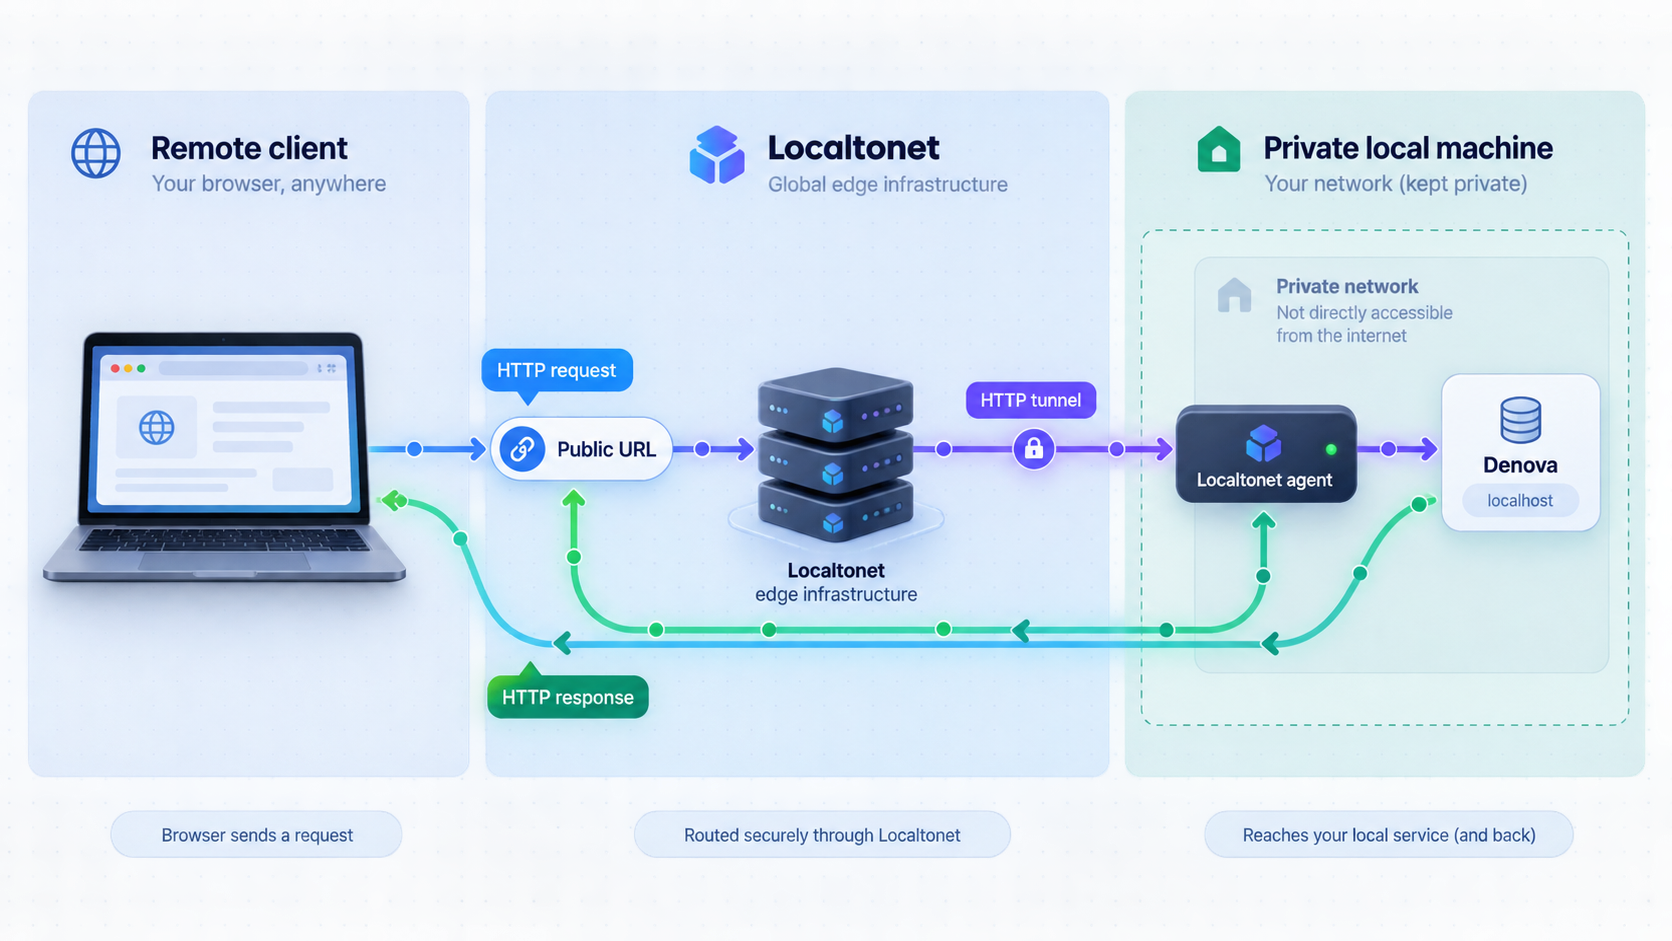
Once the backend-served interface works locally, Localtonet can make it reachable from outside the local network. Our client on the Denova device establishes an outbound connection to a Localtonet relay server. This means you do not need to configure inbound router port forwarding, obtain a public IP address, change the perimeter firewall to accept unsolicited inbound traffic, or set up a VPN for this HTTP publishing workflow.
An HTTP tunnel points to a local IP address and port that are reachable from the Localtonet client device. For the source workflow in this guide, the target is Denova's backend on 127.0.0.1 and port 8080, provided that the client runs on the same machine and the verified local endpoint is available there.
HTTP tunnels can use a random subdomain, a custom subdomain where supported, or a custom domain. These process types serve the content at a public HTTPS address. Availability can vary by plan or current dashboard options, so choose from the options shown in your account rather than assuming that every domain mode is available.
Install and run the Localtonet client
Install the Localtonet application on the computer running Denova, or on a device that can reach the Denova backend. Keep the client active while remote access is required.
Authenticate the client device
Use the device-specific authentication token assigned through your Localtonet account. Treat the token as a secret. Do not paste it into public documentation, screenshots, source files, or shared shell history.
Select an available relay server
Choose a server or region from the current Localtonet dashboard. Available server codes and regions can change and may vary by account, so this guide does not hardcode a value.
Create the HTTP tunnel
Create an HTTP tunnel and select the required process type. Set the local target IP to 127.0.0.1 and the local target port to 8080 when Localtonet and Denova are running on the same machine. If the client is on another device, use an address that the client device can actually reach and verify it privately first.
Start the tunnel
Creating a tunnel does not start it. Press the Start button and wait for the selected client and tunnel to be connected. The public address is usable only while the client remains connected and the tunnel is running.
Open and test the public HTTPS address
Open the assigned public URL from a different browser or network. Confirm that Denova loads, requests authentication as expected, and can complete a basic application operation. Stop or delete the tunnel when public access is no longer required.
For the current dashboard workflow, consult our Localtonet HTTP tunnel documentation. Dashboard options can evolve, so use the names and available server selections displayed in your account rather than copying an old server code or domain setting.
A service that was previously limited to localhost can receive requests from the internet once the tunnel starts. Test Denova authentication first, expose only the required backend port, protect all provider credentials, and stop the tunnel when it is not needed. Do not expose the Vite development endpoint merely because it is convenient during coding.
Secure and operate the remote Denova deployment
Remote access combines two separate control layers. Localtonet provides connectivity from the public address to the selected local target. Denova remains responsible for application login, project permissions, model-provider configuration, and the behavior of its Agents and plugins. A working tunnel should never be treated as a substitute for application authentication.
Protect Denova credentials and project data
Use a strong Denova password and test it from a signed-out browser. Remember that a browser may preserve a Denova login for 30 days, which can make the interface appear unauthenticated during testing. Sign out or use a private browser session to verify the real login flow.
Denova projects may contain unpublished manuscripts, character information, generated media, automation instructions, version history, and imported files. AI connections can also involve billable provider accounts. Limit access to people who need it, avoid sharing the public URL casually, and rotate credentials if they are exposed.
Expose the backend, not development tooling
Keep port 5173 for development. Build the frontend into web/dist, restart the backend, and publish port 8080. This reduces confusion between the local development workflow and the complete interface used by Denova's backend-based links.
Only configure one target per intended service. There is no need to expose Go tooling, a shell, repository files, source-control metadata, or model-provider endpoints. Localtonet should point only to the local HTTP service that the remote browser needs.
Manage the tunnel lifecycle deliberately
The tunnel exists in the dashboard after it is created, but it does not provide access until it is started. It also depends on the selected client being connected. Stop the tunnel during maintenance, before changing access settings, or whenever remote access is no longer needed. Delete configurations that have no continuing purpose.
When updating the frontend, stop or restrict remote use while rebuilding if users could encounter inconsistent assets. Run pnpm --dir web build, restart the backend, verify http://localhost:8080, and only then retest the public URL.
Understand HTTPS in this workflow
Denova recommends HTTPS rather than transmitting login credentials over plaintext when deploying through a public address or domain. Localtonet HTTP process types provide a public HTTPS address for the tunnel while forwarding to the selected local HTTP target. Users should open the assigned HTTPS URL rather than constructing an unverified plaintext public address.
If you choose a custom domain, follow the current Localtonet domain and DNS instructions shown for that configuration. Exact DNS requirements are not established in the supplied context and should not be guessed from another platform's setup.
Troubleshoot installation, build, and tunnel problems
The bootstrap script does not run
Confirm that the terminal is in the cloned denova directory and that Bash is available. On Windows, use Git Bash or WSL. Also confirm that the script has been obtained from the repository and that your environment permits it to run. If the shell reports a missing command, identify whether Go, Node.js, pnpm, ripgrep, Git, or Bash is absent before changing Denova files.
Corepack or pnpm is unavailable
Verify that Node.js 22.13 or newer is installed and active in the same terminal session. Run the documented corepack enable step again. If your Node.js distribution does not provide a usable Corepack command, correct the Node.js installation rather than substituting an undocumented project setup.
Port 5173 works, but port 8080 does not show the interface
This usually narrows the issue to the backend process or the compiled frontend assets. Run pnpm --dir web build, restart the backend, and test http://localhost:8080 again. Confirm that the build completed successfully and did not stop on dependency, type-checking, or asset-generation errors.
The backend shows an old version of the frontend
The Vite development interface can reflect current source changes while the backend continues serving an older build. Rebuild the web project and restart the backend. Refresh the browser after restart. Do not troubleshoot Localtonet until the correct interface appears directly at the local backend address.
Neither default port opens
Inspect the terminal where the bootstrap process was launched. A failed dependency download, unsupported toolchain version, compilation error, or occupied port can prevent startup. Confirm that another process is not already using port 5173 or 8080. Because the supplied Denova documentation does not establish an official port override command, do not invent one. Resolve the conflict or check the current project configuration.
The Localtonet URL reports that the service is unavailable
First open http://localhost:8080 on the Denova host. If it fails locally, fix Denova before changing the tunnel. If it works, confirm that the Localtonet client is connected, the correct device token is selected, the tunnel has been started, and the target is set to the correct local IP and port.
When the Localtonet client runs on the same computer as Denova, 127.0.0.1:8080 is the expected target for this source workflow. If the client runs elsewhere, 127.0.0.1 refers to that other device, not the Denova computer. In that topology, use a reachable private address only after enabling and testing Denova's LAN access.
The public page loads but login behavior is unexpected
A previous Denova session may still be valid because browsers can retain login for 30 days. Test with a private browser window or explicitly sign out through settings. If authentication is not enabled as intended, stop the tunnel, configure the username and password under Settings → Access, restart Denova, and test locally before starting the tunnel again.
The page opens, but AI features fail
A functioning HTTP route proves only that the browser can reach Denova. It does not prove that a model provider connection, API credential, model name, custom endpoint, or image-generation service is valid. Return to Denova's settings, verify the provider connection and selected model, and use the application's connection test. Never place a provider API key in the Localtonet target or public URL.
The tunnel disappears when a terminal closes
Both application and tunnel availability depend on running processes. Denova's backend must remain active, the Localtonet client must remain connected, and the tunnel must be started. If closing a terminal ends one of those processes, use a process-management approach suitable for your operating system. This guide does not prescribe service-unit or startup-task commands because they are not established by the supplied Denova documentation.
Frequently asked questions
Which Denova port should I expose with Localtonet?
For the documented source workflow, expose the backend on port 8080 after building the frontend into web/dist. Port 5173 is the Vite development frontend and is better kept for local development. Verify http://localhost:8080 before creating the tunnel.
Do I need to build the frontend before remote access?
Yes, for the backend-served source workflow. Run pnpm --dir web build and restart the backend. Denova's source documentation states that its QR codes and connection links use the backend port and require the built web/dist assets.
Does the packaged Denova release also use port 8080?
The supplied project documentation establishes ports 5173 and 8080 for the source workflow, but it does not establish a fixed local port for the packaged release. The release application displays its LAN address after LAN access is enabled. Use that displayed address instead of assuming a port.
Do I need router port forwarding or a public IP address?
No. The Localtonet client establishes an outbound connection to our relay server. The resulting tunnel provides a public URL without inbound router port forwarding, a public IP address, or VPN setup. The client must remain connected and the tunnel must remain running.
Is the Localtonet public URL the same as Denova's one-time login link?
No. The Localtonet URL provides the network route to the local Denova service. Denova's QR code and one-time login link are application login features, and the documented one-time link remains valid for five minutes. Keep the connectivity and authentication layers conceptually separate.
Can the Localtonet client run on another device?
It can run on a device that can reach the Denova service, but the target address must be reachable from that client. In that arrangement, 127.0.0.1 points to the Localtonet client device itself. Enable Denova's LAN access, verify the displayed private-network address, and use a reachable target instead. Running both on the same host is simpler because the tunnel can target 127.0.0.1:8080.
Should I use Denova from source for a stable deployment?
Denova recommends release builds for stable use because the master branch may include unreleased changes. A source deployment is appropriate when you need development access, want to inspect or modify the code, or deliberately want the current branch. If you switch to a packaged release, discover its displayed LAN address rather than carrying over the source port assumption.
What happens when I stop the Localtonet tunnel?
The Localtonet public route stops being available, while Denova can continue running locally. Starting the tunnel again restores public access as long as the selected client is connected and the local target remains reachable. You can also delete the tunnel when it is no longer needed.
Access your verified Denova workspace with Localtonet
Build Denova's web interface, confirm the backend on port 8080, enable Denova authentication, and then create an HTTP tunnel to provide remote browser access without inbound router port forwarding.
Get Started Free →

