

Run a Nix knowledge MCP server locally, test the complete protocol, and publish a temporary remote endpoint
mcp-nixos gives compatible AI clients current information about NixOS packages, options, Home Manager, nix-darwin, flakes, documentation, package history, and binary cache status. This guide uses the project's recommended uvx path, starts its documented Streamable HTTP endpoint on loopback, and verifies initialization, tool discovery, and a harmless query with the official MCP Inspector. After the local test succeeds, we connect the same service to a public HTTPS address through a Localtonet HTTP tunnel. Because the current project documentation does not establish built-in authentication for this endpoint, the public portion of this walkthrough is deliberately limited to short-lived, supervised testing.
📋 What's in this guide
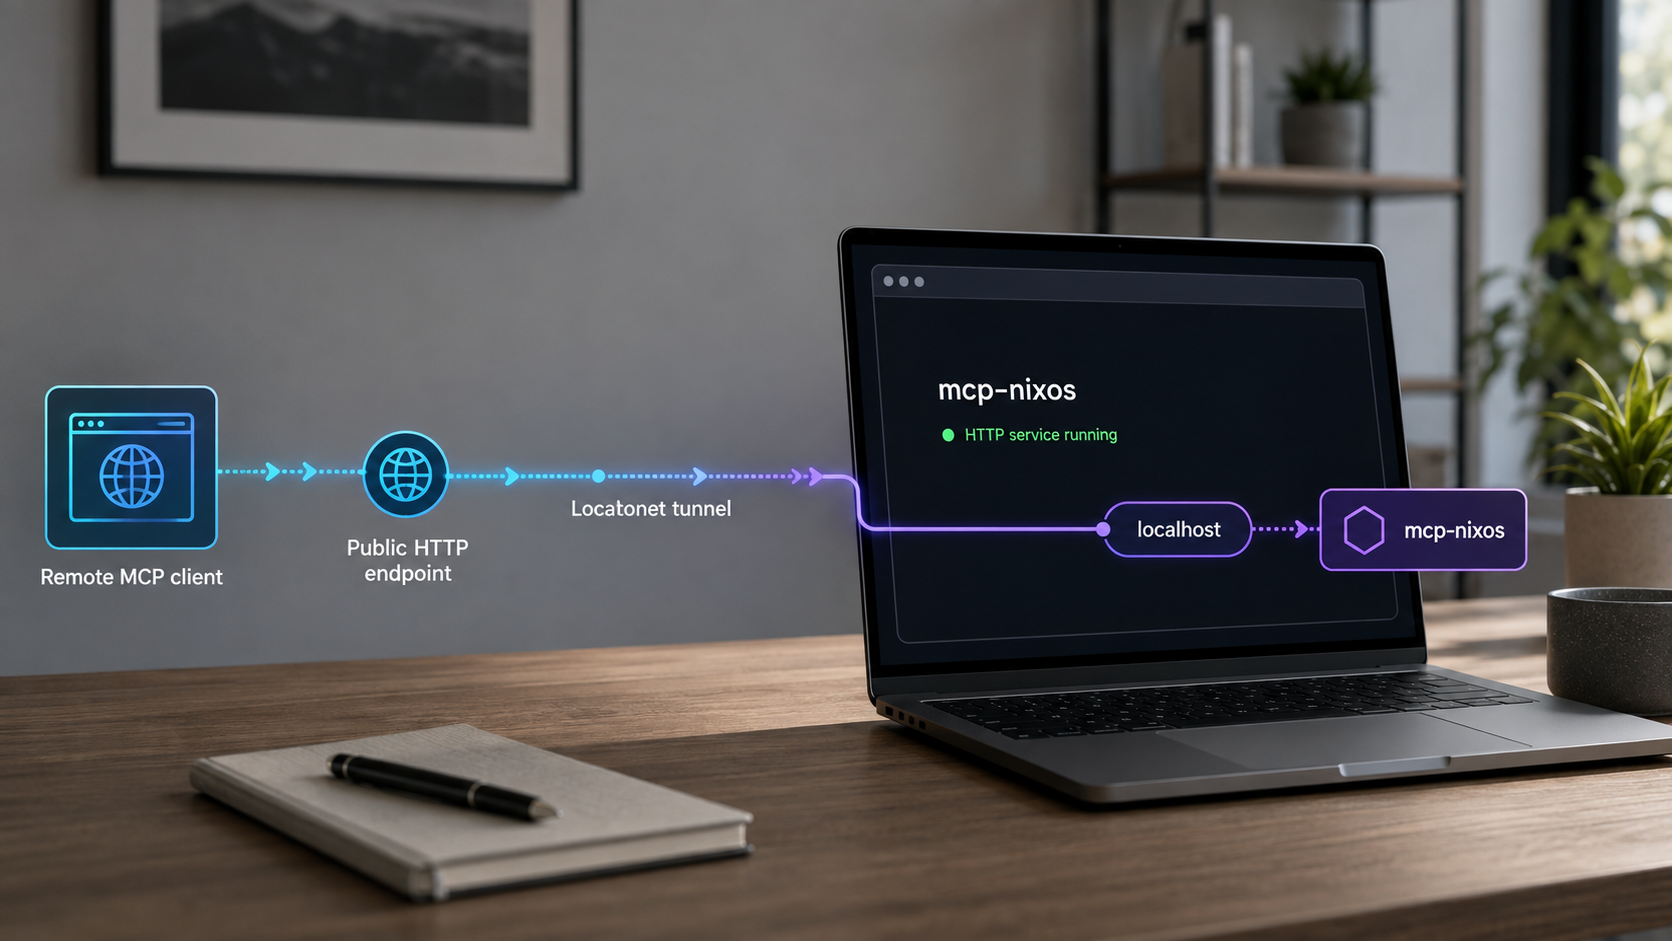
What mcp-nixos provides
MCP-NixOS is a Model Context Protocol server focused on Nix-related information. Instead of requiring an AI model to rely only on package names and options embedded in its training data, a compatible MCP client can ask the server to search current indexes and retrieve relevant details. The project describes itself as an API client and supports Windows, macOS, and Linux for its normal remote-data queries. The host does not have to run NixOS.
The current project exposes two MCP tools. The unified nix tool handles package and option searches, detailed information, statistics, channel listings, source browsing, local flake inputs, binary cache checks, and explicit Nix store access where supported. The separate nix_versions tool retrieves package version history and associated nixpkgs commit hashes through NixHub data.
nix_versions tool returns historical package versions with associated nixpkgs commit hashes.
nix tool can inspect binary cache status for packages through cache.nixos.org data.
Tool consolidation is important when verifying the server. A successful connection should not be expected to reveal a separate MCP tool for every information source. The current project documentation says the server exposes two tools, with the nix tool selecting an action and source through its arguments.
Some operations have additional host requirements. Normal searches query remote information sources and do not require Nix. Exploring pinned local flake inputs or reading an explicit path under /nix/store requires Nix and access to the relevant local store. Those local operations can reveal details about dependencies present on the host, so they deserve a separate access decision before remote use.
The authoritative command and feature descriptions are maintained in the mcp-nixos repository. Consult the current release list before deployment because commands, dependencies, and tool schemas can change between releases.
Running mcp-nixos without setting MCP_NIXOS_TRANSPORT=http starts the documented STDIO transport. A STDIO process may appear to wait quietly because it expects an MCP client to communicate through its standard input and output. It does not create the HTTP listener needed by this tunnel workflow.
Prerequisites and deployment architecture
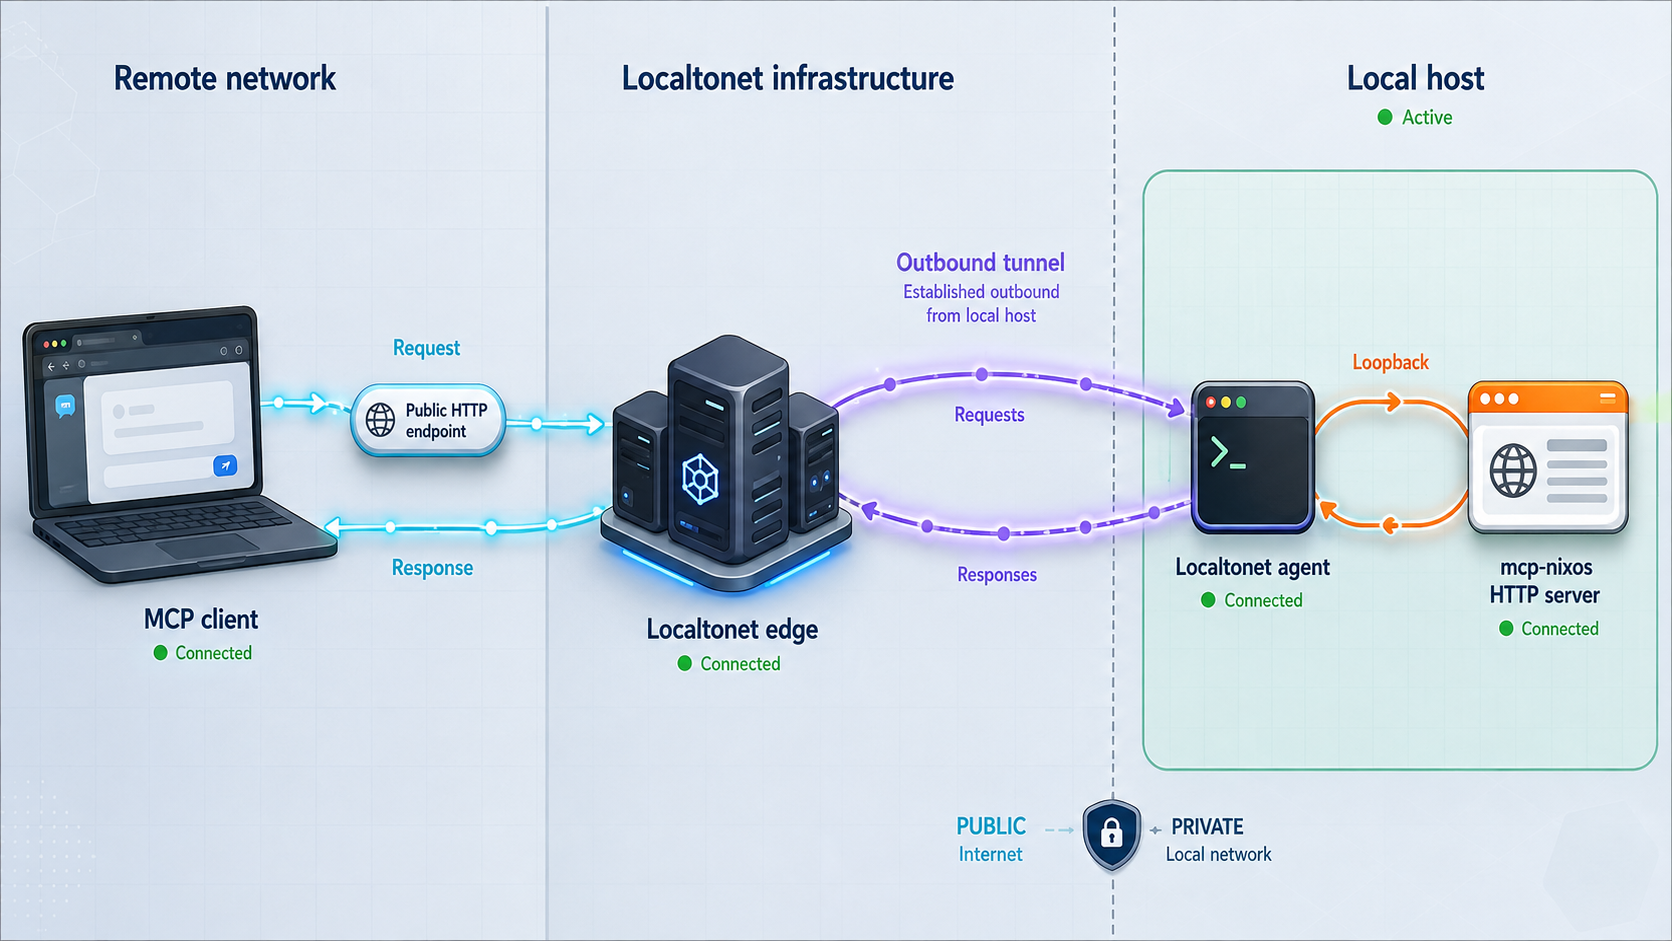
The narrowest arrangement is to run mcp-nixos and the Localtonet client on the same computer. mcp-nixos listens on 127.0.0.1:8000, and our client reaches that loopback address locally. Port 8000 is not opened directly to the LAN or internet. The Localtonet client establishes an outbound connection to our relay, and the HTTP tunnel supplies the public address while it is running.
This tutorial uses uvx, which the mcp-nixos Quick Start marks as the recommended execution method. Install uv using the
official uv installation instructions
for your operating system, then open a new terminal if the installer asks you to refresh your shell environment. Confirm that the tool runner is available before proceeding:
uvx --version
The project's current pyproject.toml is the authority for its Python compatibility requirement. At the evidence snapshot used for this revision, the package metadata requires Python 3.11 or newer. Check the
current pyproject metadata
before publication or deployment in case that requirement changes. One advantage of the recommended uv workflow is that uv can manage an appropriate Python runtime instead of requiring a manually maintained global package installation.
The current repository Quick Start supplied for this revision documents uvx, Nix, Docker, and HTTP operation, but it does not document pip install mcp-nixos as a Quick Start path. We have therefore removed the previous pip installation instructions rather than presenting an unconfirmed package workflow. If the project later documents pip installation, follow the current package and repository instructions together with the active requires-python metadata.
Protocol verification uses the official
MCP Inspector.
The Inspector is launched through npx, so install a currently supported Node.js distribution that includes npm and npx. Confirm both commands before starting the server:
node --version
npx --version
For the public stage, install and run the Localtonet client on the device that can reach mcp-nixos. You also need access to our dashboard and the device-specific authentication token for that client. Treat the token as a secret. Do not put it in the MCP Inspector, application environment examples, public screenshots, source control, or shared shell transcripts.
| Component | Purpose | Requirement |
|---|---|---|
| uv and uvx | Obtains and runs mcp-nixos using the recommended project path | Required for this walkthrough |
| mcp-nixos | Provides the MCP tools and Streamable HTTP endpoint | Run through uvx |
| Node.js, npm, and npx | Launches the official MCP Inspector | Required for the reproducible protocol test |
| Localtonet client | Creates the outbound relay connection | Required for public testing |
| Nix | Enables local flake-input and Nix store operations | Not required for ordinary remote-source queries |
Understand the three address components
127.0.0.1is the listening address and restricts direct connections to the same host.8000is the documented example port used by mcp-nixos./mcpis the default path for the Streamable HTTP MCP endpoint.
Together, these values produce http://127.0.0.1:8000/mcp. The Localtonet HTTP tunnel targets the local IP address and port. The MCP path remains part of the URL entered into Inspector or another remote-capable MCP client.
If mcp-nixos runs inside a container while the Localtonet client runs on the host, 127.0.0.1 inside the container and 127.0.0.1 on the host are not automatically the same endpoint. The same limitation applies when the two processes run on different computers. Do not broaden the bind address without understanding the resulting exposure. This guide intentionally uses both processes on one host.
Install and run mcp-nixos
The project documents uvx, Nix, and Docker execution. This HTTP tutorial uses uvx because it is the recommended Quick Start method and avoids an unverified pip installation path. Nix remains a suitable documented alternative for hosts that already use it. The documented Docker Quick Start is an interactive STDIO example, not a complete HTTP container deployment, so we do not invent port publishing or container networking instructions.
| Method | Documented command | Use in this guide |
|---|---|---|
| uvx | uvx mcp-nixos |
Recommended and used for HTTP mode |
| Nix | nix run github:utensils/mcp-nixos -- |
Documented alternative |
| Docker | docker run --rm -i ghcr.io/utensils/mcp-nixos |
Documented STDIO example only |
Confirm uvx can obtain the application
Running the following command without HTTP variables starts the default STDIO transport:
uvx mcp-nixosA STDIO server may wait without displaying a web address. Stop it with the normal terminal interrupt before continuing. This quick check confirms that uvx can resolve and start the application, but it does not verify HTTP transport.
Optional Nix execution path
On a machine with Nix installed, the project documents:
nix run github:utensils/mcp-nixos --
This also starts STDIO unless the HTTP environment variables are inherited by the process. If you choose the Nix path, substitute that command for uvx mcp-nixos in the configuration examples below. The remainder of the endpoint and Inspector workflow stays the same.
Check the release before deployment
The supplied release evidence identifies mcp-nixos v3.0.2 as released on September 4, 2026. Release information is time-sensitive. Recheck the latest mcp-nixos releases immediately before publication and before upgrading a persistent deployment. Do not assume that v3.0.2 is still current merely because it appears in this article.
Configure the mcp-nixos HTTP server
mcp-nixos reads environment variables that select the transport, listening address, port, path, and optional stateless behavior. The baseline configuration uses the documented HTTP transport, loopback address, port 8000, and default /mcp path.
Select HTTP transport
Set MCP_NIXOS_TRANSPORT to http. Without it, mcp-nixos uses STDIO and does not create the required HTTP listener.
Bind to loopback
Set MCP_NIXOS_HOST to 127.0.0.1. This is appropriate because mcp-nixos, Inspector, and the Localtonet client initially run on the same host.
Select the local port
Set MCP_NIXOS_PORT to 8000. If the port is occupied, select an unused port and carry the same value into every local test and the Localtonet target.
Start mcp-nixos through uvx
Run uvx mcp-nixos in the configured shell and leave the process running during local and public verification.
On Linux or macOS:
export MCP_NIXOS_TRANSPORT=http
export MCP_NIXOS_HOST=127.0.0.1
export MCP_NIXOS_PORT=8000
uvx mcp-nixos
On Windows PowerShell:
$env:MCP_NIXOS_TRANSPORT = "http"
$env:MCP_NIXOS_HOST = "127.0.0.1"
$env:MCP_NIXOS_PORT = "8000"
uvx mcp-nixos
These settings produce the documented local endpoint:
http://127.0.0.1:8000/mcpUse a custom path when needed
The default HTTP path is /mcp. The project documents MCP_NIXOS_PATH for changing it:
export MCP_NIXOS_TRANSPORT=http
export MCP_NIXOS_HOST=127.0.0.1
export MCP_NIXOS_PORT=8000
export MCP_NIXOS_PATH=/api/mcp
uvx mcp-nixos
The endpoint becomes http://127.0.0.1:8000/api/mcp. Use that exact path in Inspector and any later remote client. A custom path helps with routing and organization, but it is not a credential and must not be treated as authorization.
Understand stateless HTTP mode
The project also documents a mode that disables per-client session state:
export MCP_NIXOS_TRANSPORT=http
export MCP_NIXOS_HOST=127.0.0.1
export MCP_NIXOS_PORT=8000
export MCP_NIXOS_STATELESS_HTTP=1
uvx mcp-nixos
Stateless mode changes MCP session behavior. It does not add authentication, Origin validation, network filtering, or encryption to the local listener. Begin with normal HTTP mode for this tutorial, complete the Inspector test, and evaluate stateless mode separately with the actual clients that will use it.
Variables set in one terminal are not inherited by a process launched from an unrelated terminal, desktop application, container, or operating system service. If a process manager starts mcp-nixos, define the variables through that manager and confirm the effective environment without exposing secrets.
Verify the local endpoint with MCP Inspector
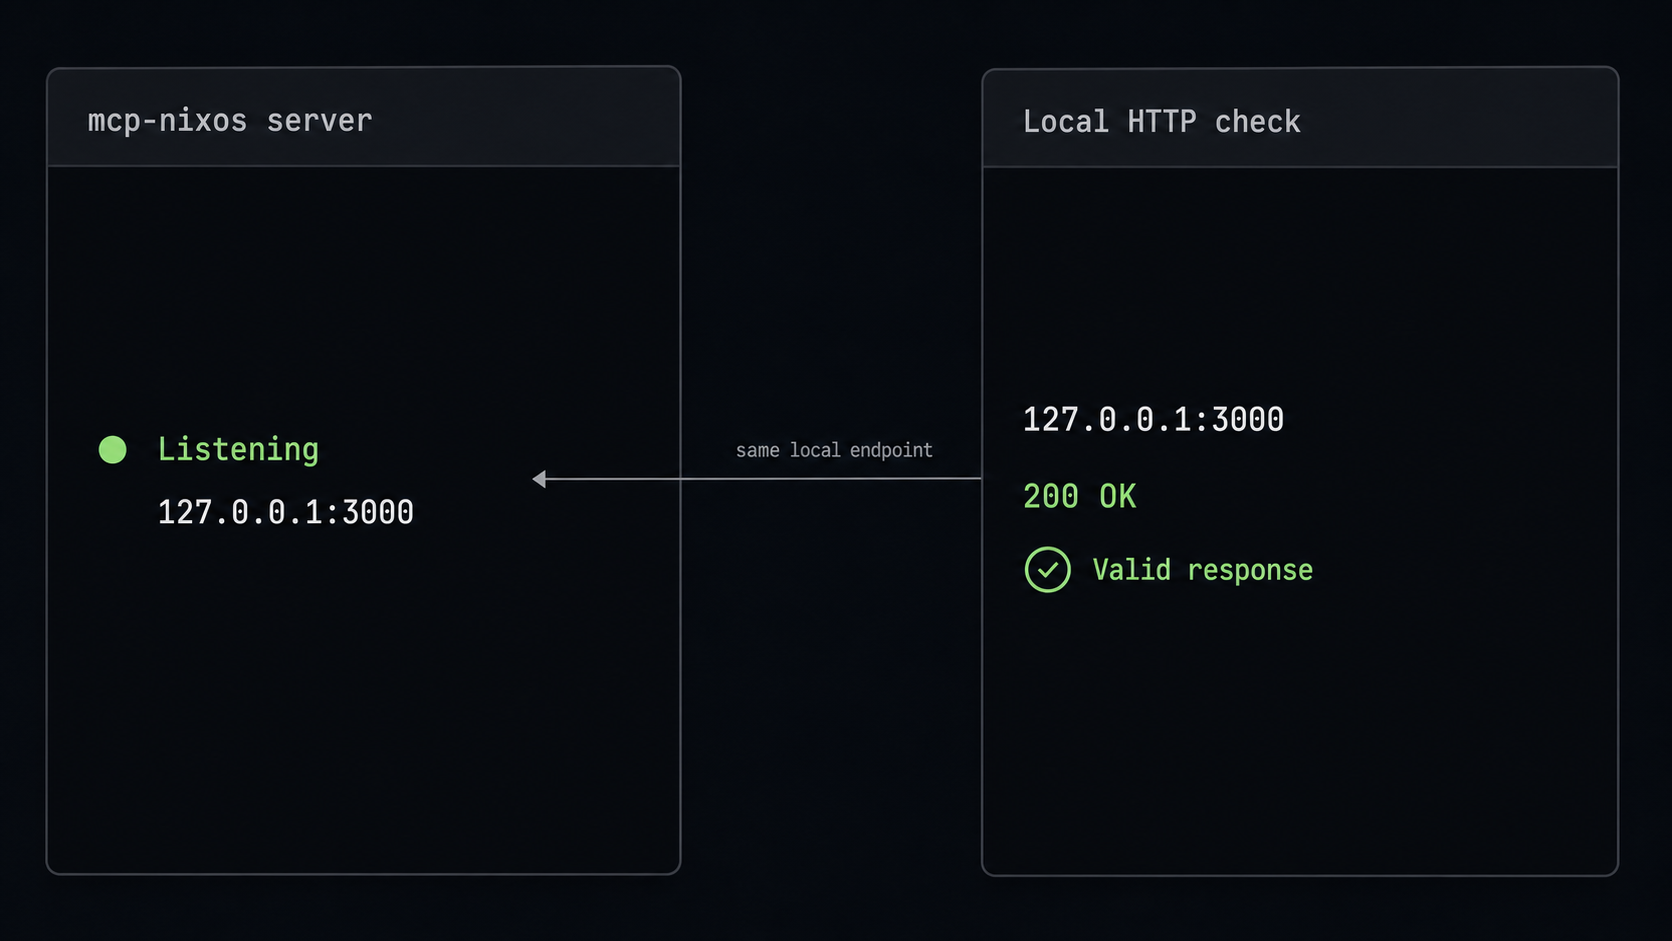
Do not create a public tunnel until the local protocol test passes. A tunnel can be connected while its target is stopped, using the wrong transport, or listening on a different port. Testing locally first separates application failures from tunnel and DNS failures.
Check basic HTTP reachability
Keep mcp-nixos running in its first terminal. From a second terminal on the same host, request the endpoint:
curl -i http://127.0.0.1:8000/mcpStreamable HTTP is a protocol endpoint rather than a normal web page. A generic GET request might return a protocol-specific status, a method response, or an error explaining that the request is incomplete. At this stage, distinguish an application-generated HTTP response from transport failures such as connection refused or timeout.
| Observed result | What it indicates | Next action |
|---|---|---|
| An HTTP status and application response | A process is reachable at the address and port | Continue to MCP Inspector |
| Connection refused | No listener is available at that address and port | Check process state, transport, host, and port |
| Timeout | The request is not reaching a responsive listener | Check namespaces, local policy, and the target address |
| 404 Not Found | The server may be reachable at the wrong path | Confirm /mcp or the configured custom path |
Launch the official MCP Inspector
In another terminal, run:
npx @modelcontextprotocol/inspectornpx may ask for permission to obtain the Inspector package. Review the package name and prompt before accepting. The command prints the local Inspector address and may launch it in a browser. Use the address printed by your installed Inspector rather than copying a port from an older article.
Initialize a local Streamable HTTP connection
- Select the Inspector transport for a remote Streamable HTTP server.
- Enter
http://127.0.0.1:8000/mcpas the server URL. - Leave authentication fields empty for this local loopback test.
- Use the Inspector's Connect action.
- Confirm that initialization completes and that the Inspector reports the server as connected.
The initial connection performs the MCP initialization exchange before normal tool operations. If Inspector reports a transport or initialization failure, do not continue to the tunnel. Review the mcp-nixos terminal and Inspector logs first.
Discover the tools
Open the Inspector's Tools view and request the tool list. For the current project, expect these names:
nix, the unified query tool.nix_versions, the package version history tool.
If initialization succeeds but no tools appear, refresh the tool list and inspect both process logs. Also confirm that Inspector is connected to mcp-nixos rather than another service on port 8000. A list containing only two tools is expected for the current release and is not evidence of missing functionality.
Invoke a harmless package search
Select the nix tool and provide this documented search shape through the Inspector fields:
{
  "action": "search",
  "query": "firefox",
  "source": "nixos",
  "type": "packages",
  "limit": 3
}
Run the tool. A successful result should contain plain-text package search information related to Firefox. Exact package entries can change as the underlying index changes, so verification should focus on receiving a valid tool result rather than matching a frozen list of package versions.
This sequence proves four separate layers: the process is listening, Streamable HTTP initialization succeeds, tool discovery succeeds, and mcp-nixos can execute a real query against a documented source. Preserve the server logs while you proceed because they make comparison with the public test much easier.
Localtonet forwards requests to the configured target, but it does not change STDIO into HTTP, correct an invalid MCP path, repair a failed initialization, or start a stopped application. Resolve the local failure before introducing a public route.
Connect the verified server through Localtonet
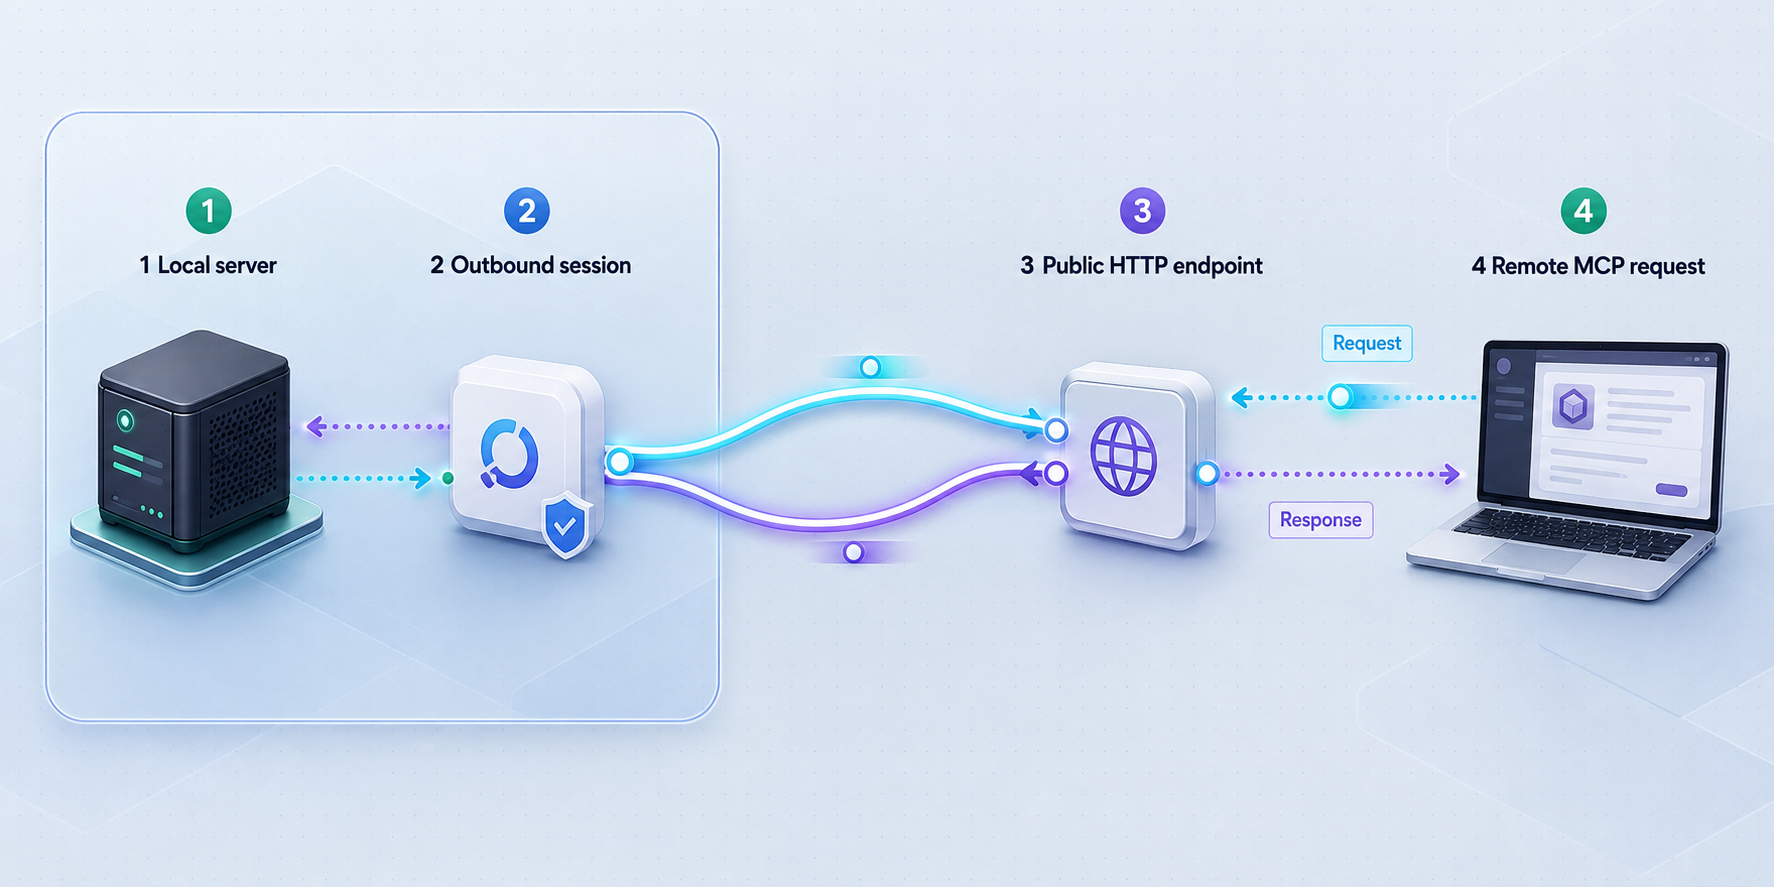
Once http://127.0.0.1:8000/mcp passes the Inspector test, a Localtonet HTTP tunnel can expose it without inbound router port forwarding, a public IP address, VPN setup, or inbound firewall changes. Our client establishes an outbound connection to a Localtonet relay server. The public endpoint exists only while the selected client is connected and the tunnel is running.
Relay server choices, process types, domain options, and plan-dependent availability are displayed in the current dashboard. Select from the values available to your account rather than copying a region or server code from an article.
Install and run the Localtonet client
Run our client on the same host as mcp-nixos for this loopback-based deployment. Confirm that the client application is connected before configuring the tunnel.
Authenticate or select the device
Use the device-specific authentication token associated with the client that will run the tunnel. Keep the token private and select the intended connected device.
Select an available relay server
Choose a currently available Localtonet relay server or region from the dashboard. Do not hardcode a value from another account or deployment.
Create the HTTP tunnel
Create an HTTP tunnel with local IP address 127.0.0.1 and local port 8000. Select an available Process Type appropriate to the test. Random Sub Domain, Custom Sub Domain, and Custom Domain all serve content at a public HTTPS address.
Start the tunnel
Use the Start button after creating the configuration. Creation does not mean the tunnel is running. Confirm that the device and tunnel show connected states.
Build the public MCP URL
Copy the assigned public HTTPS address and append the MCP path. With the default configuration, append /mcp. Stop the tunnel immediately after the supervised test.
If the assigned address is represented by the placeholder https://your-assigned-address, the MCP endpoint is:
https://your-assigned-address/mcp
Replace the placeholder with the address shown for your tunnel. If you configured MCP_NIXOS_PATH=/api/mcp, use that path instead. The tunnel target remains 127.0.0.1:8000 because the path is carried in the HTTP request.
Localtonet HTTP tunnel process types serve the content at a public HTTPS address. This is the verified statement relevant to the workflow. HTTPS does not add application-level caller authentication to mcp-nixos, and this guide does not assume undocumented TLS behavior between internal components.
See our HTTP tunnel documentation for the current dashboard workflow. Exact custom-domain DNS instructions are not included here because they must be checked against the current documentation and the domain configuration available to the account.
Repeat the MCP Inspector test through the public route
First, make a basic request:
curl -i https://your-assigned-address/mcpThen return to MCP Inspector and disconnect the local session. Replace the local URL with the assigned public HTTPS URL, select Streamable HTTP, and connect again. Confirm the following in order:
- The HTTPS host resolves and returns an HTTP response.
- The MCP initialization exchange completes.
- The Tools view lists
nixandnix_versions. - The same harmless Firefox package search returns a tool result.
Use the same invocation body:
{
  "action": "search",
  "query": "firefox",
  "source": "nixos",
  "type": "packages",
  "limit": 3
}
If local Inspector succeeds but public Inspector fails, the application and query path are already known to work. Focus on the public URL, tunnel state, selected device, target port, request path, Origin handling, and any browser-reported cross-origin or security errors.
Keep the public test supervised, do not distribute the URL, and stop the tunnel immediately after the Inspector query succeeds or fails. The supplied mcp-nixos documentation does not establish built-in authentication for this HTTP endpoint, and this guide does not provide a tested authentication gateway compatible with Inspector. Do not convert this exact setup into a persistent public service.
Security requirements for Streamable HTTP exposure
The MCP Streamable HTTP transport guidance treats DNS rebinding as a security concern. Servers should validate the HTTP Origin header, should bind to localhost when intended for local use, and should use proper authentication when exposed beyond the local machine. These controls address different risks and should not be replaced by an obscure path or difficult-to-guess hostname.
This tutorial follows the localhost recommendation by binding mcp-nixos to 127.0.0.1. However, the project material supplied for this revision does not establish whether the current mcp-nixos HTTP implementation validates every expected Origin scenario or provides configurable allowed-origin rules. Do not assume that the application supplies DNS-rebinding protection unless you have verified its current implementation and behavior.
Refer to the MCP transport security guidance when designing a durable deployment. A persistent gateway should reject unexpected Host and Origin combinations, enforce authentication and authorization compatible with the selected MCP client, and avoid forwarding around those controls.
127.0.0.1 when mcp-nixos and our client share a host. This avoids directly opening the application port to the LAN.
Why HTTPS is not enough
The assigned Localtonet address uses HTTPS, which is important for public transport. It does not determine who may initialize an MCP session or invoke tools. Authentication identifies a caller, while authorization decides what that caller can do. Neither control should be inferred from the presence of HTTPS.
How a future gateway should be placed
If you later deploy a tested authentication-capable gateway, bind mcp-nixos behind it and make the Localtonet tunnel target the gateway's local address and port. Do not configure the tunnel to bypass the gateway and point directly to mcp-nixos. The gateway must support the Streamable HTTP request pattern, the selected client's authentication method, required headers, session behavior, and Origin policy.
This article does not prescribe a gateway configuration because no tested gateway and client combination was supplied as evidence. Providing an unverified example would create a false impression that authentication had been solved. Until a specific integration is tested end to end, keep the tunnel temporary and supervised.
Consider what the tools can reveal
Most documented mcp-nixos sources contain public package, option, cache, and documentation information. Local flake-input inspection and explicit Nix store reads are different because they operate on information present on the server host. Before enabling remote users, decide whether they should be able to learn about pinned dependencies, store paths, or files available through those operations.
Routine operation and controlled updates
Use a predictable startup order
Start mcp-nixos first, verify it locally with Inspector, and then start the Localtonet client and tunnel. This order ensures that the upstream target is ready before public requests arrive. For this tutorial, leave Inspector and server logs visible during the brief public test.
Stop access safely
Stop the Localtonet tunnel as soon as the test is complete. Stopping only mcp-nixos while leaving the tunnel running creates an unavailable upstream, while stopping the tunnel leaves the loopback service available to local processes. Delete the tunnel if the configuration is no longer needed.
Change the local port consistently
If port 8000 conflicts with another process, choose an unused local port, change MCP_NIXOS_PORT, restart mcp-nixos, and repeat the complete local Inspector test. Update the Localtonet local target to the identical port before starting the tunnel. Never point the tunnel at an occupied port without first identifying the process listening there.
Change the MCP path consistently
When setting MCP_NIXOS_PATH, restart the server and update the URL in Inspector and every other client. The tunnel still targets the local IP and port. A 404 response through an otherwise healthy tunnel often indicates that the client is requesting the root URL or an outdated path.
Update without exposing an untested release
Stop the tunnel before changing mcp-nixos versions. Review the current release notes, update through the selected execution method, start the local server, repeat initialization, tool discovery, and the harmless package query, and only then open another short public test. This prevents a changed dependency, schema, or transport behavior from being presented directly to remote callers.
Troubleshooting the complete workflow
uvx is not found
Install uv using the official uv instructions, then restart the shell if required. Confirm uvx --version. Avoid substituting an undocumented pip command simply to get past the error because that can introduce a different Python environment and package source than the project currently recommends.
The process runs but port 8000 is closed
Confirm that MCP_NIXOS_TRANSPORT=http was inherited by the running process. Without it, mcp-nixos uses STDIO. Also verify the host and port variables in the same terminal that launches uvx.
curl reports connection refused
No process is listening at the requested address and port. Check whether mcp-nixos exited, whether it started in STDIO mode, and whether another terminal contains the effective environment. Resolve this before inspecting Localtonet.
Inspector reaches the server but initialization fails
Verify that Inspector is configured for Streamable HTTP and that the URL includes /mcp or the configured custom path. Review the server terminal for protocol errors. A generic HTTP response proves reachability, but only a successful MCP initialization proves transport compatibility.
Initialization works but no tools appear
Request the tool list again and inspect the logs. Confirm that the process is the expected mcp-nixos instance. The current server should expose nix and nix_versions, not one tool per data source.
The Firefox search returns an error
Check that the selected tool is nix and that the fields contain action=search, query=firefox, source=nixos, and type=packages. A tool execution error after successful initialization is different from a transport failure. It can indicate invalid arguments, a changed schema, or an upstream data-source issue.
Local Inspector works but the public host does not resolve
Confirm that you copied the actual assigned address, that the Localtonet client is connected, and that the tunnel was started. Creating a tunnel does not activate it. Also confirm that the selected device is the one running beside mcp-nixos.
The public host responds but the MCP path returns 404
Append the correct MCP path. The default is /mcp. If MCP_NIXOS_PATH=/api/mcp was set, use /api/mcp publicly as well. The public root URL is not automatically the MCP endpoint.
Public Inspector reports an Origin or browser security error
Treat an explicit Origin rejection as a security-policy result, not as proof that the tunnel is broken. Do not disable Origin validation casually. Compare the Origin sent by Inspector with the server or gateway policy, consult current MCP transport guidance, and keep the endpoint closed until a safe compatible configuration is established.
The Localtonet tunnel is connected but the upstream is unavailable
Compare the tunnel target with the locally tested address. For this architecture it should be 127.0.0.1 and port 8000, unless you deliberately changed the port. Confirm that mcp-nixos is still running and that the Localtonet client shares the same host network namespace.
One client works but another does not
Compare Streamable HTTP support, URL handling, authentication expectations, Origin behavior, and session behavior. A client configured only for command-based STDIO cannot use a remote HTTPS URL in place of an executable. If stateless mode is enabled, return temporarily to normal HTTP mode to determine whether session expectations are involved.
Local flake inputs are unavailable
Those operations require Nix and access to the relevant local Nix store. Ordinary remote package and documentation queries working successfully does not prove that local store operations are available or authorized.
Frequently asked questions
Does mcp-nixos require NixOS?
No. The project documents Windows, macOS, and Linux support because ordinary queries use remote information sources. Local flake-input and Nix store operations are exceptions because they require Nix and access to the local store.
What Python version does mcp-nixos require?
At the evidence snapshot used for this revision, the project's pyproject.toml requires Python 3.11 or newer. Check the current pyproject metadata before installation because compatibility requirements can change. The recommended uvx path can manage an appropriate runtime.
Why does this guide not use pip install mcp-nixos?
The current repository Quick Start supplied for this revision documents uvx, Nix, Docker, and HTTP operation but does not establish pip as a current Quick Start path. The guide uses the recommended uvx method instead of retaining an unconfirmed installation command.
What is the default local HTTP endpoint?
With HTTP transport, host 127.0.0.1, port 8000, and the default path, the endpoint is http://127.0.0.1:8000/mcp.
Why is curl not enough to verify the server?
curl can distinguish basic reachability from connection failure, but a complete test must initialize MCP, list tools, and invoke one. The official MCP Inspector performs those protocol-level operations.
Which tools should MCP Inspector discover?
The current project documents two tools: nix for unified queries and nix_versions for package version history. The many supported information sources are selected through tool arguments rather than separate tool names.
Does Localtonet require router port forwarding?
No. Our client establishes an outbound connection to a Localtonet relay server, so this workflow does not require inbound router port forwarding, a public IP address, VPN setup, or inbound firewall changes.
Is a tunnel active immediately after creation?
No. Use the Start button and confirm that both the selected device and tunnel are connected. The endpoint remains available only while the client is connected and the tunnel is running.
Does the public HTTPS address authenticate MCP callers?
No. HTTPS and caller authorization are separate controls. The project evidence used here does not establish built-in mcp-nixos authentication, so this walkthrough limits public exposure to a short supervised test.
Why does Origin validation matter for a localhost MCP server?
A malicious website can potentially use DNS rebinding or browser requests to target services that appear local. MCP transport guidance therefore calls for Origin validation, localhost binding for local servers, and proper authentication for remote exposure.
Test mcp-nixos through Localtonet
Run mcp-nixos on loopback, verify initialization and a harmless tool call with MCP Inspector, and then create a Localtonet HTTP tunnel for a brief public HTTPS test. Stop the tunnel afterward unless you have separately implemented and tested authentication, authorization, and Origin protections for your chosen MCP client.
Get Started Free →

