

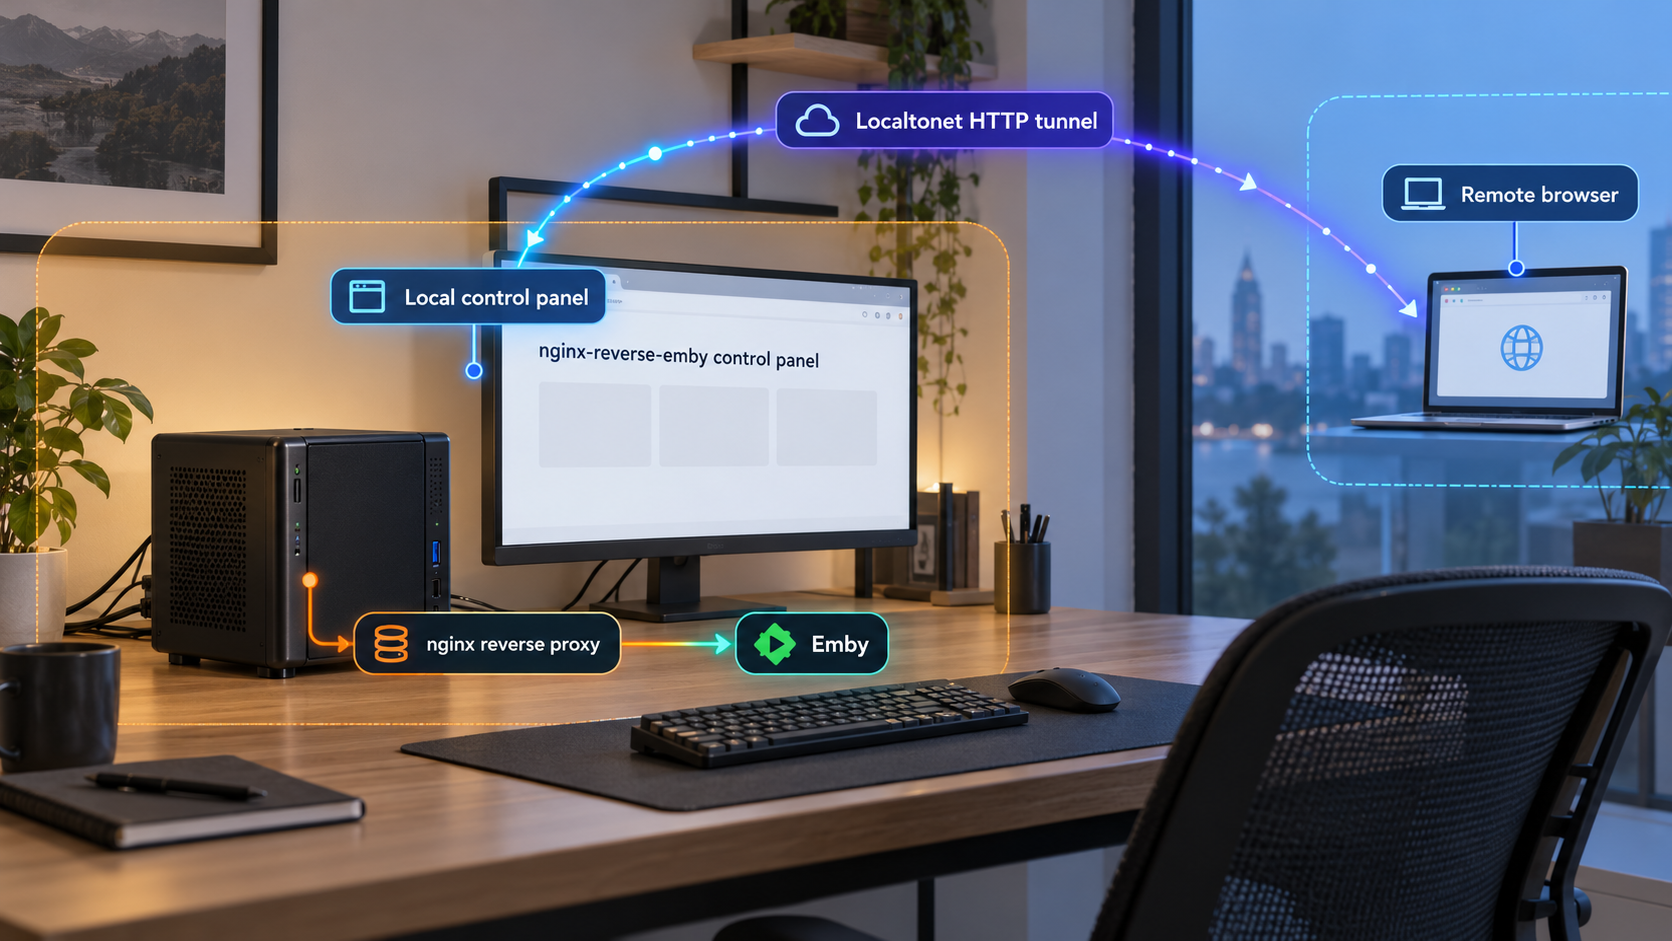
Deploy the Go-based control panel locally, verify it, and add remote administrative access without opening an inbound router port
nginx-reverse-emby is a self-hosted control panel for managing HTTP and HTTPS reverse proxies, TCP and UDP forwarding, certificates, agents, and relay connections. This guide walks through its documented Docker Compose installation methods, required tokens, startup process, local verification, initial rule creation, routine operations, and troubleshooting. After the control panel works locally at http://127.0.0.1:8080, we show how to expose that management endpoint through a separate Localtonet HTTP tunnel. Localtonet is optional here because nginx-reverse-emby already provides its own forwarding and relay functions.
📋 What's in this guide
What nginx-reverse-emby does
Despite its historical name, nginx-reverse-emby is not limited to Emby and its current default runtime does not depend on Nginx. The project provides a Go control plane and a Go agent. A Docker Compose deployment starts the control panel together with a local agent, giving one server a browser-based interface for defining and managing network forwarding rules.
Its HTTP and HTTPS rules route requests by hostname to backend web services. HTTPS rules can use ACME certificate issuance and renewal through HTTP-01 or Cloudflare DNS-01, and administrators may also upload public certificates manually. Its Layer 4 features forward TCP or UDP ports, support multiple backends, and can use PROXY Protocol where the surrounding services are compatible.
A new single-server installation already has a node named local. Rules assigned to that node are synchronized to the agent running beside the control plane. Additional agents can be enrolled on other machines, including machines behind NAT, because those agents initiate their connection to the panel. The project also has its own relay mode for situations in which an entry node cannot directly reach a backend.
127.0.0.1:8080 by default instead of listening on every host interface.
Where Localtonet fits
nginx-reverse-emby and Localtonet have some overlapping networking use cases, but they should not be treated as interchangeable components. nginx-reverse-emby manages reverse-proxy and Layer 4 rules across its own agents and relay system. Localtonet can instead be used as an optional access path to the locally bound management panel after the project is installed and verified.
With Localtonet, the client on the server establishes an outbound connection to one of our relay servers. An HTTP tunnel can then connect a public HTTPS address to the panel's local HTTP endpoint. This avoids changing the router to forward an inbound management port and does not require the server to have a public IP address. The tunnel remains available only while the selected Localtonet client is connected and the tunnel is running.
nginx-reverse-emby has its own agent and relay functionality for forwarding managed services. A Localtonet HTTP tunnel in this guide is a separate, optional path to the control panel at 127.0.0.1:8080. Do not confuse the project's relay settings with the Localtonet tunnel configuration.
Prerequisites and deployment decisions
The project's documented quick-start target is a Linux VPS capable of running Docker. For the manual workflow, the host must also have Docker Compose available through the docker compose command. The recommended deployment script can offer to install Docker Compose if it is missing, but installing system software through an automated script is an administrative decision that should be reviewed before approval.
To configure a public reverse-proxy rule through nginx-reverse-emby itself, you also need a domain whose DNS records resolve to the entry server, an accessible backend service, and inbound firewall access to the ports used by that rule. The documented HTTPS example requires ports 80 and 443 on the VPS. Those requirements belong to the project's own public proxy workflow. They are not required merely to verify the control panel locally or to reach that local panel through Localtonet.
Before creating any proxy rule, establish the backend address and confirm that the VPS can reach it. A backend can be an HTTPS URL such as https://origin.example.net or a private service such as http://192.168.1.100:8096. Substitute an address that belongs to your environment rather than copying an example blindly.
curl -I https://origin.example.netThis request must succeed from the VPS because nginx-reverse-emby cannot proxy to a backend that the selected agent cannot reach. A successful response does not guarantee that every application feature works, but it confirms DNS resolution, outbound connectivity, and an HTTP response from the example backend.
| Requirement | Needed for | Important detail |
|---|---|---|
| Linux host with Docker | Running the documented deployment | The project recommends a Linux VPS for its quick-start workflow. |
| Docker Compose | Manual installation and startup | The documented startup command is docker compose up -d. |
| Two separate random tokens | Panel login and remote-agent enrollment | API_TOKEN and MASTER_REGISTER_TOKEN must be at least 32 characters and must not match. |
| Reachable backend address | Creating a working proxy rule | Test reachability from the server before adding the rule. |
| Domain and suitable DNS | Public rules managed by nginx-reverse-emby | DNS must resolve to the entry server for the documented public HTTP/HTTPS workflow. |
| Localtonet client and device token | Optional Localtonet panel access | Install the client on the server that can reach 127.0.0.1:8080; never publish its token. |
Choose an installation path
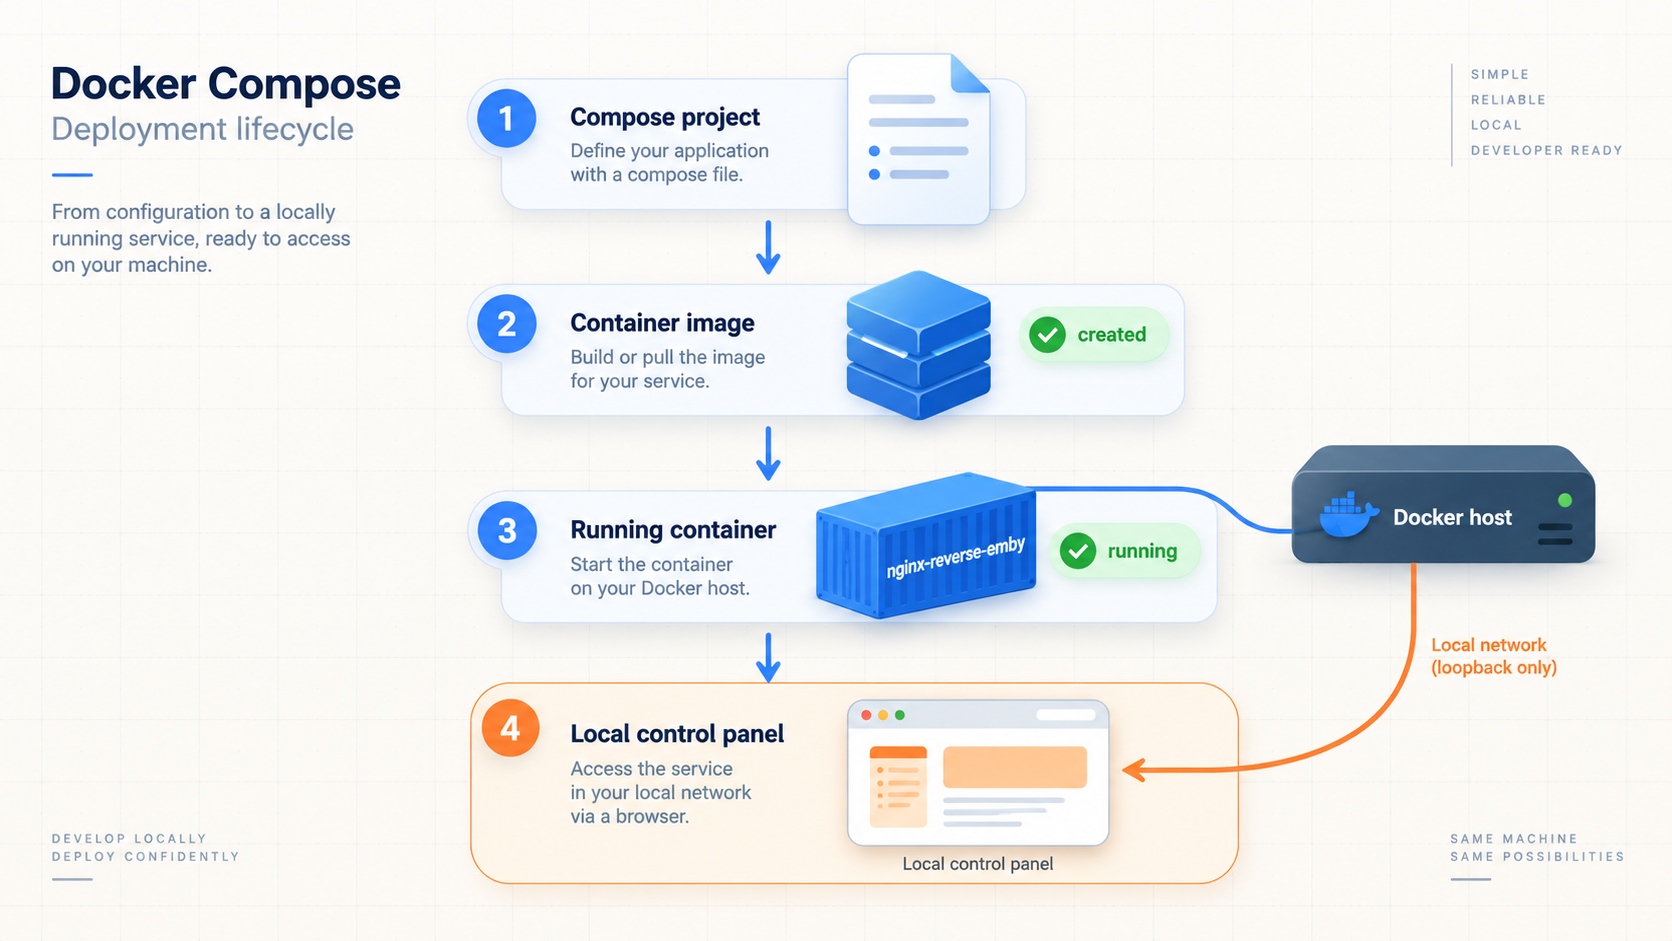
The project documents two main deployment paths. Its recommended script creates the deployment directory, generates random tokens, and starts the service. The manual Docker Compose route gives you direct control over the downloaded Compose file and its environment values. Both ultimately run the same kind of control-plane and local-agent deployment, but the administrative experience differs.
The recommended command downloads a script and immediately passes it to a shell. This is convenient, but it also executes current repository content with the permissions of your shell. Review the script and repository state first, use a controlled host, and avoid running an unfamiliar command as a privileged user without understanding its effects.
Install nginx-reverse-emby
Option A: use the recommended deployment script
The project's recommended workflow is a deployment script. It creates the necessary directory, generates random token values, and starts the containers. If Docker Compose is absent, the script asks before attempting to install it.
curl -fsSL https://raw.githubusercontent.com/sakullla/nginx-reverse-emby/main/scripts/deploy-compose.sh | shThe normal interactive flow asks for a panel domain. If DNS for a domain already resolves to this server, enter that domain. Pressing Enter without a domain selects the project's temporary HTTP workflow. The script may also ask for an optional Cloudflare token. Supplying one allows DNS-01 certificate issuance; leaving it empty uses HTTP-01 where the surrounding DNS and inbound network configuration meet that challenge's requirements.
If you use Cloudflare DNS-01, create a restricted API token with Zone Read, DNS Read, and DNS Edit permissions for the relevant zone. The project specifically warns against using a Global API Key. Treat the token as a secret and do not place it in terminal recordings, support screenshots, public issue reports, or shell examples shared with other people.
At completion, the script prints an access address and a panel token. Save the token in a password manager or another approved secret store. A new deployment does not use a conventional username and password. The panel token is the login credential.
Option B: perform a manual Docker Compose installation
Use the manual route when you do not want an interactive installer or when you need to inspect and adjust the Compose configuration yourself. The documented preparation sequence creates a working directory, downloads the repository's current Compose file, and creates its persistent data directory.
Create and enter the deployment directory
Keep the Compose file and runtime data in a dedicated directory so that configuration, backup, and access control are easier to manage.
mkdir -p nginx-reverse-emby && cd nginx-reverse-embyDownload the provided Compose file
Retrieve the project-maintained docker-compose.yaml. Review the downloaded file before starting it, especially its image, volume, network, port, and environment definitions.
curl -O https://raw.githubusercontent.com/sakullla/nginx-reverse-emby/main/docker-compose.yamlCreate the persistent data directory
The Compose deployment uses a local data directory for runtime state. Do not commit this directory to source control or upload it to an untrusted storage location.
mkdir -p dataConfigure separate panel and registration tokens
Edit docker-compose.yaml, or place the values in an environment file using the project's .env.example as the reference. Set API_TOKEN for panel login and MASTER_REGISTER_TOKEN for remote-node enrollment. Each value must be a different random string of at least 32 characters. Set NRE_TIMEZONE to the timezone appropriate for your deployment rather than assuming the example value is correct.
environment:
  API_TOKEN: <panel-login-token>
  MASTER_REGISTER_TOKEN: <remote-node-registration-token>
NRE_TIMEZONE: Asia/ShanghaiStart the deployment
Start the control plane and local agent in detached mode from the directory containing the Compose file.
docker compose up -dThe timezone shown above comes from the project's example and is not a universal default for every operator. Replace it when your server, users, or operational procedures require another timezone.
Optional Secret Vault master key
If PANEL_VAULT_MASTER_KEY is empty, the project derives the Secret Vault key from API_TOKEN. If you may rotate the panel login token later, the project recommends establishing an explicit master key in advance so the vault key is not coupled to that login credential.
openssl rand -hex 32
Store that command's output securely, then use it as the value of PANEL_VAULT_MASTER_KEY and set the documented key identifier:
environment:
  PANEL_VAULT_MASTER_KEY: <generated-secret-value>
  PANEL_VAULT_KEY_ID: primary
Never copy a real token or vault key into public documentation. If you place secrets in a .env file, the project instructs operators to restrict that file to mode 0600.
chmod 0600 .env
Do not commit real tokens, certificates, private keys, the .env file, or the data runtime directory to Git. The panel login token and remote-node registration token serve different trust purposes and must never be identical.
Verify the local control panel
For the documented manual deployment, the panel listens on the host's loopback interface at http://127.0.0.1:8080. Loopback binding is useful because an arbitrary remote computer cannot connect directly to that socket through the server's public network interface. It also means that opening http://server-address:8080 from your workstation is not the correct verification method.
Begin on the server itself. Request the local endpoint and confirm that the TCP connection and HTTP service respond:
curl -I http://127.0.0.1:8080The exact HTTP status can depend on how the application handles a HEAD request and its authentication flow. The important first check is that a service responds instead of producing a connection-refused or timeout error. If it does not, return to the Compose deployment and inspect its container state and logs before introducing DNS, certificates, firewalls, or Localtonet.
Open the panel through the documented SSH method
The project recommends an SSH local-forwarding tunnel for initial access when there is no public panel domain. Run the following from your workstation, replacing the placeholder with the real server address and replacing root if you use a different SSH account:
ssh -L 8080:127.0.0.1:8080 root@<server-ip>
Keep the SSH session open, then visit http://127.0.0.1:8080 in a browser on that workstation. The browser connects to your workstation's local port 8080, SSH carries the connection to the server, and the server delivers it to its own loopback port 8080.
Log in with the value configured as API_TOKEN, or with the panel token printed by the recommended installer. A new installation has no separate username and password. Successful login confirms that the panel endpoint, token, browser path, and control-plane container are functioning.
Do not use Localtonet to diagnose a panel that is not already responding at 127.0.0.1:8080. Local verification separates application problems from tunnel configuration problems and makes troubleshooting substantially clearer.
Create and verify the first reverse-proxy rule
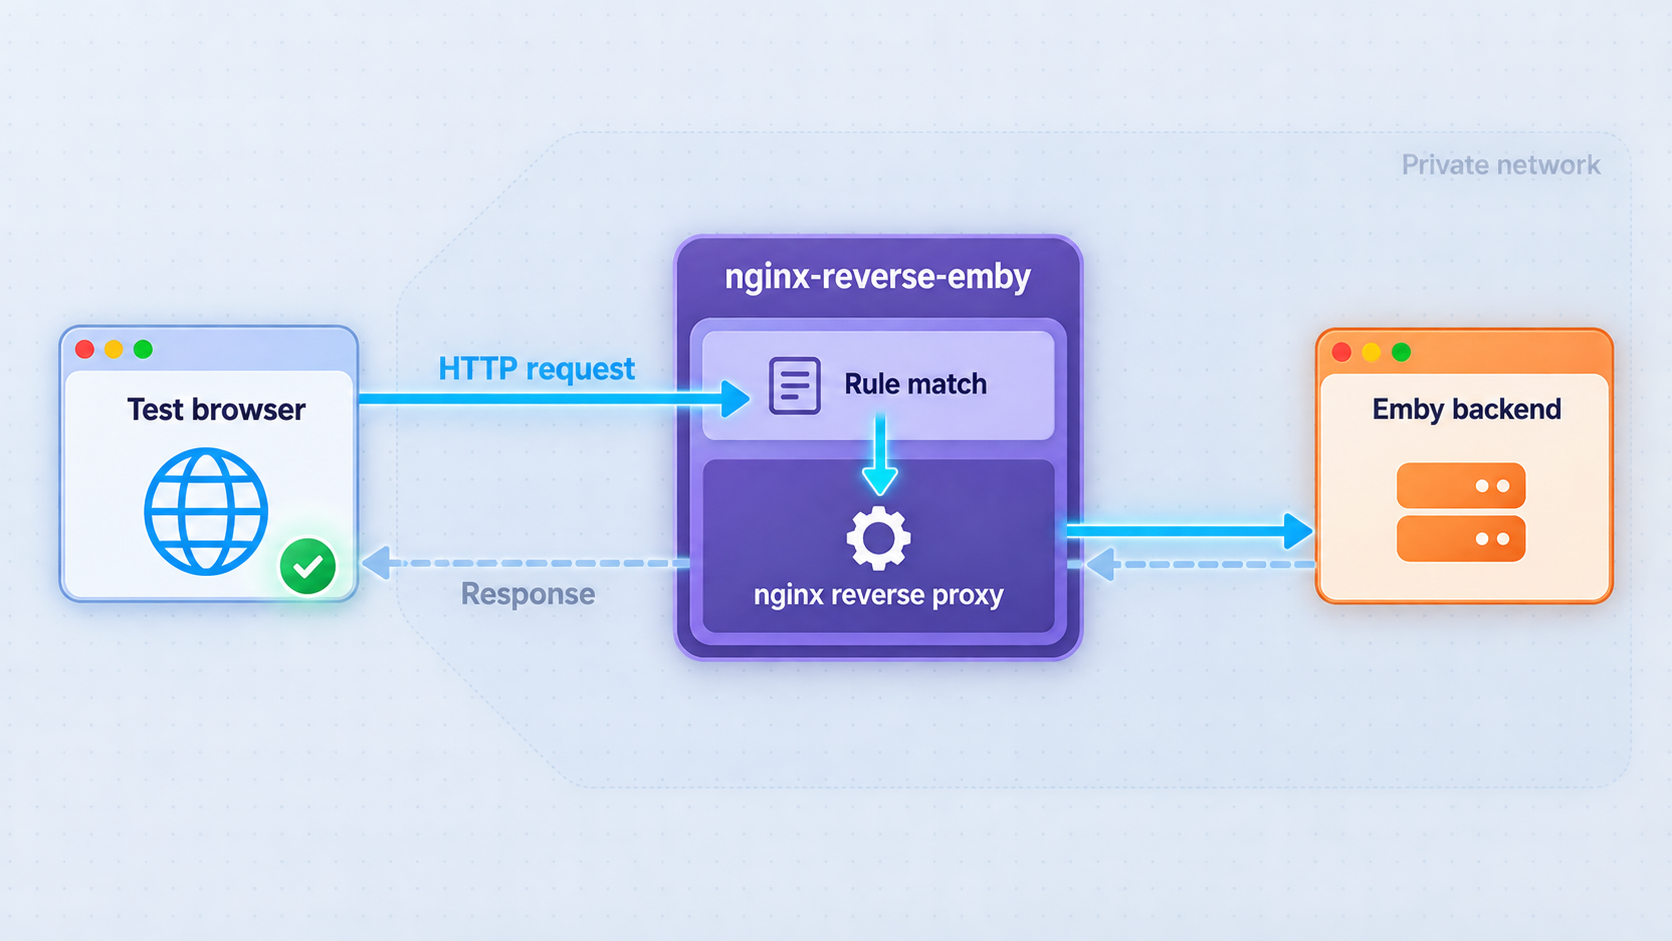
You can use nginx-reverse-emby only as a control panel initially, but a complete application check should also verify that its local agent can apply a rule. The project's quick start uses an HTTP rule assigned to the built-in local node.
Confirm the backend is reachable
From the VPS, request the real backend address. Resolve DNS, routing, certificate, and firewall failures before creating the rule.
Open the HTTP rule area
In the panel, go to Traffic Management, then HTTP Rules. Choose the existing local node for a single-server deployment.
Enter the public hostname and backend URL
Set the entry hostname, such as https://emby.example.com, and the full backend address, such as https://origin.example.net. Include the backend protocol and any nonstandard port.
Enable and save the rule
An inactive rule does not forward traffic. Enable it and save so the local agent can receive the updated configuration.
Test the entry hostname
Confirm that DNS points to the VPS and that the firewall allows ports 80 and 443 for the documented HTTP/HTTPS workflow. Open the entry hostname and verify that it displays the backend service.
An HTTPS rule can trigger automatic certificate issuance. Certificate issuance still depends on the selected challenge being able to validate the domain. HTTP-01 requires the relevant public route to reach the server. Cloudflare DNS-01 requires a correctly scoped Cloudflare API token and control of the DNS zone.
Certificate maintenance behavior
The project's managed-certificate system scans for renewal work every 24 hours by default. A single ACME issuance or renewal operation may run for up to 60 minutes by default. If it times out, the system records the failure and continues processing other certificates. The project exposes NRE_MANAGED_CERT_RENEW_INTERVAL and NRE_MANAGED_CERT_ACME_TIMEOUT for operators who have a documented reason to adjust those values.
Access the local control panel with Localtonet
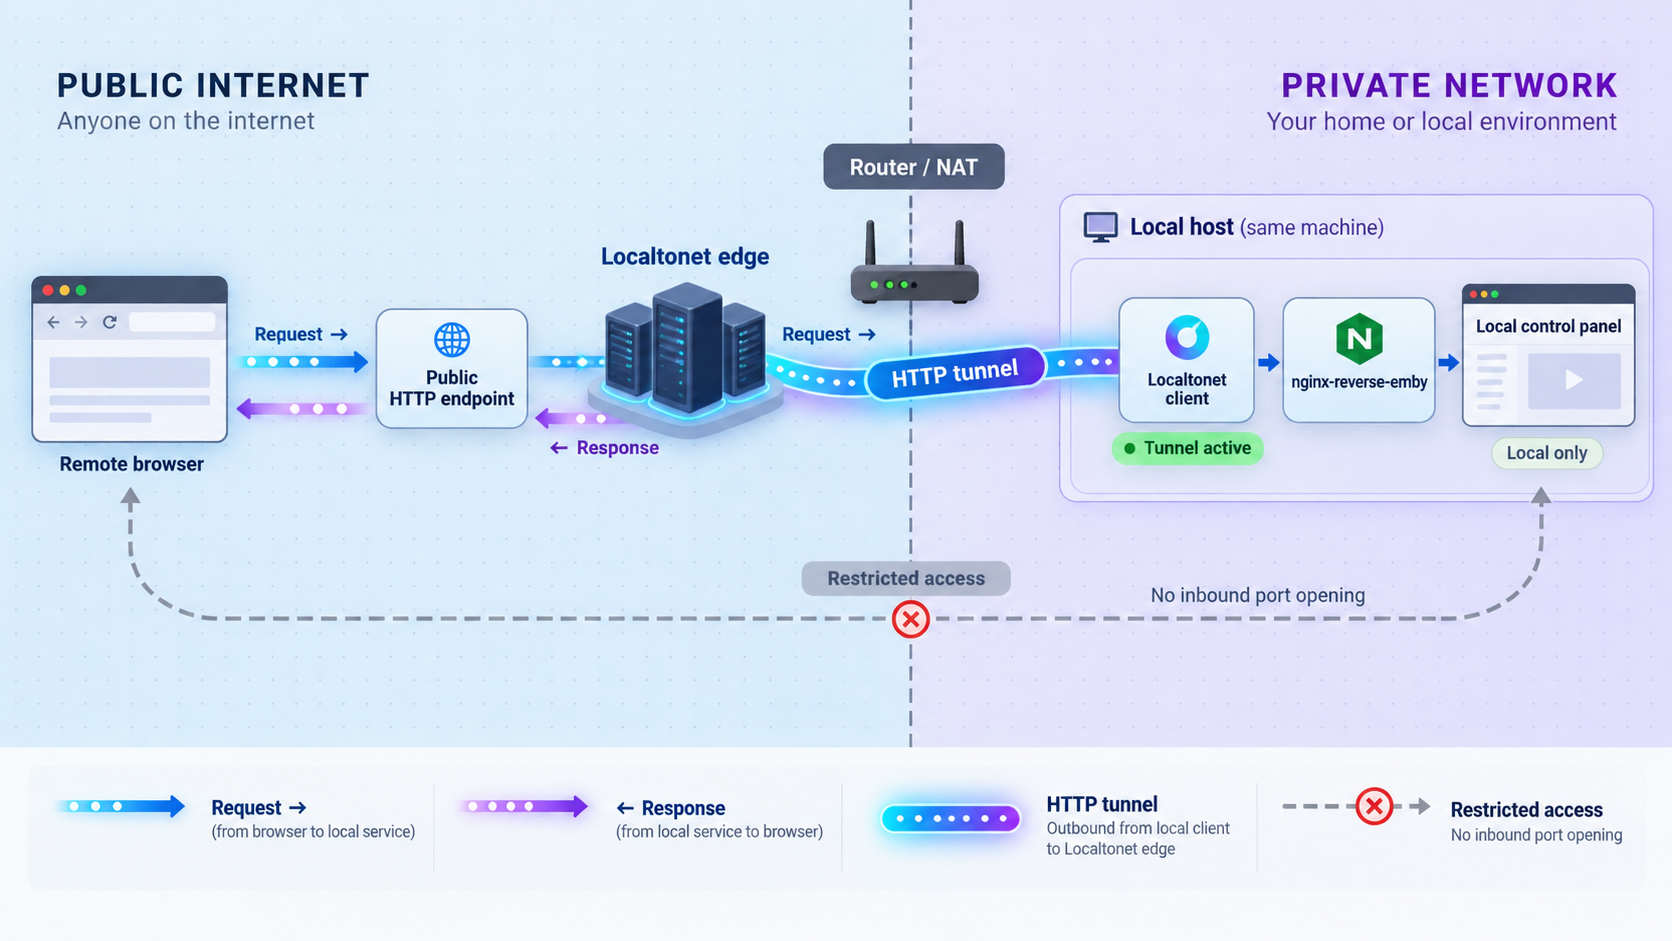
Once http://127.0.0.1:8080 works, you can expose that endpoint through a Localtonet HTTP tunnel. This is useful when you want remote browser access without publishing host port 8080 through the router or changing an inbound firewall rule. It also works when the server does not have a public IP because our client initiates the connection outbound.
Install and run the Localtonet client on the same server as nginx-reverse-emby. This placement matters because 127.0.0.1 always refers to the machine on which the connecting client runs. A Localtonet client on your laptop would target the laptop's loopback interface, not the server's panel.
Current client installation details vary by operating system and client version, and no verified installation command is supplied for this article. Use the current Localtonet download and dashboard instructions rather than copying an unverified command. Do not guess or publicly share the device-specific authentication token.
Install and run the Localtonet client on the panel host
Run our client on the Linux server where nginx-reverse-emby responds at 127.0.0.1:8080. The client must remain connected for the tunnel to remain available.
Authenticate or select the server device
Use the device-specific Localtonet authentication token through the current supported client workflow, then select that connected device in our dashboard. Keep the token private.
Select an available relay server
Choose from the relay servers or regions currently presented in the dashboard. Availability can vary, so this guide does not hardcode a server code or region.
Create an HTTP tunnel to the panel
Configure the local target as IP address 127.0.0.1 and port 8080. Select the appropriate HTTP process type available to your account, such as a random subdomain, supported custom subdomain, or custom domain. These process types serve the target at a public HTTPS address.
Start the tunnel
Creating the configuration does not start it. Use the dashboard's Start control, then wait for the tunnel and selected client to show that they are connected.
Open and test the assigned HTTPS address
Open the public address assigned to the tunnel and log in with the nginx-reverse-emby API_TOKEN. When remote administration is finished, stop or delete the tunnel if it is no longer required.
For the current dashboard sequence, consult our Localtonet HTTP tunnel documentation. Exact custom-domain DNS records are intentionally not included here because they must be checked against the current Localtonet documentation and the configuration shown in your account.
| Access method | Best fit | Operational behavior |
|---|---|---|
| Local browser on the server | Basic endpoint testing | Uses 127.0.0.1:8080 directly and does not provide access from another machine. |
| SSH local forwarding | Temporary administrator access | Requires working SSH access and remains available while the SSH forwarding session is active. |
| Localtonet HTTP tunnel | Public HTTPS access without inbound port forwarding | Requires a connected Localtonet client and a running tunnel; the panel token remains the application login credential. |
| Project self-proxy rule | A panel domain managed by nginx-reverse-emby itself | Uses a rule targeting http://127.0.0.1:8080 and requires the project's documented DNS, firewall, certificate, and forwarded-header configuration. |
Localtonet removes the need for inbound router port forwarding, but the assigned URL is still a public route while the tunnel is running. Keep the panel token long, random, and private. Share the URL only with intended administrators, stop the tunnel when it is unnecessary, and apply any suitable access restrictions available in your current configuration. A difficult-to-guess URL is not a substitute for authentication.
Security and exposure checklist
A management panel can change forwarding rules, enroll infrastructure, and handle certificate-related material, so it deserves stricter controls than an ordinary public content page. Treat both the panel URL and its credentials as administrative assets.
Keep the two project tokens separate
API_TOKEN authorizes panel login, while MASTER_REGISTER_TOKEN is used to enroll remote agents. Generate at least 32 random characters for each and ensure the values are not identical. Do not reuse either token as a Localtonet device token, Cloudflare token, vault key, or unrelated service password.
Prefer HTTPS for ongoing browser access
The project's temporary HTTP path reduces casual discovery but does not replace HTTPS or a strong token. A Localtonet HTTP tunnel presents the service at a public HTTPS address, while forwarding to the local HTTP endpoint. If you instead configure the panel's own public hostname, follow the project's self-proxy instructions and certificate workflow.
For the project's documented self-proxy method, an administrator creates a rule whose public entry is the panel hostname and whose backend is http://127.0.0.1:8080. After certificate issuance, the Compose environment can identify the public URL and enable trust for forwarded headers:
environment:
  NRE_PUBLIC_URL: https://panel.example.com
  NRE_TRUST_FORWARDED_HEADERS: "true"
Enable NRE_TRUST_FORWARDED_HEADERS only when the upstream proxy is trusted to clean and rewrite X-Forwarded-* headers. The project's documented example relies on its local agent doing so. Do not automatically copy this setting into a different proxy topology.
Use least privilege for DNS automation
A Cloudflare token used for DNS-01 should have only the documented Zone Read, DNS Read, and DNS Edit permissions for the necessary zone. Do not use a Global API Key. If you do not need DNS-01, do not configure a Cloudflare token merely because the installer offers the option.
Protect files and diagnostic output
Restrict access to the deployment directory, environment file, runtime data, certificates, and private keys. Redact credentials before sharing logs or issue reports. Screenshots can expose tokens just as easily as copied text, and shell history can retain commands containing secrets.
Limit tunnel lifetime
A Localtonet tunnel exists only while its selected client is connected and the tunnel is running. Use that lifecycle deliberately. Start remote panel access when it is required, verify the assigned endpoint, and stop or delete the tunnel when the workflow is complete. Creation alone does not start a tunnel.
Routine operations and troubleshooting
Apply Compose configuration changes
After changing the project's Compose environment, apply the configuration using the documented startup command from the deployment directory:
docker compose up -d
Before changing tokens, understand their role. Rotating API_TOKEN changes the credential used to log in. If the Secret Vault key was implicitly derived from that token, changing it can also affect the key relationship. Establishing an explicit PANEL_VAULT_MASTER_KEY in advance avoids coupling the vault master key to future login-token changes.
Back up persistent state
The local data directory contains runtime data and should be included in an approved backup strategy, but it must be treated as sensitive. Do not upload it to a public repository or an untrusted file-sharing service. Before restoring or migrating, preserve the corresponding secrets and configuration required to interpret the deployment correctly.
The local panel does not respond
If curl -I http://127.0.0.1:8080 returns a connection failure, concentrate on the application deployment. Confirm that the Compose startup completed, that the expected containers remain running, and that another local service has not taken the required binding. Review the Compose configuration and container logs without posting secrets publicly.
Do not troubleshoot DNS or Localtonet until the loopback endpoint responds. Neither an HTTP tunnel nor a public hostname can repair a service that is not listening on its local target.
The SSH tunnel opens, but login fails
Confirm that you entered API_TOKEN, not MASTER_REGISTER_TOKEN, a Cloudflare token, or the Localtonet device token. A new panel uses the access token without a separate username. Check for accidental whitespace and verify that the token in the running Compose environment is the intended value.
The first proxy rule does not work
Check the path in order. First, verify that the public hostname resolves to the VPS. Second, confirm the relevant firewall permits ports 80 and 443. Third, retest the backend from the VPS. Fourth, confirm that the rule uses the local node and is enabled. Finally, distinguish a proxy failure from a certificate challenge failure by checking the state reported by the panel.
Automatic HTTPS does not complete
For HTTP-01, verify that public traffic for the domain can reach the VPS on the required port and that DNS points to the correct host. For Cloudflare DNS-01, confirm that the API token belongs to the correct zone and has Zone Read, DNS Read, and DNS Edit permissions. Managed certificate operations are scanned every 24 hours by default, and an individual ACME operation can run for up to 60 minutes before being recorded as failed.
The Localtonet URL does not load
Test the local panel from the same machine running the Localtonet client. The target must be 127.0.0.1 on that machine and port 8080. Then verify that the selected device is connected, the intended relay server is selected, and the tunnel has actually been started. Remember that creating the tunnel configuration is not the same as running it.
If the public URL reaches a response but login fails, the tunnel path is probably functioning. Return to the panel credential check and use API_TOKEN. If the URL stops working after a server restart, verify both the application containers and the Localtonet client connection before restarting the tunnel.
Remote agents cannot join
The panel's built-in local node requires no additional enrollment for a single-host deployment. For another server, use the panel's node-management area, choose the documented operating-system path, and execute the generated enrollment procedure on the target host. Remote agents initiate their connection to the panel. Keep MASTER_REGISTER_TOKEN private and rotate it if it is exposed.
The supplied project evidence does not establish a latest release number or a release schedule. Review the repository and project documentation before upgrades, and do not infer stability or update frequency from this guide.
Frequently asked questions
Does nginx-reverse-emby require Nginx?
No. The current default runtime described by the project uses a Go control plane and Go agents and does not depend on Nginx. The repository retains its historical name.
Is the project limited to Emby?
No. Emby and Jellyfin are example use cases. The rule model can proxy general HTTP services and forward TCP or UDP ports, provided the selected agent can reach the configured backend.
What is the default local panel address?
The documented manual deployment exposes the panel at http://127.0.0.1:8080. Because it is bound to loopback, access it on the server, through the documented SSH forwarding method, or through a correctly configured remote-access path such as a Localtonet HTTP tunnel.
Which token is used to log in?
Use API_TOKEN. A new deployment does not have a separate username and password. MASTER_REGISTER_TOKEN is for remote-node registration and must be a different random value.
Does Localtonet replace the project's agents or relay?
Not in this workflow. nginx-reverse-emby continues to manage its own local and remote agents, proxy rules, and relay features. Localtonet provides a separate optional HTTP path to the locally bound administration panel.
Must I forward port 8080 on my router?
No. The documented panel listens on loopback, and a Localtonet client on the same server can reach that local endpoint through an outbound connection. Do not create an inbound port-forwarding rule for port 8080 merely to use the Localtonet workflow.
Is the Localtonet public URL private?
It is a public route while the tunnel is running, so the panel's own authentication remains essential. Keep the URL and token within the intended administrative group, use a strong random API_TOKEN, and stop or delete the tunnel when remote access is not required.
Can I use a custom domain for the Localtonet tunnel?
HTTP tunnels support random subdomain, custom subdomain, and custom-domain process types, subject to current availability and account configuration. Check the current dashboard and documentation for exact DNS requirements rather than using unverified records from another setup.
Can I run the Localtonet client on another computer?
The client must run on a device that can reach the target service. For the target 127.0.0.1:8080, it should run on the nginx-reverse-emby host because loopback refers to the client device itself. A client on another device would need a different reachable target address, which falls outside this loopback-focused workflow.
Connect your verified control panel with Localtonet
After nginx-reverse-emby responds locally at 127.0.0.1:8080, create a Localtonet HTTP tunnel for browser-based administration without opening an inbound router port. Keep the panel token private and run the tunnel only for as long as remote access is needed.


