

Run your own AI API gateway locally, verify it carefully, and publish only the endpoint your remote clients need
ccLoad is a self-hosted AI API gateway for Claude Code, Codex, Gemini, and OpenAI-compatible clients. This guide covers the documented installation choices, a recommended Docker Compose workflow, initial gateway configuration, local verification, routine operations, and common failure points. After the gateway works locally, we show how to connect it to a Localtonet HTTP tunnel for remote HTTPS access without inbound router port forwarding, firewall changes, VPN setup, or a public IP address. We also separate ccLoad authentication from tunnel connectivity so that publishing the service does not accidentally become a substitute for access control.
📋 What's in this guide
Understand the ccLoad and Localtonet architecture
ccLoad runs between AI clients and model providers. Instead of configuring every client with each upstream credential, a client sends requests to one ccLoad base address and authenticates with a ccLoad-issued token. ccLoad then selects an eligible upstream channel, applies its routing behavior, translates protocols when required, tracks usage and cost, and forwards the request.
This arrangement keeps upstream API keys or account credentials inside the gateway rather than distributing them to every client. ccLoad supports use cases involving Claude Code, Codex, Gemini clients, and OpenAI-compatible software. Its documented API surface includes Anthropic-style paths such as /v1/messages, other /v1/* paths, and /v1beta/* paths. The exact path and request format used by a client must match that client's protocol and the ccLoad configuration.
By default, ccLoad listens on port 8080. Its built-in administration interface is available under /web/, and the service provides a /health endpoint for basic verification. The listening port can be changed with the PORT environment variable. This article uses the documented default port so that the installation, local tests, and tunnel target remain easy to follow.
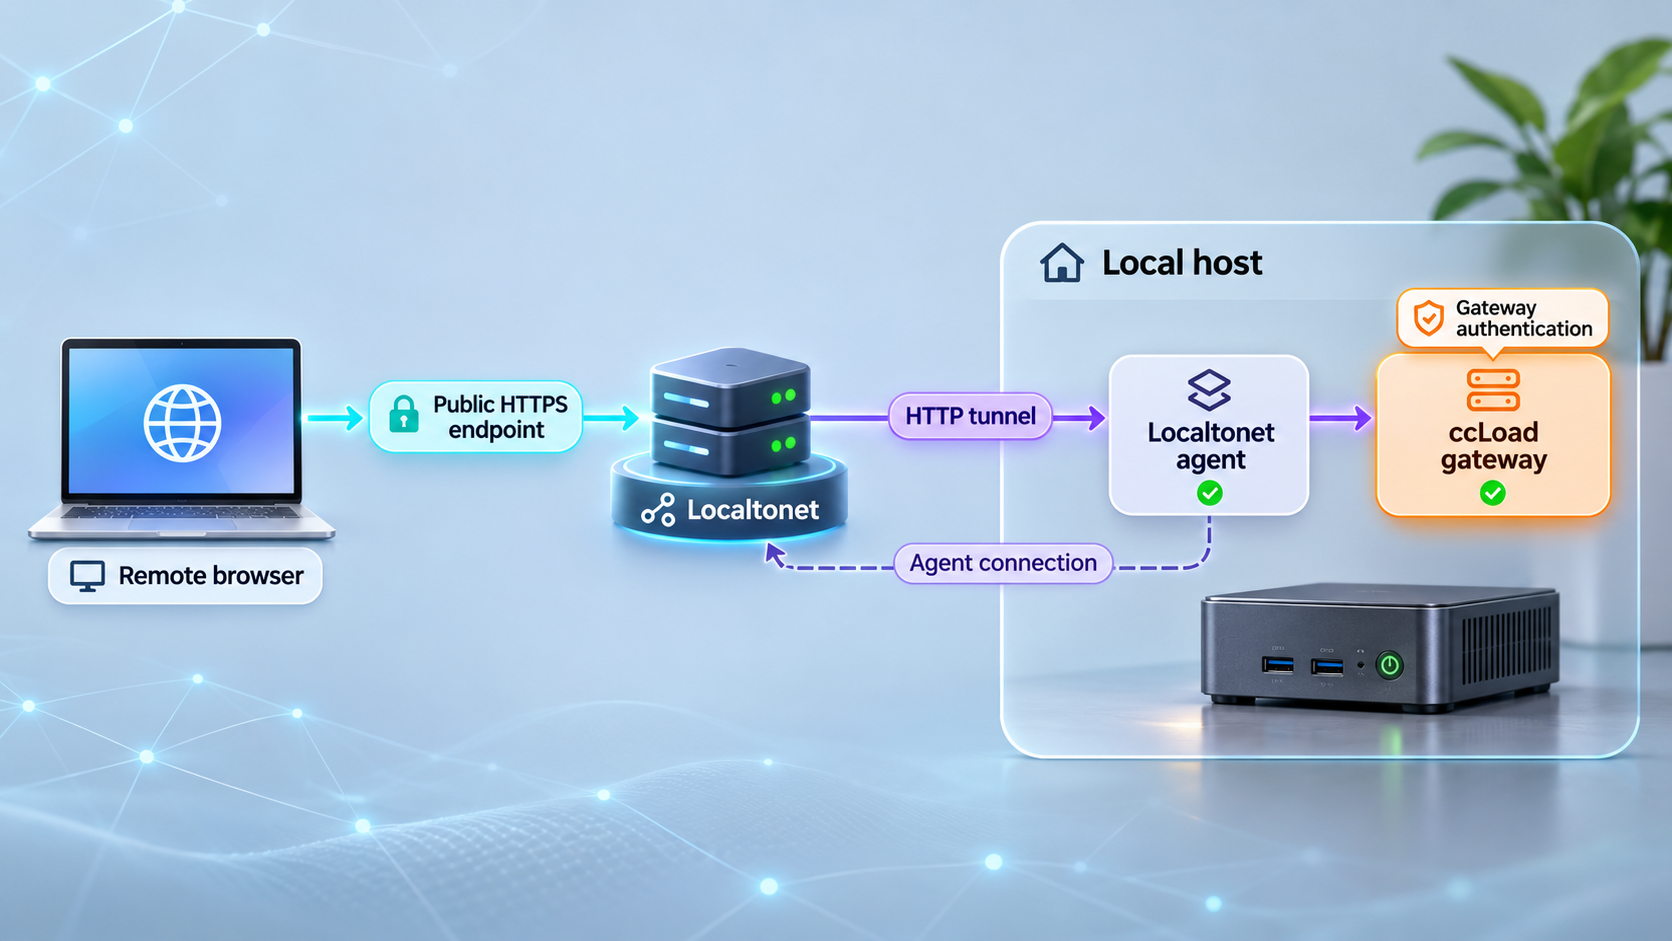
Localtonet is added only after this local service works. Our client application runs on the ccLoad host, or on another device that can reach that host, and establishes an outbound connection to a Localtonet relay server. An HTTP tunnel then points to the ccLoad local IP address and port. The result is a public HTTPS address that remote clients can use while the Localtonet client is connected and the tunnel is running.
ccLoad exposes a web administration console, a health route, and HTTP API routes. A Localtonet HTTP tunnel is therefore the natural match. A raw TCP tunnel is not required for the documented ccLoad web and API workflow.
Prerequisites and deployment decisions
Before installing anything, choose the machine that will host ccLoad. It must be able to make outbound connections to the model providers and other upstream services you configure. For remote access with Localtonet, the same machine, or another device on the same reachable network, must also be able to run our client and maintain an outbound connection to a relay server.
ccLoad offers multiple documented installation paths. Docker is the project's recommended option. Docker Compose is useful when you want the deployment represented by files and managed with standard Compose commands. Homebrew provides a service-oriented installation for systems where Homebrew is available. Prebuilt binaries are also published through GitHub Releases.
| Installation method | Best suited to | Important consideration |
|---|---|---|
| Docker | A quick containerized deployment | The official image is ghcr.io/caidaoli/ccload:latest. Persistent data and the required CCLOAD_PASS value must be configured. |
| Docker Compose | Repeatable server deployments managed from configuration files | The documented workflow uses docker-compose.yml and an .env file, then starts the service with docker compose up -d. |
| Homebrew | Hosts already managed with Homebrew | The package can be installed from the ccLoad tap and started as a background service. |
| Prebuilt binary | Operators who do not want a container runtime or Homebrew | Select the asset that matches the host operating system and CPU architecture from the current release. |
For the Docker or Docker Compose path, install a current Docker environment with the Compose plugin available. Confirm both commands before proceeding:
docker --version
docker compose version
You will also need a strong administrator password for CCLOAD_PASS. This value protects access to ccLoad's administration workflow and must not be committed to source control, pasted into issue reports, embedded in images, or shared with client users. Client access should use ccLoad-issued tokens rather than the administrator password.
Plan persistent storage before adding channels or issuing tokens. A container can be replaced during an update, so state must not exist only in an ephemeral container layer. The official Docker workflow uses a ccload_data volume. The precise container mount target should be copied from the current ccLoad documentation or Compose file because the supplied installation evidence does not establish that internal path clearly enough for us to reproduce it safely.
Mounting a volume at the wrong path can create the appearance of persistence while ccLoad continues writing somewhere else. Use the volume mapping in the current official ccLoad Docker example or use its supplied Compose file. Back up the resulting persistent data before upgrades.
Install and start ccLoad
The following workflow uses Docker Compose because it combines the project's recommended container approach with configuration files that can be reviewed before startup. Alternative installation methods follow afterward. Regardless of the method, the expected result is a running ccLoad service on port 8080, unless you deliberately set PORT to another value.
Obtain the official deployment files
Download the current docker-compose.yml and environment file described by the ccLoad project, and place them in the same dedicated directory. The repository contains the Compose definition and environment examples. Use files from the release or branch you intend to run rather than combining files from different versions.
Set the required administrator password
Open the local .env file and set CCLOAD_PASS to a long, unique value. If you want a port other than 8080, set the documented PORT variable as well. Keep the default for this guide unless another local service already occupies port 8080.
Review persistence and port publishing
Confirm that the Compose file uses persistent storage and publishes the selected host port. Do not remove the data volume merely to simplify the file. If the supplied Compose file differs from an older online example, prefer the file that belongs to your selected ccLoad version.
Start the Compose deployment
From the directory containing the Compose and environment files, start ccLoad in detached mode.
docker compose up -dConfirm that the container remains running
List the Compose services and inspect logs. A container that starts and immediately exits is not a successful installation.
docker compose ps
docker compose logs
Docker run alternative
The official standalone Docker workflow uses the image ghcr.io/caidaoli/ccload:latest, a persistent ccload_data volume, and the required CCLOAD_PASS environment variable. It also needs port 8080 published when the default is retained.
We are not reproducing a complete docker run line because the available evidence does not unambiguously establish the image's internal data mount destination. Guessing that path would risk producing a deployment that loses configuration after container replacement. Copy the current complete command from the ccLoad README, replace its example password securely, and retain its documented volume mapping.
The image name itself can be pulled independently:
docker pull ghcr.io/caidaoli/ccload:latest
For a reproducible production deployment, consider selecting a reviewed release rather than changing software whenever the moving latest tag changes. Confirm the tag currently published by the project before changing the image reference.
Homebrew alternative
On a system with Homebrew installed, the documented package workflow is:
brew tap caidaoli/ccload
brew install ccload
brew services start ccload
The service command starts ccLoad under Homebrew's service management. Before relying on this route, ensure the required password configuration has been supplied according to the current package instructions. The evidence available for this article confirms the installation and service commands, but not a stable package-specific configuration path for secrets. We therefore do not invent one.
Prebuilt binary alternative
Prebuilt binaries are available from ccLoad's GitHub Releases. Download the asset matching both the operating system and processor architecture of the host. Verify that you selected a release asset rather than repository source code, make the binary executable where required, and configure the mandatory password before exposing the service.
Release asset names, archive layouts, installation directories, and service definitions can change. Because those details are not established by the supplied evidence, this guide does not provide guessed filenames or filesystem paths. If you choose a binary installation, create an operating-system service only after confirming the binary starts correctly in the foreground and responds on the configured port.
Configure the ccLoad gateway
Installation creates the running gateway, but the gateway cannot route useful model requests until it has at least one upstream channel and a client access token. The documented quick-start sequence is to sign in to the administration console, add a channel, create an API token, and point a client at ccLoad.
Open the local administration console
On the ccLoad host, visit http://localhost:8080/web/. If you are working from another trusted device on the same LAN, replace localhost with the server's LAN address. Sign in with the password configured through CCLOAD_PASS.
Add an upstream channel
Add a channel using an upstream type and credential supported by the current ccLoad release. Depending on the provider and ccLoad feature in use, this may involve an API key, a compatible endpoint, or supported account credentials. Restrict the channel to the models and behavior you actually intend to provide.
Create a ccLoad client token
Issue a gateway token for the client or teammate that will use the service. ccLoad supports token-oriented controls such as model, channel, cost, and concurrency limits. Prefer a separate token per user, device, automation task, or trust boundary so that access can be reviewed and revoked without changing every client.
Choose the matching API base address
During local testing, use a base address beginning with http://localhost:8080. Select the API path expected by the client protocol. ccLoad documents routes under /v1/ and /v1beta/, including /v1/messages. Do not append a path simply because another client uses it.
Configure one client and test it locally
Configure the client with the local ccLoad base address and its dedicated ccLoad token. Client settings and environment variable names differ, so follow the configuration format for that exact client. Confirm one successful request before adding remote access or rolling the gateway out to other users.
Do not configure Claude Code, Codex, Gemini, an SDK, or another client with CCLOAD_PASS. The administrator password protects gateway management. Remote applications should authenticate with their own ccLoad-issued tokens, ideally with the narrowest practical permissions and limits.
Verify ccLoad locally before creating a tunnel
Local verification isolates application problems from tunnel problems. If the health route, administration console, or API does not work through the loopback address, Localtonet cannot make it healthy. Complete the checks below on the ccLoad host before creating public access.
Check the health endpoint
Request the documented health route:
curl http://localhost:8080/healthThe request should connect and return a successful health response rather than a connection refusal, timeout, or unrelated service page. The exact response body can vary by ccLoad version, so use the HTTP result and current ccLoad behavior rather than depending on a hardcoded body not established here.
Check the administration console
Open:
http://localhost:8080/web/
Confirm that the console loads and accepts the password you configured. If the health endpoint works but the console does not, inspect the complete path, browser network errors, and container logs. The trailing slash in /web/ is worth preserving during diagnosis.
Confirm the listening port
If neither route responds, check whether the process or container is running and whether port 8080 is published to the host. For Compose:
docker compose ps
docker compose logs
If you set PORT to a different value, substitute that value in every local URL and later in the Localtonet target. Also confirm that another service is not already occupying the selected host port.
Test a real gateway request
A health check proves that the web process responds. It does not prove that an upstream credential is valid, a model is allowed, a client token is accepted, or protocol conversion is configured correctly. Use a real supported client with the local base address and its ccLoad token. Confirm that the request reaches the intended channel and completes successfully.
Review ccLoad's request monitoring or logs after the test. A failed upstream request can still demonstrate that the client reached ccLoad, but it is not a successful end-to-end verification. Resolve invalid credentials, unsupported models, exhausted quotas, protocol mismatch, or upstream availability before introducing a public URL.
First verify /health, then verify the administration console, and finally send a real authenticated model request. These checks cover process availability, management access, and the full client-to-upstream path respectively.
Expose the working ccLoad service with a Localtonet HTTP tunnel
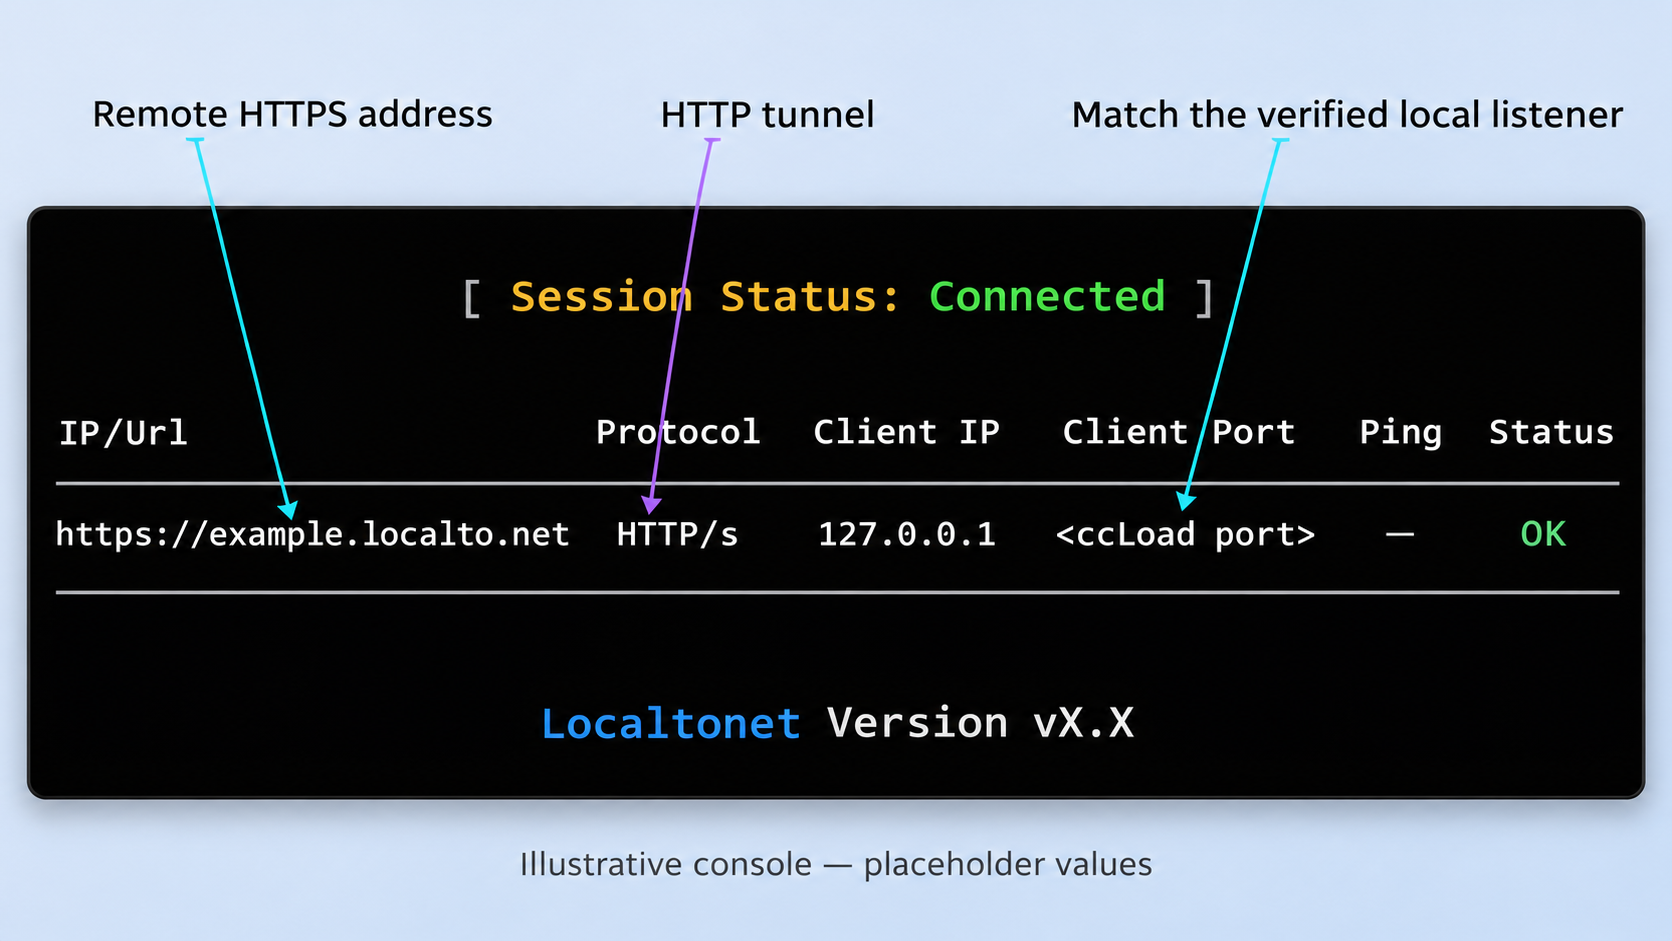
Once ccLoad responds locally, Localtonet can provide remote HTTPS reachability. Our client establishes an outbound connection, so the workflow does not require inbound router port forwarding, a public IP address, firewall changes, or VPN setup. The tunnel points to the ccLoad HTTP listener and supplies a public HTTPS address.
Run the Localtonet client on the ccLoad host when possible. This allows the tunnel target to use 127.0.0.1, keeping the origin service local to that machine. If our client runs on another device, use an address through which that device can already reach ccLoad, and verify the route locally from the Localtonet device first.
Install and run the Localtonet client
Install our client for the operating system on the device that can reach ccLoad. Start it and keep it running. The selected device must remain connected for the public tunnel to stay available.
Authenticate or select the device
Use the device-specific Localtonet authentication token supplied through the product workflow, or select the corresponding authenticated device in the dashboard. Never paste that token into this article's example commands, client configuration, public logs, or screenshots.
Select an available relay server
Select a server or region currently offered in the dashboard. Available server codes and regions can vary, so obtain the value from the current product rather than copying a hardcoded code from an old tutorial.
Create an HTTP tunnel to ccLoad
Create an HTTP tunnel and set its local target to 127.0.0.1 on port 8080 when our client runs on the ccLoad host. If ccLoad uses a different documented PORT value, use that port. If the client is on another machine, use the reachable private address of the ccLoad host instead of the loopback address.
Choose the HTTP process type
Select the appropriate available process type: Random Sub Domain, Custom Sub Domain, or Custom Domain. These options serve the same target content at a public HTTPS address. Availability may depend on the current dashboard or plan. Exact custom-domain DNS instructions should be taken from current Localtonet documentation rather than guessed.
Start the tunnel and copy its public URL
Creating a tunnel does not mean it is running. Press Start, wait for the selected client and tunnel to show as connected, and copy the assigned public HTTPS address. The tunnel can later be stopped or deleted when remote access is no longer required.
If the assigned address is represented here as https://your-assigned-host.example, the remote equivalents of the local routes would conceptually be:
https://your-assigned-host.example/health
https://your-assigned-host.example/web/
Replace the placeholder with the actual URL assigned in the dashboard. Do not copy the placeholder literally. Test the health route first, then authenticate to the administration console only from a trusted device. Finally, update a single AI client from its local ccLoad base address to the public HTTPS base address while preserving its ccLoad token and protocol-specific path.
The public URL changes only the route used to reach ccLoad. It does not create channels, fix model mappings, convert an administrator password into a client token, or alter client protocol requirements. If a client worked locally but fails remotely, compare the local and public requests carefully, including the scheme, hostname, path, authorization header, and client-selected protocol.
For the maintained product workflow and current interface, consult our Localtonet HTTP tunnel documentation.
Secure a remotely reachable AI gateway
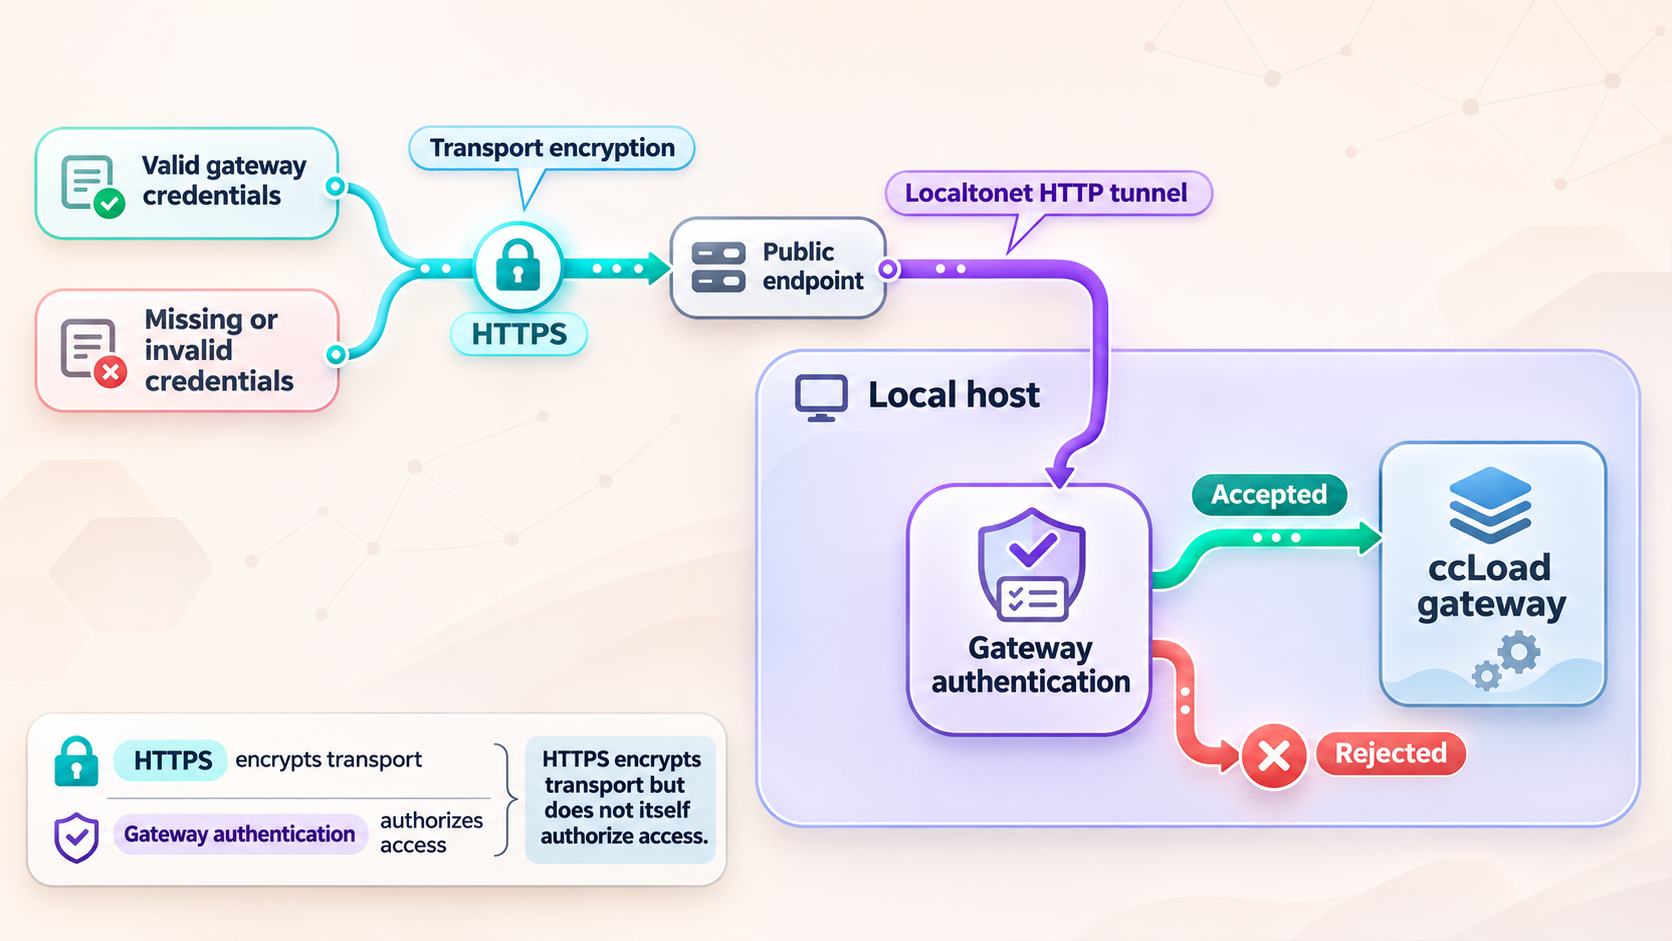
An AI gateway can hold provider credentials, account sessions, client tokens, usage records, cost information, and management controls. Publishing it requires more care than exposing a disposable development page. HTTPS protects the public transport path at the tunnel edge, but application authorization and operational controls still belong to ccLoad and the operator.
Protect the administration console
Use a unique, high-entropy CCLOAD_PASS. Do not reuse a provider password, workstation login, or client token. Store it in a suitable secret manager or protected environment configuration. Limit administration to trusted operators, and avoid leaving the console open in shared browser profiles.
Because the HTTP tunnel forwards the configured local service, routes on that service can be reachable through the assigned hostname. Do not assume that an obscure /web/ path is a security boundary. The administrator password must remain strong even if client API routes are the primary reason for publishing ccLoad.
Issue narrow client tokens
Give each user, device, or automated job a separate ccLoad token where practical. Apply available model, channel, cost, and concurrency restrictions based on need. Individual tokens provide a cleaner revocation boundary than one credential shared across an entire team.
Never place a live token in a URL query string. URLs are commonly retained in browser history, proxy records, screenshots, and application logs. Use the authorization mechanism expected by ccLoad and the client protocol.
Protect upstream credentials
One advantage of a gateway is that client devices do not need the upstream provider credentials. Preserve that separation. Add provider keys or supported account credentials only through ccLoad's intended administration workflow. Do not paste them into Localtonet configuration because our HTTP tunnel needs only the local target address and port.
Limit public exposure time
A Localtonet tunnel is available only while the selected client is connected and the tunnel is running. Stop the tunnel when remote use is no longer required. Delete obsolete tunnels, revoke unused ccLoad tokens, remove stale channels, and rotate credentials after suspected disclosure.
Review costs and activity
Remote availability can increase the consequences of a leaked token. Use ccLoad's token limits, channel controls, usage tracking, and monitoring features as applicable to your deployment. Investigate unexpected request volume, unfamiliar models, repeated authorization failures, or unexplained cost changes.
Do not treat possession of the public hostname as sufficient protection. Keep ccLoad authentication enabled, use separate client tokens, apply least privilege, monitor usage, and stop access that is no longer needed.
Routine operations and troubleshooting
Start, stop, and inspect a Compose deployment
From the directory containing the Compose file, use:
docker compose up -d
docker compose ps
docker compose logs
docker compose stop
docker compose start
stop stops the containers without intentionally removing their configuration. Be cautious with commands that remove containers and volumes. Persistent storage should survive ordinary container replacement, but a volume-removal option can permanently delete gateway state.
Update ccLoad carefully
Before an update, back up the persistent ccLoad data and retain a protected copy of the deployment configuration. Review the selected release notes, pull the intended image, and recreate the service through Compose. Do not assume every release can be downgraded using a newer data store.
After updating, repeat all three verification layers: health endpoint, administration console, and a real authenticated client request. Then test the public Localtonet URL. A container reporting “running” is not enough to establish that channels, credentials, and remote clients still work.
The health endpoint is unreachable locally
Confirm that ccLoad is running, that it did not exit due to a missing required password, and that the expected host port is published. Check whether PORT was changed. Review logs for startup errors, storage problems, or a port conflict. If another application owns port 8080, choose a different documented port and update both local tests and the tunnel target.
The console works locally but not through Localtonet
Check that the Localtonet client is connected and the tunnel has actually been started. Confirm that the tunnel type is HTTP and that its local target matches the ccLoad listener. When our client runs on the ccLoad host, use 127.0.0.1. When it runs elsewhere, 127.0.0.1 points back to the Localtonet client machine, not to the ccLoad server.
From the Localtonet client device, request the exact target address directly. If that device cannot reach ccLoad over the LAN, the tunnel cannot reach it either. Resolve local routing, host binding, or host firewall policy before changing tunnel settings.
The public health route works but API calls fail
This usually means network reachability is working and the remaining problem is at the application or client layer. Check the ccLoad token, authorization format, API path, selected model, channel status, protocol compatibility, upstream credential, and provider quota. Compare a successful local request with the failing remote request.
Also verify that the client base URL does not duplicate a path. For example, a client may append its own /v1/ route. If that route is already embedded incorrectly in the configured base, the resulting request may contain repeated path segments.
The tunnel was created but there is no public service
Creation and startup are separate lifecycle events. Press Start and verify that both the selected device and tunnel are connected. If the device disconnects, the public route cannot reach the local service. Keep the Localtonet client process running and ensure the host maintains outbound connectivity.
Configuration disappears after a container replacement
This points to a persistence problem. Confirm that the ccLoad data directory is backed by the official volume mapping and that the new container uses the same persistent volume. Do not repeatedly initialize the service and add production credentials until persistence has been tested. Create a harmless configuration change, recreate the container, and confirm the change remains before relying on the deployment.
A client receives authentication errors
Make sure the client uses a ccLoad-issued API token rather than CCLOAD_PASS, a Localtonet device token, or a provider key. These credentials have different roles and are not interchangeable. If exposure is suspected, revoke the affected client token and issue a replacement rather than distributing the same secret again.
Use a simple troubleshooting order
| Layer | Test | If it fails |
|---|---|---|
| ccLoad process | Request http://localhost:8080/health |
Inspect startup, port, environment, storage, and application logs. |
| ccLoad management | Open http://localhost:8080/web/ |
Check the route, administrator password, and browser response. |
| Gateway routing | Send one local request with a client token | Check token scope, protocol, model, channel, credential, and quota. |
| Localtonet origin path | Reach ccLoad from the device running our client | Correct the target IP, port, LAN route, or host access policy. |
| Public tunnel | Request the assigned HTTPS health URL | Check device connectivity, tunnel startup, and HTTP target settings. |
| Remote AI client | Send an authenticated request through the public base URL | Compare it with the known-good local request and inspect ccLoad logs. |
Frequently asked questions
What port does ccLoad use by default?
ccLoad listens on port 8080 by default. The port can be changed with the PORT environment variable. If you change it, use the same value in local URLs, container publishing, and the Localtonet HTTP tunnel target.
Which ccLoad installation method should I use?
Docker is the project's recommended installation method. Docker Compose is a practical choice when you want the deployment and environment represented by files. Homebrew and prebuilt release binaries are also documented options. Choose the method you can update, back up, and supervise reliably.
Why should I verify ccLoad before creating the tunnel?
A tunnel can forward traffic only to a service that is already reachable from the Localtonet client device. Local verification separates ccLoad startup, authentication, channel, and provider problems from tunnel configuration problems. Test the health route, console, and a real model request first.
Should I use an HTTP or TCP tunnel for ccLoad?
Use a Localtonet HTTP tunnel for the documented ccLoad web console, health endpoint, and HTTP API routes. It provides a public HTTPS address for the local HTTP service. A raw TCP tunnel is not necessary for this workflow.
Does the Localtonet URL replace ccLoad authentication?
No. The public URL provides network reachability. Keep ccLoad authentication enabled, protect the administrator password, and require dedicated ccLoad tokens for remote clients. Apply available model, channel, cost, and concurrency limits according to each client's needs.
Can the Localtonet client run on a different machine?
Yes, provided that machine can already reach the ccLoad host and port. In that case, configure the tunnel with the ccLoad host's reachable private address. Do not use 127.0.0.1, because it would refer to the device running the Localtonet client rather than the separate ccLoad server.
Will the public ccLoad address remain available all the time?
It remains available only while ccLoad is running, the selected Localtonet device is connected, and the tunnel is started. Stopping ccLoad, closing the client connection, or stopping the tunnel interrupts remote access.
Can I use a custom domain for ccLoad?
HTTP tunnels support Random Sub Domain, Custom Sub Domain, and Custom Domain process types, subject to current availability. Exact custom-domain DNS requirements should be checked in the current Localtonet dashboard and documentation before changing DNS records.
Connect your verified ccLoad gateway with Localtonet
Install and test ccLoad locally first, then create an HTTP tunnel to its listening address and port. Keep gateway authentication enabled, issue narrow client tokens, and start the tunnel only when the selected device is connected and ready to serve remote requests.
Get Started Free →