

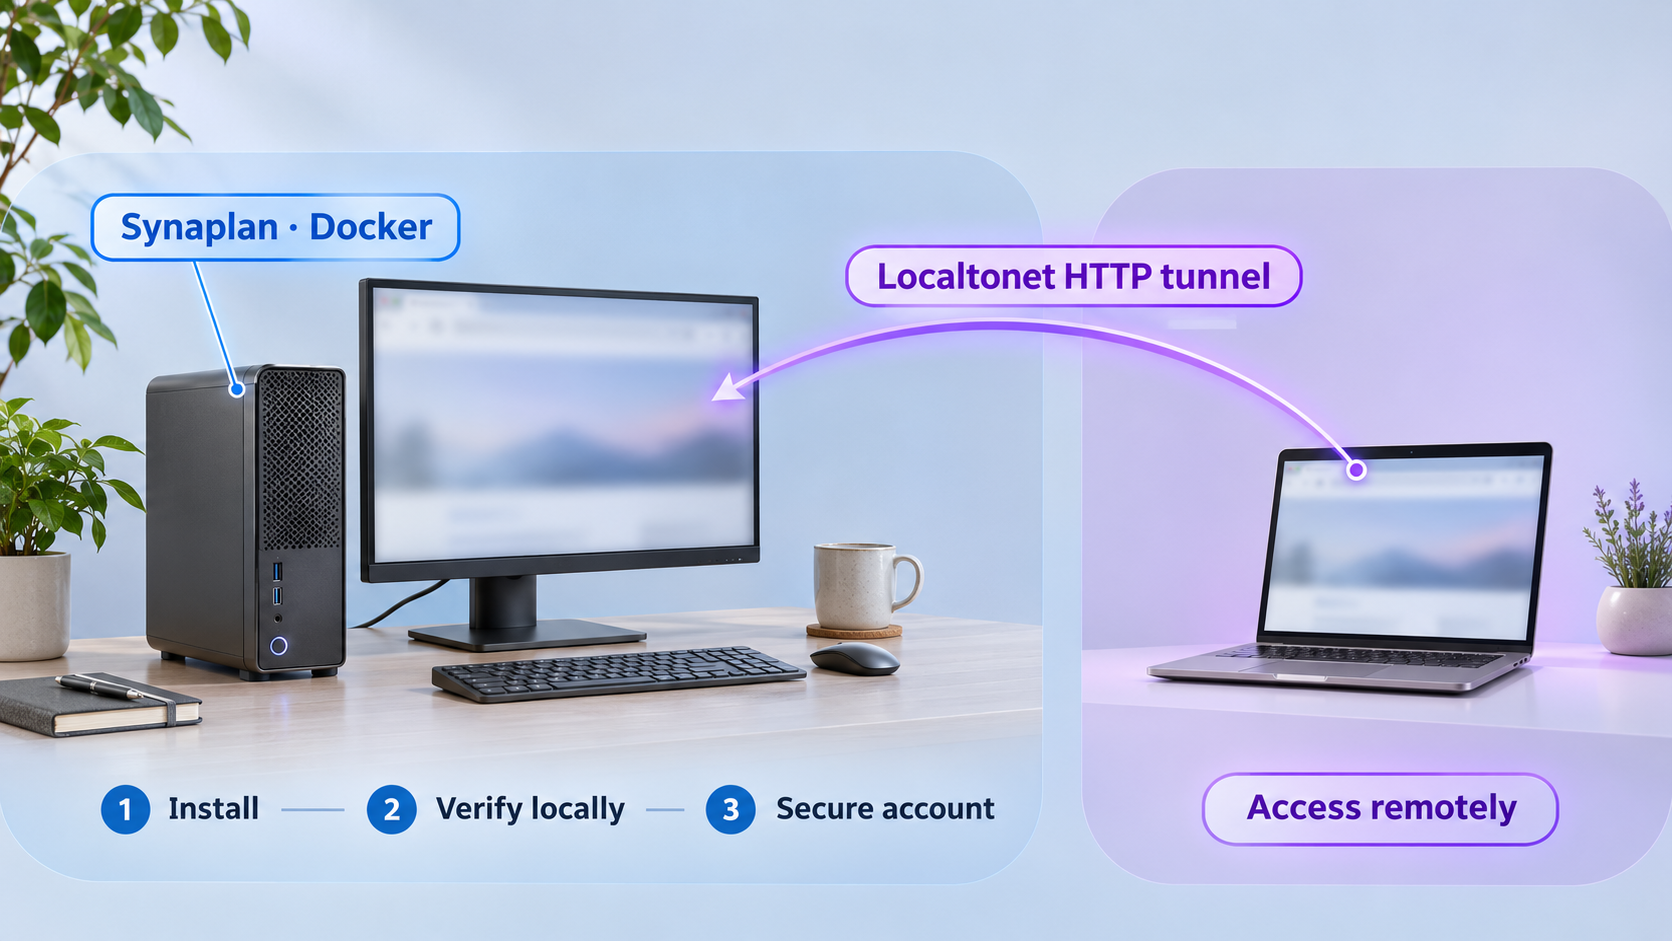
Run your own AI workspace locally, verify it, and publish only the web interface you intend to share
Synaplan is an open-source, self-hosted AI platform for chat, document retrieval, assistants, integrations, and model routing. In this guide, we install it with Docker, explain the difference between its development and production-oriented deployment paths, verify the web interface locally, and address the default demonstration credentials before any internet exposure. Once the local instance works, we connect it to an HTTP tunnel with Localtonet so authorized remote users can reach it without inbound router port forwarding, firewall changes, a public IP address, or VPN setup.
📋 What's in this guide
What this Synaplan and Localtonet workflow provides
Synaplan combines a web-based AI chat experience with capabilities such as retrieval-augmented generation over documents, multiple model providers, assistants, tools, approvals, an embeddable website widget, MCP support, and API access. It is distributed under the Apache-2.0 license and can be run on infrastructure under your control.
The installation and remote-access stages should remain separate. First, Docker starts Synaplan and makes its web interface available on the local machine. You then open the interface locally, wait for the stack to become ready, sign in, and confirm that the application works. Only after those checks pass should you create a public HTTP tunnel.
With Localtonet, our client application establishes an outbound connection from the device running, or able to reach, Synaplan to one of our relay servers. The tunnel then provides a public HTTPS address for the local HTTP service. This avoids requiring an inbound router port-forwarding rule, a public IP address, firewall changes, or a separate VPN configuration.
make up. Docker Compose can also start the same checkout directly.
http://localhost:5173, allowing you to diagnose installation issues before introducing a tunnel.
deploy/ directory.
Why use an HTTP tunnel?
Synaplan’s primary interface is a web application, so an HTTP tunnel is the natural Localtonet tunnel family for this workflow. The tunnel accepts requests at a public HTTPS address and forwards them to the local HTTP endpoint. There is no need to expose Synaplan’s database, cache, vector database, or other internal containers individually.
This is an important boundary. A remote user needs the web application endpoint, not direct access to every service in the Compose network. Publishing only the intended web interface keeps the external surface smaller and makes troubleshooting simpler.
Development quickstart versus production deployment
| Installation path | Best for | Documented local endpoint | Important characteristic |
|---|---|---|---|
Repository with make up |
Initial evaluation and local development | http://localhost:5173 |
Starts the source-oriented stack and provides a live status screen during startup. |
| Repository with Docker Compose | Starting the same checkout without the Make target | http://localhost:5173 |
The interface can remain quiet while images are still being pulled and services are starting. |
Production deploy/ contract |
Single-node Linux server deployment | http://127.0.0.1:8000 by default |
Uses published images, pinned versions, generated secrets, persistent data, validation, and smoke-test scripts. |
Do not assume every Synaplan installation uses the same port. The repository quickstart is documented on port 5173, while the production contract binds its web service to 127.0.0.1:8000 by default. Your Localtonet target must match the endpoint that actually works on your host.
Prerequisites and planning
For the repository quickstart, prepare a machine with Git, Docker, Docker Compose support, and Make. Docker Desktop can provide Docker and Compose on supported desktop systems. Start Docker Desktop before running the Synaplan commands. On a Linux host, ensure Docker Engine and Docker Compose v2 are installed and that your user can run Docker commands according to your local administration policy.
The complete stack pulls multiple container images, so installation time depends on the machine, storage, and network connection. A status page can appear before every service is fully ready. Treat the ability to load the status page as an early startup signal, not proof that every application feature is operational.
The documented production deployment has more explicit resource requirements. Its cloud-AI profile requires at least 4 vCPUs, 8 GB of RAM, and 30 GB of free disk space. The optional local-AI profile requires at least 16 GB of RAM and substantially more disk capacity. Optional components can add further requirements. These figures belong to the production contract, not a promise that every workload will use a fixed amount of resources.
What to decide before installation
- Evaluation or production: use the repository quickstart for a first local evaluation. Use the documented production contract when you need pinned releases, persistent deployment data, backups, and generated secrets.
- Cloud or local models: Synaplan can connect to external AI providers, while local models are an optional deployment choice. Provider setup and model availability are separate from publishing the web interface.
- Who will have access: decide whether the tunnel is for your own temporary access, a small authorized team, or a longer-lived service.
- Where Localtonet runs: install our client on the Synaplan host when possible, or on another device that can reach the selected local endpoint.
- Which local port is active: use port
5173for the documented repository quickstart or port8000for the default production binding.
The documented quickstart account is admin@synaplan.com with password admin123. These credentials are public knowledge and are suitable only for a controlled local demonstration. Change the administrator password, create the intended user accounts, and review application access before starting a public tunnel.
Install Synaplan with Docker
Option 1: Repository quickstart with Make
This path is the clearest way to evaluate Synaplan locally because it follows the project’s quickstart and exposes the startup status screen. Run the following commands in a terminal:
git clone https://github.com/metadist/synaplan.git
cd synaplan
make up
The clone command downloads the repository into a directory named synaplan. The second command changes into that directory. The make up target starts the Docker-based stack and brings up the status interface.
Open the following address on the same machine:
http://localhost:5173Synaplan’s status screen reports boot progress and transitions to the application when the stack is ready. Image downloads and initialization can take longer on the first run, so wait for the application rather than repeatedly restarting the containers.
Start Docker
Confirm that Docker Engine or Docker Desktop is running before invoking the quickstart. A stopped Docker daemon prevents the stack from being created.
Clone the Synaplan repository
Run git clone https://github.com/metadist/synaplan.git to obtain the source tree and its Docker configuration.
Enter the project directory
Run cd synaplan. The remaining project commands must be executed from the checked-out repository.
Start the stack
Run make up. Leave Docker enough time to pull images, create containers, and initialize the required services.
Open the local status page
Visit http://localhost:5173. Follow the status display until it switches to the Synaplan application.
Option 2: Start the repository checkout with Docker Compose
If Make is unavailable but Docker Compose v2 is present, the documented checkout can also be started directly:
git clone https://github.com/metadist/synaplan.git
cd synaplan
docker compose up -d
The -d option starts the containers in detached mode. Open http://localhost:5173 after starting the stack. In this path, the page may remain quiet while images finish pulling, so use Docker Compose status and logs if startup appears stalled.
docker compose ps
docker compose logs
These are standard Docker Compose inspection commands. The first shows container state, while the second displays stack logs. Avoid copying logs into public support channels without reviewing them for email addresses, file names, provider information, or other deployment details.
Option 3: Use the production deployment contract
The repository quickstart launches a development-oriented stack that includes source-build services and development tools. For a production installation on a Linux server, Synaplan provides a separate single-node contract in the repository’s deploy/ directory. It uses published images rather than source bind mounts and requires a pinned release version.
Begin from a cloned Synaplan repository and create the deployment environment file:
cp deploy/selfhost.env.example deploy/.env
Edit deploy/.env and set a published immutable semantic version in SYNAPLAN_VERSION. Also configure the public URL expected by Synaplan and decide how the first administrator will be created. The production documentation supports either setting the bootstrap administrator variables or leaving both administrator variables empty to use the first-run setup wizard.
Do not place passwords, provider keys, Localtonet device tokens, or generated deployment secrets in commands, screenshots, tickets, or shared documents. The exact production values depend on your environment and must be chosen by the administrator. Do not use a mutable latest image tag where the production contract requires a pinned release.
After reviewing the environment file, run the documented production sequence:
deploy/scripts/prepare.sh
docker compose --env-file deploy/.env -f deploy/compose.yaml pull
deploy/scripts/validate-release.sh
docker compose --env-file deploy/.env -f deploy/compose.yaml up -d
deploy/scripts/smoke-test.sh
The preparation script generates deployment secrets on first start and writes them to deploy/data/secrets.env. That file is authoritative for the deployment and is required for restoration. Protect it with the same care as the application database and include it in the deployment’s protected backup process.
By default, only the production web service binds a host port, at 127.0.0.1:8000. Internal services such as MariaDB, Redis, Qdrant, and other components remain on the Compose network. This default is well suited to a Localtonet client running on the same host because the client can target the loopback web endpoint without publishing internal service ports.
Complete first-run configuration and secure the account
For the quickstart, sign in with the documented demonstration account only while the instance remains local:
Email: admin@synaplan.com
Password: admin123
Change the password immediately. Use a unique password that is not shared with any other service. If the instance will serve multiple people, create individual accounts rather than distributing one administrator login. Administrator access should be limited to users who actually need to configure providers, models, integrations, or system-wide settings.
The first-run flow also allows you to connect an AI provider. Provider credentials are independent of Localtonet. Store them only in the Synaplan configuration area intended for provider keys, and never place them in the tunnel target, a public URL, client command, or article example.
Security checklist before remote access
- Replace the documented demonstration password.
- Confirm that only intended users have accounts.
- Keep administrator privileges separate from normal chat usage where practical.
- Review uploaded documents and knowledge collections before inviting other users.
- Confirm that model-provider keys are stored in the intended application settings.
- Do not expose database, cache, vector, mail-testing, or administration utility ports.
- Back up production data and
deploy/data/secrets.envusing the project’s documented lifecycle process. - Start the public tunnel only when the local application has passed verification.
A Localtonet HTTP tunnel makes the selected web endpoint reachable at a public HTTPS address. It does not replace Synaplan’s user accounts, permissions, administrator controls, provider-key handling, or data-governance decisions. Keep application authentication enabled and apply least privilege to every user.
Be careful with application URL assumptions
Some web applications need an externally visible base URL for redirects, cookies, generated links, integrations, or webhook callbacks. The supplied Synaplan quickstart evidence does not establish the exact configuration required for every remote URL scenario. Test sign-in, navigation, uploads, chat, and any integration you plan to use through the assigned public address.
Do not assume that mobile applications, messaging integrations, widgets, webhooks, or third-party callbacks automatically work merely because the main web interface is reachable. Their URL, authentication, and callback requirements must be checked against the current Synaplan documentation for the specific feature.
Verify Synaplan locally before creating a tunnel
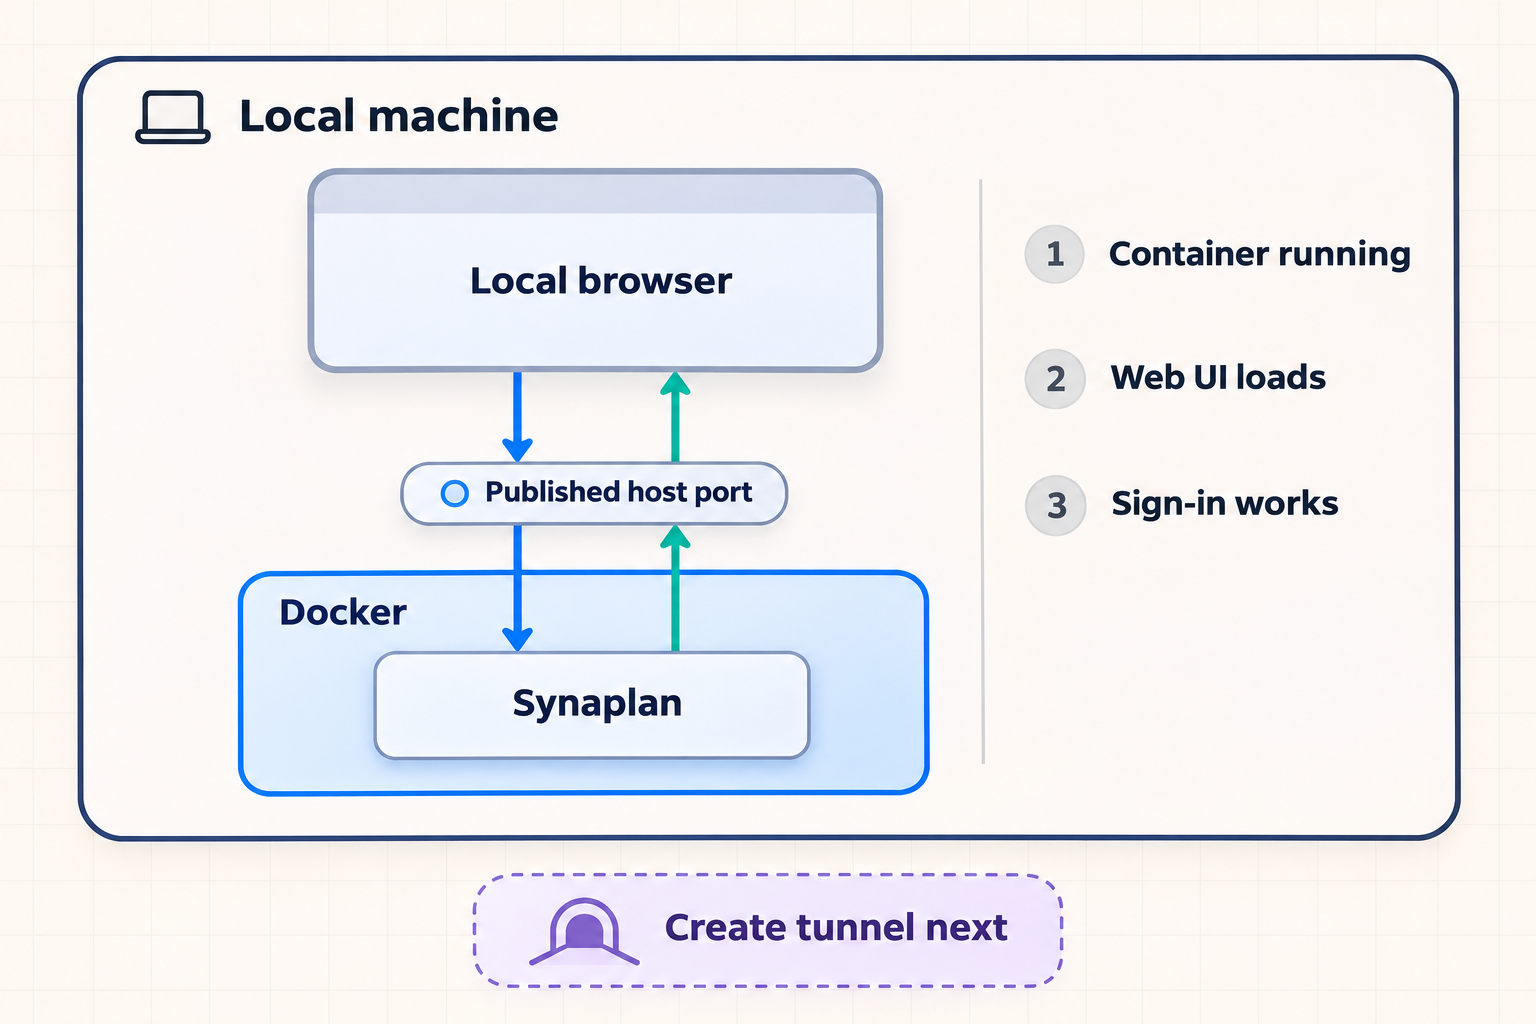
Local verification separates application problems from networking problems. If the interface does not work on the host, adding a public tunnel cannot repair it. Complete the checks below from the machine running Synaplan.
Check the expected URL
For the repository quickstart, open:
http://localhost:5173For the production contract with its default binding, open:
http://127.0.0.1:8000A successful check should return the Synaplan status page, setup wizard, sign-in screen, or application interface, depending on installation state. A connection-refused message usually means no process is listening on that address and port. A loading status page usually means the front-end endpoint is responding while other services continue to initialize.
Inspect Docker state
From the directory containing the active Compose configuration, use:
docker compose ps
docker compose logs
Confirm that the expected containers exist and are not continuously restarting. If a service fails, inspect its relevant log output rather than repeatedly running the installation command. Common causes include an unavailable Docker daemon, insufficient memory or disk space, failed image downloads, a port already in use, and incomplete initialization.
Perform an application-level test
Loading a sign-in page proves only that the web endpoint responds. Continue with a basic application test:
- Sign in with the intended account.
- Confirm that the main application loads without a recurring error.
- Open the administration or provider area needed for your deployment.
- If an AI provider is configured, submit a harmless test prompt.
- Sign out and sign in again using the new password.
If provider-backed chat fails while the interface works, treat that as an application or provider configuration issue. The HTTP tunnel only forwards web traffic and does not supply model credentials or repair provider connectivity.
Verify the exact local target first. Record whether it is 127.0.0.1:5173, localhost:5173, 127.0.0.1:8000, or another deliberately configured address. Only then create the tunnel with the matching IP address and port.
Share Synaplan with a Localtonet HTTP tunnel
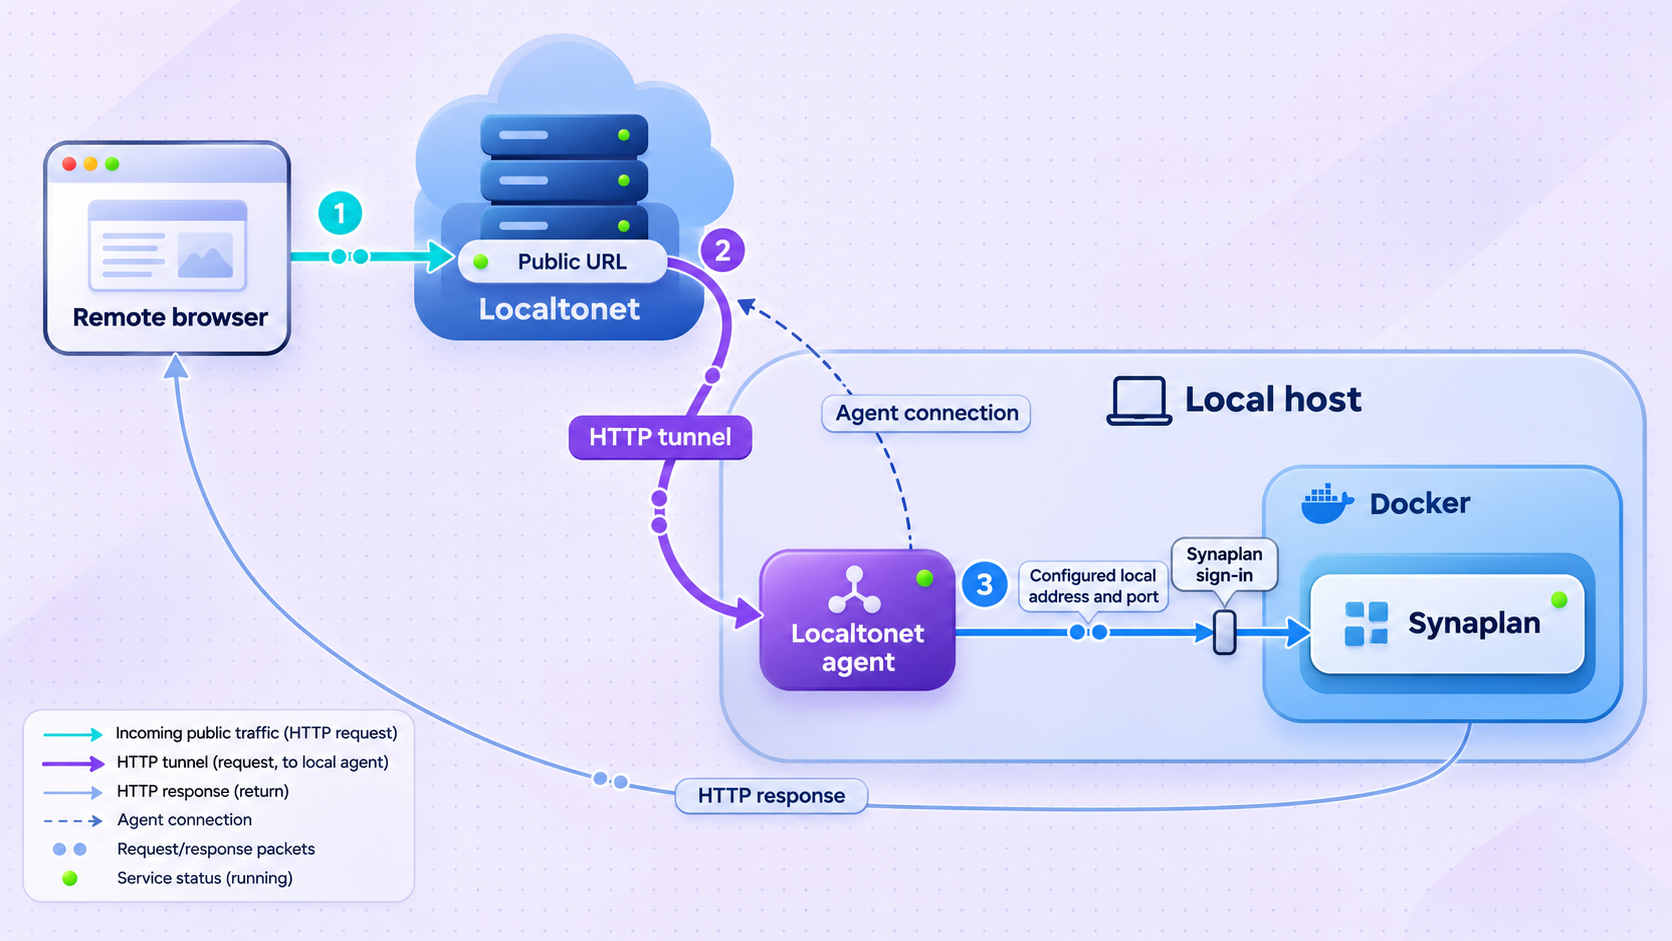
Once Synaplan works locally and the demonstration credentials have been replaced, install and run the Localtonet client on the device that can reach the web interface. The simplest arrangement is to run our client directly on the Synaplan host. In that case, a service bound to loopback can be targeted through 127.0.0.1.
If our client runs on a different device, 127.0.0.1 refers to that second device, not to the Synaplan server. Synaplan must then listen on an address reachable from the Localtonet client, and the target must use the Synaplan host’s reachable private address. Changing a service binding can affect network exposure, so apply host firewall rules and local access controls deliberately.
| Synaplan deployment | Typical target when Localtonet is on the same host | Tunnel family |
|---|---|---|
Repository quickstart with make up |
127.0.0.1:5173 |
HTTP/s |
| Repository checkout with Docker Compose | 127.0.0.1:5173 |
HTTP/s |
Production deploy/ contract |
127.0.0.1:8000 |
HTTP/s |
These targets are based on the documented default endpoints. If you changed the Compose configuration or host binding, use the address that passed your local verification instead.
Configure the HTTP tunnel
Install and run the Localtonet client
Install our client for the operating system on the device that can reach Synaplan. Keep the client running because the tunnel is available only while the selected device is connected and the tunnel is running.
Select the device with its authentication token
In the Localtonet dashboard, select the device-specific authentication token associated with the client. Treat this token as a secret. Do not paste it into documentation, terminal recordings, screenshots, or support messages.
Choose an available relay server
Select a currently available server or region from the dashboard. Available server codes and regions can vary, so use the current values shown in your account rather than copying a hardcoded example.
Create an HTTP tunnel to the verified local target
Choose the HTTP tunnel family and enter the local IP address and port that worked during verification. For the quickstart on the same host, that is normally 127.0.0.1 and port 5173. For the default production binding on the same host, use 127.0.0.1 and port 8000.
Select the HTTP process type
Choose Random Sub Domain, Custom Sub Domain, or Custom Domain according to the options currently available to your account. Each process type serves the target through a public HTTPS address. Exact custom-domain DNS requirements should be taken from the current dashboard and documentation rather than guessed.
Start the tunnel and test the assigned address
Creating the tunnel does not mean it is active. Press Start, copy the assigned public address, and open it in a separate browser session. Confirm that Synaplan loads and requires the expected application sign-in.
For current dashboard details, consult our Localtonet tunnel documentation. Do not copy a token or relay code from someone else’s configuration. Tokens identify specific client devices, and current relay choices must come from your own dashboard.
Test the public path safely
Open the assigned public URL in a private browser window or on a device outside the Synaplan host. This avoids accidentally relying on an existing administrator session. The expected result is the Synaplan sign-in or setup interface, not an automatically authenticated administrator page.
Sign in with a non-administrator account if one is appropriate for the intended users. Test the operations you plan to share, such as opening chat, viewing authorized files, or submitting a test prompt. If you intend to test a widget or integration, validate it separately because the main interface working does not prove that every callback or embedded-client requirement is satisfied.
Do not rely on an unguessable-looking address as the only protection for an AI workspace. Keep Synaplan authentication enabled, remove default credentials, restrict administrator privileges, and stop the tunnel when remote access is no longer required.
Routine operation, backups, updates, and shutdown
Starting and stopping remote access
The Synaplan application and the Localtonet tunnel have independent lifecycles. Synaplan can remain running locally while its tunnel is stopped. Likewise, a configured tunnel cannot serve the application if the Synaplan containers are stopped or our selected client is disconnected.
Stop the tunnel when a temporary review or demonstration ends. Delete it if the configuration is no longer needed. Stopping the tunnel removes public reachability through that tunnel but does not delete Synaplan data or stop its Docker containers.
Stopping the repository stack
If you started the repository checkout with Docker Compose, the standard command to stop and remove its running containers is:
docker compose downRun it from the same project directory and against the same Compose configuration used to start the stack. Do not add volume-removal options unless you understand exactly which persistent data they delete.
Production data and backups
The production contract keeps database, cache, vector, upload, model, backup, and secret data beneath deploy/data/. Its documented backup lifecycle uses preparation and completion hooks so database and vector snapshots are consistent:
deploy/scripts/pre-backup.sh
# Capture deploy/data with your backup system.
deploy/scripts/post-backup.sh
The pre-backup hook pauses writers and prepares consistent data, while the post-backup hook resumes normal operation. A production backup must include deploy/data/secrets.env. Restoring a database without the corresponding generated secrets can leave the restored data unusable.
Do not treat container images as the complete application state. Protect the deployment data, generated secrets, uploads, database content, and vector data before changing versions. Use the project’s release-specific update instructions rather than substituting an unreviewed image tag.
Updates
A Git checkout can change significantly over time, while the production contract is designed around pinned immutable release versions. Before updating, read the release notes and the project’s current self-hosting update instructions. Back up the deployment, confirm resource requirements, and avoid the mutable latest tag.
After any update, repeat both verification layers. First test the local endpoint. Then start or retest the Localtonet tunnel and verify the public path in a fresh browser session. This catches application migration problems separately from tunnel connectivity problems.
Troubleshooting Synaplan and Localtonet
The Docker command cannot connect to the daemon
Start Docker Desktop or the Docker Engine service, then retry. Confirm that the current user is permitted to use Docker. This is a host installation issue and should be resolved before investigating Synaplan containers.
Port 5173 or 8000 is already in use
Another process may already be bound to the required host port. Identify the conflicting service using your operating system’s network tools and decide which application should own the port. Do not arbitrarily change the Synaplan port without also updating local verification and the Localtonet tunnel target.
The status page loads but Synaplan never becomes ready
Run docker compose ps and inspect docker compose logs. Look for failed image pulls, repeating container restarts, storage errors, or resource exhaustion. The status endpoint responding means only that part of the stack is reachable.
The local page works but the public URL does not
Check the Localtonet client, selected device token, tunnel status, local target, and port. Confirm that the tunnel was started rather than merely created. If our client runs on another device, do not use 127.0.0.1 unless Synaplan also runs on that same device.
The public page opens, but login or navigation behaves unexpectedly
Retest in a private browser window and inspect whether the application redirects to a local hostname or an unexpected base address. The exact public-base-URL configuration for every Synaplan deployment is not established by the quickstart evidence supplied for this guide. Review the current Synaplan deployment documentation before changing production URL or cookie settings.
Chat fails while the web interface remains available
This usually points to provider credentials, provider connectivity, model selection, or an application service problem rather than the HTTP tunnel. Test the same action through the local URL. If it fails locally too, diagnose Synaplan and its configured AI provider first.
The tunnel disconnects intermittently
A Localtonet tunnel is available only while the selected client device remains connected and the tunnel is running. Check whether the host is sleeping, restarting, losing internet access, or stopping the client process. Also confirm that Synaplan remains healthy at the local target during the same period.
A remote user can see more data than expected
Stop the tunnel immediately, then review Synaplan users, roles, shared files, assistants, and knowledge access. Tunnel connectivity does not determine application-level authorization. Remove unintended access, rotate affected credentials where appropriate, and retest with a non-administrator account before restarting the tunnel.
Frequently asked questions
Which port does Synaplan use?
The documented repository quickstart serves its status page and web interface at http://localhost:5173. The production deploy/ contract binds the web service to 127.0.0.1:8000 by default. Use the port associated with your installation and confirm it locally before configuring the tunnel.
Should I use make up or the production deploy directory?
Use make up for a quick local evaluation or development workflow. Use the production contract for a longer-lived single-node Linux deployment that needs pinned images, generated secrets, persistent deployment data, release validation, smoke testing, and a documented backup lifecycle.
Can I expose Synaplan before changing the default password?
No. The quickstart demonstration credentials are publicly documented. Change the administrator password and review user access while the instance is still local. Then test the public URL in a private browser session to confirm that authentication is required.
Does Localtonet require router port forwarding?
No. Our client establishes an outbound connection to a Localtonet relay server. This allows the selected local service to receive traffic through the assigned public address without inbound router port forwarding, firewall changes, VPN setup, or a public IP address.
Why should I use an HTTP tunnel instead of a TCP tunnel?
Synaplan’s user interface is a web application served over HTTP, so an HTTP tunnel matches the application protocol and provides a public HTTPS address. A raw TCP tunnel is unnecessary for the documented web-interface workflow and should not be used to expose Synaplan’s internal database or supporting services.
Can the Localtonet client run on a different computer?
Yes, if that computer can reach the Synaplan web endpoint. In that arrangement, do not configure the target as 127.0.0.1 unless Synaplan runs on the Localtonet client computer itself. Use a reachable private address and secure the local network path appropriately.
Does a working public URL guarantee that widgets, mobile apps, and integrations will work?
No. It proves that the selected HTTP endpoint is reachable through the tunnel. Widgets, mobile applications, messaging channels, webhooks, and other integrations can have separate callback, authentication, base-URL, or client configuration requirements. Validate each integration against its current Synaplan documentation.
What happens when I stop the tunnel?
The public route through that tunnel becomes unavailable. Synaplan can continue running locally, and its Docker data is not deleted. The tunnel also becomes unavailable if the selected Localtonet client disconnects, even if the tunnel configuration still exists in the dashboard.
Share your verified Synaplan instance with Localtonet
Install Synaplan, replace the demonstration credentials, confirm the correct local endpoint, and then create an HTTP tunnel for controlled remote access without inbound router port forwarding.
Get Started Free →