

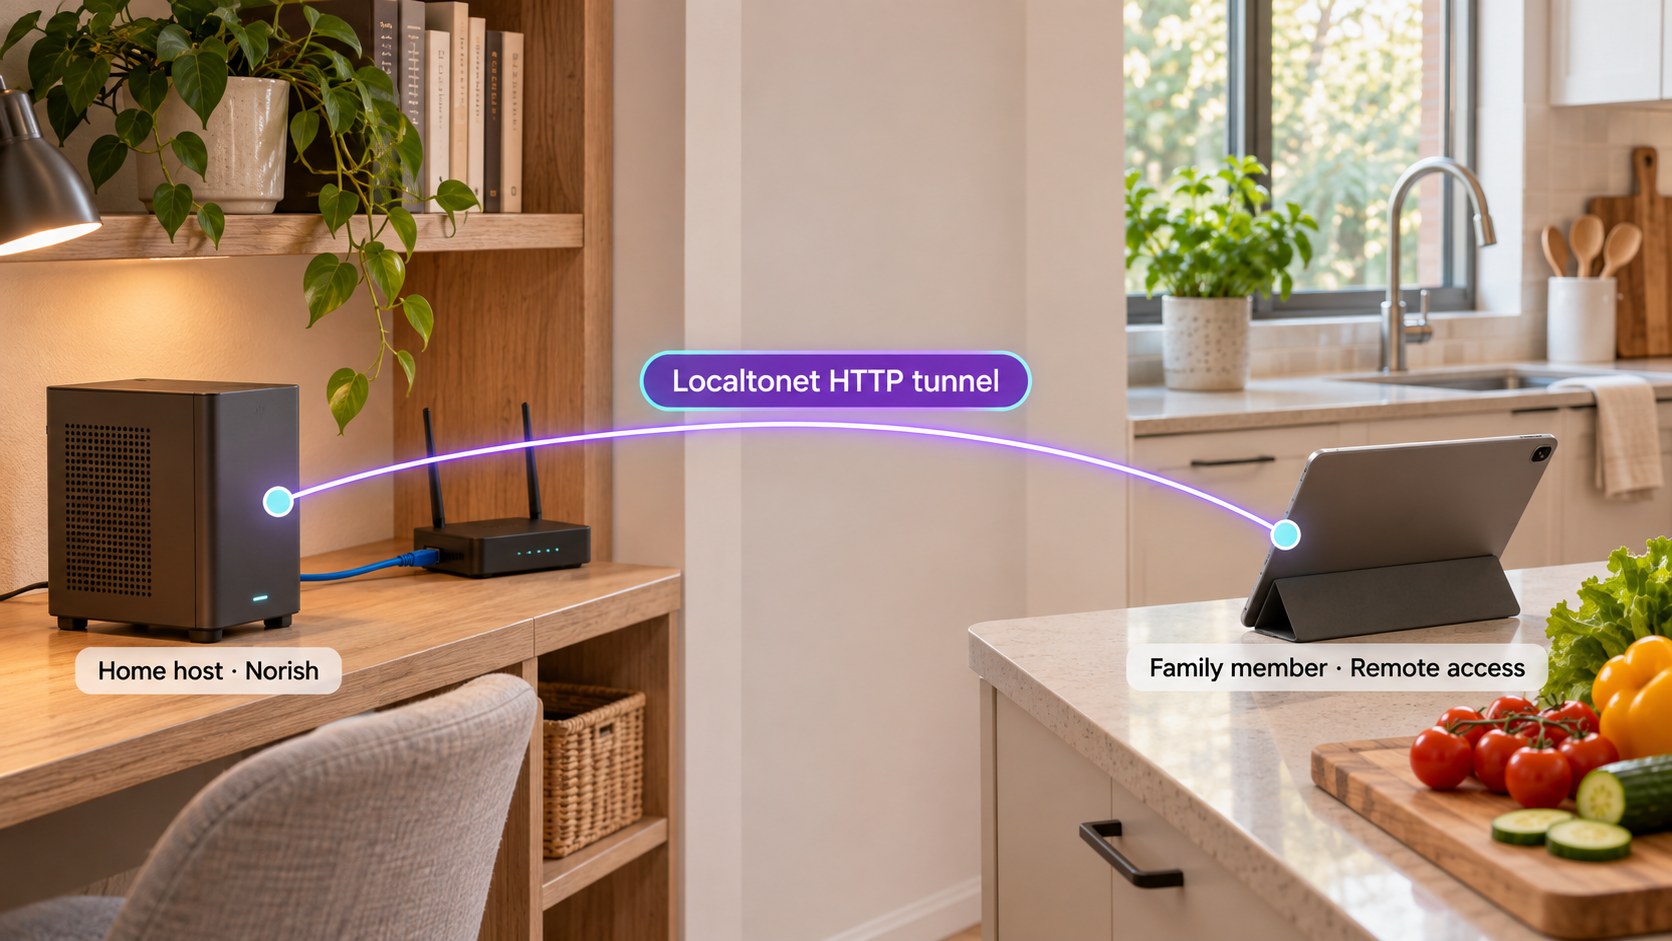
Build a private recipe hub at home, verify it locally, and prepare it for remote family access
Norish is a self-hosted recipe application designed for families and friends. In this guide, we install its documented Docker Compose stack, generate the required secrets, start the containers, and verify the application at its local HTTP endpoint. After the local deployment works, we explain how to connect it to an HTTP tunnel with Localtonet without opening an inbound router port. We also address the important uncertainty around Norish's public authentication URL before you invite remote users.
📋 What's in this guide
What this Norish deployment includes
Norish is a real-time, self-hosted web application for organizing and sharing recipes with families and friends. The documented deployment method uses Docker Compose, which groups the application and its supporting services into one stack. This is a practical installation model for a home server because Docker manages the individual containers while Compose records how they are connected and configured.
The supplied Norish Compose stack includes four container images: norishapp/norish for the main web application, postgres:17-alpine for the database, norishapp/obscura for the accompanying Obscura service, and valkey/valkey:9 for Valkey. The Norish service publishes container port 3000 on host port 3000, producing the local endpoint http://localhost:3000 when the browser is running on the Docker host.
These supporting containers are part of one application deployment. Do not expose PostgreSQL, Valkey, or Obscura merely to make the web interface remotely reachable. The HTTP tunnel discussed later should target the Norish web port only. Database and internal service ports should remain private unless Norish documentation explicitly requires another arrangement for a carefully reviewed deployment.
norishapp/norish container and mapped to host port 3000.
postgres:17-alpine for persistent application data managed by Norish.
norishapp/obscura service shares an OBSCURA_CDP_TOKEN value with the Norish service.
valkey/valkey:9 as part of the application stack.
A tunnel cannot repair an unhealthy application stack. Complete the Norish installation and confirm that http://localhost:3000 works from the Docker host before configuring remote access with Localtonet.
Prerequisites and deployment decisions
Choose a machine that will remain online whenever family members need the application. It must be able to run the Norish Docker Compose stack and the Localtonet client. Remote access will stop if the machine shuts down, Docker stops, the Norish containers fail, the Localtonet client disconnects, or the tunnel is stopped.
Before beginning, prepare the following:
- A host with Docker Engine and the Docker Compose plugin installed and working.
- Permission to run Docker commands on that host.
- OpenSSL for generating the two values documented by Norish.
- A dedicated directory in which to store the official
compose.yamlfile. - Storage suitable for application and database persistence as defined by the official Compose file.
- A browser on the host, or another local device that can reach the host's port 3000.
- A Localtonet account and a supported Localtonet client installation for the later remote-access stage.
This guide assumes Docker and the Compose plugin are already installed. Installation commands differ among Linux distributions, Docker Desktop releases, Windows configurations, and macOS configurations. Rather than provide a platform-specific command that may be wrong for your host, verify the tools directly:
docker --version
docker compose version
openssl version
Each command should identify an installed tool. If docker works but docker compose does not, install or enable the current Docker Compose plugin for the operating system before proceeding. The Norish startup command in the documented workflow uses the space-separated docker compose form.
The available evidence identifies the images, required secrets, port mapping, and startup command, but it does not include the complete current compose.yaml contents. We therefore do not reconstruct or guess volumes, health checks, database credentials, service dependencies, or other settings. Save the complete Compose file supplied by the current Norish project documentation, then make only the documented variable changes.
Install Norish with Docker Compose
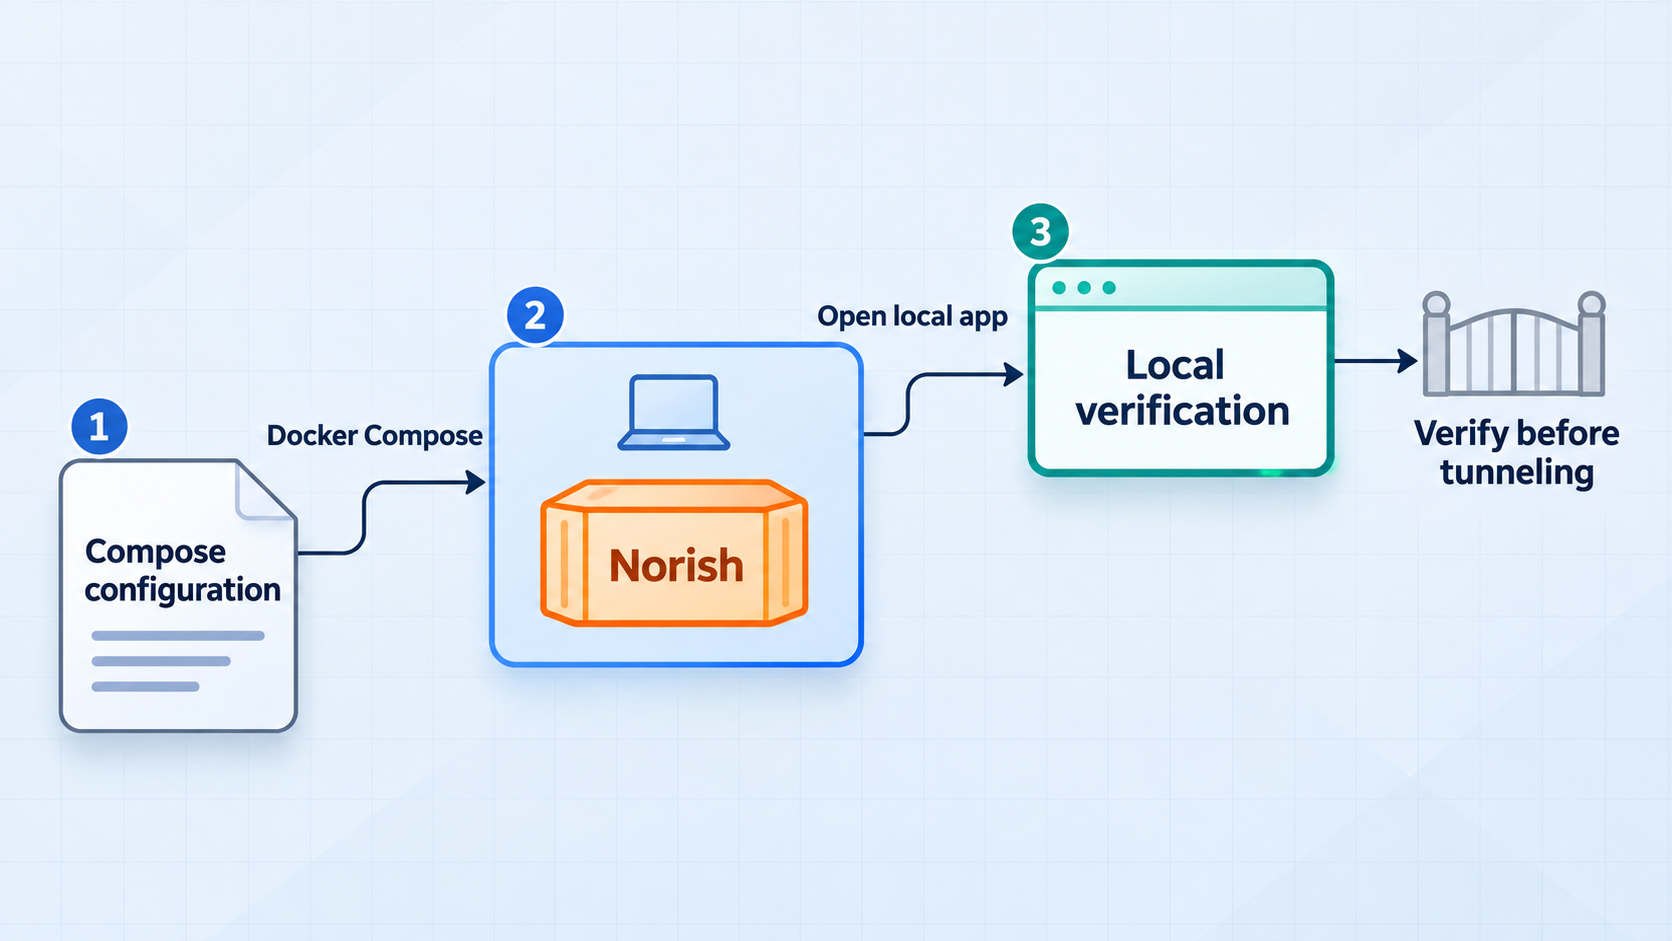
Keep the Norish deployment in its own directory. This makes it easier to identify the correct Compose project, protect its configuration, inspect its status, and avoid running operational commands against an unrelated stack.
Create a deployment directory
Create a directory reserved for Norish and enter it. The example name is local and can be changed without affecting the containers described by the official Compose file.
mkdir norish
cd norishSave the official compose.yaml file
Copy the complete Compose definition from the current Norish repository into this directory and save it as compose.yaml. Confirm that the file defines the Norish, PostgreSQL, Obscura, and Valkey services before editing it. Do not assemble a partial file from the image names in this article.
Generate the MASTER_KEY value
Run the documented OpenSSL command. Copy the generated output into the MASTER_KEY setting expected by the official Norish Compose definition. Treat the value as a secret and do not post it in screenshots, tickets, chat messages, or source control.
openssl rand -base64 32Generate and synchronize OBSCURA_CDP_TOKEN
Generate the token with the documented command. The exact same output must be assigned to OBSCURA_CDP_TOKEN on both the Norish service and the Obscura service. Generating two different values is not equivalent and can prevent the services from communicating correctly.
openssl rand -hex 32Review the local URL and port mapping
The documented stack maps 3000:3000 for the Norish service and sets AUTH_URL to http://localhost:3000. For the initial installation, retain the documented local configuration so that you can establish a known working baseline before introducing a public hostname.
Start the Norish stack
From the directory containing compose.yaml, run the documented detached startup command. Docker will create or start the services defined by that file.
docker compose up -dDetached mode returns control to the terminal while the containers continue running. A successful command means Docker accepted the Compose definition and attempted to start its services. It does not by itself prove that the application completed initialization, connected to its database, or can serve a browser request. Verification is a separate step.
Generate your own MASTER_KEY and OBSCURA_CDP_TOKEN. Do not copy values from another installation, publish them with the Compose file, or put real values into a public repository. Back up required secrets securely because losing application keys can have consequences that depend on how Norish uses them.
Verify Norish on the local network
Local verification isolates application problems from tunneling problems. Start with Docker's view of the project:
docker compose psReview every service in the Compose project, not only the Norish container. The application depends on its supporting stack, so a database or companion service that repeatedly exits can leave port 3000 unavailable or produce errors after the page loads.
Next, open the following address in a browser running on the Docker host:
http://localhost:3000
If the browser is on another machine in the same LAN, localhost refers to that other machine, not the Docker host. In that case, use the Docker host's private LAN address followed by port 3000, provided the host firewall and Docker port publishing allow LAN access. The exact private address depends on your network, so it should be discovered on the host rather than guessed.
You can also make a simple request from the Docker host:
curl -v http://localhost:3000/The precise response body or redirect can vary with the Norish release and its authentication state. The useful signal is that an HTTP connection reaches the application instead of failing with a refused connection or timeout. A browser remains the better functional test because it lets you exercise navigation, account flows, and recipe features.
Perform a functional test, not only a port test
A listening port confirms only that something accepted the connection. Before remote access, complete the initial application flow presented by your installed Norish release. Then test representative actions such as loading the main interface, navigating between screens, and creating or viewing a non-sensitive test recipe if the interface permits it.
Pay particular attention to sign-in, sign-out, redirects, and links generated by the application. These actions can depend on the configured application URL. They may work at localhost but behave differently when the same service is reached through a public HTTPS hostname.
| Check | Expected result | If it fails |
|---|---|---|
| Compose project status | The required services remain running rather than immediately exiting. | Inspect the logs for the affected service and recheck the Compose configuration. |
| Local TCP connection | A request to port 3000 connects to the Norish service. | Check the port mapping, container state, host firewall, and whether another process uses the port. |
| Browser interface | The Norish web interface loads without a persistent application error. | Review application and dependency logs instead of configuring a tunnel. |
| Authentication flow | Local sign-in and redirect behavior completes as expected for the installed release. | Recheck AUTH_URL and the current Norish deployment instructions. |
| Basic recipe workflow | A non-sensitive test action survives navigation and reload. | Check application, database, and browser errors before remote publication. |
Routine Docker Compose operations
Run Compose commands from the directory containing the Norish compose.yaml. This reduces the risk of controlling the wrong project and ensures Compose reads the expected definition.
Inspect service status
docker compose psUse this after a host restart, Docker restart, or reported outage. A stopped dependency can be as important as a stopped web container.
Read stack logs
docker compose logsTo follow new messages while reproducing a problem, use:
docker compose logs -f
Stop following the output with Ctrl+C. This interrupts the log viewer, not the running containers. Review logs before sharing them because they can contain hostnames, account identifiers, configuration details, or other sensitive information.
Restart the current stack
docker compose restart
A restart is useful after a transient failure, but it does not correct an invalid secret or a mismatched token. If the Norish and Obscura services have different OBSCURA_CDP_TOKEN values, correct the configuration and recreate the affected containers using the normal Compose startup command:
docker compose up -dStop and start the project
docker compose stop
docker compose start
Stopping the stack makes Norish unavailable locally and remotely. Localtonet may still have a running tunnel configuration, but requests cannot succeed when the local target is stopped.
Plan backups before storing important recipes
A production backup must cover the persistent data and configuration actually defined by the official Norish Compose file. The supplied evidence does not establish the exact volume names, database backup procedure, attachment locations, restore command, or compatibility rules between releases. We therefore cannot responsibly prescribe a complete Norish backup command here.
Before relying on the deployment, identify every persistent volume or bind mount in the current official Compose file and follow the current Norish guidance for database and application backups. Keep a protected copy of required secrets with the backup plan. Most importantly, test restoration on a separate deployment. An archive that has never been restored is not yet a verified recovery procedure.
Do not assume that pulling new images and recreating containers is sufficient for every Norish release. Database migrations, configuration changes, or release-candidate behavior may require additional steps. Back up the deployment and review the instructions for the exact version you plan to install before upgrading.
Give family members remote access with Localtonet
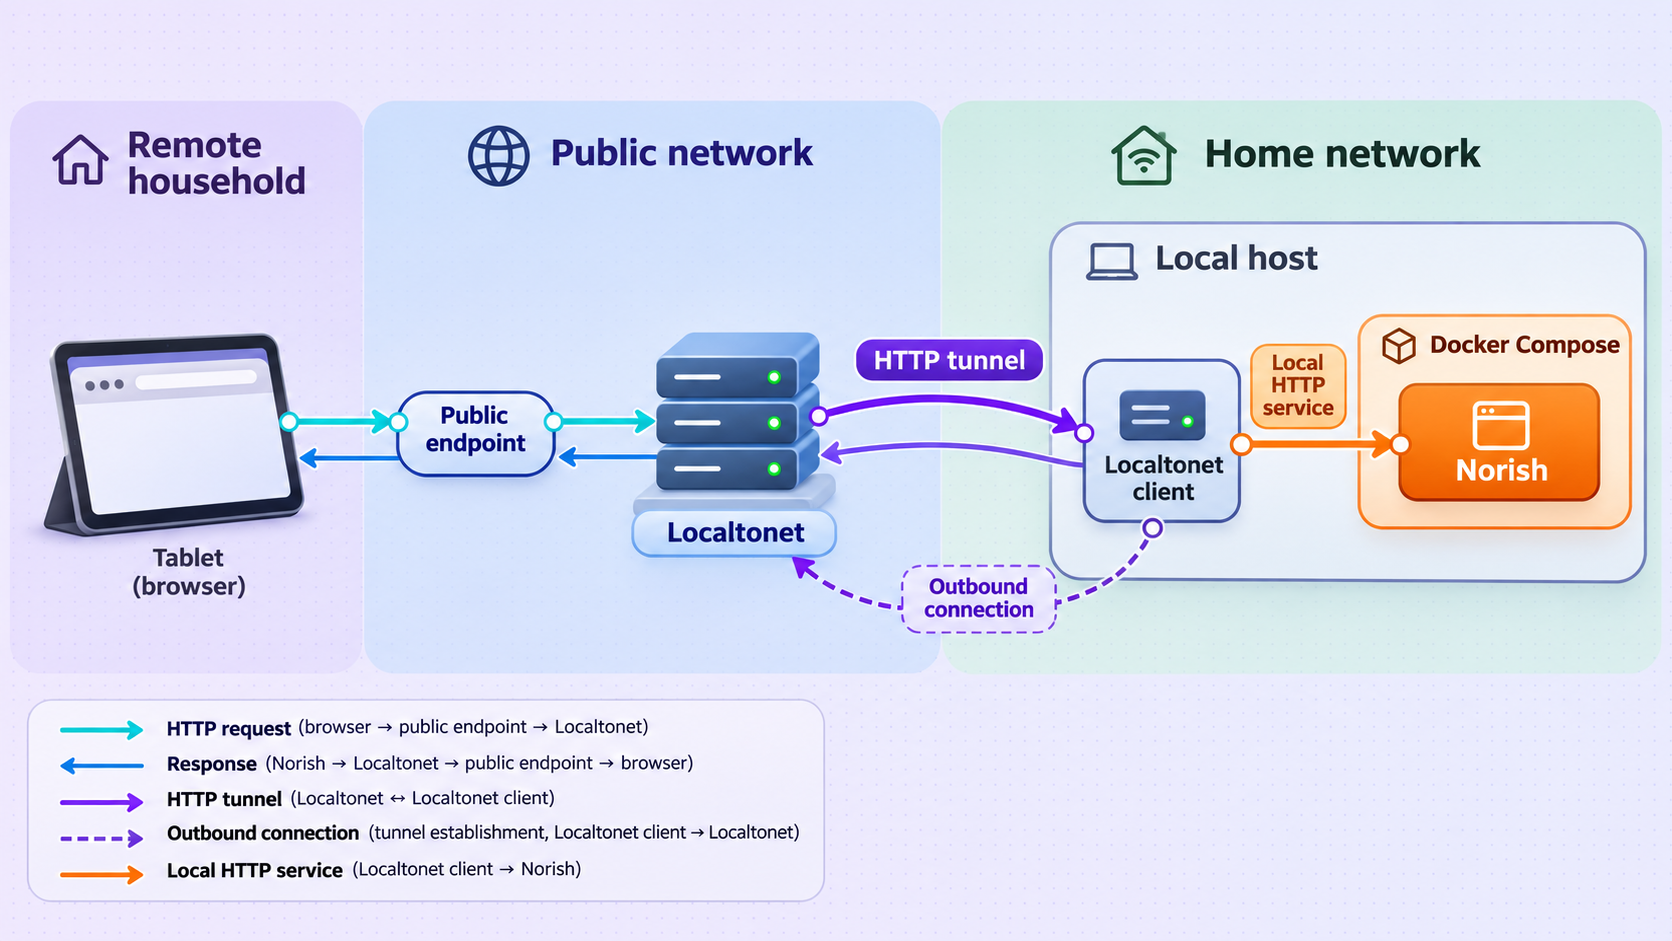
Once Norish works at http://localhost:3000, an HTTP tunnel can connect a public HTTPS address to that local HTTP service. The Localtonet client runs on a device that can reach Norish and establishes an outbound connection to one of our relay servers. This avoids inbound router port forwarding, firewall changes, VPN setup, and the need for a public IP address.
The simplest placement is to run our client on the same host as Docker. In that arrangement, the local target can be 127.0.0.1 with port 3000. If the client runs on another LAN device, 127.0.0.1 would refer to that client device, not the Norish host. You must instead use a private address that the client device can actually reach and confirm local connectivity from that device first.
Install and run the Localtonet client
Install our client on the Norish host or another device that can reach the Norish HTTP service. Keep it running for as long as remote access is required.
Authenticate the client device
Use the device-specific authentication token assigned through Localtonet. Tokens identify client devices and must not be guessed, embedded in this article, exposed in screenshots, or shared with family members.
Select an available relay server
Choose a currently available server or region from our product interface. Available values can vary, so obtain them from the current dashboard rather than copying a hardcoded server code from a tutorial.
Create an HTTP tunnel to Norish
Configure the local target as the IP address reachable from the Localtonet client and port 3000. When the client runs on the Norish host, 127.0.0.1:3000 is the appropriate local target for the documented port mapping. HTTP tunnels can use Random Sub Domain, Custom Sub Domain, or Custom Domain process types, and each serves the content through a public HTTPS address.
Start the tunnel
Creating a tunnel does not make it active. Press Start for the configured tunnel and keep the selected client device connected. Our dashboard then provides the public address assigned to the running tunnel.
Test the public address carefully
Open the assigned HTTPS address from a device outside the home network, such as a phone using mobile data. Test page loading, sign-in, sign-out, redirects, recipe navigation, and any browser features your family will use. Stop or delete the tunnel if the application is not ready for public access.
For the current product workflow and interface details, consult our Localtonet HTTP tunnel documentation. Exact dashboard choices and availability can vary by plan, client version, region, or deployment, so use the values shown in your account.
The documented Compose setup sets AUTH_URL to http://localhost:3000. The available evidence does not establish the exact supported value, callback configuration, trusted proxy settings, or additional reverse-proxy changes required when Norish is served through a public Localtonet HTTPS address. Do not guess these settings. Check the current Norish deployment documentation for the installed release, use the exact public URL assigned to your tunnel where Norish instructs, and fully test authentication and redirects before inviting family members.
This limitation matters because applications often use a configured base URL when generating redirects or validating authentication callbacks. A page may load through the tunnel while a later sign-in action returns the browser to localhost. On a family member's computer, that hostname means their own computer, not your server.
If changing Norish's public URL causes the local localhost workflow to behave differently, use the current Norish guidance for its intended canonical URL. Do not attempt to solve callback problems by exposing extra container ports. Keep the tunnel limited to the web service and correct the application-level URL configuration instead.
Secure a family-facing Norish deployment
A public URL changes the threat model. Before the tunnel, port 3000 may be reachable only from the host or LAN. After the tunnel starts, internet clients can send requests to the Norish web application through the assigned address. The public URL itself is not a secret access-control mechanism.
MASTER_KEY, OBSCURA_CDP_TOKEN, database credentials, Localtonet device tokens, and any other values in the Compose deployment.
Use least exposure
The browser-facing Norish endpoint is the intended remote target. Publishing a database port does not improve recipe access and creates an unnecessary attack surface. The same principle applies to host administration panels, SSH services, and container management interfaces. Give each service its own deliberate access decision rather than exposing an entire machine.
Review data sensitivity
Recipes may appear harmless, but a family application can also reveal names, account identifiers, photographs, meal schedules, dietary restrictions, or private notes. Use non-sensitive test content until authentication and remote behavior have been validated. Tell invited users that the service is self-hosted and establish who is responsible for accounts, updates, and backups.
Maintain both layers
Localtonet provides the network path, while Norish remains responsible for its application behavior. Keep the host, Docker installation, Norish images, and supporting services maintained. Review release notes before changes, back up persistent data, and test after upgrades. A working HTTPS address does not guarantee that the application itself is correctly authorized or free of vulnerabilities.
Protect the Localtonet device token
The token identifies the client device that runs the tunnel. Store it only where required by the Localtonet client, avoid terminal recordings that reveal it, and redact it from diagnostic output. Family members need the Norish public address and their appropriate application access, not your device token.
Troubleshooting Norish and the HTTP tunnel
Port 3000 refuses the local connection
Run docker compose ps and inspect the logs. Confirm that the command is being executed in the directory containing the intended Compose file. Check whether the Norish container exited, whether a dependency is unavailable, and whether another host process already occupies port 3000.
Do not configure Localtonet until a request from the client device can reach the local target. If our client runs on the same host, test http://127.0.0.1:3000 there. If it runs elsewhere, test the Norish host's LAN address from that client device.
Norish or Obscura reports token-related errors
Compare the configured OBSCURA_CDP_TOKEN values without publishing them. Norish requires the same generated value on its Norish and Obscura services. Two separately generated strings will not match. Correct the configuration and run docker compose up -d so Compose can apply the current definition.
The local page works, but the public address does not
Check that the Localtonet client is connected, the intended device token is selected, and the tunnel has been started. Remember that creating a tunnel is not the same as running it. Confirm that its target IP is valid from the client device and that its target port is 3000.
If the client runs in another container or isolated network environment, 127.0.0.1 may point to that environment rather than the Docker host. Use an address that is genuinely reachable from the client, but do not guess container gateway addresses because they vary by platform and network configuration.
The public page loads, but sign-in returns to localhost
This is consistent with a public base URL or authentication callback mismatch. The documented local Compose configuration uses AUTH_URL=http://localhost:3000. Follow the current Norish documentation for setting its canonical public URL and any associated proxy or callback settings. Use the exact public HTTPS hostname assigned to your tunnel where the Norish instructions require it.
We do not provide a speculative replacement line because the evidence available for this article does not establish whether Norish requires only an AUTH_URL change or additional trusted-proxy, origin, cookie, or callback configuration.
The tunnel works only while a terminal is open
Confirm that the Localtonet client is installed and run in the supported persistent mode for your operating system. The tunnel requires the selected client to remain connected. Norish must also remain running through Docker Compose. Closing an interactive process that hosts either component can interrupt remote access.
The page is reachable but application actions fail
Separate transport from application behavior. If the public URL returns the Norish interface, the tunnel is reaching the local web service. Reproduce the action locally, follow docker compose logs -f, and inspect browser errors. If it fails both locally and remotely, troubleshoot Norish first. If it fails only through the public hostname, investigate Norish's public URL, authentication, origin, and reverse-proxy requirements for that release.
A host reboot makes the service unavailable
Check whether Docker started, whether the Compose services resumed according to the restart behavior defined in the official file, and whether the Localtonet client reconnected. The Compose stack and tunnel client are separate dependencies. Both must be operational for remote users to reach Norish.
Frequently asked questions
What address does Norish use after the documented Docker Compose installation?
The documented Compose stack maps host port 3000 to container port 3000, so the local address on the Docker host is http://localhost:3000. From another LAN device, use the Docker host's reachable private address with port 3000, subject to the host firewall and network configuration.
Which Norish port should the Localtonet HTTP tunnel target?
Target port 3000. If our client runs directly on the Norish host, use 127.0.0.1 as the local IP. If it runs on another device, use the Norish host address that is reachable from that device. Do not expose the PostgreSQL or Valkey services for normal browser access.
Do the Norish and Obscura services need different OBSCURA_CDP_TOKEN values?
No. Generate one value with openssl rand -hex 32 and use that same value for OBSCURA_CDP_TOKEN on both services. Keep the token private.
Must I change AUTH_URL before opening the Localtonet tunnel?
The documented local configuration uses http://localhost:3000. The evidence available for this guide does not establish the exact supported public value or whether other reverse-proxy settings are required. Verify the current Norish instructions for your release before family use, then test authentication, redirects, and sign-out through the exact public HTTPS address.
Does Localtonet require router port forwarding for Norish?
No. Our client establishes an outbound connection to a Localtonet relay server, so the workflow does not require an inbound router port, firewall change, VPN setup, or public IP address.
Is creating a Localtonet tunnel enough to make Norish available?
No. After creation, the tunnel must be started. The selected Localtonet client must remain connected, the tunnel must remain running, and the Norish Docker Compose stack must continue serving its local port.
Can I use a generated subdomain or a custom domain?
Localtonet HTTP tunnels support Random Sub Domain, Custom Sub Domain, and Custom Domain process types, with content served at a public HTTPS address. Availability can vary by plan or current product configuration. Exact custom-domain DNS requirements should be taken from the current Localtonet documentation rather than guessed.
Does the public Localtonet URL replace Norish authentication?
No. A public URL provides network reachability and should not be treated as a password. Confirm and test the access controls provided by your installed Norish release before sharing the address, use strong credentials where supported, and expose only the application endpoint.
Connect your working Norish server with Localtonet
After Norish loads locally on port 3000 and its public authentication settings have been verified, create an HTTP tunnel to share the recipe application without configuring inbound router port forwarding.
Get Started Free →