

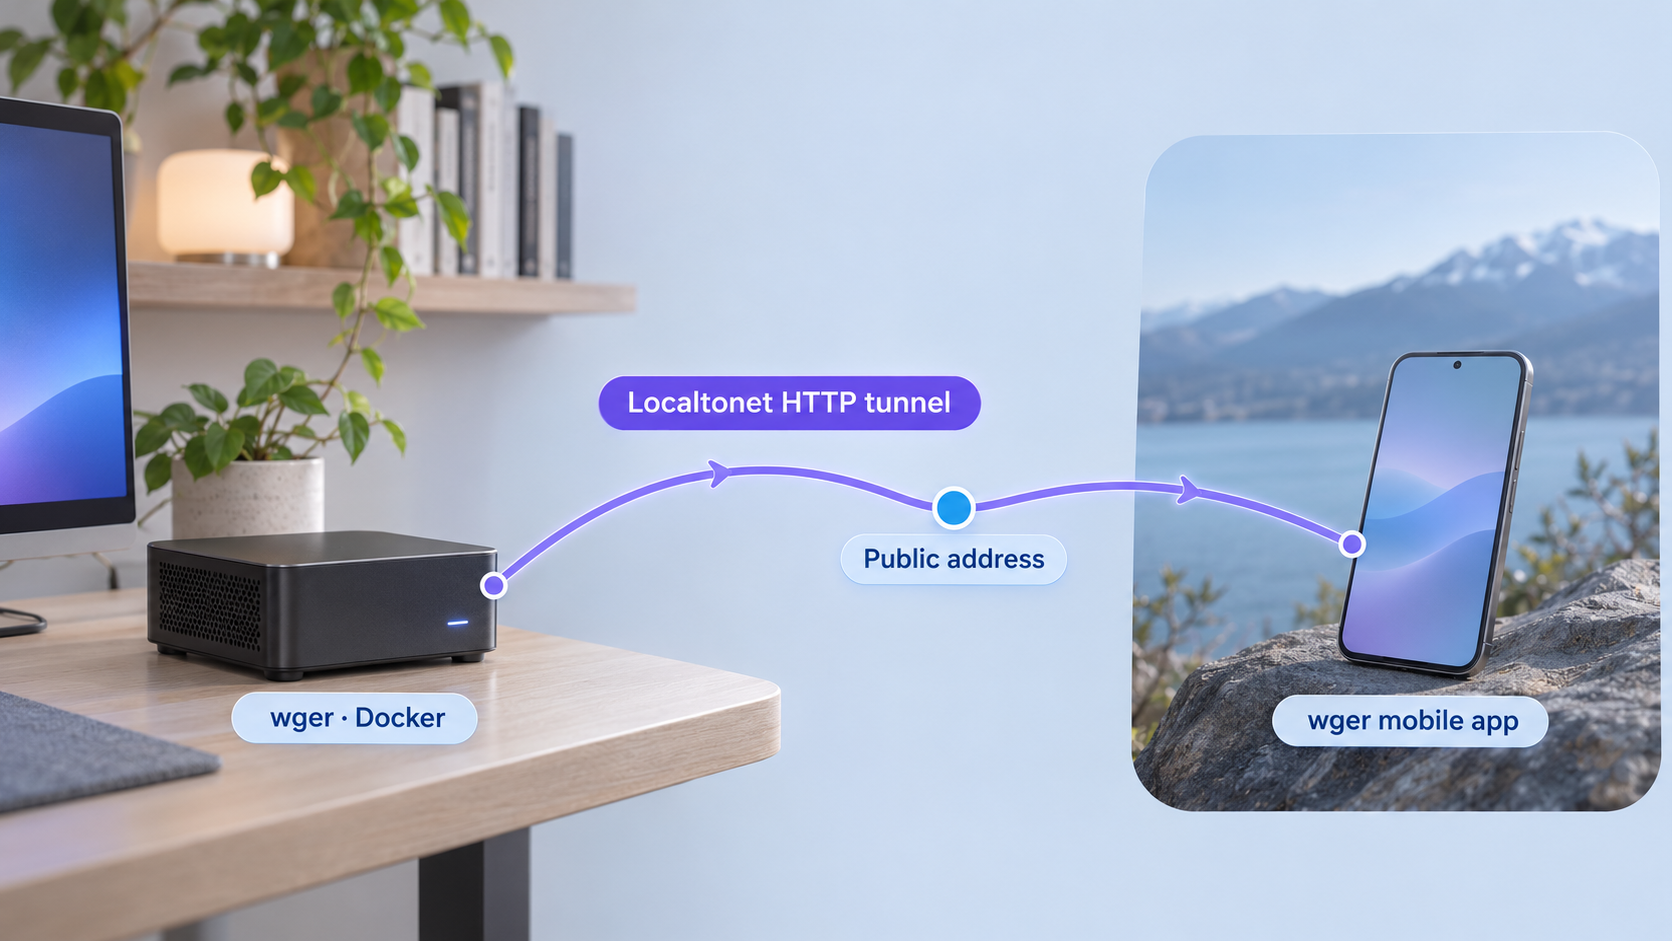
Run your own fitness tracker and reach it securely from outside your home network
wger is a self-hosted workout, nutrition, measurement, and weight-tracking application with a browser interface, mobile apps, and a REST API. This guide explains how to prepare its official Docker Compose deployment, start it, identify its published local address, verify the installation, and handle routine container operations. Once the local service works, we will expose its HTTP endpoint through Localtonet so that a compatible wger mobile app or browser can reach it remotely without inbound router port forwarding, firewall changes, a VPN, or a public IP address. Exact ports and deployment variables can change in the upstream Compose repository, so this guide shows you how to read those values from your own checked-out configuration instead of assuming them.
📋 What's in this guide
What you are deploying
wger is a free and open-source fitness application built with Django. It can manage workouts, nutrition and diet plans, body weight, and other measurements. It also provides a REST API for integrations and automation. The project can be useful for an individual who wants control over personal fitness records, as well as for a small gym that needs a web-based management tool.
The wger project documents several ways to run the application, but its official Docker Compose repository is the appropriate starting point for a persistent self-hosted deployment. That repository contains the service definitions and supporting configuration needed to run the application as a multi-container stack. This is different from the project's quick demo container, which is explicitly intended for evaluation and does not preserve data when its image is replaced.
Docker Compose describes the containers, networks, storage, and published ports that make up the deployment. You start the stack from the directory containing its Compose file. Docker then creates the required resources and launches the services in the correct relationship.
Production Compose stack versus the demo image
Do not confuse the official Compose deployment with the single-container demo. The demo is convenient for briefly exploring the interface, but its documentation warns that updating or replacing the image overwrites its data. The production Compose configuration is intended to persist the database and uploaded images.
| Installation path | Best use | Important behavior |
|---|---|---|
| Official Docker Compose stack | Persistent self-hosting | Uses the dedicated wger Docker repository and is the deployment covered in this guide. |
| Demo container | Short evaluation | Uses known demo credentials and can overwrite data when replaced, so it is not suitable for a durable public deployment. |
| Development container | Application development | Mounts source code and is designed for development rather than a normal production installation. |
| Direct local installation | Specialized development or administration needs | Requires the project's separate local installation workflow and is outside this Docker-focused guide. |
The available evidence for the current wger Compose deployment does not establish one permanent host port that is safe to repeat for every checkout. Read the published port from the Compose configuration on your machine. This also protects the workflow from becoming incorrect if the upstream project changes its mapping.
Prerequisites for the Docker deployment
Prepare the host before downloading or starting wger. It can be a home server, workstation, virtual machine, or another device on which Docker is supported. The host must remain powered on whenever you want to use the application. Remote access also requires the Localtonet client to remain connected and its tunnel to remain running.
You need the following:
- A host with Docker Engine or Docker Desktop installed.
- Docker Compose support through the modern
docker composecommand. - Permission to create containers, networks, and persistent Docker storage on the host.
- Enough free storage for the database, uploaded media, container images, and future backups.
- A current copy of the official wger Docker Compose repository from the wger Docker repository.
- A browser on the host or another device that can reach the host over the local network.
- For remote access, the Localtonet client installed on the wger host or on another device that can reach wger's local IP address and port.
The upstream material supplied for this guide does not define minimum CPU, memory, or disk requirements. Resource needs depend on usage, retained records, uploaded files, and the other workloads running on the host. We therefore do not recommend an invented hardware minimum. Monitor the actual containers after deployment and increase resources if the database or application is constrained.
Confirm that this is a persistent deployment
Before startup, inspect the downloaded repository and make sure you are using its normal production Compose configuration rather than a demo or development example. Persistent storage matters because fitness records, user accounts, measurements, database content, and uploaded images should survive container replacement and image updates.
Plan the local network boundary
Decide whether wger should be reachable only on the Docker host, throughout your local network, or both. The Compose port mapping determines which host address and port receive browser requests. Do not change that mapping based on an assumed value from an old tutorial. Read the current Compose file and note the host-side port associated with the web-facing service.
The documented demo image uses known administrative credentials and is not intended to preserve data. Do not connect that demo to a public tunnel. Use the persistent Compose deployment, create private credentials, and confirm that anonymous users cannot reach information they should not see.
Install and start wger with Docker Compose
The official wger project describes its Docker installation as essentially a docker compose up -d workflow. That command is short because the Compose repository contains the service definitions. The important work is making sure that you run it from the correct directory and review the current configuration before exposing anything.
1. Obtain the official Compose repository
Download or clone the current wger Docker Compose repository onto the Docker host. Use a directory that you can retain for the lifetime of the installation. Do not copy an unverified Compose file from a forum post or an unrelated tutorial, because it may use outdated images, incomplete storage definitions, or different service names.
The exact checkout command is not repeated here because the repository can be obtained through Git, a GitHub archive, or an existing source-management workflow. Whichever method you choose, the result must be a local directory containing the current official Compose configuration.
2. Review the files before starting containers
Open the Compose file and any example configuration files included in your checkout. Identify the web-facing service, persistent storage definitions, image references, and host port mapping. Also read the repository's current README for required preparation that applies to that exact revision.
If the repository provides example environment files, follow its instructions for copying and editing them. Do not create environment-variable names based on an older guide. The supplied evidence does not establish a complete, stable list of required variables or defaults, so reproducing one here would risk giving you an invalid deployment.
3. Record the published web port
In a Compose port mapping, the host-side value is the port you will use for local testing and for the Localtonet target. Record that value, together with the address of the Docker host. If the service is bound only to the loopback interface, a Localtonet client on the same host can normally target that local interface. If the Localtonet client runs on another device, the service must be reachable from that device through an appropriate local address and permitted network path.
Avoid changing the container-side port unless the wger configuration explicitly tells you to do so. For this workflow, Localtonet needs the reachable host address and published host port, not an internal Docker network address that exists only between containers.
4. Start the production stack
Change into the directory containing the active Compose file, then run the startup command documented by the project:
docker compose up -d
The -d option starts the stack in detached mode. Docker may need to download images during the first start, so initial startup can take longer than later restarts. Do not create the public tunnel until the application is responding locally.
5. Inspect the deployment through Docker
Use Docker Desktop or your normal Docker administration interface to confirm that the Compose project was created and that its services remain running. A container that repeatedly exits, restarts, or reports an unhealthy condition needs to be investigated before you continue.
Inspect the affected container's logs through that same interface. Startup failures commonly reflect unavailable ports, invalid configuration, unavailable storage, image download problems, or a supporting service that has not initialized correctly. The exact service names and health checks belong to the Compose revision you downloaded, so use the names shown on your host rather than names copied from an older deployment.
A multi-container application may need time to initialize its database and application services. A temporary connection failure immediately after startup does not necessarily mean the deployment is broken. Wait for the containers to settle, then inspect their current status and logs.
Review wger configuration before remote access
A working local page is only the first checkpoint. Before publishing the service, review account security, proxy-aware settings, persistent storage, backups, and the hostname behavior expected by the current wger release.
Create private application credentials
Use a unique password for every wger account, especially accounts with administrative privileges. Do not reuse the documented demo credentials. Version 2.7 changed password hashing to Argon2, with existing passwords migrated when users next sign in, but strong hashing does not make a weak or reused password safe.
Keep administrative accounts separate from routine fitness-tracking accounts when the application's role model permits it. Public reachability increases the importance of limiting privileged access.
Check hostname and reverse-proxy behavior
A Localtonet HTTP tunnel gives the service a public HTTPS address while forwarding requests to the local HTTP target. wger is a Django application, and Django deployments can enforce accepted hostnames and trusted origins. The wger 2.7 release also introduced a USE_X_FORWARDED_HOST setting for installations behind a reverse proxy.
Do not enable that setting blindly. First test the public URL. If wger rejects the tunnel hostname, generates redirects to the wrong address, or fails an origin check, consult the administration documentation for the exact wger version and configure only the host and proxy settings that its documentation requires. The available evidence does not establish a universal allowed-host or trusted-origin variable for every Compose revision, so this guide does not invent one.
Only enable forwarded-host or related proxy behavior when the application documentation requires it and requests reach wger through a controlled proxy path. Treat accepted hostnames and trusted origins as security settings, not as errors to disable broadly.
Verify persistent storage
Confirm that the database and uploaded images are stored in the persistent locations defined by the production Compose stack. Containers are replaceable. Important data must not exist only in a container's writable layer.
A backup should include every persistent component required to reconstruct the installation, not just one exported file. The exact backup procedure and storage names depend on the current repository. Review its backup directory and current instructions, then test restoration on an isolated deployment before relying on the backup for recovery.
Consider release-specific changes
wger 2.7 includes changes that matter to self-hosters. Its release notes call out breaking changes, new settings, API changes, Argon2 password hashing, asynchronous email when Celery is configured, health-data synchronization in the mobile app, revised measurements, and an optional OAuth2 provider that is disabled unless configured.
If you are upgrading an existing installation rather than creating a new one, read the complete release notes for every version you cross. In particular, custom scripts that use the REST API may require updates because version 2.7 changes measurement-related API behavior. Do not assume that a successful container start proves every external integration is compatible.
Verify wger locally before creating a tunnel
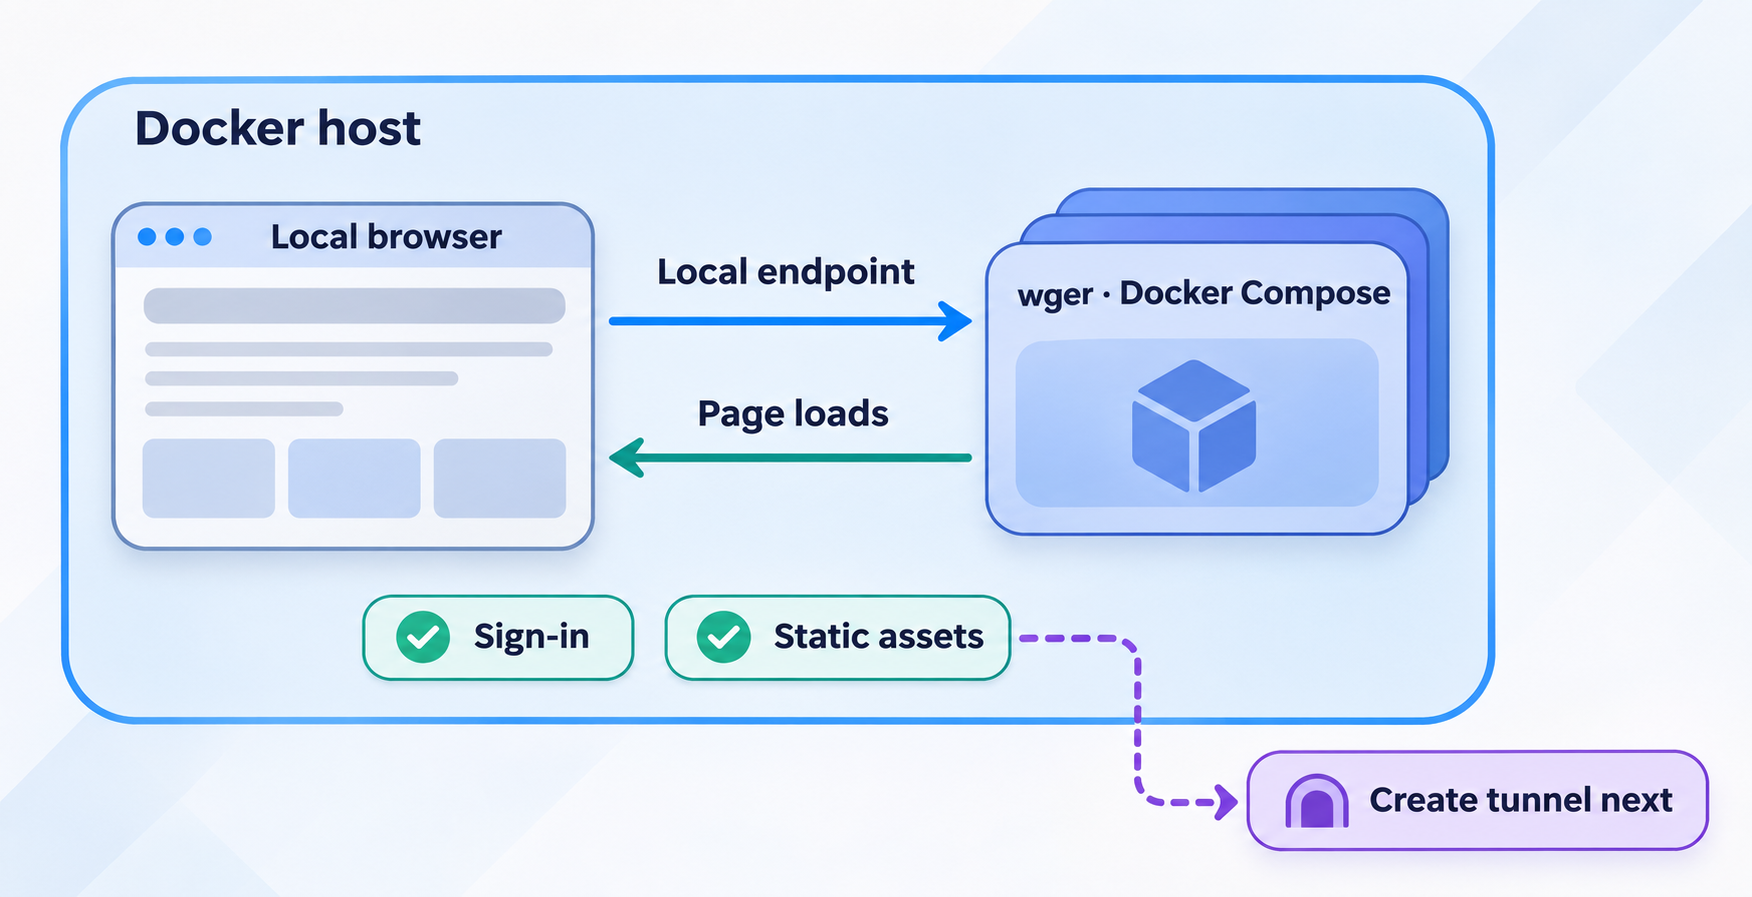
Local verification separates application problems from tunnel problems. If wger does not work directly on the host or local network, publishing the same endpoint will not repair it.
Build the local URL from observed values
Use the Docker host address and the host-side published port recorded from the Compose configuration. If you are testing on the same machine and the service is bound locally, the address may use the loopback host. From another local device, use a reachable LAN address instead. This guide intentionally does not provide a numeric port because the supplied upstream evidence does not confirm a permanent production mapping.
Open the resulting HTTP address in a browser. A successful test should return the wger interface rather than a generic connection error, an unrelated service, or a container gateway error.
Test the complete sign-in path
Do more than confirm that the landing page loads. Sign in with a non-demo account, navigate through the application, and verify that static resources and authenticated pages load correctly. If you plan to use measurements, workouts, or nutrition records remotely, create a small test record and confirm that it remains available after a normal container restart.
Use this local verification checklist
- The expected wger page loads at the observed local host and port.
- Styles, scripts, and images load without obvious missing-resource errors.
- A private account can sign in and sign out.
- A test record can be created and read again.
- The record survives a normal restart of the existing Compose stack.
- No application container remains in a repeated restart loop.
- The local endpoint is reachable from the device that will run the Localtonet client.
Do not compensate for a broken local deployment by changing tunnel settings. Inspect the wger containers, configuration, storage, and published port first. Create the HTTP tunnel only after the same target works without Localtonet.
Expose the verified wger endpoint with Localtonet
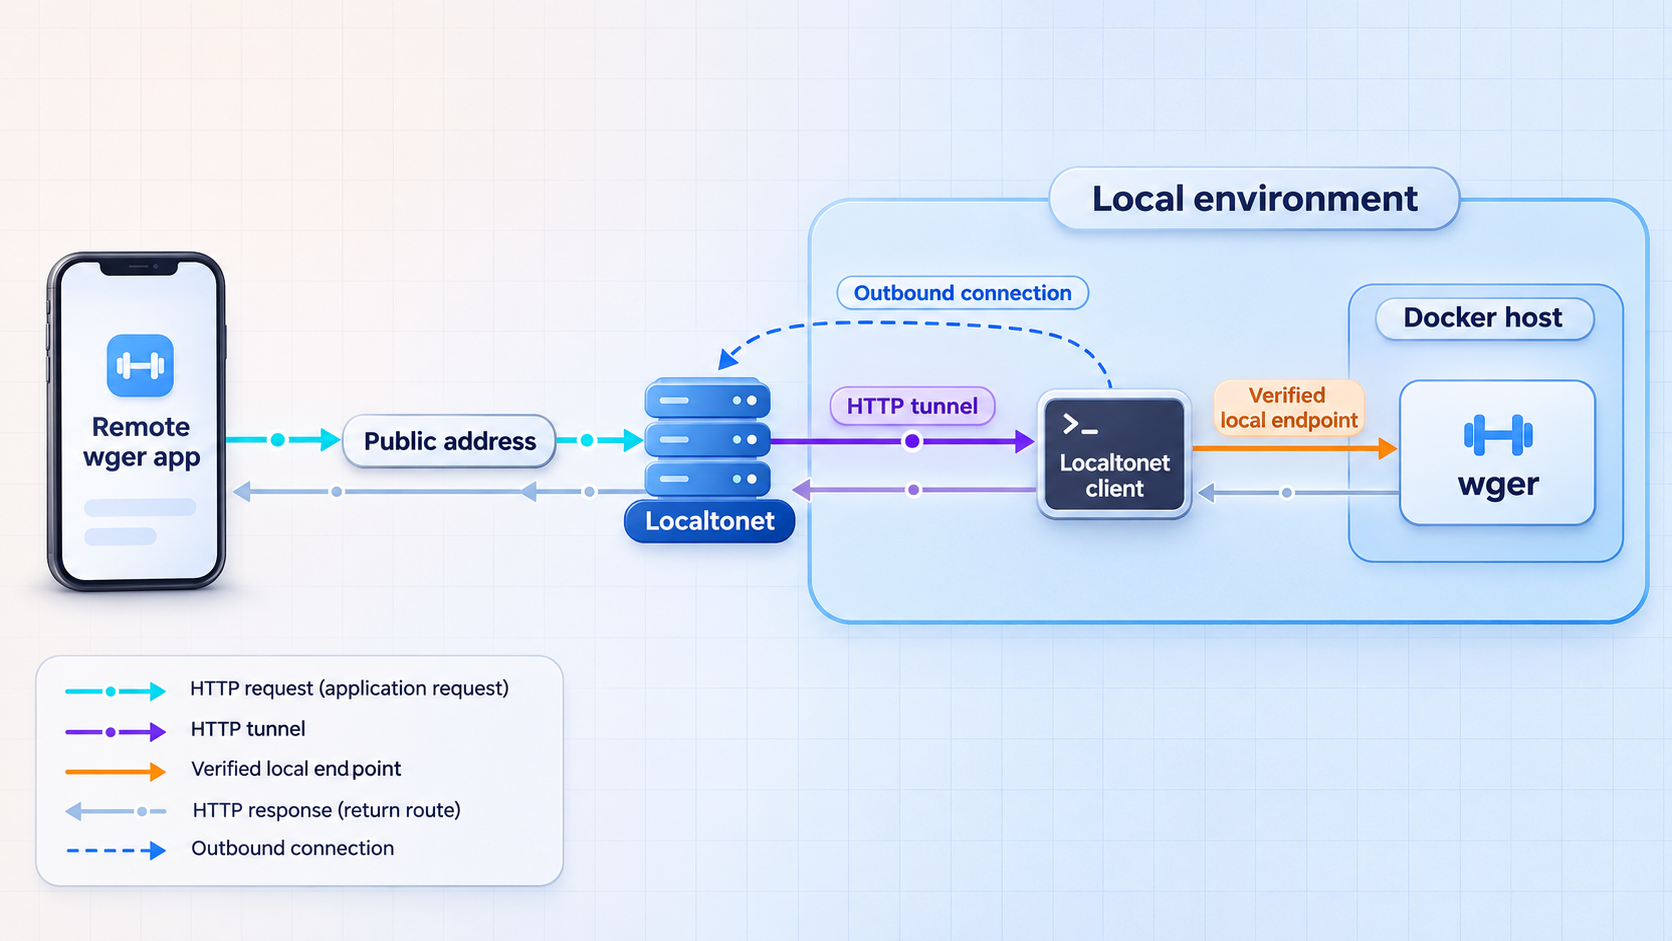
Once the application works locally, the next step is to publish its HTTP endpoint. With Localtonet, the client application establishes an outbound connection to one of our relay servers. The resulting HTTP tunnel provides a public HTTPS address without requiring inbound router port forwarding, firewall changes, VPN setup, or a public IP address.
The Localtonet client can run directly on the Docker host or on another device that can reach wger over the local network. The target must be the exact local address and port that passed the previous verification.
Install and run the Localtonet client
Install our client for the operating system on the wger host, or use another connected device that can reach the verified wger endpoint. Keep the client running whenever remote access is required.
Authenticate and select the client device
Use the device-specific authentication token associated with the client that will carry the tunnel. Keep this token private. Do not place it in the Compose repository, screenshots, mobile settings, or public documentation.
Select an available relay server
Choose an available server or region from the current Localtonet dashboard. Available values can vary, so use the options shown in your account instead of copying a server code from another installation.
Create an HTTP tunnel to wger
Configure the local target with the reachable IP address and host-side port that you verified earlier. Use an HTTP tunnel because wger presents a web application and REST API over HTTP. Do not enter an internal container-only address unless the Localtonet client can actually reach that Docker network.
Start the tunnel and record its public URL
Creating a tunnel does not start it. Press Start, wait for the selected client to connect, and use the assigned public HTTPS address. HTTP tunnels can use a random subdomain, a supported selected subdomain, or a custom domain, depending on the configuration available to you.
Test remotely and stop exposure when unnecessary
Test the public address from a device that is not relying on the same local path. When remote access is no longer needed, stop the tunnel. Delete it if the configuration will not be used again.
Our HTTP tunnel documentation provides the current dashboard workflow. Use the fields shown in the current interface and avoid relying on old screenshots for server names or account-specific options.
The public address works only while the selected Localtonet client is connected and the tunnel is running. If the Docker host, wger stack, client device, or tunnel stops, remote requests will not reach the application.
Which address should the tunnel target?
| Client location | Likely target type | Verification requirement |
|---|---|---|
| Localtonet client on the Docker host | A local host address and the published Compose port | The address must load wger from that same host. |
| Client on another LAN device | The Docker host's reachable LAN address and published port | The endpoint must load from the client device before tunneling. |
| Client in a different container | An address reachable through the actual Docker network arrangement | Do not assume container names or networks; test from the client environment. |
| Client on an unrelated remote network | Not suitable unless that device already has legitimate reachability to wger | Localtonet forwards to a service reachable from the connected client device. |
Security checks before sharing the URL
Treat the public URL as an internet-reachable application address. Require authentication, use private account credentials, remove unused users, and apply least privilege. Do not share administrative credentials or access tokens through chat messages, screenshots, or mobile configuration exports.
Review any registration behavior enabled by your wger configuration. If the instance is intended only for you or a small known group, do not leave unnecessary public account creation enabled. The exact control and setting name must be taken from the current wger administration documentation rather than guessed.
Connect the wger mobile app to the public address
wger provides mobile applications, and version 2.7 includes mobile features such as importing supported body metrics from Apple Health on iOS and Health Connect on Android. A self-hosted mobile workflow requires the app to use the address of your own wger instance rather than a hosted default.
First open the Localtonet public URL in the mobile device's browser. Confirm that the wger sign-in page loads and that you can authenticate. This browser test proves that the phone can resolve and reach the public address before app-specific settings are involved.
Next, use the mobile app's option for a custom or self-hosted server address if that option is present in the app version installed on your device. Enter the complete public HTTPS URL assigned to the running Localtonet HTTP tunnel. Preserve the scheme and any path required by the current app.
The supplied upstream evidence confirms that wger has mobile applications, but it does not establish the exact menu name or field sequence for every current iOS and Android release. We therefore do not invent a fixed tap-by-tap path. Use the app's current self-hosted server setting and verify the required URL format against that release if the field is not clear.
Sign in using a normal wger account. Do not enter the Localtonet device token into the wger app. The two credentials have different purposes: the Localtonet token identifies the client device carrying the tunnel, while the wger credentials authenticate a user to the fitness application.
If browser access succeeds but the app does not connect, check whether the app expects a particular base URL format, whether wger is redirecting to a local hostname, and whether the server rejects the public host or request origin. Also verify that the tunnel remains running while the app is being tested.
Routine operation, backups, and updates
A self-hosted fitness tracker becomes valuable over time, which also makes operational discipline important. Plan for restarts, backups, upgrades, and periodic access reviews before the database contains months or years of personal records.
Starting and stopping the service
Use Docker's Compose project controls from the directory containing the deployment configuration, or use the equivalent controls in Docker Desktop. Stopping containers should not remove properly configured persistent storage. Deleting volumes or replacing the project with an incompatible configuration can remove data, so read every destructive prompt carefully.
The Localtonet tunnel has a separate lifecycle. Stopping wger does not automatically delete its tunnel configuration, and creating a tunnel does not start wger. For predictable maintenance, stop public exposure before making major application changes, complete the local verification again, and then restart the tunnel.
Back up all persistent data
The official Docker repository includes backup-related material, but the supplied evidence does not establish one universal command or retention schedule for every current revision. Follow the backup instructions included with your checkout and include the database, uploaded media, and any deployment configuration required for recovery.
Store at least one backup separately from the Docker host. A backup on the same disk does not protect against disk loss. Protect backup files as sensitive data because they may contain account details, measurements, workouts, nutrition information, and other private records.
Test restoration
A backup is not proven until it can be restored. Use an isolated environment, restore the required components, start the application without exposing it publicly, and confirm that accounts and sample records are intact. Document the steps that worked for your Compose revision.
Upgrade deliberately
Before an upgrade, read the wger release notes, create and verify a backup, and note the currently deployed image versions. Version 2.7 specifically warns self-hosters about breaking changes. API consumers should also review changes before updating because an application can appear healthy while a custom script fails against a changed endpoint or data model.
After upgrading, repeat the local verification checklist. Test authentication, records, static assets, API-dependent tools, and any mobile synchronization you use. Only then resume the Localtonet tunnel.
Review public access periodically
Remove users who no longer need access, rotate compromised passwords, and stop unused tunnels. Keep the Localtonet device token private. If you move the client to another device, use the token associated with the intended device instead of copying secrets into an image or source repository.
Troubleshooting the complete workflow
The Compose stack does not remain running
Inspect the status and logs of every service in the Compose project. Find the first service that fails rather than focusing only on the web-facing container. Check for an occupied host port, invalid configuration, unavailable persistent storage, image download failures, or a database service that did not initialize.
Make sure the command was run in the directory containing the intended production Compose file. Running the same command in a different directory can start another project or fail to find a configuration.
The browser cannot open wger locally
Re-read the Compose port mapping and use the host-side port. Confirm that the web-facing container is running and that no other process has taken the port. If testing from another LAN device, verify that the service is bound to an address reachable from that device and that local network policy permits the connection.
The tunnel starts, but the public URL returns an error
Test the exact Localtonet target from the device running our client. A target that works only from your laptop but not from the client device is not reachable by that tunnel. Correct the target IP address or local network path before changing application settings.
Confirm that the tunnel type is HTTP and that the target uses the wger host-side port. Do not configure a raw port tunnel merely because Docker publishes a port. wger is a web application, so the HTTP tunnel is the appropriate family for this workflow.
The public URL is rejected by wger
A hostname rejection, origin failure, or redirect to a private address points to application-side proxy and host configuration. Review the current wger administration documentation for accepted hosts, trusted origins, and forwarded-host behavior. Version 2.7 provides USE_X_FORWARDED_HOST for reverse-proxy setups, but enable it only as documented for your deployment.
The browser works, but the mobile app does not
Confirm that the app is configured with the full public HTTPS address and not the private LAN address. Check whether the app version supports selecting a self-hosted server and whether it expects a specific base URL form. If authentication fails, test the same account in the mobile browser and make sure the tunnel has not stopped.
The tunnel works intermittently
Check each dependency in order: the wger containers, Docker host, local network path, Localtonet client, and tunnel status. The public endpoint is available only while the selected client is connected and the tunnel is running. Host sleep, container restarts, network changes, or stopping the client will interrupt access.
Records disappeared after an update
Stop making changes and determine whether the updated deployment attached the same persistent storage as the previous stack. Do not initialize new storage over the old deployment or repeatedly recreate resources without understanding the volume mapping. Restore from a verified backup if the original persistent data is unavailable.
Frequently asked questions
What port does the production wger Docker installation use?
Use the host-side port published by the current official Compose configuration on your machine. The available evidence does not establish one permanent production port that is safe to hardcode. Read the mapping, open that local endpoint, and use the same verified port as the Localtonet HTTP target.
Can I expose the wger demo container through Localtonet?
You should not publish the demo container. It uses known demonstration credentials and is documented as overwriting data when replaced. Use the persistent production Compose deployment, create private credentials, and verify its storage before enabling remote access.
Does Localtonet require router port forwarding?
No. Our client establishes an outbound connection to a Localtonet relay server, so this workflow does not require inbound router port forwarding, a public IP address, VPN setup, or inbound firewall changes. The client device still needs legitimate local reachability to the wger target.
Should I use an HTTP, TCP, or VPN connection for wger?
Use a Localtonet HTTP tunnel for the wger web application and REST API workflow described here. Standard HTTP tunneling is not a VPN. Localtonet VPN Manager is a separate private mesh VPN feature and is not required to publish this web endpoint.
Can the Localtonet client run on a different machine from Docker?
Yes, provided that the client device can reach the wger host's local IP address and published port. Test that endpoint directly from the client device before creating the tunnel. If it cannot connect locally, the tunnel cannot forward requests to it.
Why does wger reject the public tunnel hostname?
Django applications can validate hostnames and request origins. Review the current wger documentation for its accepted-host, trusted-origin, and reverse-proxy configuration. wger 2.7 includes a USE_X_FORWARDED_HOST setting, but it should be enabled only when appropriate for the documented proxy arrangement.
Does creating a Localtonet tunnel make it immediately available?
No. After creating the tunnel, you must start it. The public URL remains available only while the selected client device is connected, the tunnel is running, and the local wger service is reachable.
What should I back up before updating wger?
Back up every persistent component required to restore the installation, including the database, uploaded media, and relevant deployment configuration. Follow the instructions included with your current Compose checkout, keep a protected copy away from the Docker host, and test restoration before an upgrade.
Connect your self-hosted wger instance with Localtonet
Verify the production Compose deployment locally, then create an HTTP tunnel to its observed host address and published port. You can reach the working application through a public HTTPS URL without opening an inbound router port.
Get Started Free →