

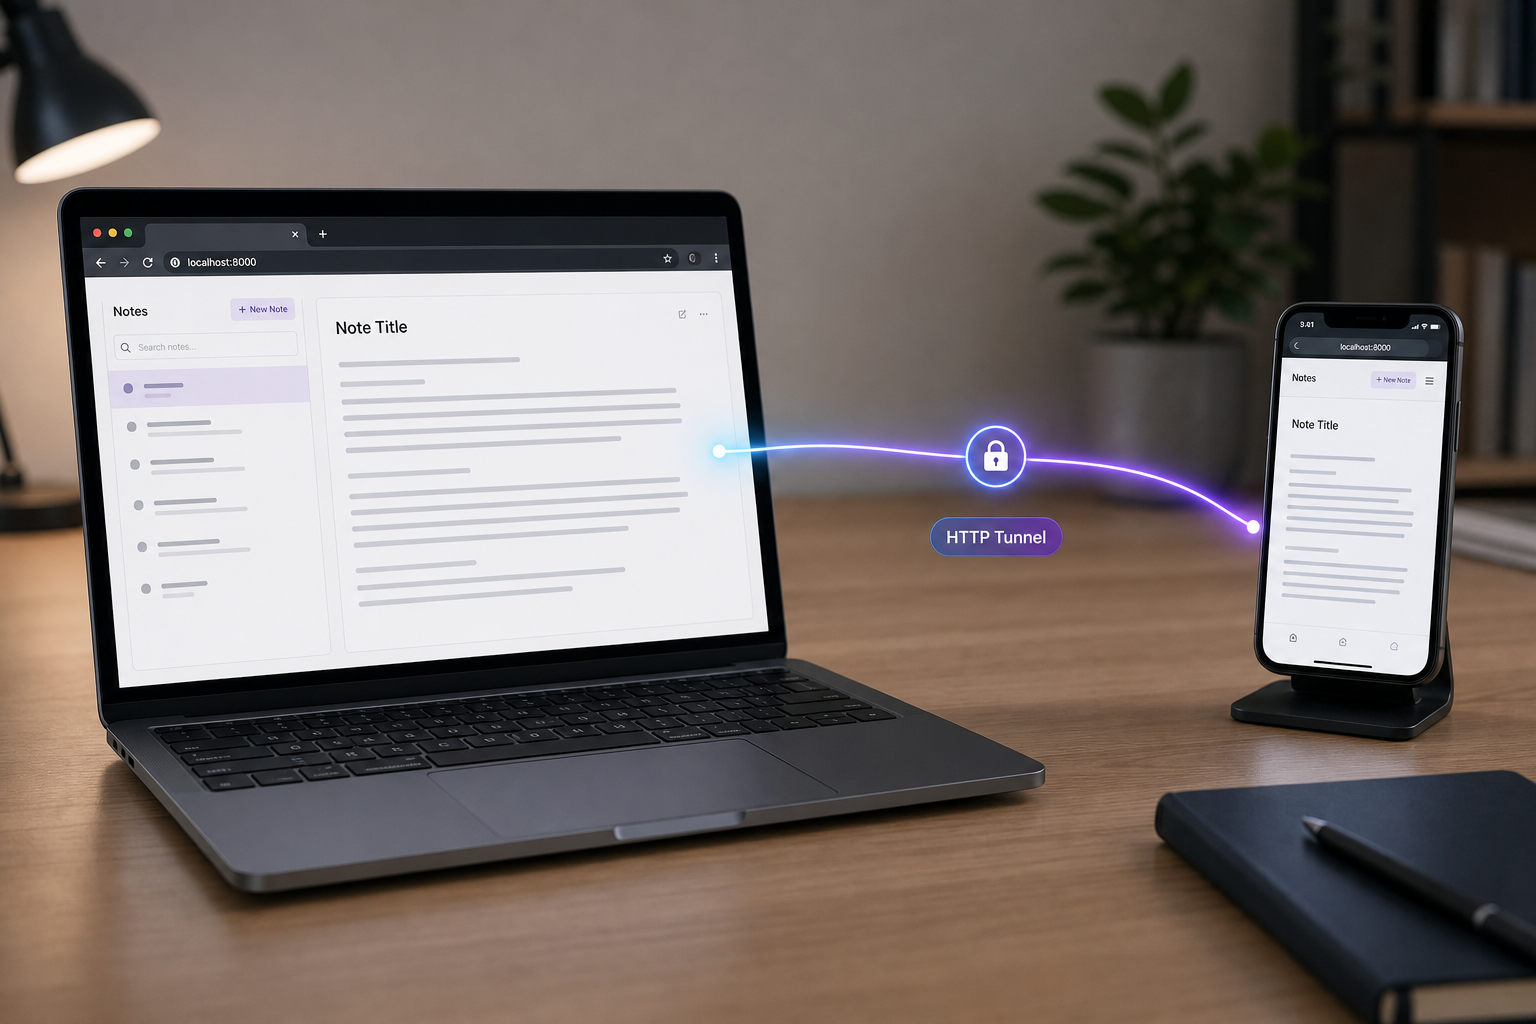
Install it from source, confirm it works on your own machine, then publish it through an HTTP tunnel
NoteDiscovery is a self-hosted, privacy-focused knowledge base that stores your notes as plain Markdown files. In this guide we walk through the non-Docker installation path (git, pip and python run.py), show how to verify it on localhost:8000, and cover the common operations and failure modes the project's own startup script reveals. Only after the app works locally do we add Localtonet, so you can reach the same web UI from a phone, a laptop on another network, or a colleague's browser without opening router ports. We also state clearly where the available project documentation stops, so you know which details you need to check yourself.
📋 What's in this guide
Why self-host NoteDiscovery?
Most note-taking tools keep your content on someone else's servers. NoteDiscovery takes the opposite approach. According to the project's website, it is free and open source under the MIT license, has no paid tiers, no accounts and no telemetry, and your notes live on the server you choose. There is no cloud sync and no third-party storage. Notes are plain Markdown files in ordinary folders, which means you can drop an existing Obsidian vault in, open the same files in another Markdown editor, or back them up with any tool that copies files. There is no proprietary database to escape from.
The trade-off of any self-hosted app is reachability. A service running on a home computer, a spare mini PC or a development laptop is normally visible only on that local network. If you want to open your notes from a phone on mobile data, or share a read-only link with someone elsewhere, you need a way to publish the web UI. That is the second half of this guide, and we keep it as a distinct step so that you can confirm the application itself is healthy before you put it on the public internet.
This tutorial was prepared against the project's v0.33.0 release. That release changed two editor behaviors worth knowing: saving a note no longer silently overwrites a copy that changed on disk (the editor asks whether to reload or overwrite), and typing [[ suggests notes while ![[ suggests media files. Later versions may differ, so treat the project's own release notes as the authority for anything newer.
Prerequisites
The non-Docker installation path documented by the project needs only a small set of tools. Before you start, confirm each of the following.
- Python 3.8 or newer. The project lists Python 3.8+ as the requirement. Check with
python --versionorpython3 --version. - pip. It is used to install the dependencies listed in requirements.txt.
- git. It is used to clone the repository from GitHub.
- A virtual environment (recommended). The project recommends one on distributions that follow PEP 668. Those distributions mark the system Python as externally managed and refuse global pip installs.
- Internet access on first start. The startup script downloads the frontend libraries into frontend/vendor/ the first time you run it, so the machine needs to reach the internet at that moment.
- A free local port. The default is 8000. We explain how to change it below.
For the remote-access step you will also need a Localtonet account and the Localtonet client application installed on the same computer that runs NoteDiscovery, or on a device that can reach it over the network. We cover that in its own section.
The project material we worked from does not state which operating systems are officially tested for the Python path, the minimum RAM or disk, or the exact Python version tested in CI beyond the 3.8+ requirement. If you are on an unusual platform, check the repository's README and pyproject.toml before committing to it.
Install NoteDiscovery with git, pip and python run.py
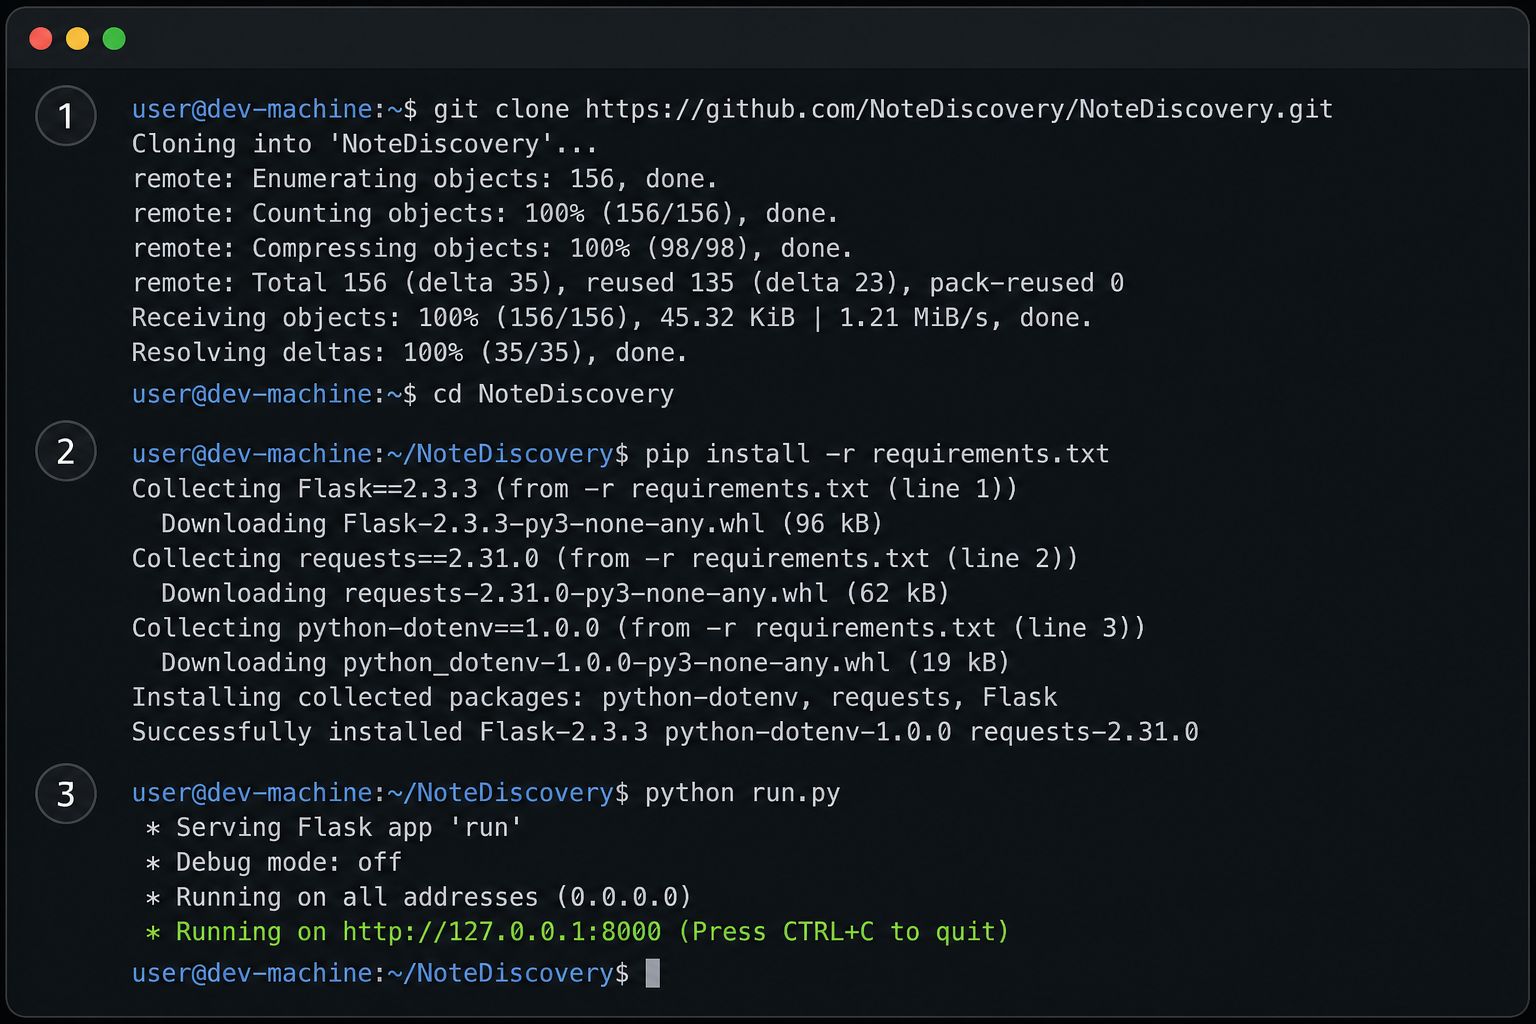
The installation is four actions: clone, isolate, install dependencies, start. We keep them in that order because creating the virtual environment before the pip install avoids the PEP 668 error on modern Debian, Ubuntu and similar systems.
1. Clone the repository
git clone https://github.com/gamosoft/NoteDiscovery.git
cd NoteDiscovery
The repository root contains the files that matter for this guide: run.py (the quick start script), requirements.txt (Python dependencies), config.yaml (configuration), and the scripts, backend and frontend directories. It also contains Dockerfile and docker-compose files for the container paths we mention later.
2. Create and activate a virtual environment
A virtual environment keeps NoteDiscovery's dependencies separate from the rest of your system. These are standard Python commands, not NoteDiscovery-specific ones.
# Linux and macOS
python3 -m venv venv
source venv/bin/activate
# Windows (Command Prompt)
python -m venv venv
venv\Scripts\activate
In Windows PowerShell the activation script is .\venv\Scripts\Activate.ps1, and PowerShell's execution policy may need adjusting on some machines. After activation your prompt usually shows (venv) at the start.
3. Install the dependencies
pip install -r requirements.txtThis installs everything the project declares in requirements.txt. If pip reports an "externally-managed-environment" error, you skipped the virtual environment step, or it is not active in your current shell.
4. Start the application
python run.pyThe project describes run.py as a quick start script for running the application without Docker. From its source we can describe what it does on startup:
- Chooses a port. It looks for a PORT environment variable first, then the
server.portvalue in config.yaml, and finally falls back to 8000. - Prepares frontend assets. It runs scripts/vendor_assets.py in check mode. If frontend/vendor/ is not present yet, it prints "Downloading frontend libraries..." and downloads them. This is why the very first start can take longer than later starts and needs internet access.
- Treats a failed download as non-fatal. If the download fails, the script warns that the web UI will not load until you run
python scripts/vendor_assets.py. The script's own comment notes that only the web UI needs these libraries, while the API and the MCP endpoint do not.
The portion of run.py that actually launches the web server was not available in the material we reviewed, so we do not describe how the server is started internally or which network interface it binds to. What the project's README states is that you open the app at http://localhost:8000 once it is running.
Changing the port
If 8000 is already in use, set the PORT environment variable for that run, or edit the port in config.yaml. Because PORT takes priority, it overrides the file.
# Linux and macOS
PORT=8001 python run.py
# Windows PowerShell
$env:PORT = "8001"
python run.pyRemember the port you pick, because the Localtonet tunnel target later must use the same value.
Where your notes are stored
The project says notes are plain Markdown files in folders, and the Docker instructions mount a local ./data directory at /app/data inside the container. For the Python path, the exact default notes directory is not established by the evidence we have, and config.yaml is the place the project uses for settings. Open config.yaml after your first run, find the storage-related setting, and note the path before you start writing anything important. That is the folder you will back up.
Verify the installation on localhost:8000
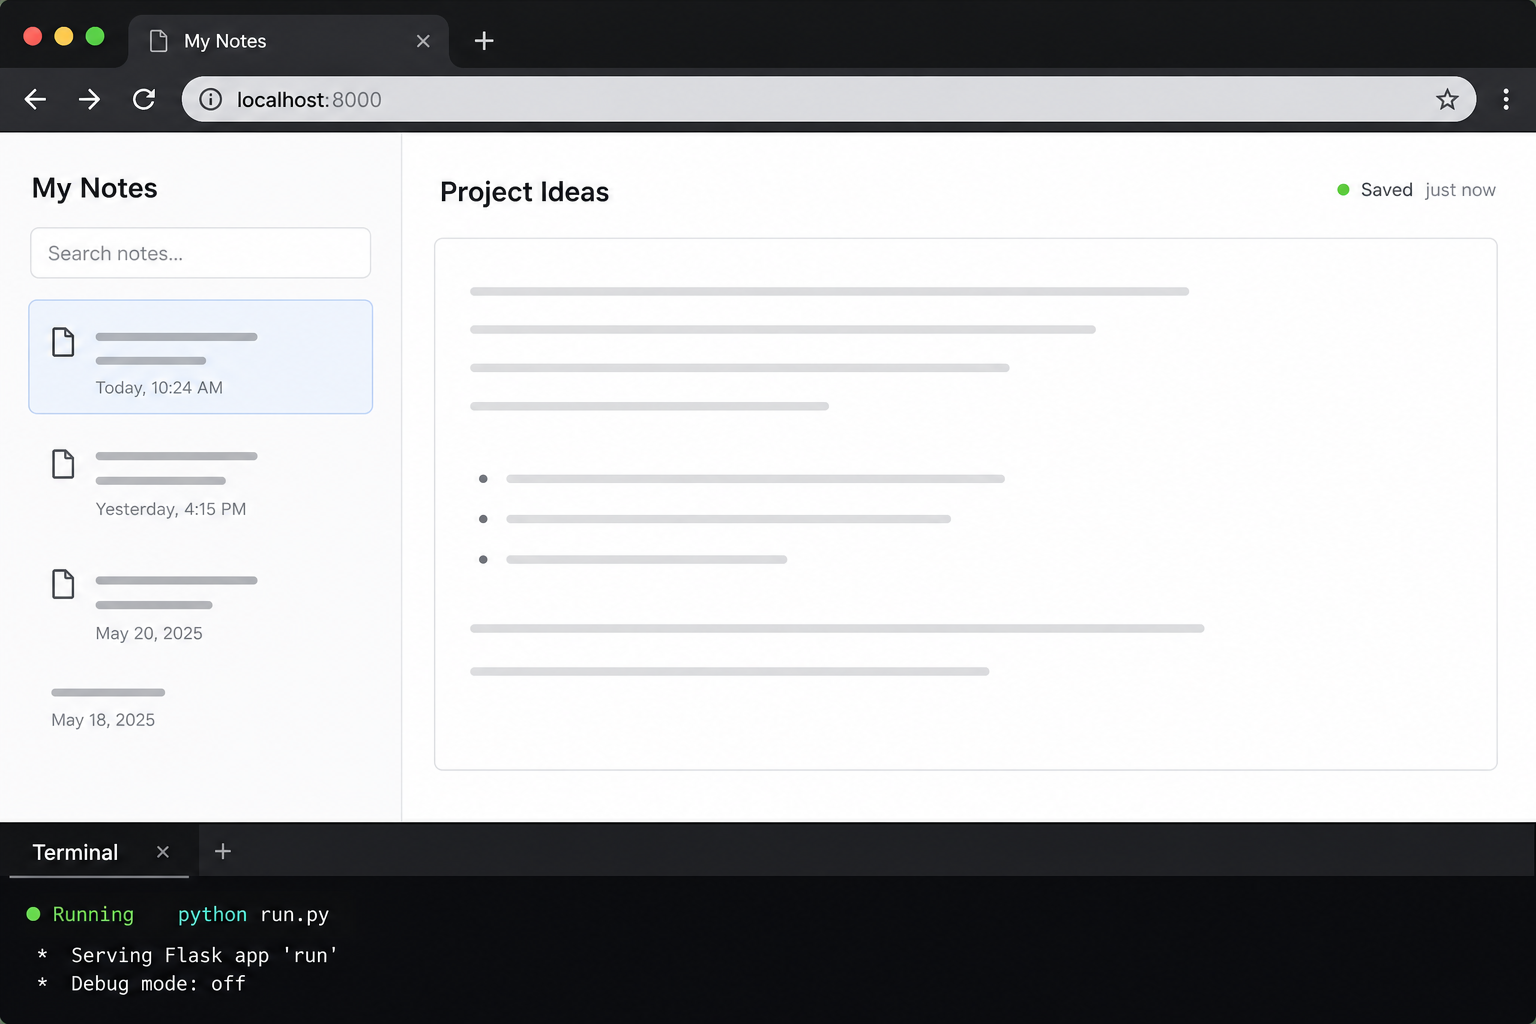
Verification should be boring and complete before any tunnel exists. If something is wrong, you want to find it while the only variable is your own machine.
Check the terminal output
After python run.py, watch the console. On a first run you should see the frontend library download message, and no traceback. If you see the warning that frontend libraries could not be downloaded, jump to the troubleshooting section before continuing.
Open the web UI
In a browser on the same machine, open http://localhost:8000 (or the port you chose). You should see the NoteDiscovery interface. A quick functional test is worth doing now:
- Create a new note and type a few lines of Markdown, including a heading.
- Save it, then reload the page and confirm it is still there.
- Create a second note and type
[[to see the note suggestions that v0.33.0 provides. - Find the notes folder on disk and confirm that a plain Markdown file appeared. This confirms your storage path and your backup target in one step.
Check from the command line
If you are working on a headless server, you can request the page header with a standard HTTP client.
curl -I http://localhost:8000A successful HTTP response status means the web server is up. The NoteDiscovery material we reviewed does not document a dedicated health-check route, so we do not suggest one. Loading the root page is the verification the README itself points to.
Optional: the MCP endpoint
The README says an optional MCP endpoint is available at /mcp on the same port when MCP_ENABLED=true is set. If you want it, set that variable in the environment before running run.py, just as you would PORT. We recommend leaving it off for your first verification pass and enabling it only when you have a specific AI-assistant workflow in mind. Authentication details for the MCP endpoint were not part of the material we reviewed, which matters for the remote-access step.
Docker and Docker Compose alternatives
This article is about the Python path, but it is useful to know the other documented options so you can pick the right one for a long-running install. The project's README documents the following.
| Method | What it uses | Notes |
|---|---|---|
| Python (this guide) | git clone, pip install -r requirements.txt, python run.py | Needs Python 3.8+ and pip. A virtual environment is recommended, and required in practice on PEP 668 systems. |
| docker run | Pre-built image ghcr.io/gamosoft/notediscovery:latest | The documented command maps port 8000 and mounts a local ./data directory to /app/data. Copy the exact command from the README. |
| Docker Compose (pre-built image) | docker-compose.ghcr.yml | Recommended by the project among the Compose options. |
| Docker Compose (build from source) | docker-compose.yml | Builds the image locally from the repository's Dockerfile. |
The Localtonet step later in this guide is identical for all four methods, because in every case the result is a web UI on a local port. Only the way you start and stop the app changes. For container installs the target is the port published on the host (8000 in the documented docker run command).
Reach NoteDiscovery from anywhere with Localtonet
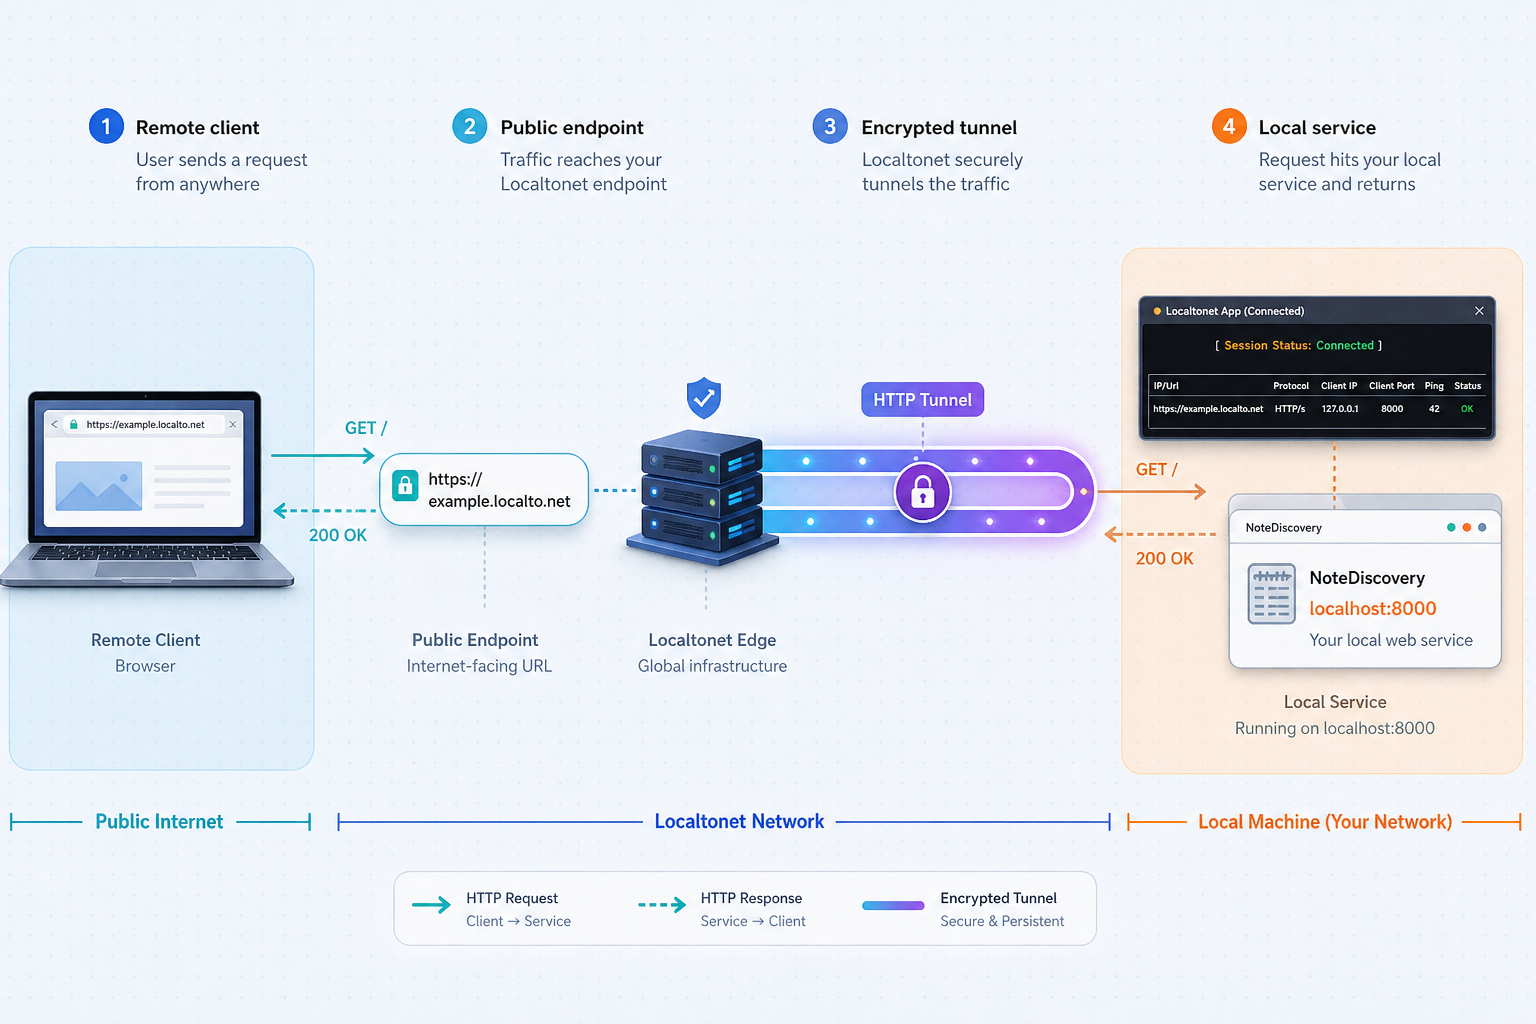
With NoteDiscovery verified locally, we can publish it. Localtonet is a tunneling platform: the Localtonet client on your device opens an outbound connection to one of our relay servers, and the resulting HTTP tunnel gives you a public HTTPS address for the service. You do not need inbound router port forwarding, firewall changes, VPN setup or a public IP address. NoteDiscovery is a conventional web application on a single port, which is exactly what an HTTP tunnel is designed for.
Two behaviors are worth understanding first. A tunnel is available only while the selected client or device is connected and the tunnel is running, and creating a tunnel does not start it. You must press Start. So if the computer sleeps, the Localtonet client exits, or python run.py is stopped, the public address stops working or shows an error.
Install and run the Localtonet client
Install the Localtonet application on the device that can reach NoteDiscovery. Normally this is the same computer where you ran python run.py. Keep NoteDiscovery running on its local port.
Authenticate the device with its token
Sign in to the Localtonet dashboard and use the AuthToken that identifies this device. Tokens are device-specific, so keep yours private and never paste it into notes, screenshots or public repositories.
Select a relay server
Choose from the servers currently offered in the dashboard. Available values change over time, so pick from the live list rather than from an article.
Create an HTTP tunnel to the local port
Create a new HTTP tunnel and choose a Process Type: Random Sub Domain, Custom Sub Domain or Custom Domain. For the local target, enter the address of the machine running NoteDiscovery and its port, for example 127.0.0.1 and 8000, or whichever port you chose.
Start the tunnel and open the public URL
Press Start. Then open the public HTTPS address assigned to the tunnel from a different network, such as a phone on mobile data, and confirm you see the NoteDiscovery interface.
Stop or delete the tunnel when you no longer need it
A stopped tunnel no longer serves traffic. Delete tunnels you have finished with so that no forgotten public address remains.
Exact field labels and button placement can change between dashboard versions, so use this as the sequence and follow the current Localtonet HTTP tunnel documentation for the precise screens. If you want a stable address on your own domain, choose the Custom Domain process type, but check the current documentation for the DNS requirements before relying on it, because we do not hardcode them here.
Test the remote address
Do not test from the same computer only, since the browser may take a local path. Use a phone with Wi-Fi turned off or a machine on another network. Then repeat the functional test: open the app, create a note, reload and confirm it saved. If the page loads but looks unstyled, that is almost always the frontend libraries problem described under troubleshooting, not a tunnel problem.
The NoteDiscovery material available to us does not list settings that are required specifically when the app is reached through a reverse proxy or tunnel, such as trusted host, base URL or cookie options. In a plain HTTP tunnel to a local port, many web apps work without changes, but we have not verified that for every NoteDiscovery feature. If a feature misbehaves only through the public URL, check the project's configuration documentation and issue tracker for proxy guidance.
Security before you expose your notes
A tunnel makes a local service reachable by anyone who knows or guesses the public address. Localtonet does not bypass or replace the access controls of the application behind it, so the application needs its own protection. Notes are often among the most sensitive data you keep: credentials pasted into drafts, meeting minutes, personal journals. Treat the moment you press Start as the moment your notes become internet-facing.
The NoteDiscovery website describes password protection as optional, which means a default install may not require a login. The excerpt of the README we reviewed does not show how authentication is configured, so we cannot give you the setting names. Before you start the tunnel, read the project's authentication and security documentation (the repository includes a SECURITY.md and config.yaml), enable authentication, and confirm from a private browser window that the public address asks for credentials.
Practical measures we recommend, all of which are general good practice rather than claims about NoteDiscovery internals:
- Enable the app's authentication first, then test it through the public URL.
- Use a strong, unique password and do not reuse one from another service.
- Be deliberate with public share links. The project says share links work with authentication on, which means a shared note can be opened by anyone holding the link. Share only what you intend to publish.
- Leave MCP disabled unless you need it. The /mcp endpoint lets AI tools read and edit notes. Since we could not confirm how that endpoint is protected, do not leave it reachable on a public address without verifying its access controls.
- Keep the token private. Anyone with your Localtonet device token could use your device identity, so never commit it to a repository.
- Stop the tunnel when it is not needed. A tunnel that is stopped cannot be reached, which is the simplest way to reduce exposure.
- Keep NoteDiscovery updated, since a public service should not run old code indefinitely.
- Back up before exposing. Copy your notes folder, so any mistake made through the remote interface is recoverable.
We also suggest that you use any additional access controls available for your tunnel in the Localtonet dashboard, where your plan and the current dashboard offer them. We do not assume which controls exist on which plan, so check what is available before relying on it.
Daily operations
Starting and stopping
With the Python path, the application runs as long as the python run.py process is alive. Stop it with Ctrl+C in the terminal. Next time, change into the project folder, activate the virtual environment again and rerun the command. A new terminal does not remember the activation. For an install that must survive reboots and closed terminals, run it under a process manager or service of your operating system. That is a general system-administration task and the project material we reviewed does not prescribe a specific unit or service file. A container with a restart policy is another route that many people prefer for always-on use.
Order of operations
Start NoteDiscovery first, confirm localhost works, then start the tunnel. When shutting down, stop the tunnel first. This keeps the public address from showing connection errors to visitors while the app restarts.
Updating
The material we reviewed does not include an official upgrade procedure for the Python path. The usual approach for a git checkout is to stop the app, back up the notes folder, pull the latest changes, reinstall dependencies in the virtual environment in case requirements changed, and start again:
git pull
pip install -r requirements.txt
python run.py
Read the release notes before updating, because they describe behavior changes. As an example, v0.33.0 added the reload-or-overwrite prompt when a note changed on disk. That prompt is directly relevant if you edit the same Markdown files with a sync tool or from two browser tabs.
Backups
Because notes are plain Markdown files, a backup is a file copy of the notes folder, plus config.yaml if you customized it. Any file backup or sync tool works. If you use a sync tool on the same folder that NoteDiscovery writes to, remember the editor's conflict prompt: when a file changed on disk since you opened it, you will be asked whether to reload or overwrite, so read the prompt rather than clicking through.
Installing as an app
NoteDiscovery supports installation as a Progressive Web App on desktop or mobile. Doing this from the Localtonet public HTTPS address gives you a home-screen icon that opens your own notes. Keep in mind it still depends on your tunnel being running and your host being online.
Troubleshooting
The table below maps common symptoms to causes that follow from the documented behavior of run.py, Python tooling and the tunnel lifecycle.
| Symptom | Likely cause | What to do |
|---|---|---|
| pip reports an externally-managed environment | PEP 668 distribution blocks global installs | Create and activate a virtual environment, then rerun pip install -r requirements.txt. |
| Page loads blank or without styling, or the UI will not load | Frontend libraries in frontend/vendor/ were not downloaded | Run python scripts/vendor_assets.py with internet access, then restart. The script's --check option exits successfully when the assets are already present. |
| Port already in use or nothing at localhost:8000 | Another program uses 8000, or the app is on a different port | Set PORT (it takes priority over config.yaml), restart, and use that port in the browser and in the tunnel target. |
| Public URL does not respond | Tunnel created but not started, client disconnected, or NoteDiscovery stopped | Confirm the app works on localhost, that the Localtonet client is connected, and that the tunnel shows as started. |
| Tunnel starts but shows an error page | Wrong local IP or port in the tunnel target | Edit the tunnel so the target matches the port NoteDiscovery actually listens on. |
| Editor asks to reload or overwrite on save | The note file changed on disk after you opened it | Decide whether the disk version or your edit is correct. This is the v0.33.0 conflict protection, not a fault. |
If the problem is not in the table
Narrow it down by layer. First, does http://localhost:8000 work on the host? If not, the problem is NoteDiscovery itself, and the console output is your first clue. Second, does the page work from another device on the same LAN using the host's LAN address? Whether run.py listens on all interfaces is not established by the material we reviewed, so a failure here does not necessarily indicate a fault. Third, does the Localtonet public address work? If localhost works and the tunnel target is right, the issue is the tunnel state or the client connection. Working layer by layer saves a lot of guesswork.
When you post logs, screenshots or configuration to a forum or issue tracker, remove your Localtonet AuthToken, any NoteDiscovery passwords and private note contents first.
Frequently asked questions
How do I install NoteDiscovery without Docker?
You need Python 3.8+, pip and git. Clone https://github.com/gamosoft/NoteDiscovery.git, create and activate a virtual environment, run pip install -r requirements.txt, then start it with python run.py and open http://localhost:8000. On the first start the script downloads the frontend libraries, so allow internet access.
Which port does NoteDiscovery use, and can I change it?
The default is 8000. The startup script reads the PORT environment variable first, then the server port in config.yaml, and uses 8000 if neither is set. Whatever port you use must also be the port in your Localtonet HTTP tunnel target.
Do I need to open router ports to reach NoteDiscovery remotely?
No. With Localtonet, the client on your device makes an outbound connection to a relay server, and the HTTP tunnel provides a public address. You do not configure inbound port forwarding, firewall rules, a VPN or a public IP address. The tunnel works only while the device is connected and the tunnel is started.
Is it safe to expose NoteDiscovery through a tunnel?
It can be, if you protect it. The project describes authentication as optional, so enable it and verify through the public address that a login is required before you share the link. Be careful with public share links and leave the MCP endpoint off unless you have confirmed how it is protected. Stop the tunnel when you do not need remote access.
Why does the web UI not load after python run.py?
The most likely cause is that the frontend libraries in frontend/vendor/ could not be downloaded on first start. The script prints a warning in that case. Run python scripts/vendor_assets.py with a working internet connection and restart the app. The API and the MCP endpoint do not depend on those libraries, only the web UI does.
Where are my notes stored, and how do I back them up?
Notes are plain Markdown files in normal folders, so a backup is a file copy. In Docker, the documented command mounts ./data to /app/data. For the Python path, the default directory is not established by the material we reviewed, so check config.yaml and confirm by creating a test note and locating the file.
Can I use the same Localtonet steps if I run NoteDiscovery in Docker?
Yes. The tunnel only needs a reachable local IP and port. In the documented docker run command, port 8000 is mapped to the host, so the HTTP tunnel target is the host's port 8000. Docker Compose with docker-compose.ghcr.yml or docker-compose.yml ends in the same place.
Start with Localtonet
Get NoteDiscovery running on localhost:8000 first, then create an HTTP tunnel with Localtonet to open your notes from your phone or another network. Turn on the app's authentication before you press Start, and stop the tunnel when you are done.
Get Started Free →