

Run the n8n editor locally with Docker, verify it, and add remote HTTPS access
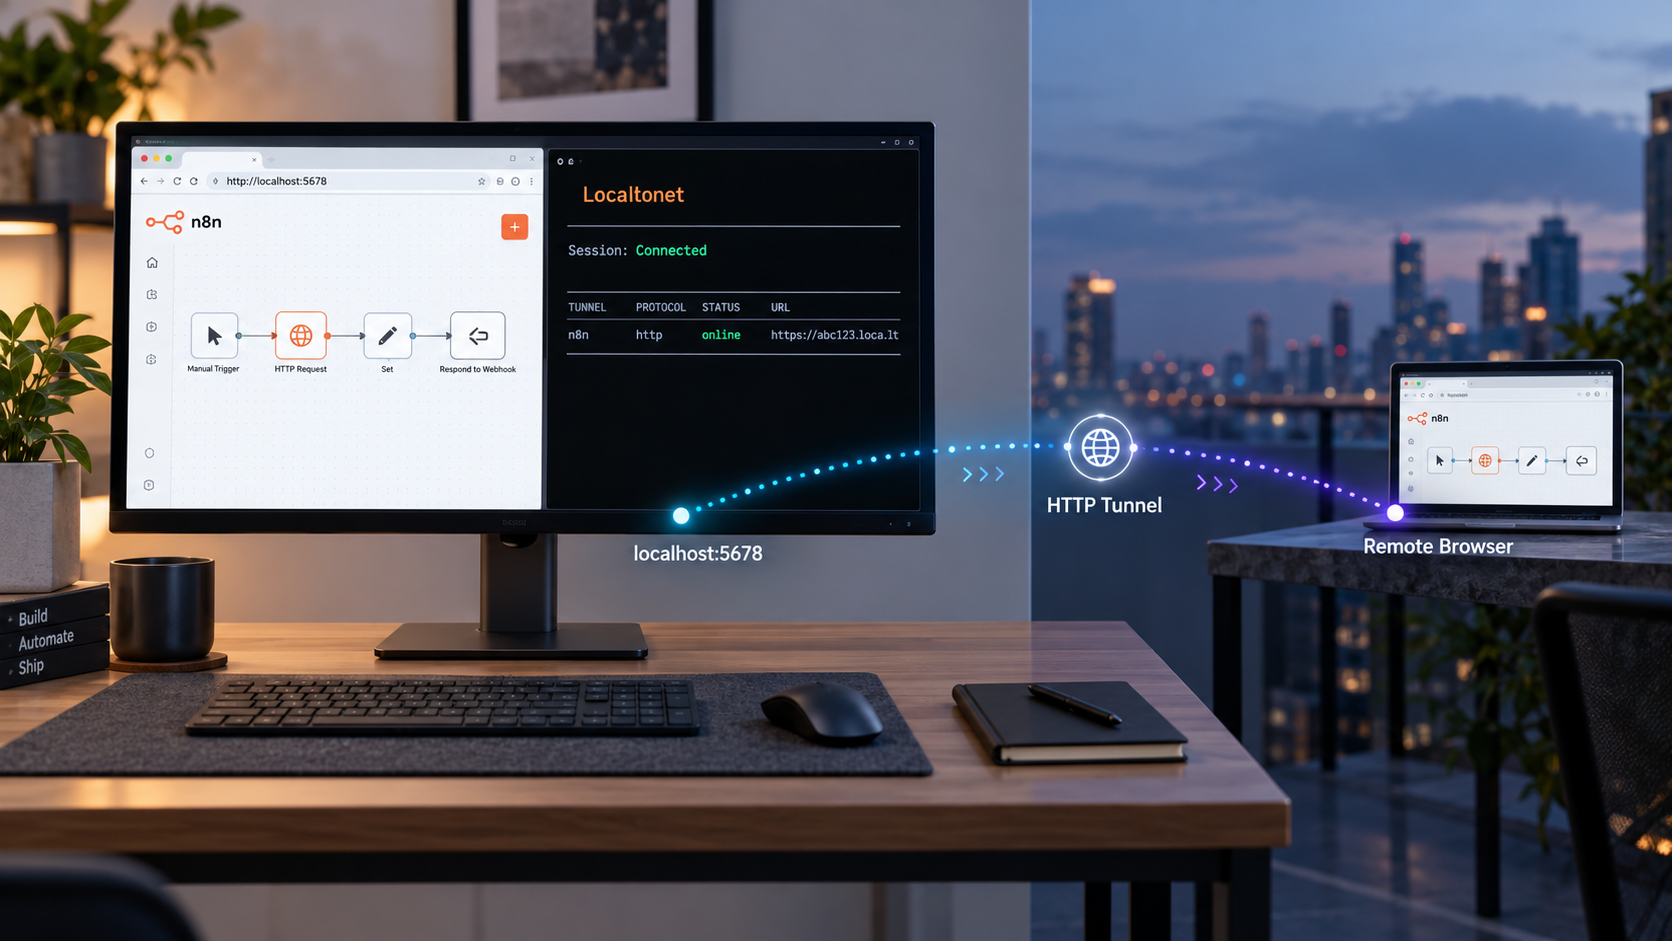
n8n provides a visual environment for building automation workflows and AI agents, and its official Docker quick start publishes the editor on local port 5678. In this guide, we install n8n with a persistent Docker volume, confirm that the editor works at http://localhost:5678, and cover the basic container operations needed to maintain the deployment. After the local service is healthy, we connect it to a Localtonet HTTP tunnel so the editor can be reached remotely without configuring inbound router port forwarding, firewall rules, a VPN, or a public IP address.
📋 What's in this guide
How the n8n and Localtonet setup works
n8n is a fair-code, self-hostable platform for building workflows and AI agents. It combines a visual canvas with the ability to add JavaScript or Python where a workflow needs custom logic. The official n8n quick start provides a Docker image and maps the application to port 5678 on the Docker host.
The installation and remote-access portions of this workflow should be treated as two separate layers. Docker runs n8n and publishes its local web interface. Localtonet then provides an HTTP tunnel to that already working local interface. This separation makes troubleshooting much simpler: if http://localhost:5678 does not work on the host, creating a public tunnel will not repair the underlying container.
docker.n8n.io/n8nio/n8n image runs the n8n application without requiring a manual source build.
n8n_data volume is mounted at /home/node/.n8n, keeping application data outside the disposable container layer.
http://localhost:5678.
The Localtonet client must run on the n8n host or on another device that can reach the n8n host and port. When both programs run on the same machine, the local tunnel target can use the loopback address and port 5678. If the client runs elsewhere, localhost would refer to that other device, not to the n8n host, so the target must instead be an address reachable from the Localtonet client.
The public address is available only while the selected Localtonet client is connected and the tunnel is running. The n8n container must also remain active and reachable on its local target. A stopped container, stopped tunnel, disconnected client, or unreachable local address will interrupt remote access.
Prerequisites and deployment decisions
This tutorial follows n8n's official Docker quick start. Before beginning, install Docker on the machine that will host n8n and confirm that the Docker engine is running. The exact Docker installation procedure depends on the operating system and packaging method, so this guide does not invent a universal installation command. Use the installation path supported for your host, then verify that your user can invoke Docker.
You also need a web browser for opening the editor and a Localtonet account and client for the remote-access stage. Install the Localtonet client on the n8n host when possible. That arrangement keeps the local target simple because the client can connect directly to the host's published port.
Check that Docker is available
Run the following commands in a terminal. The first reports the installed client version. The second confirms that the client can communicate with the Docker engine.
docker --version
docker info
A version response from the first command does not by itself prove that the engine is reachable. If docker info reports a connection or permission error, resolve that issue before installing n8n. Common causes include a stopped Docker service, a desktop Docker application that has not finished starting, or insufficient permission to access the Docker socket.
Confirm that host port 5678 is available
The documented Docker command publishes n8n with -p 5678:5678. The value before the colon is the host port, and the value after it is the container port. If another program already occupies host port 5678, Docker cannot create that mapping.
This guide intentionally retains port 5678 because it is the endpoint documented by n8n and the endpoint named in this workflow. If Docker reports that the address or port is already allocated, identify the conflicting container or process rather than changing unrelated settings at random.
Understand the two documented installation choices
| Method | Commands | When to use it |
|---|---|---|
| n8n install script | curl -fsSL https://get.n8n.io | sh |
A quick start when Docker is already installed and you are comfortable reviewing and executing a downloaded shell script. |
| Manual Docker deployment | Create the volume, then run the official image | The clearest choice when you want to see the image, port mapping, volume, container name, and lifecycle flags explicitly. |
| Custom production deployment | Not defined by the supplied quick-start evidence | Use n8n's current deployment guidance when you need a different database, queue architecture, scaling model, or organization-specific controls. |
The n8n quick start documents curl -fsSL https://get.n8n.io | sh, but a pipe executes downloaded content immediately. In controlled or production environments, review the script and follow your organization's software approval process. The manual Docker method below is easier to inspect because each deployment parameter is visible.
Install n8n manually with Docker
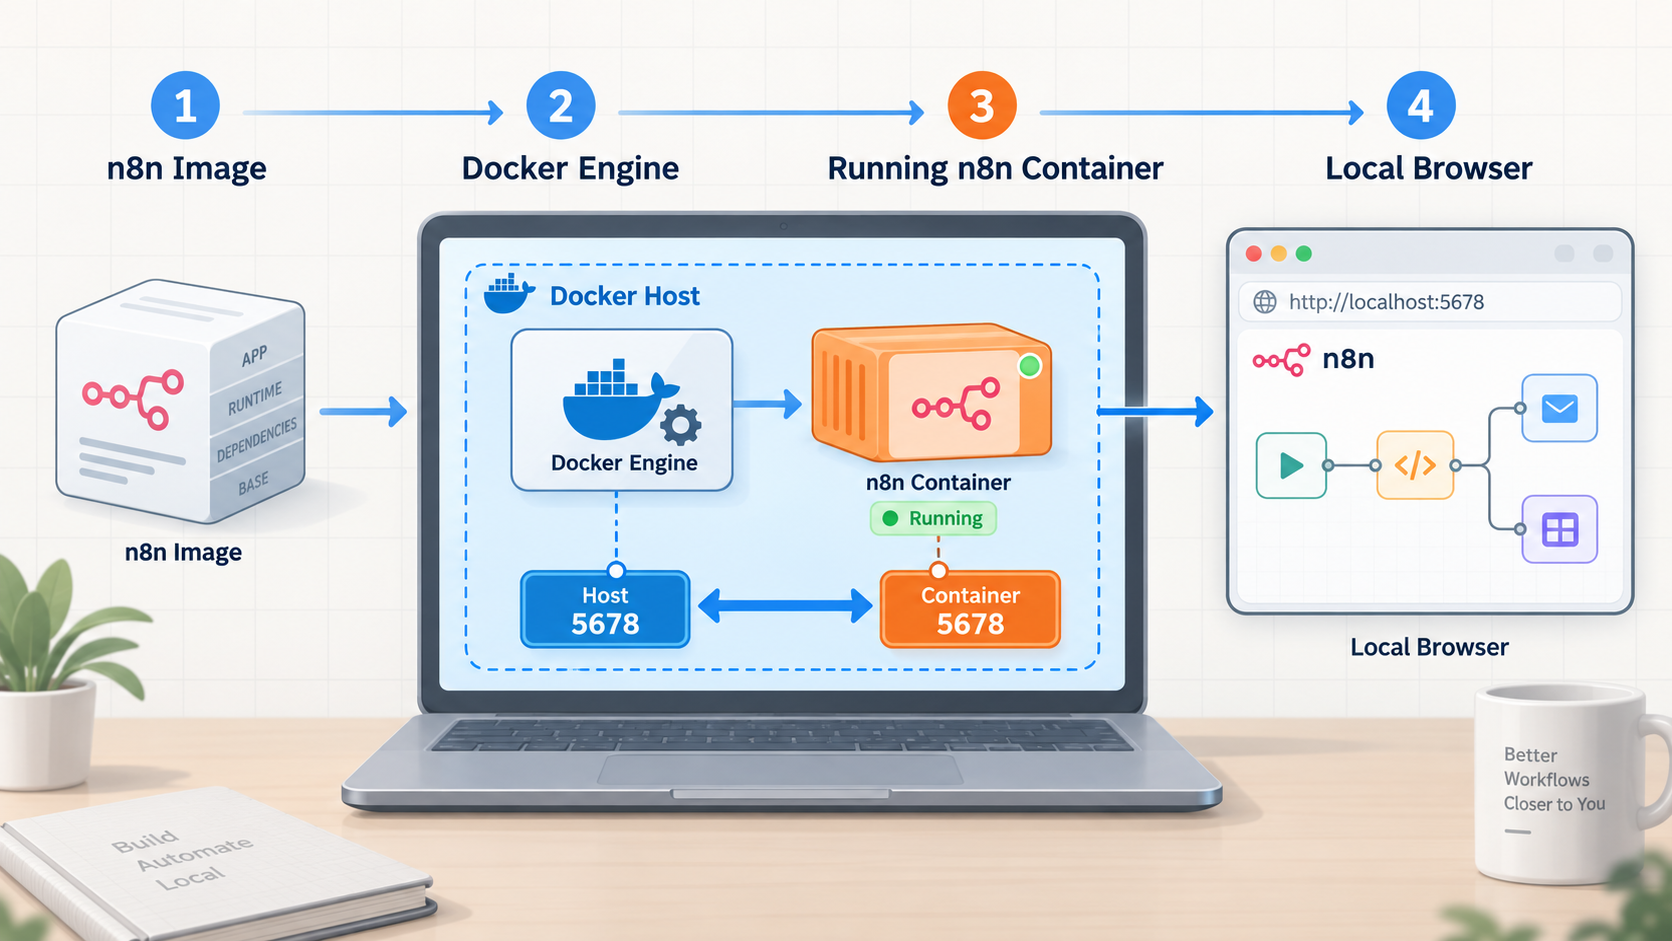
The manual method uses the official n8n image, a named Docker volume, and a direct host-to-container port mapping. It is a compact quick-start deployment rather than a complete production architecture. The commands below are reproduced as a connected sequence because the volume name and mount target must remain consistent.
Create the persistent n8n data volume
Create the named Docker volume used for n8n application data:
docker volume create n8n_dataDocker should return the volume name. Reusing the documented name keeps the following mount command straightforward.
Start the official n8n container
Run the official image, publish port 5678, and mount the named volume at n8n's documented data location:
docker run -it --rm --name n8n -p 5678:5678 -v n8n_data:/home/node/.n8n docker.n8n.io/n8nio/n8nThis command runs interactively and leaves application output attached to the terminal. Keep that terminal open while using n8n.
Open the local n8n editor
After startup completes, open http://localhost:5678 in a browser on the Docker host. Complete any first-run interface steps presented by the installed n8n version, but do not expose the service publicly until local access works.
What each Docker option does
| Option | Meaning | Operational consequence |
|---|---|---|
-it |
Allocates an interactive terminal | The process remains attached, allowing you to see output directly and stop it from that terminal. |
--rm |
Removes the container after it stops | The container object is temporary, but the separately named volume is not the same as the container layer. |
--name n8n |
Assigns the container name n8n |
Docker inspection and management commands can refer to a predictable name while the container exists. |
-p 5678:5678 |
Maps host port 5678 to container port 5678 | The browser and Localtonet client can reach n8n through the Docker host on port 5678. |
-v n8n_data:/home/node/.n8n |
Mounts the named volume at n8n's data path | Application data stored at that path is kept outside the temporary container layer. |
docker.n8n.io/n8nio/n8n |
Identifies the official n8n container image | Docker obtains and runs the image when it is not already available locally. |
The quick-start container uses --rm, so Docker removes the container after it exits. The named n8n_data volume is what preserves data written to /home/node/.n8n. Treat that volume as application data. Do not delete it as a routine troubleshooting step, and establish an appropriate backup process before relying on this deployment for important workflows.
Verify n8n locally on port 5678
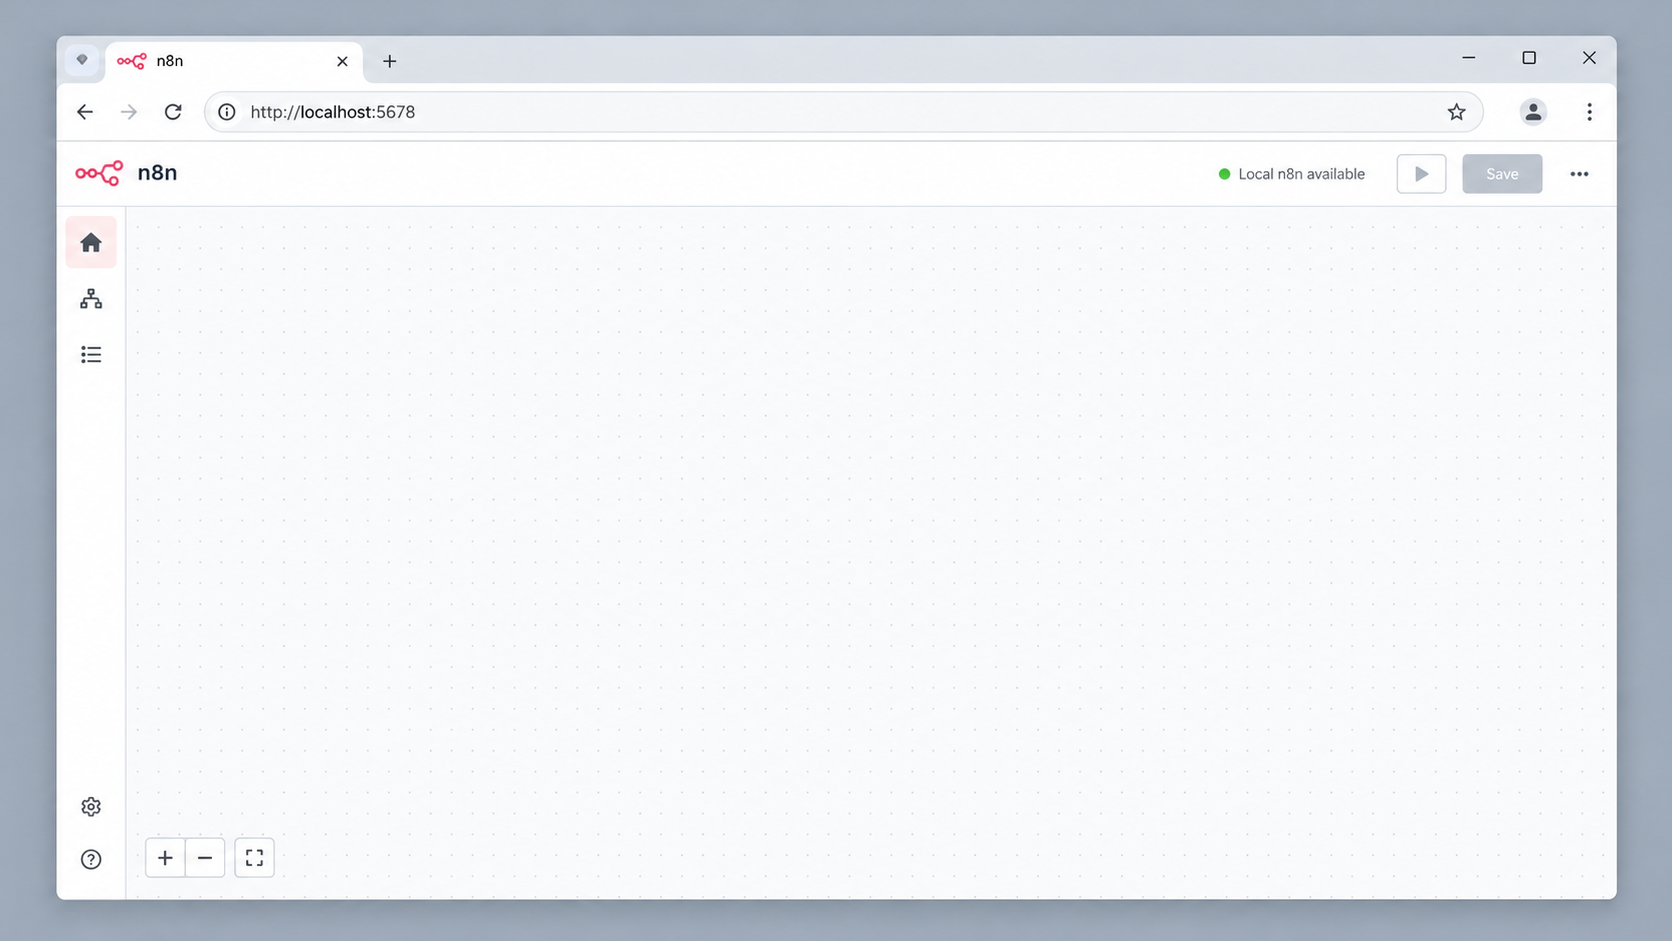
Local verification establishes whether Docker, the container, and n8n itself are working before Localtonet is introduced. Perform these checks from the Docker host first.
Check the browser endpoint
Open the exact local address:
http://localhost:5678A working result should display the n8n web interface or the first-run interface appropriate to the installed release. The precise screens can change between n8n versions, so this guide does not prescribe undocumented account fields or interface labels.
Test the HTTP response from a terminal
If curl is installed, request the endpoint directly:
curl -I http://localhost:5678An HTTP response confirms that something is listening and responding on the expected endpoint. A connection-refused error normally means no process is accepting connections on that address and port. A browser page and an HTTP response together are stronger evidence than simply seeing a container name in Docker.
Confirm that the container is running
docker ps
Look for the container named n8n and a published port mapping involving 5678. If it is absent, inspect the terminal where docker run was started. Because the command uses --rm, a stopped container is automatically removed and may not appear in a normal running-container list.
Verify persistence without deleting data
To confirm that the named volume exists, list Docker volumes:
docker volume ls
The list should include n8n_data. This proves that the Docker volume object exists, although it is not a substitute for a tested backup. Before performing any restart test, save work through the n8n interface and avoid experimenting with volume-removal commands.
Do not create the tunnel as a workaround for a failed local test. First make sure the n8n interface opens at http://localhost:5678. Only then should the Localtonet HTTP tunnel target that endpoint.
Operate and restart the quick-start container
The documented command is optimized for a quick interactive start. It does not detach the process, define a restart policy, or retain the stopped container. Understanding those choices prevents surprises during routine use.
Stop n8n
If the n8n process is attached to the current terminal, use the terminal interrupt appropriate to that environment, commonly Ctrl+C. Docker then stops the process. Because the command includes --rm, the container is removed after stopping.
The named volume remains separate from the removed container. That is why the next run must use the same volume name and mount path.
Start n8n again
Run the documented container command again:
docker run -it --rm --name n8n -p 5678:5678 -v n8n_data:/home/node/.n8n docker.n8n.io/n8nio/n8n
The new container mounts the existing n8n_data volume. Verify the editor at http://localhost:5678 after every restart before assuming remote access is healthy.
Inspect current output
In this quick-start arrangement, application output appears in the terminal attached to docker run. Read the first reported error rather than repeatedly restarting the command. Port conflicts, image retrieval failures, Docker daemon problems, and file or volume issues require different remedies.
Plan upgrades deliberately
Container upgrades should not be treated as an automatic side effect of restarting. Before changing the image version, review the current n8n release guidance, release notes, compatibility requirements, and backup recommendations. The supplied quick-start evidence does not establish a universal upgrade command or rollback process, so we do not invent one here.
For an important deployment, create and test backups before upgrades. A Docker volume improves persistence across container replacement, but persistence is not the same as backup, version compatibility, or disaster recovery.
Connect the n8n web editor through Localtonet
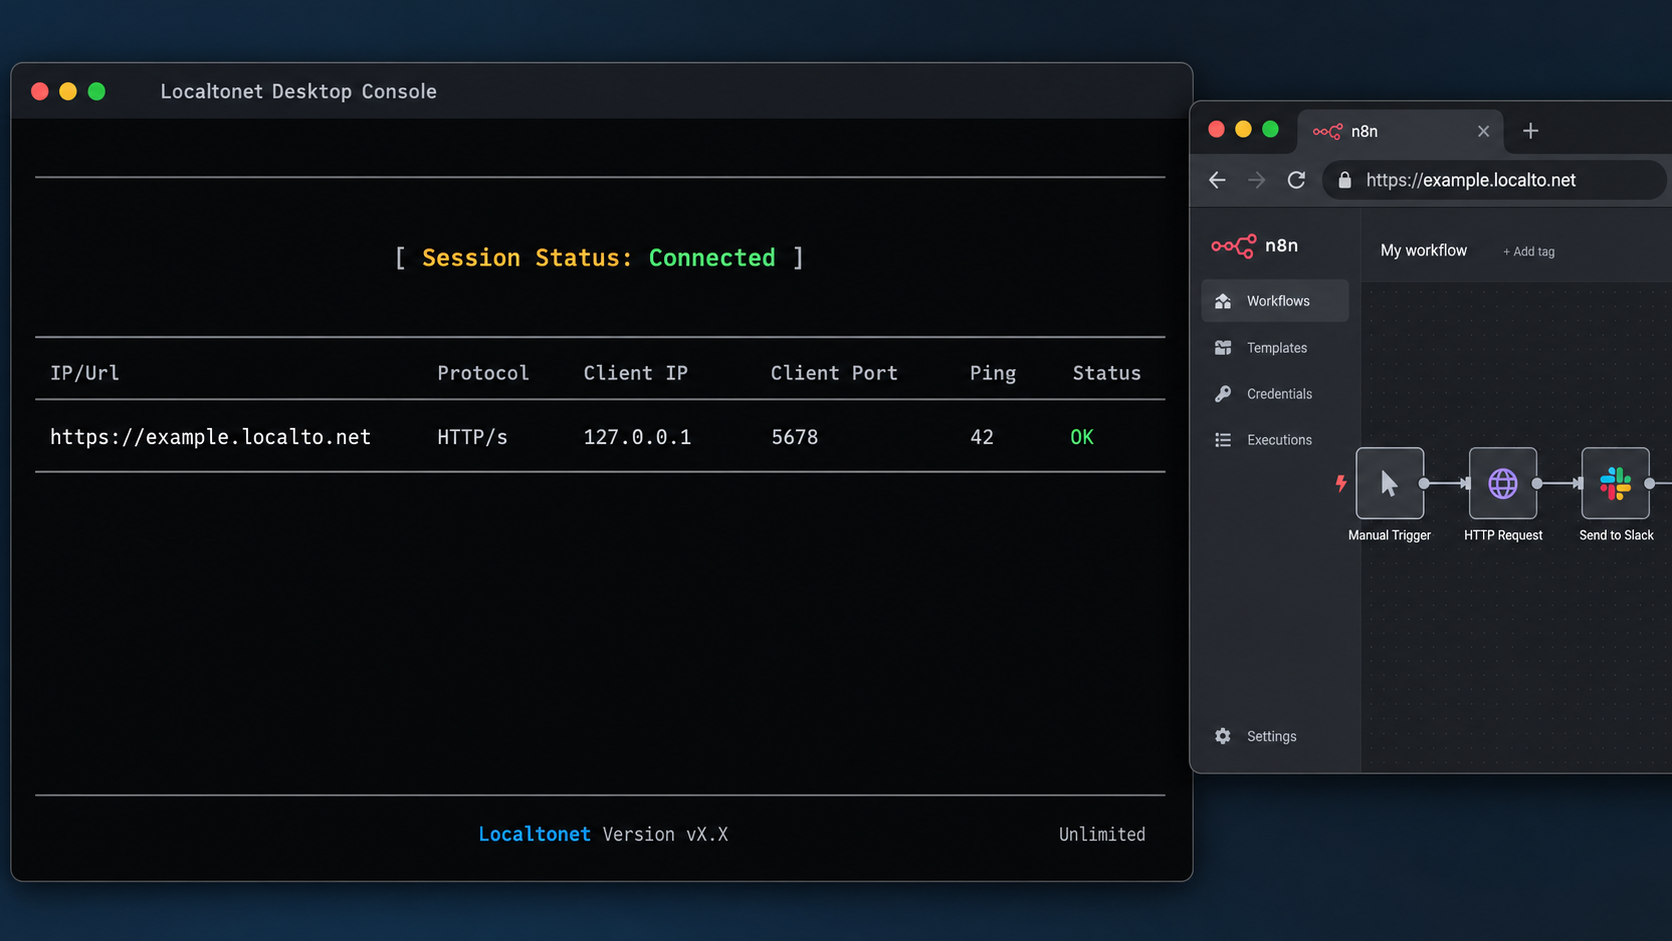
Once n8n is verified locally, use an HTTP tunnel because the documented endpoint is an HTTP web application. The supplied n8n quick-start evidence does not identify a UDP service or a separate raw TCP endpoint for this workflow. Selecting a tunnel type should follow the application protocol rather than the fact that every network service ultimately uses a port.
With Localtonet, our client establishes an outbound connection to a relay server. The resulting HTTP tunnel provides a public HTTPS address for the local service without requiring inbound router port forwarding, firewall changes, VPN setup, or a public IP address.
Install and run the Localtonet client
Install the Localtonet application for the operating system on the device that can reach n8n. Run it on the Docker host when possible, and keep the client connected while remote access is needed.
Authenticate or select the client device
Use the device-specific authentication token associated with the client that will run the tunnel. Treat the token as a secret. Do not paste it into tutorials, screenshots, source repositories, workflow exports, or shared logs.
Select an available relay server
Choose from the relay servers or regions currently available in the Localtonet dashboard. Availability can vary, so do not copy a hardcoded server code from an old guide.
Create an HTTP tunnel for the local n8n target
Select the HTTP tunnel type and point it to the n8n service. When the Localtonet client and Docker run on the same host, use the loopback target with port 5678. If the client runs on another device, use the n8n host address that is actually reachable from that client rather than localhost.
Create and start the tunnel
Save the HTTP tunnel configuration and press the Start button. Creating a tunnel does not mean it is running. Confirm that the selected client is connected and that the tunnel has been started.
Open and test the assigned public address
Use the public HTTPS URL assigned to the running tunnel. Test it from a separate browser session or network, authenticate to n8n as required, and stop the tunnel when remote access is no longer needed.
HTTP and File Server tunnels can use a generated subdomain, a selected subdomain where supported, or a custom domain. Those process types serve content through a public HTTPS address. Exact custom-domain DNS requirements must be checked against the current dashboard and documentation before making DNS changes.
For the current product workflow, consult our Localtonet HTTP tunnel documentation. Dashboard options, server availability, and plan-specific capabilities can change, so use the values presented in your account rather than assuming that every option is available in every subscription.
A local editor exposed through an HTTP tunnel becomes reachable from the internet at its public address. Use n8n's supported authentication and security controls, protect credentials, apply least privilege, and expose only the service that actually needs remote access. Stop or delete the tunnel when it is no longer required.
Security, webhook, and production considerations
A successful tunnel proves connectivity, not authorization. The Localtonet HTTP tunnel transports requests to the local service, while n8n remains responsible for its application accounts, workflow permissions, credentials, and other application-level controls. Do not assume that an unguessable-looking URL is an authentication mechanism.
Protect the n8n editor
Before sharing the public address, complete n8n's supported account and authentication setup for the installed version. Use strong, unique credentials and limit administrative access. Do not embed credentials in the tunnel URL, publish screenshots containing secrets, or place a Localtonet device token inside an n8n workflow.
Workflows can interact with external systems and may contain sensitive connection details. Apply least privilege to every service account or API credential used by n8n. A credential used only to read one data set should not receive broad write or administrative permissions.
Separate editor access from inbound webhook requirements
Opening the web editor and receiving third-party webhook callbacks are related but distinct requirements. An HTTP tunnel can make the local web service reachable, but n8n may need additional public-base-URL or webhook configuration so generated callback URLs use the correct external address.
The supplied n8n quick-start evidence establishes the local editor endpoint but does not establish the current environment-variable names or complete reverse-proxy configuration for public webhook URLs. Those settings can be version-sensitive, so this guide does not guess them. If workflows must receive external callbacks, verify the current n8n documentation for the installed release and test the exact callback URL shown by n8n.
Keep device tokens and workflow secrets separate
A Localtonet authentication token identifies the client device and must remain private. n8n credentials authorize workflow integrations and must also remain private. They serve different purposes and should not be reused, logged, or stored together merely for convenience.
Do not confuse tunneling with a VPN
This setup uses an HTTP tunnel for one web service. It is not a VPN connection and does not expose an entire private network. Localtonet VPN Manager is our separate private mesh VPN feature. Choosing an HTTP tunnel here keeps the target limited to the n8n HTTP endpoint.
Move beyond the quick start when requirements grow
The documented Docker command is useful for installation and evaluation, but it does not define a complete production deployment. Production decisions may include backups, monitored restarts, version pinning, upgrade testing, database architecture, logging, organizational access controls, and availability planning. The appropriate design depends on workload and n8n's current deployment guidance.
| Layer | Primary responsibility | Check before remote use |
|---|---|---|
| Docker host | Runs Docker and publishes host port 5678 | The engine is healthy, the port is available, and the volume is present. |
| n8n container | Runs the editor and workflow application | The interface opens locally and application authentication is configured. |
| Localtonet client | Establishes the outbound relay connection | The correct device is connected and can reach the local target. |
| HTTP tunnel | Provides the public HTTPS address | The target points to the correct host and port, and the tunnel is started. |
| Workflow integrations | Authorize n8n to interact with external systems | Credentials use least privilege and callback URLs are tested where applicable. |
Troubleshoot common setup problems
Docker cannot connect to the daemon
If docker info cannot reach the engine, n8n has not started yet. Start the Docker service or desktop application and resolve any local permission issue. Creating a Localtonet tunnel at this point will not help because there is no working local application to forward.
Docker reports that port 5678 is already allocated
Another process or container is using the requested host port. Run docker ps to check active containers. If an earlier n8n instance is already running, test it at http://localhost:5678 before starting another copy. If a different service owns the port, decide which service should use it. Do not terminate an unknown process without understanding its purpose.
The container starts and then disappears
The quick-start command includes --rm. If n8n exits, Docker removes the stopped container automatically. Read the attached terminal output for the original error. Repeatedly running the command without addressing that error may obscure the actual cause.
The browser reports connection refused
Confirm that the terminal running n8n is still open, then run docker ps. Check that the container is present and that port 5678 is published. Test curl -I http://localhost:5678 from the Docker host. A local refusal must be fixed before testing the public URL.
Local access works, but the Localtonet URL does not
Check each layer in order:
- Confirm that n8n still opens locally on port 5678.
- Confirm that the selected Localtonet client is connected.
- Confirm that the HTTP tunnel is running, not merely created.
- Confirm that the tunnel targets the correct local IP address and port 5678.
- If the client is on a different device, confirm that it can reach the n8n host directly.
- Retest the assigned public HTTPS URL.
A common addressing mistake is entering localhost when the Localtonet client runs on a different machine. Loopback always identifies the machine making the connection. In that arrangement, it points back to the client device instead of the Docker host.
The public editor loads, but a webhook callback fails
Confirm that the external system is calling the public URL rather than localhost. Then inspect the callback URL generated by n8n and the workflow execution result. If n8n generates local URLs, consult the current n8n guidance for public URL and reverse-proxy configuration. The local Docker quick start alone does not establish those version-specific settings.
Data appears missing after a restart
Confirm that the restart command uses the same volume mapping:
-v n8n_data:/home/node/.n8nA differently named volume or missing mount gives the new container a different storage context. Stop before deleting or recreating volumes. Inspect the existing Docker volumes and determine which one contains the expected deployment data.
The public address stops working unexpectedly
Check whether the n8n terminal was closed, the host entered sleep mode, Docker stopped, the Localtonet client disconnected, or the tunnel was stopped. Both the application and tunnel must remain active. For unattended use, evaluate a deployment model with deliberate service supervision and restart behavior rather than relying indefinitely on an attached quick-start terminal.
Frequently asked questions
What port does the n8n Docker quick start use?
The official quick-start command maps host port 5678 to container port 5678 using -p 5678:5678. The editor is then available locally at http://localhost:5678.
Why does the setup use a Localtonet HTTP tunnel instead of TCP or UDP?
The documented n8n endpoint is an HTTP web editor, so an HTTP tunnel matches the application protocol and provides a public HTTPS address. The supplied quick-start evidence does not document a UDP endpoint or a separate raw TCP service for this workflow.
Do I need router port forwarding or a public IP address?
No. The Localtonet client establishes an outbound connection to our relay, so this workflow does not require inbound router port forwarding, firewall changes, VPN setup, or a public IP address.
Does stopping the quick-start container delete my n8n data?
The --rm flag removes the stopped container. The command separately mounts the named n8n_data volume at /home/node/.n8n, so the next container must reuse that same mapping. Do not delete the volume, and maintain backups for important data.
Can the Localtonet client run on a different device from n8n?
Yes, provided that the client device can reach the n8n host and port. In that arrangement, do not use localhost as the target because it refers to the client device itself. Use an address for the n8n host that is reachable from the selected client.
Is creating a Localtonet tunnel enough to make it available?
No. Creating a tunnel does not start it. The selected device must be connected, and the tunnel must be started with the Start button. The public endpoint remains dependent on the Localtonet client, the running tunnel, and the local n8n service.
Will the public editor URL automatically configure n8n webhooks?
Not necessarily. The tunnel makes the HTTP service reachable, but n8n may require additional public URL or webhook configuration so it generates the correct callback addresses. The quick-start evidence does not establish the current version-specific settings, so verify them against the documentation for the installed n8n release.
Is this Docker command a complete production deployment?
No. It is the documented quick start and is appropriate for learning and initial validation. Production use requires deliberate decisions about backups, upgrades, restart behavior, monitoring, access control, data architecture, and the current n8n deployment recommendations.
Connect your verified n8n editor with Localtonet
Start n8n on port 5678, confirm that the editor works locally, and then create a Localtonet HTTP tunnel for controlled remote access without inbound router configuration.
Get Started Free →

