

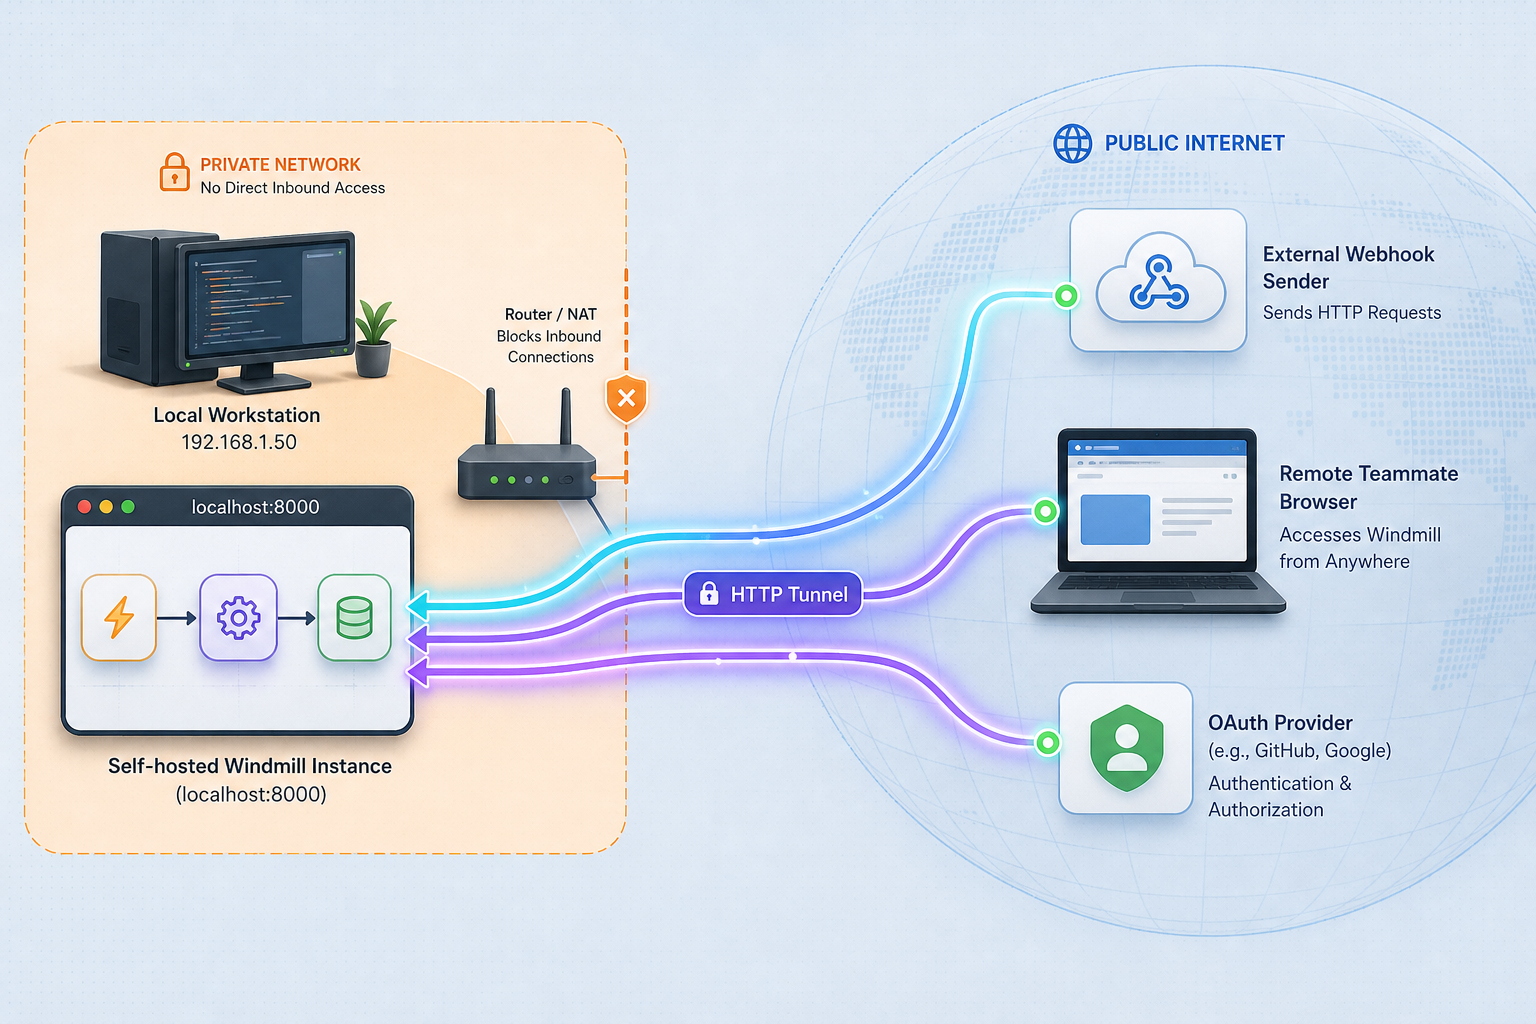
Run your own workflow engine, then let the outside world reach its webhook endpoints
Windmill is an open-source, code-first platform for workflows, apps and AI agents. Self-hosting it gives you control over where scripts run, but a Windmill instance on a laptop, homelab server or office network is not reachable from services such as payment providers, Git hosts or chat platforms. This guide covers the self-hosted install path with Docker Compose, how to verify the instance locally, and then how to publish it with a Localtonet HTTP tunnel so you can receive webhooks, share the UI with remote teammates and test OAuth callbacks. We are explicit about which details come from verified material and which you must read from the files you download.
📋 What's in this guide
Why expose a self-hosted Windmill instance?
Windmill describes itself as a code-first platform for workflows, apps and AI agents, built on a job orchestrator and workflow engine. Its public site lists scripts in Python, TypeScript, Go, PHP, Bash and SQL, workers that run one script at a time, and flows that are graphs (DAGs) describing dependencies between steps. The project is open source and, per the repository, ships under AGPLv3 licensing files alongside an Apache license file. At the time of writing, the latest release we reviewed is v1.854.1, dated 2026-10-30.
A self-hosted instance normally listens on a private address. That is fine for scripts that run on a schedule or that you start by hand, but it breaks down the moment something outside your network needs to call in. Typical situations:
Localtonet solves the reachability part. The Localtonet client on your device makes an outbound connection to one of our relay servers, and the tunnel gives you a public address that forwards to a local IP and port. No router port forwarding, firewall change or public IP is required. The tunnel exists only while the client is connected and the tunnel is started.
Prerequisites
The Windmill repository and website point to Docker Compose, Kubernetes (Helm charts) and cloud-provider deployments as the self-hosting routes. This guide covers Docker Compose because it is the quickest way to get a single machine running. The material we reviewed was truncated before the detailed self-hosting section, so we cannot quote exact minimum CPU, memory or Docker version requirements. Treat the list below as general groundwork rather than official sizing guidance.
- A machine you control (a server, VM, homelab box or workstation) that can run containers.
- Docker with the Compose plugin installed and working. You can confirm with
docker --versionanddocker compose version. - Enough free disk space and memory for several containers. Windmill's stack involves a database and workers, so do not run it on a nearly full device. Check the official self-hosting page for current resource recommendations.
- A free Localtonet account and the Localtonet client for your operating system, used in the tunnel step.
- A decision about who should be able to reach the instance publicly. Read the security section before you start the tunnel.
The reviewed evidence does not state the web UI's local port, default credentials, required environment variables or the exact compose service names. We do not invent them here. Wherever this guide says "read it from your compose file", that is deliberate: the file you download is the source of truth for your version.
Install Windmill with Docker Compose
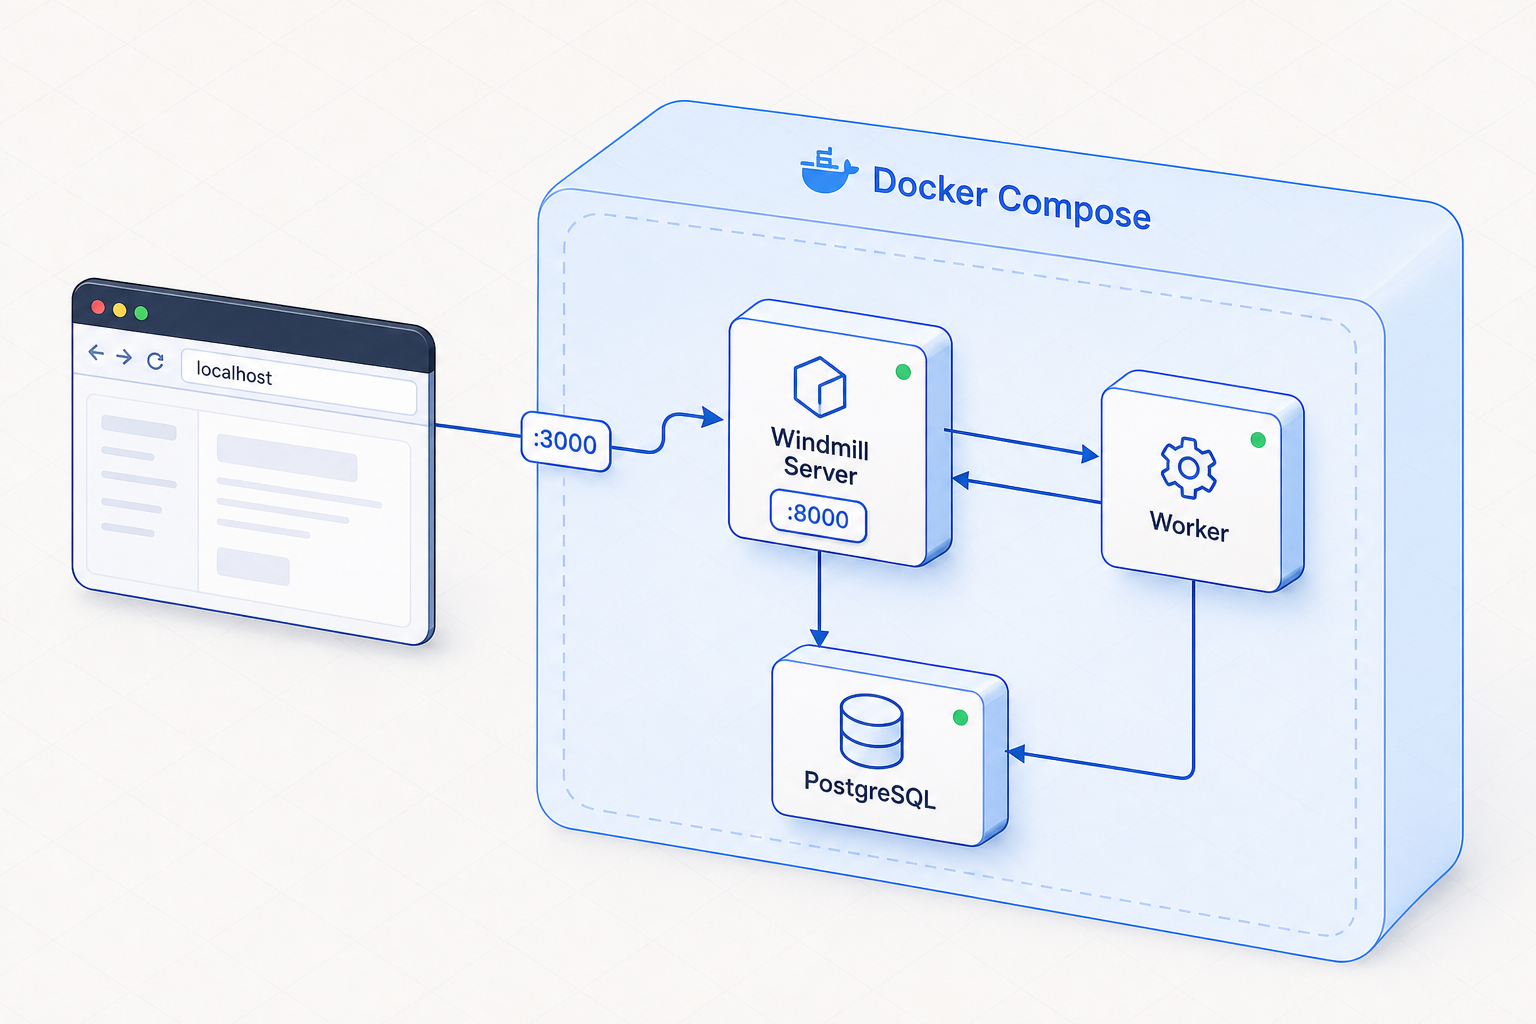
The repository root contains a docker-compose.yml, a Caddyfile, a .env file and a Dockerfile, among many other directories such as backend, frontend, cli and docker. That tells us the Compose route is a first-class, maintained part of the project, and that a Caddy configuration ships next to it. We have not verified what role the Caddyfile plays in the stack, so do not assume. Read it, and read the compose file, before you decide which port to tunnel.
The general flow
The self-hosting page on windmill.dev advertises a roughly three minute path. In practical terms, a Compose-based install of this kind follows this shape:
- Obtain the official
docker-compose.ymland any companion files the official instructions name (the repository root suggests.envandCaddyfileare candidates). Use the official self-hosting instructions to know exactly which files and from where; fetching the wrong file is the most common source of a broken first start. - Open the
.envfile and review every value before first start. Do not leave placeholder secrets or database credentials unchanged on a machine you plan to expose publicly. The reviewed evidence does not list the variable names, so use the comments in the file itself. - Start the stack from the directory containing the compose file.
- Wait for the containers to become healthy, then continue to local verification.
The start command is the standard Docker Compose invocation:
docker compose up -d
Pulling images can take a while on first run. The -d flag runs containers in the background so your terminal stays free.
Other installation routes
| Route | Best for | Notes for this guide |
|---|---|---|
| Docker Compose | A single machine, homelab, evaluation or small team | Covered in this guide. Pair it with a Localtonet HTTP tunnel for remote reachability. |
| Kubernetes (Helm charts) | Clusters where you already operate Kubernetes | Listed as an official route. Commands and values are not covered here because we did not verify them. The Localtonet client must run on a device that can reach the service you want to publish. |
| Cloud providers | Running on managed infrastructure | Listed as an official route. A public cloud deployment may already have a public address, in which case a tunnel is usually unnecessary. |
Windmill also offers Windmill Cloud. If you do not need to operate the infrastructure yourself, that avoids the exposure problem entirely. This guide is for people who want the self-hosted instance.
Verify the installation locally
Always prove the service works on its local address before you add a tunnel. If it fails locally, a tunnel will only make the same failure visible at a public URL, and it makes diagnosis harder because there are more moving parts.
1. Check the containers
docker compose ps
Every service in the stack should show as running. A container that keeps restarting points to a configuration problem, often in the .env values or in a database that is not yet ready.
2. Read the logs
docker compose logs --tail=100
Look for errors at the end of the output, especially database connection failures or permission errors on mounted volumes. To follow a single service, add its name from docker compose ps.
3. Find the published port
Open your docker-compose.yml and look for a ports: mapping. The left-hand number is the port on your host. That is the port you will give to the Localtonet tunnel. If a reverse proxy service such as Caddy is part of your stack, the published port may belong to the proxy rather than to the Windmill server container itself; the compose file will show which service publishes it. docker compose ps also prints published ports in its PORTS column.
4. Open the UI
Browse to http://localhost:<published-port> on the host, substituting the port you found. You should see the Windmill web interface. The first-run login and any initial setup prompts are defined by the official docs for your version; we do not state default credentials because the reviewed evidence does not establish them. If the stack asks you to create an account or change a password, do that now, before any public exposure.
You can also test from the command line:
curl -I http://localhost:<published-port>Any HTTP response header block shows the port is answering. If you get a connection refused error, the port mapping or the container state is wrong.
Add the Localtonet HTTP tunnel
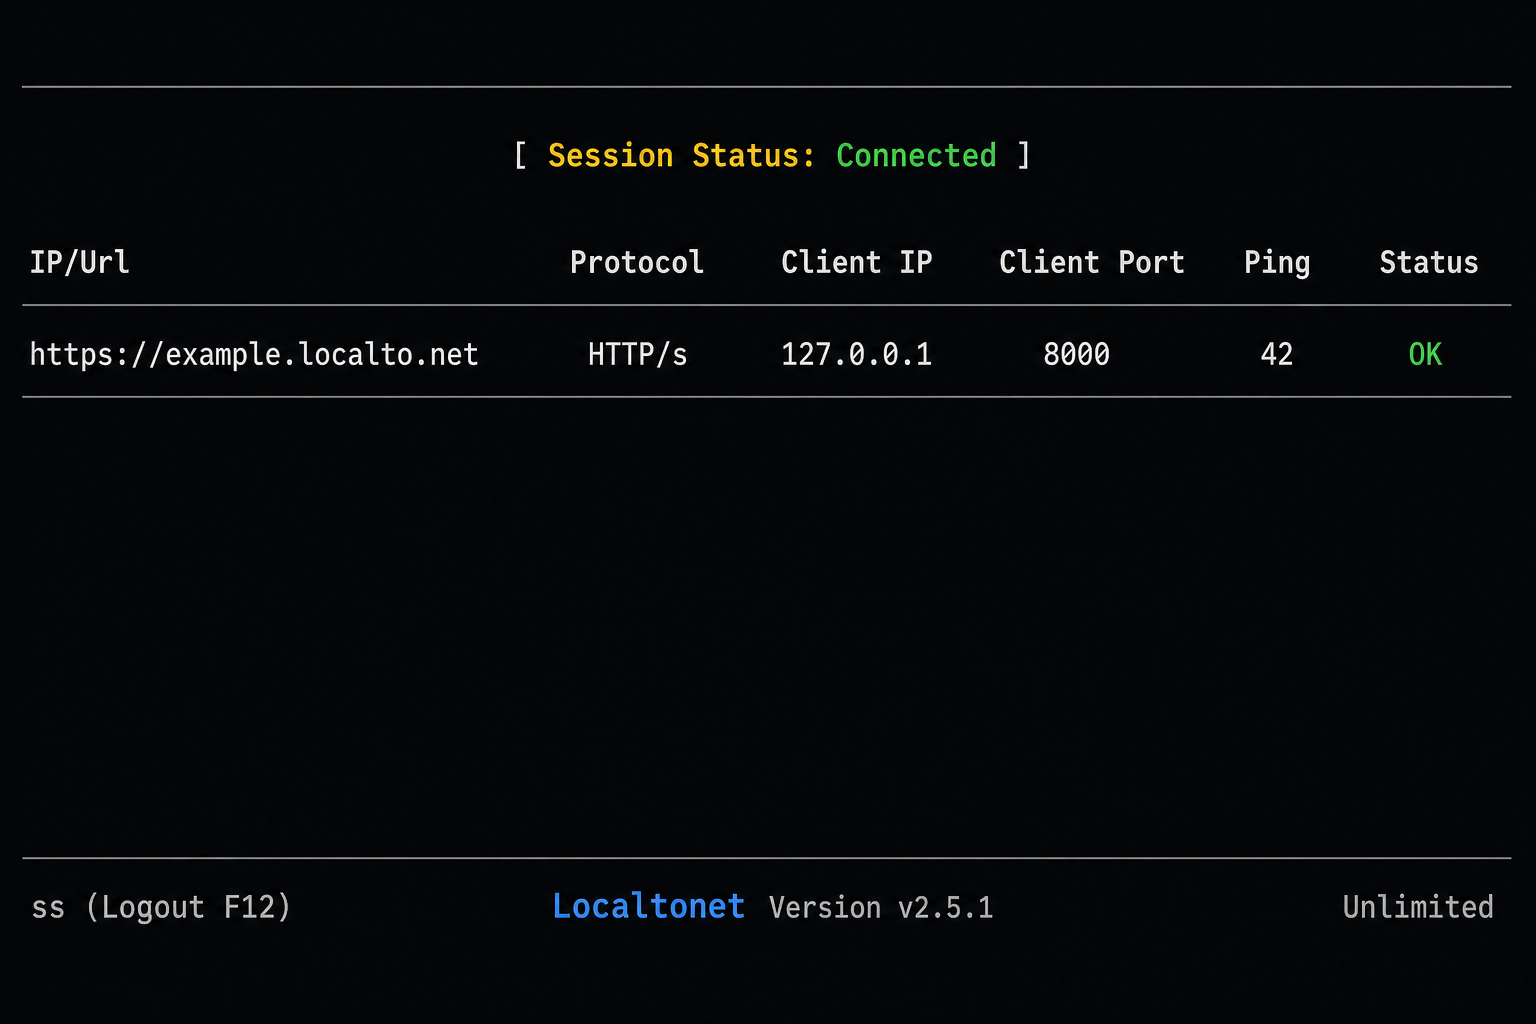
With Windmill running locally, the remote-access step is a separate, small piece of work. An HTTP tunnel forwards public HTTPS traffic to a local IP address and port that the Localtonet client can reach. Because the client makes an outbound connection, you do not touch your router or firewall rules for inbound traffic. For the full reference see the Localtonet HTTP tunnel documentation.
Install the Localtonet client on the Windmill host
Install the Localtonet app for your operating system on the device that can reach the Windmill port. This is usually the same machine that runs Docker. If you run the client on a different machine, the target IP must be one that machine can reach.
Authenticate the device with its token
Use the auth token for this device from your Localtonet dashboard. Tokens identify the device that will run the tunnel, so keep it private and never paste it into public notes, screenshots or repositories.
Select the AuthToken and a relay server
In the dashboard, pick the token for the Windmill host and choose an available relay server or region from the current list. Available values change, so choose from what the dashboard shows rather than from an article.
Create an HTTP tunnel and choose a Process Type
Choose Random Sub Domain, Custom Sub Domain or Custom Domain. Random is fine for a quick test. For production webhooks and OAuth redirects you want an address that does not change, so use a custom subdomain or your own domain. For custom domains, check the current Localtonet documentation for exact DNS requirements before you configure anything.
Set the local target
Enter the local IP address and the published port you found in the compose file, for example 127.0.0.1 with your port if the client runs on the Docker host. Do not point the tunnel at a port you have not confirmed answers locally.
Press Start and open the public address
Creating a tunnel does not run it. Start it, then open the assigned HTTPS address in a browser from outside your network (a phone on mobile data works well). You should see the same Windmill interface you saw on localhost.
Confirm from the command line as well, using your own assigned address:
curl -I https://<your-localtonet-public-address>When you are done testing, stop or delete the tunnel from the dashboard. The public address stops working as soon as the tunnel is stopped or the client disconnects.
Receive webhooks and test OAuth callbacks
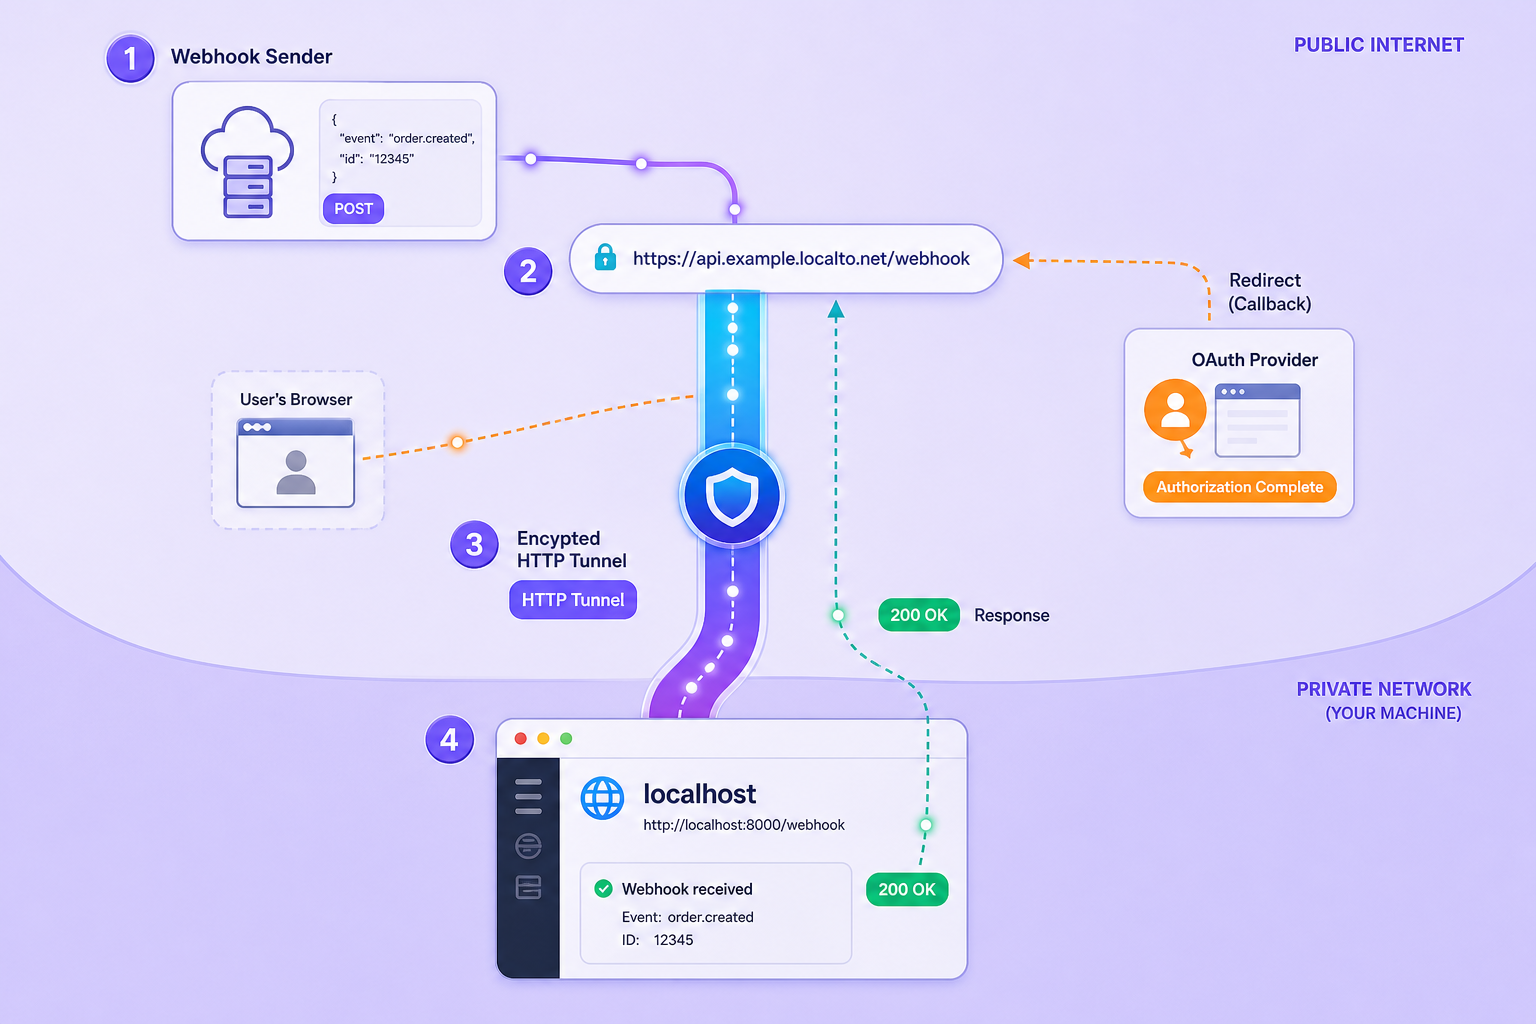
Windmill's feature set includes webhooks, HTTP routes, auto-generated UIs and APIs, and OAuth and SSO configuration. Each of these produces or consumes URLs. Once the tunnel is running, any URL your instance hands out for external callers needs the public host in place of the local one.
Receiving webhooks
A webhook sender needs a URL. In Windmill, you obtain the trigger URL for a specific script or flow from the platform itself. The exact path format and authentication mechanism are defined by the Windmill docs for your version, and the evidence we reviewed does not state them, so we do not reproduce paths here. The reliable approach is this:
- Create or open a script or flow that you want an external service to trigger.
- Copy its webhook or HTTP route details from the Windmill interface.
- Replace the local host and port in that URL with your Localtonet public address, keeping the path and any token or query parameters as Windmill shows them.
- Paste that public URL into the sending service's webhook settings.
- Trigger a test event from the sender and check the run in Windmill.
Testing OAuth and SSO callbacks
Identity providers require the redirect URI you register to match exactly what the application sends. If your instance generates redirect URIs from its own idea of its base address, it may still produce a localhost URL even when you reach it through the tunnel. We have not verified whether Windmill exposes a public base URL setting or how it behaves, so check the OAuth and SSO section of the official documentation for how your version determines its external address. Register the HTTPS address of your Localtonet tunnel with the provider only after you have settled on a stable subdomain or custom domain; random subdomains change, and every change invalidates the registered callback.
Windmill webhooks are inbound HTTP calls that trigger your scripts and flows. Localtonet also has a platform-wide webhook feature that notifies you when a token or tunnel changes to Connected or Disconnected. They are unrelated. The Localtonet one is useful for knowing when your tunnel drops, which matters if a sender stops getting responses.
Sharing the UI with teammates
Give remote colleagues the public HTTPS address and let them sign in with their own accounts, created inside Windmill. Avoid sharing a single admin login. If the instance supports SSO in your version, configure that rather than distributing passwords.
Security considerations before you go public
A workflow engine is not a static website. It executes code, holds secrets for the services it automates, and has an administrative interface. Publishing it is a meaningful change in your attack surface. A tunnel only makes a service reachable; it does not replace authentication, and it does not bypass any policy on your network.
Before starting a public tunnel, replace any default or placeholder credentials in your .env file and in the application, create proper user accounts, and confirm that no sign-up path lets strangers create a privileged account. Stop the tunnel when you are not actively using it.
- Least privilege: give external callers and teammates only the access they need. Keep admin accounts to the people who actually administer the instance.
- Secrets: never paste your Localtonet auth token, Windmill tokens or webhook secrets into tickets, chat or commits. Rotate anything that leaks.
- Webhook authentication: prefer webhook mechanisms that require a secret or signature rather than a bare, guessable URL. Check which options your Windmill version provides.
- Review what runs: remember that scripts run on your workers. Anyone who can create and run scripts can execute code on your infrastructure, so restrict that permission.
- Keep updated: the project releases frequently. Review release notes and update the images you run on an exposed instance.
- Network separation: if possible, run the stack on a host that does not sit next to sensitive systems on a flat network.
Troubleshooting
| Symptom | Likely cause | What to check |
|---|---|---|
| Containers keep restarting | Bad configuration or database not ready | Run docker compose logs --tail=100 and review the values in your .env file. |
| Localhost does not answer | Wrong port, or the service has not finished starting | Compare the ports: mapping in the compose file with docker compose ps, then wait and retry. |
| Public address shows an error but localhost works | Tunnel not started, client disconnected, or wrong local target | Confirm the tunnel was started, the client is connected, and the target IP and port match what answers locally. |
| Webhook sender reports failures | Tunnel stopped, URL still uses the local host, or authentication mismatch | Re-copy the trigger URL, swap in the public host, and check Windmill's run history for the incoming request. |
| OAuth redirect mismatch | Registered callback differs from the one sent, often after a random subdomain changed | Use a stable custom subdomain or domain and re-register it with the provider. |
Routine operations
Standard Docker Compose commands cover day-to-day work. To stop the stack without deleting data, use docker compose stop; to start it again, docker compose start. To update, follow the official upgrade guidance for your version, then pull images and recreate containers. Before any upgrade, back up your database volume; the compose file shows which volumes hold your data. Removing containers with docker compose down -v deletes named volumes, so avoid the -v flag unless you intend to wipe the instance.
Frequently asked questions
Which port should the Localtonet tunnel point to?
Use the host port that your own docker-compose.yml publishes for the web interface. The evidence we reviewed does not state a default, so we do not give a number. Confirm it with docker compose ps and by opening it in a browser on the host before you create the tunnel.
Do I need to open ports on my router?
No. The Localtonet client makes an outbound connection to a relay server, so you do not need inbound port forwarding, firewall changes, VPN setup or a public IP address. The tunnel is available only while the client is connected and the tunnel is running.
Should I use a random or a custom subdomain for webhooks?
For anything beyond a quick experiment, use a custom subdomain or a custom domain. Webhook senders and OAuth providers store your URL, so an address that stays the same saves you from reconfiguring them. For a custom domain, check the current Localtonet documentation for the DNS requirements first.
Is a Localtonet tunnel a VPN for my Windmill instance?
No. An HTTP tunnel publishes one web service at a public HTTPS address. It is not a VPN. If you want private, non-public access between devices, our separate VPN Manager feature is the actual VPN product and a different approach from the one in this guide.
Why does this guide not list exact Windmill commands and environment variables?
The material we could verify confirms the supported installation routes and the files in the repository, but it was truncated before the detailed self-hosting instructions. Rather than guess file URLs, variable names or default logins, we describe how to read them from the compose and environment files you download, and we keep the generic Docker steps that do not depend on those details.
What happens to incoming webhooks when my tunnel is stopped?
The public address stops reaching your instance, so senders will see failed deliveries. Whether a sender retries depends on that sender. For workloads that must not miss events, run the client on an always-on machine and consider our token and tunnel webhooks to be notified when a tunnel disconnects.
Start with Localtonet
Once your Windmill stack answers on localhost, create an HTTP tunnel with Localtonet to receive webhooks, share the interface with remote teammates and test OAuth callbacks over HTTPS, without changing your router or firewall.
Get Started Free →