Connect a domain you own to a Localtonet tunnel and use it with automatic HTTPS.
Prerequisites
- A domain you own and access to its registrar’s admin panel.
- A Localtonet account.
- The Localtonet client installed.
Steps
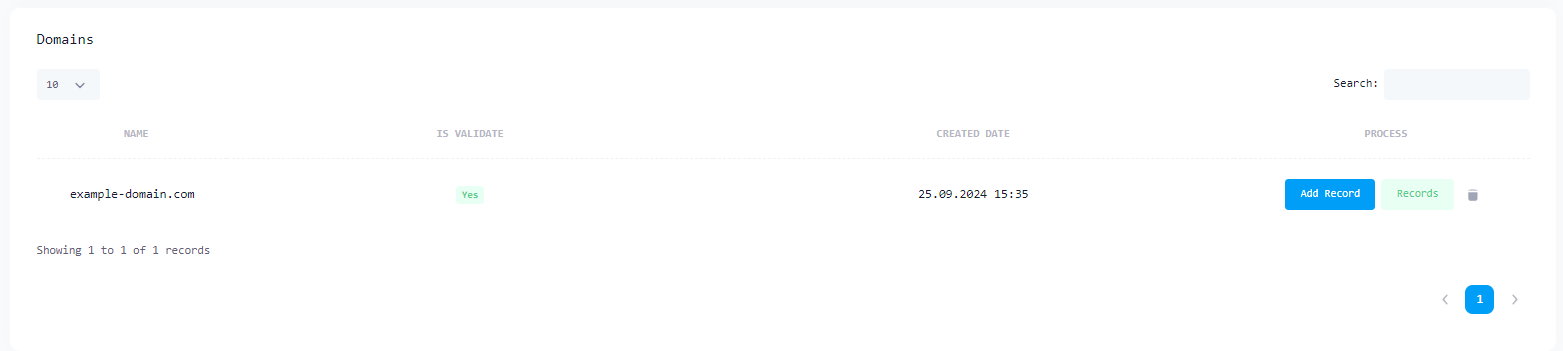
- Open the DNS Manager, click Add Domain, and enter only the root domain, such as
yourdomain.com. Do not includewwwor another subdomain. See the DNS Manager example. - At your registrar, replace all existing nameservers with only
ns1.localtonet.comandns2.localtonet.com, then save. - Wait for DNS propagation. It usually completes within 1–2 hours but can take up to 48 hours. You can check it at dnschecker.org.
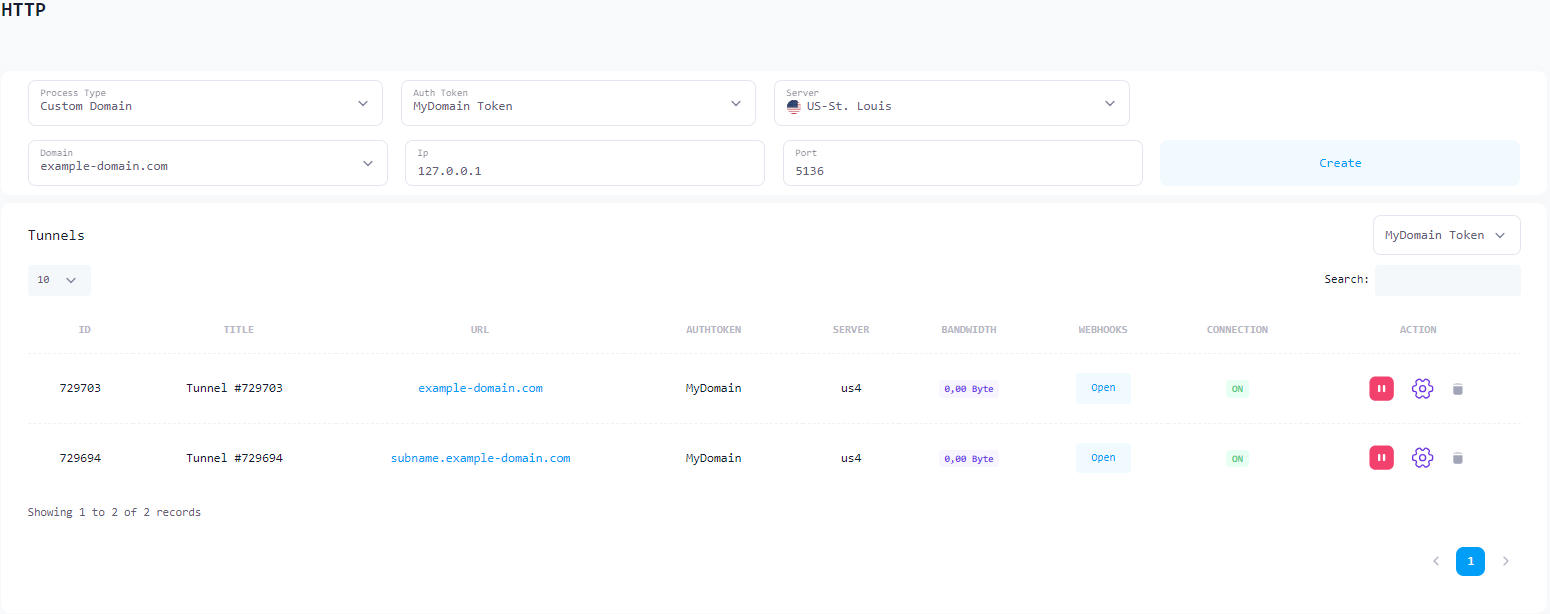
- Open the HTTP Tunnel page and click Create New Tunnel.
- For Process Type, select Custom Domain. Select your domain, then enter a subdomain such as
appforapp.yourdomain.com, or leave it blank to use the root domain. See the configuration example. - Enter the local service IP and port, such as
127.0.0.1and3000or8080. - Click Create, then Start. Localtonet automatically provisions and renews the TLS certificate.
DNS management
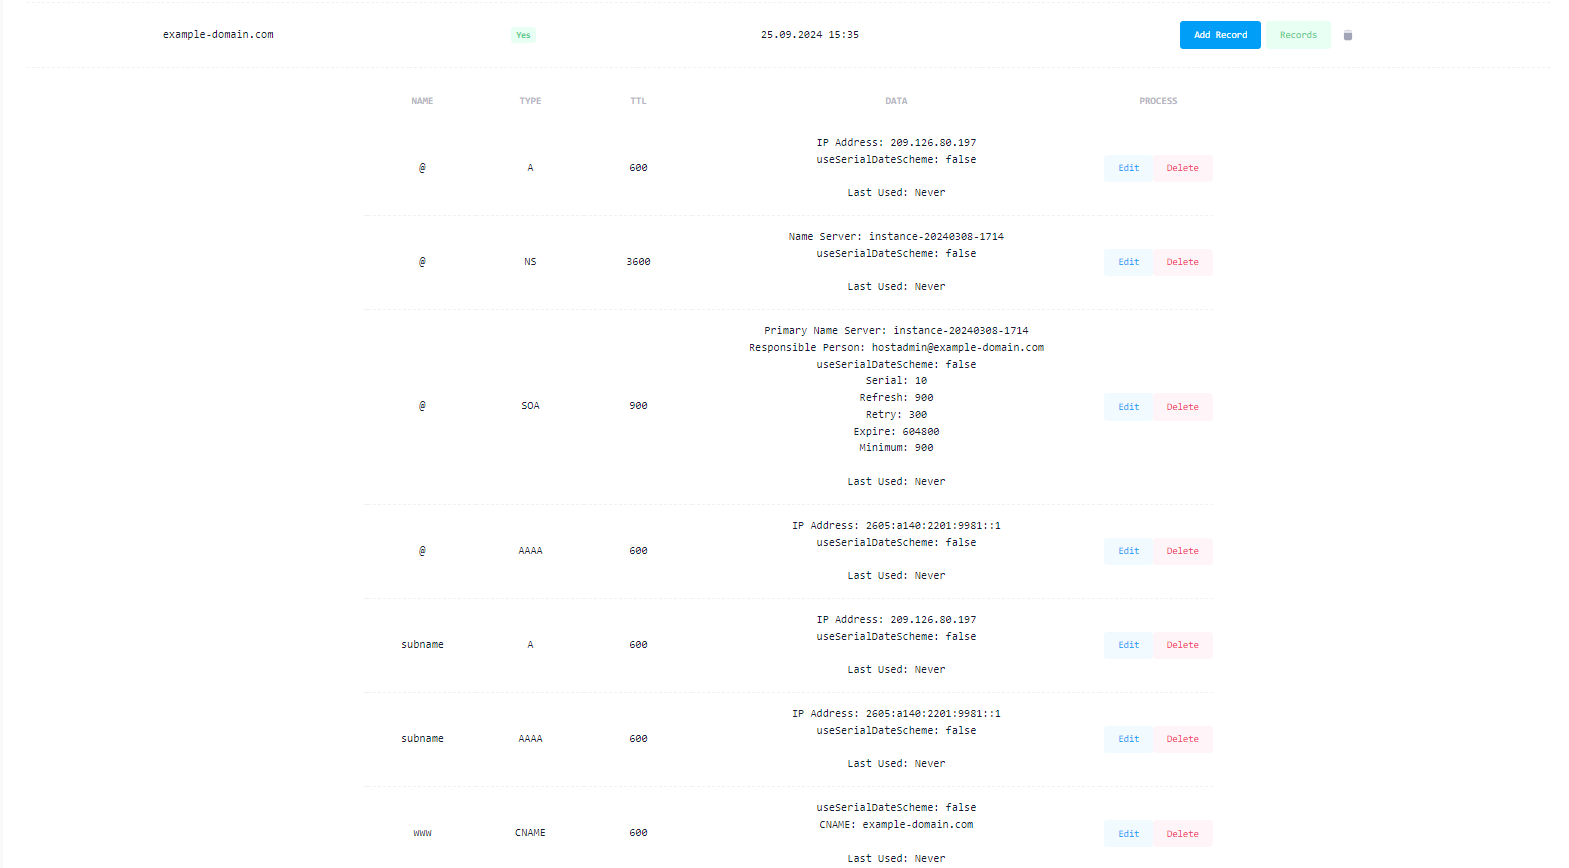
After changing the nameservers, manage all A, CNAME, MX, and TXT records in the Localtonet DNS Manager, not at your registrar. See the DNS records example.